Windows for IoT offers a powerful solution for integrating smart devices in various fields. Windows 10 IoT Core and Windows 10 IoT Enterprise help developers create efficient, secure, and manageable Internet of Things systems. By combining the robustness of the Windows ecosystem with IoT capabilities, projects can be built with ease.
One of the primary benefits is the platform’s flexibility. Whether you are working with a small sensor or a complex industry device, Windows for IoT provides the tools needed. From device management to security features, all essential aspects are covered, ensuring your IoT solutions remain reliable and efficient.
Developers can take advantage of a vast range of Windows tools and services. This includes easy integration with Azure services and seamless updates through Device Update Center. The platform makes deploying and maintaining IoT devices straightforward, involving less hassle and allowing more focus on innovation.
Windows for IoT: Powering the Future of Connected Devices
Understanding Windows for IoT
Windows for IoT is a family of operating systems designed by Microsoft specifically for Internet of Things (IoT) devices. It offers a secure, manageable, and scalable platform for building a wide range of IoT solutions, from simple sensors to complex industrial equipment.
Different Editions of Windows for IoT
| Edition | Description | Ideal for |
|---|---|---|
| Windows IoT Enterprise | Full version of Windows 10 Enterprise with features for creating dedicated devices locked to specific apps and peripherals. | Kiosks, digital signage, medical devices |
| Windows Server IoT 2022 | Full version of Windows Server 2022 for IoT solutions, offering enterprise-grade security and manageability. | Industrial automation, gateway devices |
| Windows 10 IoT Core | Smallest edition of Windows 10, designed to run a single app with minimal resource usage. Still offers the security and manageability expected from Windows. | Low-power devices, sensors, simple gateways |
Key Benefits of Using Windows for IoT
- Familiar Development Environment: Developers can leverage their existing knowledge of Windows and Visual Studio to build IoT applications.
- Enterprise-Grade Security: Windows for IoT inherits the robust security features of Windows, protecting devices and data from threats.
- Scalability and Flexibility: The platform can be scaled to accommodate a wide range of devices and scenarios.
- Cloud Integration: Seamless integration with Azure IoT services for device management, data analytics, and more.
- Wide Hardware Support: Windows for IoT runs on various hardware platforms, including ARM, x86, and x64 architectures.
- Long-Term Support: Microsoft provides extended support for Windows for IoT, ensuring stability and security for long-term deployments.
Applications of Windows for IoT
Windows for IoT finds applications in numerous industries:
- Industrial Automation: Monitoring and control of industrial equipment, predictive maintenance.
- Retail: Point-of-sale systems, digital signage, inventory management.
- Healthcare: Medical devices, patient monitoring systems, telemedicine.
- Smart Buildings: Energy management, security systems, building automation.
- Transportation: Fleet management, vehicle tracking, smart traffic systems.
Key Takeaways
- Windows for IoT combines robust features with IoT capabilities.
- Flexibility ensures support for a range of devices.
- Azure services and update tools simplify development and maintenance.
Understanding IoT and Windows for IoT
Windows for IoT brings a powerful platform to the Internet of Things, helping devices connect, manage, and communicate effectively. It offers enterprise-level security and tools.
The Internet of Things (IoT) Explained
IoT refers to a network of physical devices connected to the internet, capable of collecting and sharing data. This includes everything from smart home gadgets to industrial sensors.
These devices use sensors to gather information and communicate it to other devices or systems. Examples are smart thermostats that adjust temperature based on user habits and connected machinery that alerts technicians before failures occur.
Windows IoT Platform Overview
Windows IoT is a version of the Windows operating system tailored for IoT devices. It supports robust security, easy management, and seamless cloud integration with Azure.
Users can create custom IoT solutions using familiar development tools like Visual Studio. This eliminates the need for new software learning curves, streamlining the development process.
Comparing Windows 10 IoT Core and Windows 10 IoT Enterprise
Windows 10 IoT Core and Windows 10 IoT Enterprise are two main editions. IoT Core is designed for smaller devices like sensors and single-purpose applications.
Windows 10 IoT Enterprise, on the other hand, offers the full power of Windows 10 Enterprise. This makes it ideal for advanced devices like kiosks and ATMs that require a full operating system with more extensive features.
Suitability for IoT Solutions
Windows IoT provides a flexible and secure platform for various IoT solutions. It supports a wide range of devices and ensures they can efficiently interact with other systems and the cloud.
Ideal for industries such as retail, healthcare, and manufacturing, Windows IoT enables monitoring and controlling devices remotely. This enhances efficiency and reduces downtime, making operations smoother and more reliable.
Windows IoT’s compatibility with Azure and other tools allows for sophisticated data analysis and automation, integrating artificial intelligence and machine learning into IoT systems.
Setting Up Windows for IoT Devices
Setting up Windows for IoT devices involves system requirements, installing and configuring the operating system, using enterprise features, and creating device images. Follow these steps to ensure your devices run smoothly and efficiently.
System Requirements and Compatibility
Windows for IoT supports a variety of hardware such as ARM, x64, and ARM64 architectures. Intel and AMD processors are commonly used for robust performance. NXP and Qualcomm also provide compatible options.
Minimum Requirements:
- RAM: At least 512MB
- Storage: 2GB or more
- Processor: At least a 400 MHz model
Check Microsoft’s compatibility list for specific device models to ensure your hardware meets these needs. Unsupported devices might not perform as expected.
Installation and Configuration of Windows 10 IoT Core
To install Windows 10 IoT Core, first download the image from Microsoft’s website. Use the IoT Dashboard to flash your device. Connect your device to your PC, then select “Set up a new device” in the dashboard. Follow the prompts to install the operating system.
Steps:
- Download the IoT Core image.
- Connect your device to your development PC.
- Open the IoT Dashboard.
- Select “Set up a new device.”
- Follow the installation prompts.
Configure network settings and device information during setup. Attend to any additional prompts to complete the installation.
Enterprise-Class Features and Installation for Windows 10 IoT Enterprise
Windows 10 IoT Enterprise offers features suitable for larger and more complex deployments. It includes enhanced security, manageability, and support for legacy apps.
Installation Steps:
- Download the Windows 10 IoT Enterprise image.
- Create a bootable USB drive with the image.
- Insert the USB into your device and boot from it.
- Follow the setup instructions to complete the installation.
After installation, configure enterprise features like BitLocker encryption and group policies. Use Device Update Center to manage OS updates and device drivers. This ensures devices stay secure and up-to-date.
Provisioning and Device Image Creation
Provisioning IoT devices involves setting up software and configuration in advance for deployment. Using the Windows Imaging and Configuration Designer (ICD), create custom images that include all necessary applications and settings.
Steps for Image Creation:
- Install ICD on your PC.
- Choose settings and apps to include.
- Create the image file.
- Deploy the image to the device.
Plug in the flash drive with the image, boot the device, and follow the prompts to complete the image installation. This process helps ensure consistency across multiple devices.
For more detailed guides, refer to Microsoft’s documentation on device image creation.
Developing for IoT Devices Using Windows
When developing for IoT devices using Windows, there are several key areas to focus on. These include the development environment and tools, building applications with Universal Windows Platform (UWP), containerization and cloud-native development, as well as incorporating AI and machine learning.
Overview of Development Environments and Tools
Developing for Windows IoT requires a solid development environment. A popular choice is Visual Studio. It offers a comprehensive Integrated Development Environment (IDE) that supports a range of Windows IoT features.
Visual Studio provides tools for debugging and deploying applications. Developers use these tools to test their code directly on IoT devices. Another important tool is Device Update Center (DUC), which helps in validating and publishing updates to Windows IoT. This ensures that devices run smoothly and securely.
In addition, development tools like Windows IoT Core aid in creating efficient applications by providing specific features tailored for IoT devices.
Building Applications with Universal Windows Platform (UWP)
The Universal Windows Platform (UWP) simplifies building applications for IoT devices. UWP allows developers to create a single app that can run across all Windows 10 devices.
UWP applications are versatile. They run on desktops, tablets, and IoT devices. This platform leverages a common API set that provides access to Windows features and services.
Developers use UWP to build apps that utilize hardware features of IoT devices, like sensors and cameras. The UWP framework makes it easier to create responsive and adaptive layouts that work well on different screen sizes. Additionally, UWP supports background tasks, which are crucial for IoT applications that need to perform actions continuously.
Containerization and Cloud-native Development
Containerization and cloud-native techniques are essential for modern IoT solutions. Containerized workloads make it possible to deploy applications consistently across various devices. This helps manage dependencies and configurations effectively.
Tools like Docker can be used to containerize IoT applications. By doing this, developers ensure that their apps run the same way, regardless of where they are deployed. This reduces the chances of errors and improves reliability.
For cloud-native development, using Azure IoT Edge is beneficial. Azure IoT Edge extends cloud analytics and intelligence to IoT devices. It allows developers to deploy cloud services such as AI and machine learning models directly on IoT devices. This enables real-time processing and decision-making at the device level, reducing latency and improving responsiveness.
Incorporating AI and Machine Learning
Incorporating AI and machine learning into IoT applications enhances their functionality and intelligence. Windows IoT supports these technologies by providing integration with various AI and ML tools.
Developers can use Azure IoT Edge to deploy machine learning models on IoT devices. This allows devices to perform complex tasks like pattern recognition and predictive maintenance without relying heavily on cloud services.
Additionally, Windows IoT offers libraries and frameworks that simplify the use of AI and ML. These include APIs for cognitive services that can be used to add features such as image recognition and natural language processing to IoT applications.
By integrating AI and ML, IoT devices become smarter and more capable, providing users with advanced functionalities and improved performance.
Windows IoT Device Management and Security
Windows for IoT provides a strong foundation for managing and securing devices. It offers tools and features that enhance device management, protect data, and ensure reliability.
Security Features and Best Practices
Windows for IoT has many security features to protect devices and data. Microsoft Defender for IoT helps secure devices by identifying and fixing vulnerabilities. Built-in firewalls and antivirus software further shield devices from threats. Secure Boot ensures only trusted software runs on the device.
Following best practices is important. Regular security updates and patches keep devices safe from new threats. Least privilege access restricts user permissions to the minimum necessary. Encryption of data at rest and in transit provides additional protection.
Managing Updates and Support Lifecycle
Managing updates for IoT devices is crucial. Windows Update for Business allows IT admins to control when and how updates are installed. The Long-Term Servicing Channel (LTSC) provides updates for up to ten years, ensuring devices remain supported and secure.
Users can schedule updates to avoid downtime. Automatic rollbacks help prevent issues by reverting to a previous update if problems occur. Keeping devices on a supported version avoids security risks associated with outdated software.
Enterprise-Grade Security and Virtualization-Based Security
Windows for IoT offers enterprise-grade security. BitLocker encryption protects data stored on devices. Credential Guard secures user login information, preventing unauthorized access.
Virtualization-based security (VBS) adds another layer of protection. VBS uses hardware virtualization to isolate critical parts of the system from the rest. This makes it harder for malware to compromise the device. Combined with other enterprise features, VBS ensures a secure environment for IoT devices.
Device Management and Provisioning
Device management and provisioning are key to deploying and maintaining IoT devices efficiently. Windows Autopilot simplifies the setup process by automating device provisioning. Mobile Device Management (MDM) tools allow administrators to configure and manage devices remotely.
Assigned Access can lock devices to run only specific applications, improving security and usability in specialized scenarios. Policies can be set to enforce security settings, manage app updates, and control connectivity options.
Regular monitoring and audits ensure devices remain compliant with organizational policies. Tools like Microsoft Intune provide detailed insights and control over device configurations, making it easier to manage large fleets of IoT devices effectively.
For more information on how Microsoft secures IoT devices, visit Microsoft Defender for IoT or learn about Windows IoT on the Microsoft Developer site.
Deployment and Maintenance for IoT Devices
Effective deployment and maintenance of IoT devices using Windows IoT help ensure optimal performance and reliability. This covers deploying IoT devices, best practices for updates, and integrating with Azure services for better connectivity.
Deploying IoT Devices with Windows IoT Core Services
Windows IoT Core Services helps deploy IoT devices efficiently. It supports creating and customizing device images. These images ensure the devices run consistently with minimal setup. Using Windows Update, devices can scan and receive updates smoothly.
Kiosk Mode can lock down devices to a single app, improving security. It is useful for public-facing devices, ensuring users only access certain functions. This feature is common in retail or interactive displays, adding a layer of control and protection.
Updates and Maintenance Best Practices
Regular updates are vital. Windows IoT Core Services allow for cloud-managed updates. This ensures that devices receive the latest patches and improvements without manual intervention. It improves the reliability and security of devices.
To manage updates effectively, schedule them during low-usage times. This minimizes disruption. Use Windows IoT’s ability to manage device restarts, reducing downtime. Automation can also streamline the process, ensuring continuous operation.
Ensure that updates do not interfere with critical functions. Test updates on sample devices before deploying them broadly. This can prevent unexpected issues and downtime.
Integrating with Azure Services for Enhanced Connectivity
Azure Services can enhance IoT device connectivity. Azure IoT allows seamless communication between devices and the cloud. This enables advanced data analysis and control.
Using Azure, developers can send commands to devices, adjust settings, and collect data. Cloud-native AI and analytics can be brought to the edge, improving decision-making and performance. This integration ensures efficient and cost-effective management of IoT devices.
Azure supports various protocols like I2C for device communication. This broad protocol support allows flexibility in connecting different device types, ensuring a versatile IoT ecosystem.
Integration with Azure also enhances security. Azure provides robust tools to monitor and manage device health, ensuring long-term reliability and performance.
Specialized Use Cases and Features
Windows for IoT offers unique features tailored for specific industries and devices. Its capabilities are adept at handling requirements from ATMs to digital sign boards in retail settings.
Industry-Specific Deployment: ATMs, Kiosks, and Thin Clients
Windows for IoT is ideal for ATMs and kiosks. These devices require strong security and intuitive interfaces. The Kiosk Mode Experience locks the device to a single app, enhancing security.
Thin Clients in businesses benefit from the Universal Windows Platform (UWP). This platform easily manages and updates apps remotely. It’s known for its enterprise-class power and flexibility, which is useful in dynamic environments. Using data to monitor and adjust performance helps maintain smooth operation.
Optimizing for Headless and Dedicated Devices
Headless devices operate without screens. These include sensors and industrial equipment. Windows for IoT optimizes these by focusing on connectivity and performance. For example, data from sensors can be processed in real time. This allows quick decision-making.
Dedicated Devices like digital signage use Windows 10 IoT Enterprise. These devices stay locked to run only specified applications. The Unified Write Filter (UWF) protects such devices from unwanted changes. This is useful in environments like schools and hospitals.
Use Case: Retail and Restaurants
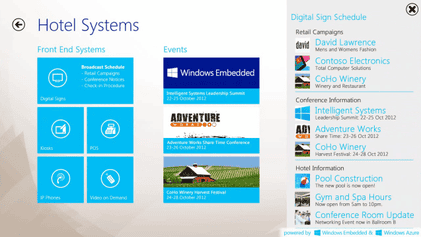
Windows for IoT is made for retail and restaurants. Digital Sign displays help in showing promotions and menus. These signs connect easily to cloud services for real-time updates.
Restaurants also use Windows IoT for point-of-sale (POS) systems. These setups rely on secure devices that process transactions quickly. The Microsoft Edge Browser can also run web-based ordering systems effectively.
In retail, machine learning improves inventory management. By using real-time data, stores can reorder stock just in time to meet demand. This ensures efficiency and customer satisfaction.
Partner and Community Ecosystem
Microsoft offers a robust ecosystem for Windows IoT, helping developers and organizations enhance their IoT devices. The ecosystem includes partnerships and valuable resources for developers.
Exploring the Windows Partner Ecosystem
Windows IoT benefits from a broad partner ecosystem. This ecosystem includes hardware manufacturers, solution integrators, and technology providers. These partners work together to create and support a wide range of IoT solutions.
Compatibility and integration are key to this ecosystem. Microsoft ensures that partners’ hardware and software integrate seamlessly with Windows IoT. This allows for smooth deployment of devices and scalable solutions.
The ecosystem supports both small and large-scale projects. Partners offer solutions for different industries such as healthcare, manufacturing, and retail. These industry-specific solutions help meet varied needs.
Resources and Support for Developers
Developers using Windows IoT have access to extensive resources and support. Microsoft provides documentation, tutorials, and development tools. These resources help in building and managing IoT devices efficiently.
Developer communities and forums are also available. These platforms offer a space for developers to share knowledge and solve problems. Engaging with the community helps in staying updated and resolving issues faster.
Support services include updates and security features. Windows IoT operating systems have long-term servicing channels. These channels ensure that devices receive regular updates and security enhancements, maintaining device performance and safety.
By leveraging these resources, developers can create reliable and secure IoT solutions tailored to their needs.
The Future of Windows for IoT Devices
Windows for IoT devices is evolving rapidly. Key trends include edge solutions, the development of Windows Server IoT 2022, and advancements in technologies like AI and machine learning.
Trends: Intelligent Edge and Digital Transformation
Edge solutions are becoming more important in IoT. These systems reduce the need for cloud processing by handling data closer to where it’s created. This change supports faster decisions and lowers bandwidth use.
Digital transformation is driving many businesses to adopt smarter devices. This includes using AI and ML to analyze data and make predictions. Pairing these capabilities with Windows for IoT allows for better automation and more efficient processes.
Windows Server IoT 2022 and Future Prospects
Windows Server IoT 2022 offers enhanced security and management for IoT solutions. It supports both large and small businesses with scalable cloud connectivity. This helps organizations handle growing amounts of data securely.
Customization is a key feature, allowing companies to tailor systems to their needs. Through services like Azure, Windows IoT simplifies the integration of intelligent edge devices. This provides a powerful environment for deploying complex IoT systems.
Evolving Technologies in IoT and Windows Development
Technologies in IoT continue to evolve, bringing new capabilities to Windows devices. AI and machine learning are integral, allowing devices to learn from data and improve over time. This helps in predictive maintenance and other automated processes.
Corporations like Lenovo are using IoT and Windows to create innovative products. These range from smart buildings to advanced healthcare systems. The Windows ecosystem supports these developments by providing tools like Visual Studio for building and managing IoT systems effectively.
Frequently Asked Questions
This section addresses key points about using Windows for IoT devices. It covers system requirements, differences from standard Windows, compatibility, installation options, and support lifecycles.
What are the system requirements for running Windows 10 IoT Enterprise on devices?
Windows 10 IoT Enterprise needs a device with at least a 1 GHz processor, 1 GB of RAM for 32-bit or 2 GB for 64-bit, and 16 GB of storage for 32-bit or 20 GB for 64-bit devices. Additionally, the graphics card must support DirectX 9 or later.
How does Windows 10 IoT differ from the standard version of Windows 10?
Windows 10 IoT offers specialized features for industrial devices. It includes enhanced security, lockdown features, and management tools not found in the standard Windows 10. This makes it more suitable for embedded systems and other IoT devices.
Is there a version of Windows IoT compatible with the newest hardware and features?
Yes, Windows IoT versions are frequently updated to work with the latest hardware. For instance, Windows 11 IoT supports new processors and advanced features.
What options are available for downloading and installing Windows 10 IoT?
You can download Windows 10 IoT from the Microsoft website or through licensing partners. Installation options include using an ISO file, which can be burnt to a USB drive or installed directly onto the device’s storage.
How does Windows 10 IoT Enterprise LTSC differ from other Windows 10 IoT editions?
Windows 10 IoT Enterprise LTSC (Long-Term Servicing Channel) focuses on providing long-term support. It receives security updates but not feature updates, making it ideal for devices that require stability and extended support.
What support lifecycle can be expected for Windows IoT editions?
Windows 10 IoT Enterprise LTSC editions are supported for up to 10 years. Other editions typically receive updates for a shorter period, usually tied to the general Windows support lifecycle. For the latest details, visit the Microsoft Learn page.