Taking screenshots on your Amazon Fire tablet is a handy skill that lets you capture important information, save memorable moments, or troubleshoot technical issues. Whether you want to save a recipe, remember a conversation, or show someone what you’re seeing on your screen, knowing how to take a screenshot is essential. To take a screenshot on an Amazon Fire tablet, simply press and hold the Power button and Volume Down button at the same time for about one second until you see the screen flash briefly.
The process works on all Fire tablet models, though you might need to adjust your technique slightly depending on which generation you own. Once captured, your screenshots are automatically saved to your device’s internal storage where you can easily access them later through the Photos app.
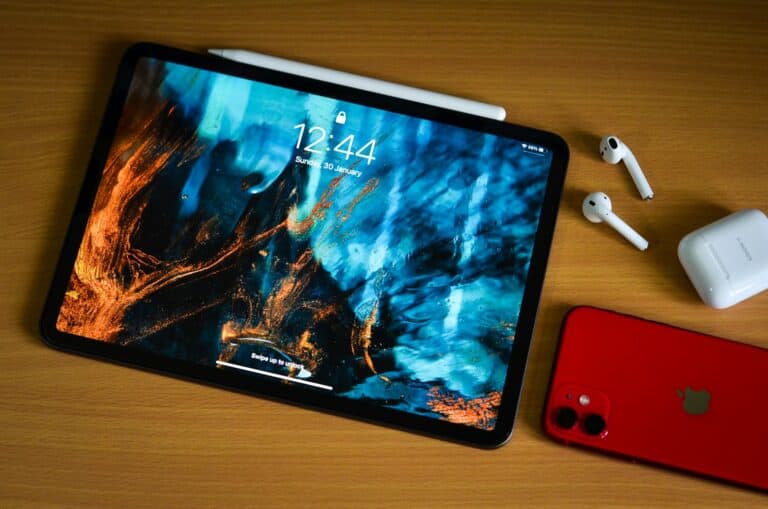
How To Take a Screenshot On An Amazon Fire Tablet
Taking a screenshot on an Amazon Fire tablet is quick and easy. You can capture whatever is on your screen and save it as an image.
Method 1: Using Hardware Buttons
- Prepare the Screen
Navigate to the screen you want to capture. - Press Buttons Simultaneously
Press and hold the Power button and the Volume Down button at the same time. - Wait for Confirmation
The screen will flash briefly, and you may hear a camera shutter sound indicating the screenshot has been taken. - Find Your Screenshot
The screenshot will be saved automatically in your Photos app under the Screenshots album.
Method 2: Using the Quick Settings Menu (If Available)
- Swipe down from the top of the screen to open the Quick Settings menu.
- Look for a Screenshot icon and tap it.
- The screen will flash, and the screenshot will be saved to your Photos app.
Tips
- Screenshots work on most Fire tablets including Fire HD 8, Fire HD 10, and others.
- Screenshots are saved in the Amazon Photos app or the Photos app, depending on your device settings.
- You can share or edit screenshots directly from the Photos app.
By following these steps, you can easily capture and save screenshots on your Amazon Fire tablet (source: Android Central, WikiHow).
Key Takeaways
- Press and hold the Power and Volume Down buttons simultaneously for one second to capture a screenshot on any Fire tablet model.
- Screenshots are automatically saved to your device’s storage and can be accessed through the Photos app.
- Fire tablets also offer accessibility options for those who may have difficulty pressing multiple buttons at once.
Understanding the Basics of Amazon Fire Tablets
Amazon Fire Tablets combine user-friendly interfaces with Android-based functionality, making them versatile devices for various tasks. Their screenshot capabilities rely on specific hardware components and button combinations that differ slightly from other Android devices.
Defining Key Concepts
Fire Tablets are Amazon’s line of tablet computers that run on Fire OS, a custom version of Android. Unlike standard Android tablets, Fire Tablets are designed specifically for Amazon’s ecosystem of apps and services.
These devices function similarly to other Android tablets but have some unique characteristics. Fire Tablets come in various sizes, including 7-inch, 8-inch, and 10-inch models. Each model has slightly different features, but they all share common navigation elements.
Fire OS provides a customized experience focused on content consumption. This operating system affects how users interact with the device, including how screenshots are captured.
Hardware Components Involved in Taking Screenshots
The primary components used for taking screenshots on Fire Tablets are the physical buttons located on the device’s exterior. Most Fire Tablets utilize a combination of the power button and volume down button to capture screenshots.
The power button is typically located on the top or side of the device. It’s used to turn the screen on and off and, when combined with other buttons, performs additional functions.
The volume buttons are usually situated on the side of the tablet. The volume down button specifically is needed for capturing screenshots on most Fire Tablet models.
For newer Fire Tablets (2013 models and later), pressing these two buttons simultaneously will capture whatever is currently displayed on screen. Older models might require different methods or additional software tools.
The Step-by-Step Process to Take a Screenshot
Taking screenshots on an Amazon Fire Tablet is simple once you know the correct button combination. The process involves pressing specific buttons simultaneously, then accessing your captured image afterward.
Positioning Your Fingers
Before attempting to take a screenshot, make sure you’re viewing exactly what you want to capture on your Fire Tablet screen. Find the physical buttons on your device – you’ll need to locate both the Power button and the Volume Down button.
On most Amazon Fire Tablet models, the Power button is located on the top edge of the device when held in portrait orientation. The Volume Down button is typically on the upper part of the side edge. It’s important to position your fingers comfortably to press both buttons simultaneously.
Make sure your grip is steady to avoid accidental button presses that might lock your screen or change the volume instead of capturing your screenshot.
Capturing the Screenshot
To take the screenshot, press and hold both the Volume Down and Power buttons together for one second. Don’t hold too long or you might trigger other functions like powering off your device.
When done correctly, you’ll see a quick screen flash and possibly hear a camera shutter sound (if your sound is on). This visual confirmation indicates your screenshot was successful.
If nothing happens, try again with slight adjustments to your timing. The buttons must be pressed simultaneously, not one after the other. This method works on all Fire tablets released in 2013 and newer.
Some newer Fire HD models may offer alternative screenshot methods, such as using quick settings or accessibility features.
Accessing and Sharing Your Screenshot
After capturing your screenshot, a thumbnail preview may briefly appear. Your screenshot is automatically saved to your device’s internal storage in the “Screenshots” folder within the Photos app.
To view your screenshots:
- Open the Photos app
- Look for the “Screenshots” album or folder
- Tap on any screenshot to view it full-screen
Once viewing your screenshot, you can share it using the share icon. Common sharing options include:
- Messaging apps
- Social media
- Cloud storage
You can also connect your Fire Tablet to a computer using a USB cable for file transfer if you need to move screenshots to another device. The screenshots are saved as PNG files and can be edited with any image editing app.
Troubleshooting Screenshot Issues
Sometimes taking screenshots on your Amazon Fire tablet doesn’t work as expected. Let’s explore common problems and solutions to help you capture your screen successfully.
Basic Troubleshooting Steps
If the standard method of pressing Volume Down and Power buttons together isn’t working, try these solutions:
- Hold the buttons for slightly longer (about 5 seconds)
- Make sure to press both buttons at exactly the same time
- Try pressing Volume Down first, then quickly add the Power button
- Check if your case is blocking the buttons
Restart Your Device
A simple restart can fix many screenshot issues. Press and hold the Power button until the device restarts, then try taking a screenshot again.
Button Sensitivity Issues
Some Fire tablets have less sensitive buttons that require firmer pressure. Try applying more pressure when pressing both the Volume Down and Power buttons.
Storage Problems
If screenshots aren’t saving, check your available storage. Delete unnecessary files or move photos to cloud storage to free up space.
Find Your Screenshots
Screenshots are typically saved in the Photos app in a “Screenshots” folder. If you can’t find them, check the “Downloads” folder or use the search function in the Files app.
Software Updates
Outdated software can cause screenshot functionality issues. Check Settings for any pending updates that might resolve the problem.
Alternate Methods for Taking Screenshots
While the physical button method is common, there are other ways to capture your screen on Fire tablets. These alternatives can be helpful when buttons are hard to reach or not working properly.
Using Apps to Take Screenshots
Fire tablets run on a modified version of Android, making them compatible with many screenshot apps from the Amazon Appstore. Apps like Screenshot Touch and Screen Master offer convenient features beyond the basic button method.
These apps often provide:
- Floating buttons that trigger screenshots with a single tap
- Scroll capture for long webpages or conversations
- Editing tools to crop or annotate images immediately
- Scheduled screenshots at timed intervals
Some apps even allow gesture controls or voice commands. To install a screenshot app, open the Amazon Appstore and search for “screenshot.” Choose an app with good ratings and install it following the on-screen instructions.
Taking Screenshots through USB Connection
For technical users, connecting your Fire tablet to a computer provides another screenshot method. This approach works well for documenting multiple screens or when physical access to the tablet is limited.
To use this method:
- Connect your Fire tablet to a computer using a USB cable
- Enable file transfer mode on your tablet when prompted
- On your computer, install Android Debug Bridge (ADB) tools
- Open a command prompt or terminal window
- Type
adb shell screencap /sdcard/screenshot.png - Use
adb pull /sdcard/screenshot.pngto transfer the image to your computer
This method is especially useful for developers testing applications or creating documentation. The resulting screenshots typically have higher quality than those taken with physical buttons.
Frequently Asked Questions
Taking screenshots on Amazon Fire tablets varies slightly depending on the model. Different devices may require specific button combinations or have unique storage locations for captured images.
What are the steps to capture a screenshot on a Fire HD 10 tablet?
To take a screenshot on a Fire HD 10 tablet, press and hold the Power button and Volume Down button at the same time for about one second.
The screen will flash white to indicate that the screenshot was successfully captured. This button combination works on most newer Fire tablets including the HD 10 model.
Is there a way to take a screenshot on the Amazon Fire 7 tablet?
Yes, taking a screenshot on an Amazon Fire 7 tablet follows the same method as other Fire tablets.
Users need to press and hold the Power and Volume Down buttons simultaneously for one second and then release. The screen will flash white briefly, indicating the screenshot has been taken.
Where can I find the screenshots I’ve taken on an Amazon Fire tablet?
Screenshots taken on an Amazon Fire tablet are automatically saved to the Photos app.
To access them, open the Photos app and look for the Screenshots folder or album. Users can view, edit, share, or delete their screenshots from this location.
Can you guide me through taking a screenshot on a Fire tablet 8?
Taking a screenshot on a Fire tablet 8 requires pressing the Power button and Volume Down button simultaneously for about one second.
When done correctly, the screen will flash white and briefly display a smaller version of the captured image. The Fire tablet 8 uses the same screenshot method as other Fire tablets released in 2013 and newer.
What method is used to take a screenshot on a Fire TV device?
Fire TV devices don’t have a built-in screenshot function accessible through remote buttons like Fire tablets.
For developers, Amazon provides specific tools to capture Fire TV screenshots through the Android Debug Bridge (ADB). Regular users may need to use another device to photograph their screen.
How do I take a screenshot with a Kindle Paperwhite?
Kindle Paperwhite devices don’t support taking screenshots through button combinations like Fire tablets do.
These e-readers lack physical volume buttons, making traditional screenshot methods impossible. Users typically need to take a photo of the screen using another device if they need to capture what’s displayed.