Have you ever experienced your phone suddenly shutting down, getting unusually hot, or rapidly losing battery power? These might be signs of a short circuit, an electrical problem that can damage or even ruin your device. A short circuit happens when electricity flows through an unintended path, creating excessive heat and potentially dangerous situations. The most reliable way to confirm if your device has a short circuit is to check for specific symptoms like unexpected restarts, battery drain, burning smells, or visible damage to components.
Short circuits can affect any electronic device, from smartphones to laptops and household appliances. They often occur due to damaged wiring, water exposure, or component failure. While some signs are obvious, others might be subtle and easily confused with different problems. Knowing what to look for can help you address the issue before it causes permanent damage.
How to Know If a Device Has a Short Circuit: A Practical Guide
A short circuit can cause devices to malfunction, overheat, or fail completely—and in some cases, it can be dangerous. Knowing how to recognize the signs of a short circuit can help you prevent further damage, data loss, or even fire hazards.
This guide explains what a short circuit is, common warning signs, and how to safely check if a device has one.
What Is a Short Circuit?
A short circuit happens when electrical current takes an unintended path with little or no resistance. This causes a sudden surge of current, which can lead to overheating, blown fuses, sparks, or device failure.
Short circuits can occur due to:
- Damaged or exposed wiring
- Liquid spills
- Loose components
- Manufacturing defects
- Worn insulation
Common Signs a Device Has a Short Circuit
1. Device Won’t Turn On
If a device is completely dead and won’t respond to power, a short circuit may have triggered a safety shutdown or blown a fuse.
2. Burning Smell or Smoke
A sharp, burnt plastic or electrical smell is a strong indicator of a short circuit.
⚠️ Immediately unplug the device if you notice this.
3. Sparks or Visible Flash
Seeing sparks when plugging in or turning on a device is a clear sign of electrical shorting.
4. Overheating
If the device becomes hot very quickly—even when idle—it may have uncontrolled current flow.
5. Tripped Circuit Breaker or Blown Fuse
If plugging in a device:
- Trips your home breaker, or
- Blows a fuse repeatedly
…the device may be internally shorted.
6. Unusual Sounds
Buzzing, popping, or crackling sounds often indicate electrical arcing caused by a short circuit.
7. Battery Drains or Swells (Portable Devices)
In battery-powered devices:
- Rapid battery drain
- Bulging or swelling battery
can point to an internal short.
How to Check for a Short Circuit Safely
⚠️ Safety First
Before testing:
- Unplug the device
- Remove batteries if possible
- Let it cool completely
1. Visual Inspection
Look for:
- Burn marks or discoloration
- Melted plastic
- Exposed wires
- Corrosion from liquid damage
Even small scorch marks can indicate a short.
2. Smell Test
Carefully smell near vents or ports. A persistent burnt odor often means internal damage.
3. Check the Power Cable and Adapter
Sometimes the issue is external:
- Frayed cords
- Bent prongs
- Loose connectors
Try a known-good cable or adapter before assuming internal damage.
4. Use a Multimeter (Advanced Users)
A multimeter can confirm a short circuit.
Basic continuity test:
- Set the multimeter to continuity or resistance (Ω)
- Touch probes to suspected terminals
- If resistance is near zero where it shouldn’t be, a short may exist
✅ This step is best for experienced users or technicians.
5. Test in a Different Outlet
Rule out electrical supply problems by using a different wall outlet or power strip.
Devices Most Commonly Affected
- Smartphones and tablets (liquid damage)
- Laptops and chargers
- Power adapters
- Kitchen appliances
- Extension cords and power strips
What NOT to Do
❌ Do not keep powering a suspected shorted device
❌ Do not open sealed electronics unless trained
❌ Do not ignore burning smells or heat
❌ Do not bypass fuses or breakers
Can a Short Circuit Be Repaired?
- Minor shorts (loose wires, damaged cables): Often repairable
- Liquid damage or board-level shorts: May require professional repair
- Severe damage: Replacement is often safer and cheaper
When to Seek Professional Help
Contact a qualified technician if:
- The device trips breakers repeatedly
- You see smoke or sparks
- The device has liquid damage
- You’re unsure how to test safely
Final Thoughts
Short circuits are serious but often give warning signs before causing major damage. By paying attention to smells, heat, power behavior, and visual clues, you can identify a short circuit early and avoid safety risks.
When in doubt, stop using the device and seek professional repair—it’s always better to be safe than sorry.
Key Takeaways
- Look for warning signs including rapid battery drain, unexpected shutdowns, burning odors, and unusual heating of the device.
- Use a multimeter to test for abnormal resistance readings when the device is powered off.
- Always disconnect power sources and take proper safety precautions before attempting to inspect any suspected short-circuited device.
Understanding Short Circuits
Short circuits occur when electricity takes an unintended path in a circuit, creating potentially dangerous situations. Recognizing the signs and understanding the mechanics behind these electrical failures is crucial for maintaining safety and preventing damage to devices.
Definition of a Short Circuit
A short circuit happens when electric current flows along a path with little or no resistance instead of following its intended route. Normally, electricity travels through conductors designed to handle specific current levels. In a short circuit, this orderly flow is disrupted when two conductors touch directly or connect through a conductive material.
This unintended connection creates a path of minimal resistance, allowing excessive current to flow through the circuit. Think of it like water that suddenly finds a hole in a pipe – it rushes through with great force.
Short circuits can occur in any electrical device or system, from small electronics to home wiring. The distinguishing feature is always the same: current bypassing its normal path and taking a “shortcut.”
Causes of Short Circuits
Several factors commonly trigger short circuits in devices and home electrical systems:
- Damaged insulation: When wire coverings wear out, crack, or melt, exposed conductors can touch.
- Water exposure: Moisture creates conductive paths between components that should remain isolated.
- Loose connections: Vibration or poor installation can cause wires to disconnect and touch other conductors.
- Foreign objects: Metal items like paperclips or screws falling into devices create conductive bridges.
- Circuit overloads: Excessive power demands can damage components, leading to shorts.
Age-related deterioration of electrical components often contributes to short circuit risk. Older devices with worn insulation or corroded connections are particularly vulnerable.
Faulty manufacturing can also introduce defects that eventually cause short circuits, such as improperly installed components or inadequate spacing between conductors.
Consequences of Short Circuits
The immediate effect of a short circuit is a dramatic increase in current flow. This surge can cause several serious problems:
Short circuits often trigger blown fuses or tripped circuit breakers as safety devices activate to prevent further damage. This is actually a protective measure, cutting power before more serious consequences occur.
Severe overheating happens almost instantly during a short. The excessive current generates intense heat that can melt wire insulation, damage components, and even start fires.
Devices experiencing short circuits may show visible damage like melted metal on wires, burn marks, or emit burning odors. Electronic components can fail completely, requiring costly repairs or total replacement.
The most serious consequence is fire risk, which threatens property and lives. This is why functional circuit breakers and fuses are essential safety components in all electrical systems.
Identifying Signs of a Short Circuit
Short circuits can damage devices and pose safety risks if not caught early. Learning to spot the key indicators will help you identify problems before they become dangerous.
Visual Indicators
When checking for a short circuit, several visual clues may point to trouble. The most obvious sign is blown fuses or tripped circuit breakers, which happen when excess current flows through the circuit. If your breaker panel shows a tripped switch or your fuse box contains a darkened fuse, this suggests a short circuit might be present.
Physical damage to wires is another key indicator. Look for:
- Melted or discolored wire insulation
- Burn marks around outlets or plugs
- Charred components on circuit boards
- Discoloration or melting on device casings
Past short circuits often leave evidence behind. You might notice darkening inside fuses or blackened areas on electrical components. This residue indicates a previous electrical failure that needs attention.
Audible and Physical Clues
Short circuits often announce themselves through distinctive sounds and sensations. A buzzing or crackling noise coming from an outlet, switch, or appliance can indicate current traveling along an unintended path. This sound requires immediate investigation.
Unexpected behavior in electrical devices provides important clues. Devices turning off suddenly without apparent reason might indicate a short circuit. Similarly, if touching a device produces a mild tingling sensation, disconnect it immediately and have it checked by a professional.
The smell of burning plastic or rubber often accompanies short circuits. This distinct odor results from insulation materials overheating and melting. If you detect such smells, especially from outlets or electrical panels, turn off power to that circuit immediately.
Flickering lights that persist even after replacing bulbs might indicate a short circuit somewhere in the wiring. This symptom deserves prompt professional attention.
Using Thermal Imaging
Thermal imaging provides a non-invasive way to detect short circuits through temperature differences. A thermal camera can reveal overheating components that might be invisible to the naked eye, making this technology particularly useful for complex devices.
When using a thermal camera, look for:
- Unusually hot spots on circuit boards
- Temperature differences between similar components
- Unexpected heat patterns in walls containing wiring
For home use, affordable thermal camera attachments for smartphones have made this technology more accessible. Regular thermal scans of electrical panels and major appliances can help catch potential short circuits before they become hazardous.
Professional electricians use more sophisticated thermal imaging equipment during inspections. They can identify precise locations of shorts in wiring hidden behind walls or inside complex equipment, often preventing major electrical failures before they occur.
Tools for Troubleshooting Short Circuits
Finding a short circuit requires the right diagnostic equipment to safely and accurately identify where electrical pathways have failed. Proper tools can help pinpoint issues without causing further damage to components or risking safety hazards.
Multimeter Fundamentals
A multimeter is the most versatile and essential tool for identifying short circuits. This device measures multiple electrical values including voltage, resistance, and current.
When troubleshooting shorts, the resistance (ohms) setting is particularly valuable. Low or zero resistance between points that should be isolated indicates a short circuit path.
To use a multimeter effectively:
- Disconnect power from the circuit
- Set the multimeter to resistance/ohms mode
- Connect the probes to suspected areas
- Check for abnormally low resistance readings
Modern digital multimeters feature a continuity mode that emits an audible beep when detecting a complete circuit path. This function makes it easier to identify shorts without constantly looking at the display.
Technicians should work methodically, testing one section at a time to isolate the problem area before moving on to component-level testing.
Test Lamp Usage
A test lamp offers a simple yet effective way to find shorts, especially in automotive and household wiring systems. This tool consists of a light bulb connected to two probes.
When connected between a power source and a short-circuited line, the lamp will illuminate brightly. The brightness of the bulb indicates the resistance level in the circuit – brighter means lower resistance and possibly a more severe short.
Test lamps are particularly useful for:
- Checking fuse boxes and circuit breakers
- Testing wiring harnesses
- Identifying shorts in automotive electrical systems
Unlike multimeters, test lamps can be used in live circuits, though safety precautions are still essential. When placed between a breaker and a circuit, a short will cause the lamp to light up, helping technicians trace the path of least resistance.
Importance of Continuity Testing
Continuity testing verifies whether current can flow between two points. This fundamental technique helps identify breaks and shorts in electrical paths.
To perform effective continuity tests:
- Disconnect all power sources
- Isolate the component or wire being tested
- Connect tester leads to opposing ends
- Interpret readings (beep/no beep or resistance values)
Continuity testing allows technicians to trace shorts by systematically checking connections. This process works by elimination – starting with major sections and narrowing down to specific components.
For electronics repair, continuity tests can reveal solder bridges and component failures that create unwanted paths for electricity. These tests are critical before applying power to prevent damage to sensitive components.
Visual inspection should always accompany continuity testing, looking for burnt areas, discoloration, or physical damage that might indicate where a short has occurred.
Safety Precautions Before Troubleshooting
Working with potentially short-circuited devices requires careful attention to safety protocols. Proper precautions protect you from electrical shocks, burns, and other hazards that could occur during troubleshooting.
Power Disconnection
The first critical step before investigating any potentially short-circuited device is to completely disconnect it from power sources. Always prioritize safety by turning off and unplugging the device from electrical outlets.
For battery-powered devices, remove the battery if possible. This eliminates the risk of electric shock during inspection.
Wait at least 5 minutes after disconnection before touching internal components. Some devices contain capacitors that can store electricity even after being unplugged.
When working with household wiring, turn off the appropriate circuit breaker and verify power absence using a voltage tester. Never rely solely on a switch being in the “off” position.
Important: Confirm power disconnection before proceeding to any further inspection steps.
Safety Gear
Proper protective equipment is essential when investigating electrical problems. At minimum, use rubber-soled shoes and insulated tools designed for electrical work.
Recommended safety gear includes:
- Insulated gloves rated for electrical work
- Safety glasses to protect against sparks
- ESD (electrostatic discharge) wristband when handling sensitive electronics
- Non-conductive tools with insulated handles
For more complex repairs, consider using a rubber mat to stand on while working. This provides an additional layer of insulation between the technician and ground.
Avoid wearing metal jewelry like watches, rings, or bracelets that could conduct electricity. Loose clothing should also be secured to prevent accidental contact with components.
Grounding and Environment
The workspace environment plays a crucial role in electrical safety. Always work in a dry area free from water or moisture, as these can conduct electricity and increase shock risks.
Set up in a well-lit, clean space with adequate ventilation, especially if soldering might be required. Proper lighting helps identify visible burns or melted components that often indicate short circuits.
Use an anti-static mat and grounding strap when working with sensitive electronic components. This prevents static electricity damage to circuit boards or chips.
Keep a class C fire extinguisher nearby when working with electrical equipment. Never use water to extinguish electrical fires.
Children and pets should be kept away from the troubleshooting area to prevent accidents or distractions during detailed inspection work.
Conducting Troubleshooting Steps
Finding a short circuit requires methodical investigation using specific tools and techniques. Safety should always be the priority when working with potentially damaged electrical devices.
Initial Visual Inspection
Before using any testing equipment, a thorough visual inspection can reveal obvious signs of a short circuit. Look for:
- Burn marks or discoloration on circuit boards or components
- Melted plastic around connection points
- Bulging or leaking capacitors
- Damaged wires with exposed conductors
- Unusual odors like burning plastic or electronic components
Power down the device completely and disconnect it from any power source before inspection. Use good lighting and magnification if necessary to examine small components.
Physical damage often appears at the short circuit location. Sometimes the damage is subtle, like a tiny strand of wire creating a bridge between components or a small crack in a circuit trace.
Performing Continuity Tests
A multimeter is essential for detecting short circuits through continuity testing. Set the multimeter to the continuity or resistance (ohms) setting.
Basic continuity test steps:
- Ensure the device is completely powered off and disconnected
- Set multimeter to continuity mode (look for sound symbol)
- Touch the probes together to verify the meter beeps
- Test between points that should NOT be connected
When testing components, remember that some resistance readings are normal. Zero or very low resistance between points that should be isolated indicates a short circuit.
For complex devices like smartphones, testing between the power and ground pins can reveal motherboard shorts. Resistance readings that are significantly lower than manufacturer specifications often indicate problems.
Checking for Excessive Current Flow
Short circuits typically draw abnormal amounts of current. This can be measured safely using:
Current testing methods:
- Current-limited power supply to prevent further damage
- Clamp meter to measure current without breaking the circuit
- Heat detection using thermal cameras or temperature probes
When a device draws excessive current immediately upon power-up, it likely has a short circuit. Normal devices should draw predictable amounts of current during operation.
For complex electronics, incrementally increasing voltage while monitoring current can help isolate problems. A sudden current spike at a specific voltage point often indicates where the short is occurring.
Heat patterns can also reveal short circuit locations, as they typically generate significant heat at the affected area.
Practical Tips for Addressing Short Circuits
When dealing with a short circuit, proper methods can prevent further damage and restore device functionality. These approaches address the root causes while improving safety and reliability.
Repair or Replace Faulty Wiring
Start by disconnecting all power sources before attempting repairs. Locating damaged wiring requires careful visual inspection for signs of burn marks, melting, or discoloration. A multimeter set to measure resistance helps identify problematic sections.
When replacing wires:
- Use the correct gauge wire rated for the current load
- Ensure proper insulation for the application environment
- Secure connections with appropriate terminals or soldering techniques
- Apply heat shrink tubing over repaired joints
For sensitive electronics, specialized tools like a thermal camera can identify hot spots before visible damage occurs. Temporary repairs should always be followed by permanent solutions to prevent recurring issues.
Restoring Electrical Connections
Corroded or loose connections often create resistance points that lead to shorts. Regular inspections help catch these issues early.
Cleaning Process:
- Disconnect power completely
- Apply appropriate electronic contact cleaner
- Gently scrub connection points with a soft brush
- Dry thoroughly before reconnection
Tightening loose terminals requires the correct tools to avoid stripping. For circuit boards, examine solder joints for cracks or cold solder connections. Reflowing questionable joints with fresh solder often resolves intermittent shorts.
When working with ground connections, ensure they provide a proper path without creating unintended bridges to other circuits.
Upgrading Circuit Protection
Modern protective devices can prevent short circuits from causing catastrophic damage. Fuses and circuit breakers should be sized appropriately for the expected load.
Consider implementing:
- Fast-blow fuses for sensitive electronics
- Resettable circuit breakers for frequently accessed areas
- GFCI protection where moisture might be present
For DIY projects, test circuits can be designed with high-current relays to safely trigger protection systems. When upgrading, the entire electrical path should be evaluated.
Professional electricians recommend documenting all changes to wiring and protection schemes. This helps future troubleshooting efforts and ensures maintenance follows the designed protection strategy.
Frequently Asked Questions
Short circuits can damage electronic devices and cause safety hazards. Identifying and addressing them quickly helps prevent further damage and potential fire risks.
What are the signs of a short circuit in an electronic device?
Short circuits often produce noticeable symptoms. These include burning smells, visible burns or melted metal on wires, and unusual heat coming from the device.
Flickering lights or displays can indicate a short circuit is occurring. Many devices will simply stop working entirely when a short circuit happens.
Some electronics might make buzzing or crackling sounds just before or during a short circuit. Physical signs like burns are often the most reliable indicators that a short has occurred.
How can a multimeter be used to check for a short circuit?
A multimeter is the most reliable tool for detecting short circuits. First, disconnect the device from power and set the multimeter to continuity mode or resistance mode.
Touch the multimeter probes to the suspected circuit points. A reading of zero or nearly zero ohms typically indicates a short circuit is present.
For power circuits, checking between hot and neutral or hot and ground can reveal shorts. Technicians should always follow proper safety procedures when working with electrical components.
Is it possible to detect a short circuit without a multimeter, and if so, how?
Visual inspection is the primary method without specialized tools. Look for discoloration, burn marks, or melted components on circuit boards and wiring.
A distinct burning smell often accompanies short circuits. This odor typically remains even after the device is powered off.
For household circuits, a tripped circuit breaker that immediately trips again when reset often indicates a short circuit. Unusual heat from specific components might also suggest where a short has occurred.
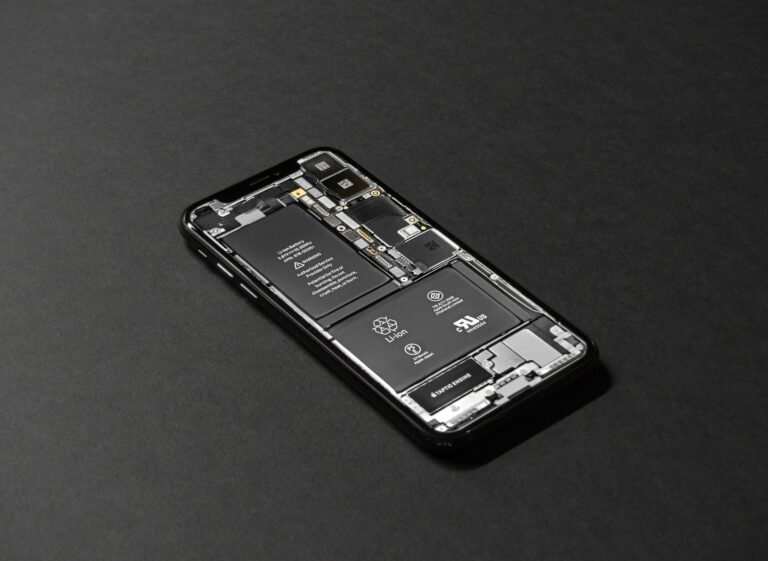
What are the common indicators that a smartphone has experienced a short circuit?
Smartphones with short circuits typically display several symptoms. These include sudden battery drain, device becoming unusually hot, or complete failure to power on.
Random reboots or system crashes may occur before complete failure. The only definitive way to confirm a short circuit in a smartphone is to have a professional remove the motherboard for inspection.
Water damage is a common cause of shorts in phones. If a phone has been exposed to liquid and then shows these symptoms, a short circuit is likely the culprit.
What steps should be taken to locate a short circuit within household wiring?
Begin by identifying which circuit is affected. Turn off the main power and check which breaker is tripping.
Disconnect all devices from outlets on the affected circuit. If the breaker no longer trips when reset, one of the devices likely has the short.
Test each device individually by plugging them in one at a time. When the breaker trips again, the last device connected is likely causing the short.
For persistent issues, examining each outlet and switch with the power off may be necessary. Professional electricians have specialized tools to trace shorts in walls.
Can electronic devices be repaired after suffering a short circuit, and what are the typical methods?
Many electronic devices can be repaired after a short circuit. The first step is identifying and replacing the damaged components that caused or resulted from the short.
Repair typically involves removing the damaged components and soldering new ones in place. Common replacements include fuses, capacitors, and sections of circuit board traces.
For complex devices like smartphones, professional repair is recommended. Short circuits often damage multiple components, and replacement of key components on the motherboard may be required for successful repair.