Turning a 2D drawing into a physical 3D object used to be a complex task for professional artists. Now with accessible 3D printing technology, you can transform your flat concepts into tangible figures right at home. The journey from 2D to 3D involves three main stages: creating a digital 3D model based on your concept art, preparing that model for printing, and finishing the printed piece with paint and details.
The transformation process begins with basic shapes that capture the essence of your 2D concept, as demonstrated by concept artists like Emily Chapman who sculpts, prints and paints outstanding models for display. You don’t need to be a professional—many software tools now make it possible to convert any image into a 3D design with relatively simple steps, allowing you to extract key elements like shapes and contours from your 2D artwork.
How to Turn a 2D Concept into a 3D Printed Figure
Turning a 2D drawing into a 3D printed figure involves converting flat artwork into a digital 3D model that a printer can understand. This process is widely used in product design, collectibles, prototyping, and creative projects. While it may sound complex, modern tools make it accessible even for beginners.
The core idea is to “model” depth and shape based on your original 2D concept, then export it as a printable file.
Step-by-step process:
- Start with a clean 2D design (sketch or digital image)
- Import it into 3D modeling software
- Use modeling tools to add depth and dimension
- Refine details like curves, edges, and textures
- Export the file as STL or OBJ
- Slice the model using 3D printing software
- Print using your 3D printer
Popular tools for beginners and pros:
- Blender – powerful and free modeling tool
- Tinkercad – beginner-friendly and browser-based
- ZBrush – ideal for detailed characters
- Fusion 360 – precise and engineering-focused
Tips for better 3D prints:
- Keep wall thickness consistent
- Avoid overly thin or floating parts
- Use supports for complex shapes
- Test print at a smaller scale first
Common mistakes to avoid:
- Skipping model cleanup (leads to print errors)
- Ignoring printer limitations
- Using low-resolution source images
By combining creativity with the right tools, you can transform simple 2D ideas into fully realized 3D printed figures ready for display or production.
Key Takeaways
- Start with basic shapes to build your 3D model’s foundation before adding detailed features from your 2D concept.
- Choose appropriate 3D modeling software that matches your skill level and offers tools for converting 2D elements into 3D forms.
- Post-processing your printed figure with sanding, painting, and detailing transforms a raw 3D print into a professional-quality display piece.
Understanding the Basics of 3D Printing
Before diving into turning your 2D concept into a physical model, you need to grasp the fundamental principles of 3D printing. This technology has revolutionized prototyping and manufacturing by building objects layer by layer from digital designs.
Types of 3D Printers and Technologies
The most common type of 3D printer for beginners is the Fused Deposition Modeling (FDM) printer. These affordable machines work by melting plastic filament and depositing it in layers to build your model. They’re perfect for home use and learning the basics.
For more detailed prints, Stereolithography (SLA) printers use liquid resin cured by UV light. These create smoother surfaces but require more maintenance and safety precautions.
Selective Laser Sintering (SLS) printers use lasers to fuse powder materials together. While expensive, they create strong, functional parts without support structures.
For professional, high-detail work, Digital Light Processing (DLP) and Polyjet technologies offer incredible precision but at a much higher price point.
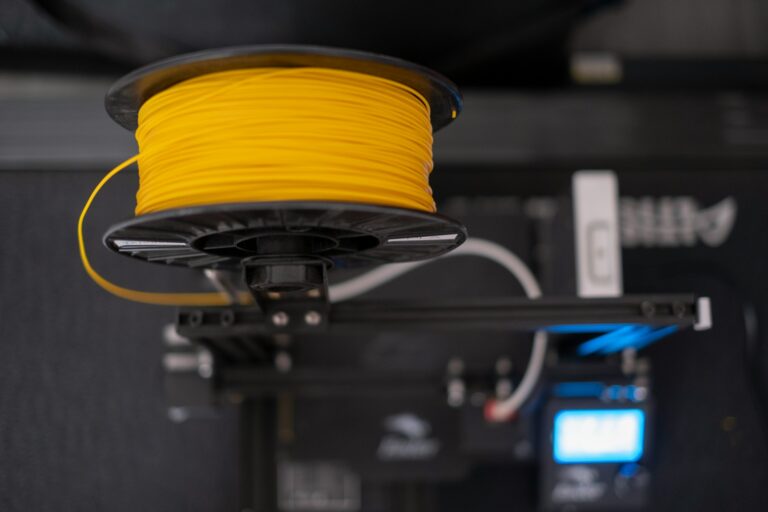
Materials Used in 3D Printing
PLA (Polylactic Acid) is the most beginner-friendly filament. It’s biodegradable, prints at lower temperatures, and produces less odor. Perfect for your first 3D printed figure!
ABS plastic offers better durability and heat resistance but requires a heated bed and produces fumes. Consider ventilation when working with ABS.
Other common materials include:
- PETG: Combines PLA’s ease of use with ABS’s durability
- TPU: Flexible material for movable parts
- Nylon: Strong and slightly flexible
- Resin: For SLA printers, offering incredible detail
Each material affects your final figure’s strength, appearance, and how it handles paint and finishing techniques.
Benefits and Limitations of 3D Printing
The primary benefit of 3D printing is turning your imagination into reality. You can create complex geometries that would be impossible with traditional manufacturing methods.
3D printing allows for quick iterations. You can test designs, make adjustments, and print again within hours instead of waiting weeks for professional prototyping.
However, 3D printing does have limitations. Print times can be lengthy—complex figures might take 20+ hours to complete. Resolution limitations mean very fine details may be lost without high-end equipment.
Size constraints are another consideration. Most home 3D printers have build volumes under 250mm³, though larger models exist.
Finally, post-processing is nearly always necessary. Your prints will likely need sanding, priming, and painting to achieve a professional finish worthy of display.
From Concept to 3D Model
Transforming a 2D concept into a 3D model requires understanding key principles and using the right tools. The journey begins with interpreting your artwork and continues through the modeling process.
Interpreting 2D Concepts for 3D Modeling
When you begin turning a 2D concept into a 3D figure, start by analyzing your concept art from multiple angles. Consider how your character or object would look from all sides, not just the view shown in your illustration.
Begin by breaking down your design into basic shapes. Artists often use spheres, cubes, and cylinders as the foundation for more complex forms. This technique, called blocking out, gives you a solid structural base.
Create reference sheets with front, side, and top views if possible. These orthographic views help maintain proper proportions when modeling.
Pay special attention to the silhouette – a strong silhouette translates well to 3D. Think about how gravity affects your design and ensure the model will stand properly when printed.
Choosing the Right 3D Modeling Software
Selecting appropriate 3D modeling software depends on your experience level and project needs. For beginners, Blender offers a free, powerful option with extensive online tutorials and community support.
Professional options include:
- ZBrush: Excellent for organic sculpting and character design
- Maya: Industry standard for animation and complex modeling
- Fusion 360: Better for mechanical or precision designs
- Tinkercad: Simple browser-based option for absolute beginners
Consider your workflow preferences. Sculptors might prefer ZBrush’s brush-based approach, while those from a technical background might prefer CAD-based programs.
Many concept artists use a combination of programs. You might sculpt in ZBrush and then refine in Maya or Blender depending on your project’s needs.
Basic Principles of 3D Modeling
When creating 3D models from concept art, focus on topology – how the polygons flow across your model. Good topology ensures smooth surfaces and efficient geometry.
Start with low-poly modeling to establish basic shapes. As Emily Chapman demonstrates in her process, beginning with simple forms helps establish proper proportions before adding details.
Remember these key principles:
- Maintain even polygon distribution
- Create clean edge loops around important features
- Consider the deformation needs if animating
- Keep geometry simple where detail isn’t needed
Pay attention to scale consistency throughout your model. 3D printing requires models to have proper wall thickness and support structures for overhangs.
Use reference images as background templates in your 3D software. Many programs allow you to import and position your concept art on different planes to guide your modeling.
3D Modeling Software and Tools
Choosing the right software is crucial for turning your 2D concept into a printable 3D model. The tools you select will impact your workflow efficiency and the quality of your final 3D printed figure.
Comparison of Popular 3D Modeling Programs
Beginner-Friendly Options:
- Blender: Free, open-source with powerful sculpting tools
- TinkerCAD: Web-based, perfect for simple designs
- Meshmixer: Excellent for modifying existing models
Professional Software:
- Fusion 360: Parametric modeling with free license for hobbyists
- ZBrush: Industry standard for detailed character models
- Rhino: Precision NURBS modeling for complex shapes
Each program has unique strengths. Blender offers comprehensive tools for organic modeling while Fusion 360 excels at mechanical designs. Consider your project needs and skill level when choosing. Many professionals use multiple programs in their workflow to leverage specific features.
Creating Your First 3D Model
Start with basic shapes when creating your first 3D model. This approach, called primitive modeling, builds complex objects from simple forms like cubes, spheres, and cylinders.
Step-by-Step Process:
- Import your 2D sketch as a reference image
- Position it on appropriate planes (top, front, side)
- Create basic shapes that match your concept’s outline
- Use boolean operations to combine or cut shapes
- Refine details with sculpting tools
For character designs, start with a simple body form and progressively add detail. Work with symmetry tools to ensure balanced features. Remember to check your model regularly for any non-manifold edges or printing issues.
Advanced 3D Modeling Techniques
Once you’ve mastered the basics, several advanced techniques can elevate your designs to professional quality.
Sculpting: Digital clay modeling lets you create organic forms with tools that mimic traditional sculpting. Use dynamic topology to add detail only where needed.
Retopology: This technique reorganizes your model’s mesh for better printing. A clean topology ensures smooth surfaces and structural integrity.
Modifiers and Effects: Learn to use modifiers like subdivision surface to smooth models or displacement maps to add intricate textures. These tools can transform simple designs into complex forms.
Photogrammetry tools can convert multiple photos into 3D models, useful for capturing real-world objects. For architectural or mechanical designs, parametric modeling allows precise control through mathematical relationships between components.
Preparing the 3D Model for Printing
Before sending your model to the printer, several crucial preparation steps will ensure better print quality and fewer failures. These processes optimize your design for the physical limitations of 3D printing technology.
Optimizing 3D Models for Printing
Start by checking your mesh for any errors or imperfections. Use software like Meshmixer or Netfabb to identify and repair non-manifold edges, holes, or intersecting faces that could cause print failures.
Make sure your model has appropriate wall thickness. Walls that are too thin might break during printing or removal of supports. Generally, a minimum wall thickness of 0.8mm works well for most home printers.
Consider the orientation of your model. Position your 3D figure to minimize overhangs and maximize stability. The best orientation often balances quality with minimizing support structures.
You may need to adjust scale and dimensions to fit your printer’s build volume. Some designs benefit from being printed in separate parts and assembled later.
Incorporating Supports and Overhangs
Support structures are essential for printing overhangs exceeding 45-degree angles. Modern slicing software can automatically generate these temporary scaffolding elements.
You can customize support density and pattern based on your specific model. Denser supports provide better stability but use more material and take longer to remove. Tree-style supports work well for complex figurines with many overhangs.
Consider designing your own custom supports for critical areas. This gives you more control than automatic generation and can result in cleaner surfaces where supports attach.
For detailed figures, strategically place support structures to avoid marring important surface details. Remember that every support contact point will leave a small mark on your finished print.
Slicing and CAM Processes
Slicing software transforms your 3D model into printer instructions (G-code) by converting it into horizontal layers. Popular options include Cura, PrusaSlicer, and Simplify3D.
Key settings to adjust in your slicer:
- Layer height: Lower values (0.1-0.2mm) for detail, higher for speed
- Infill percentage: 15-20% for most figures, higher for strength
- Print speed: Slower for detail, faster for rough prototypes
- Temperature: Material-specific, affects strength and appearance
For complex figures, consider using different settings for different parts. You can create custom processes that print delicate features slowly and sturdy bases more quickly.
Preview your sliced model layer by layer before sending it to print. This final check helps identify potential issues with overhangs, supports, or thin features before wasting material on a failed print.
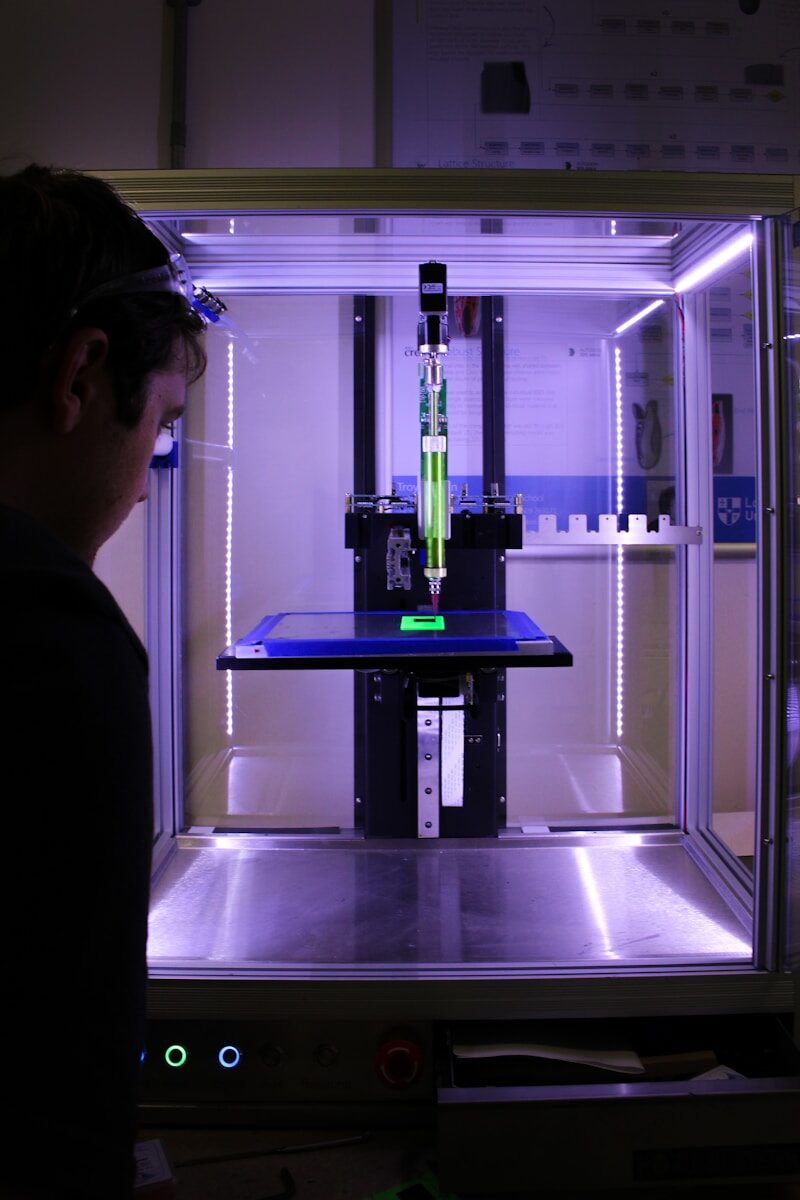
The 3D Printing Process
Turning your digital 3D model into a physical object requires careful setup and monitoring. The quality of your final figure depends greatly on how well you manage each step of the printing process.
Setting Up the 3D Printer
Before starting your print, ensure your printer is properly calibrated. Check that the build plate is level—even small deviations can cause first layer adhesion problems. Most modern printers have assisted leveling features, but manual adjustments may still be necessary.
Clean the build surface thoroughly with isopropyl alcohol to remove oils and residue. This simple step significantly improves adhesion and prevents mid-print failures.
Select the appropriate build plate for your model—glass plates work well for PLA, while flexible magnetic sheets are ideal for removing complex prints. Apply adhesion helpers like glue stick or specialized sprays for particularly challenging models.
Check your filament for quality issues. Ensure it’s properly loaded and not tangled, as filament jams can ruin hours of printing progress.
Choosing the Right Printing Parameters
Printing parameters dramatically affect your figure’s quality and realism. Start with layer height—lower values (0.1-0.2mm) capture more detail but increase print time, while higher values print faster but show visible layer lines.
Set appropriate temperatures based on your filament type:
- PLA: 190-220°C nozzle, 50-60°C bed
- PETG: 230-250°C nozzle, 70-80°C bed
- ABS: 230-250°C nozzle, 100-110°C bed
Print speed affects detail quality—slower speeds (30-50mm/s) produce better results for figurines with intricate features. Consider enabling retraction settings (5-7mm distance) to prevent stringing between separate parts.
Infill density balances strength and material usage—15-20% is typically sufficient for display pieces. For small figurines, use 3-4 perimeters to ensure adequate strength.
Monitoring the Printing Process
Stay vigilant during the first few layers as most print failures occur early. Watch for signs of poor adhesion, warping, or under-extrusion. Many printers now offer remote monitoring through cameras and smartphone apps.
Check periodically for potential issues like filament tangles or clogs. Listen for unusual sounds—grinding noises often indicate extruder problems requiring immediate attention.
For longer prints, consider using uninterruptible power supplies to protect against power outages. Many modern printers include power loss recovery features.
Maintain optimal ambient conditions—avoid drafts, maintain consistent room temperature, and consider an enclosure for temperature-sensitive materials like ABS. This improves print quality and increases your productivity by preventing failed prints.
Post-Processing and Finishing Touches
Once your 3D printed figure emerges from the printer, the real magic begins with post-processing. These steps transform a raw print into a professional-quality piece through careful refinement and artistic touches.
Cleaning and Smoothing the Printed Figure
Start by removing all support structures with flush cutters or pliers. Be gentle around delicate areas to avoid damaging your figure. You’ll notice print lines and layer marks that need addressing next.
For PLA prints, sand progressively using 120-grit sandpaper, then move to 220, 400, and finally 600+ grit for a smooth finish. Work in circular motions and rinse between grits to remove debris.
Polishing 3D printed objects can be done with specialized sanding tools for hard-to-reach areas. For larger figures printed in sections, use epoxy putty to join parts seamlessly.
Consider using filler primer spray to cover remaining layer lines. Apply 2-3 light coats, sanding between each for best results. This creates a smooth canvas for painting.
Painting and Detailing for Realism
Begin with a thin primer coat to help paint adhere properly. Choose colors that match your original 2D concept and apply thin, even base coats using an airbrush or fine brush.
Create depth through layering techniques. Apply a darker wash in recessed areas and use dry brushing to highlight raised details. This mimics how light naturally hits objects and adds dimension.
For figurines, pay special attention to facial features and textures. Use a magnifying glass and fine detail brushes for precision work. Reference your original 2D concept art frequently to maintain consistency.
Consider adding weathering effects with sponges or stippling brushes for realistic wear. Metal parts can be given shine with metallic paints or rub-n-buff. Fabric areas benefit from matte finishes and subtle highlights.
Applying the Final Finishes
Seal your work with appropriate clear coats. For glossy surfaces like armor, use high-gloss varnish. For skin or fabric, choose satin or matte finishes. Apply in thin, even layers to prevent pooling.
Consider adding special effects for dramatic impact. LED lights can illuminate translucent parts, while fluorescent paints create glow effects under UV light.
Create a custom base or stand to display your figure. This completes the presentation and protects delicate parts. Simple wooden bases can be painted or textured to complement your figure’s theme.
Take professional photos of your completed work. Use soft, diffused lighting to highlight your post-processing achievements. These images showcase your journey from 2D concept to finished 3D printed masterpiece.
Case Studies and Practical Examples
Real-world examples demonstrate how 2D concepts transform into stunning 3D printed figures. These projects showcase the journey from sketch to physical object, providing valuable lessons for your own creative process.
Showcasing Successful 3D Printing Projects
The transformation of a children’s book character into a physical figurine by designer Sarah Chen shows the power of 3D printing. Sarah began with simple sketches, then developed a basic 3D model using foundational shapes before adding details.
A notable example comes from Tokyo-based graphic designer Yuki Tanaka, who turned his anime-inspired drawings into a collection of articulated figurines. His process involved:
- Creating clean vector outlines from sketches
- Building the 3D base structure in Blender
- Adding character-specific details and textures
- Testing multiple printing orientations for optimal results
The Imaginarium studio transformed doodle art into metal prints, demonstrating how even simple sketches can become premium collectibles when executed properly.
Expert Insights from Industry Professionals
Mark Williams, creative director at ModelWorks Studio, emphasizes starting with silhouettes. “The strongest 3D printed figures maintain their visual impact from all angles,” he explains. “Begin with a distinctive profile before adding details.”
Industry professionals recommend these key steps:
- Maintain proportions – Use reference grids when translating 2D to 3D
- Consider material limitations – Different printing materials require specific minimum thicknesses
- Plan for supports – Design with printing orientation in mind to minimize support structures
“The most common mistake is adding too much detail too early,” notes 3D artist Emma Liu. She recommends blocking out major forms first, then systematically adding details in stages.
Innovative Uses of 3D Printing in Various Fields
Game development studios now regularly use 3D printing to produce physical prototypes of digital characters. Blizzard Entertainment created limited-edition figurines of Overwatch heroes, starting from 2D concept art that was meticulously translated into 3D models.
In education, teachers are turning student drawings into 3D printed models to teach spatial thinking. This approach helps students understand geometry and engineering principles through their own creative work.
Medical illustrators collaborate with surgeons to transform 2D anatomical illustrations into 3D printed models for patient education and surgical planning. These models provide tactile references that enhance understanding of complex procedures.
Fashion designers like Iris van Herpen combine 2D fabric patterns with 3D printing to create avant-garde pieces that would be impossible to produce using traditional methods.
Frequently Asked Questions
Turning a 2D concept into a 3D model involves specific techniques, tools, and considerations to achieve successful prints. These common questions address the essential aspects of the 2D-to-3D transformation process.
What steps are involved in converting a 2D image into a 3D model suitable for printing?
The process typically begins with basic shapes as your foundation. Start by importing your 2D image as a reference into your chosen 3D modeling software.
Next, create the primary shapes that form the core structure of your model. You’ll need to extrude flat surfaces to add depth to different parts of your design.
Then focus on adding details like textures, patterns, and specific features that make your design unique. Finally, check and optimize your model for 3D printing by ensuring proper wall thickness and structural integrity.
What software can be used to create a 3D model from a 2D sketch?
Several software options exist for different skill levels. Fusion 360 is particularly powerful, allowing you to turn a 2D image into a 3D model with specialized scripts and features.
Blender is a free option where you can input your 2D plans as reference images and build models around them.
SelfCAD is another tool specifically designed to convert 2D sketches to 3D models with printing capabilities built in.
Are there any services that offer to transform 2D designs into 3D printable objects?
Yes, professional services can handle the conversion process for you. Hollywood 3D Printing offers services to transform your 2D sketch into a 3D printable file.
Many online platforms connect you with freelance 3D modelers who specialize in converting 2D concepts into 3D models. These services are particularly useful for complex designs or when you lack the time or skills to create the models yourself.
Local maker spaces and 3D printing shops often provide modeling services where professionals can help transform your sketches into printable models.
What are the best practices for ensuring the printability of a 3D model made from a 2D concept?
Maintain appropriate wall thickness throughout your model. Walls that are too thin will break, while excessively thick sections waste material and increase printing time.
Check for manifold geometry, which means your model must be “watertight” without gaps or holes in the mesh. Non-manifold geometry can cause printing failures.
Consider the orientation of your model during printing. Some features may require supports, which can affect surface quality. Design with the printing process in mind.
Add fillets and chamfers to sharp corners to improve structural integrity and reduce stress points in your finished print.
How can you add depth and detail to a 3D model that was originally a 2D image?
Use the extrusion technique to create varying heights for different elements. This helps translate flat artwork into a three-dimensional form with proper depth relationships.
Apply displacement maps to add texture details. These maps can automatically create raised or recessed areas based on your original 2D image’s light and dark areas.
Manually sculpt additional details using digital sculpting tools. This approach gives you precise control over how details appear in your final model.
Consider creating separate components for complex details that would be difficult to model as a single piece. You can assemble these parts after printing.
What are the common challenges when turning 2D artwork into a 3D printed figure and how can they be overcome?
Interpreting depth from a flat image is often difficult. Overcome this by gathering multiple reference images from different angles or creating rough sketches of how you envision the 3D form.
Maintaining the character and style of the original artwork can be challenging. Stay true to the original by constantly comparing your 3D model to the 2D concept throughout the process.
Complex geometries may require support structures during printing. Design your model to minimize overhangs where possible, or strategically place them where supports won’t damage important details.
Fine details may be lost in the printing process. Consider scaling up your model or simplifying extremely fine details that fall below your printer’s resolution capabilities.