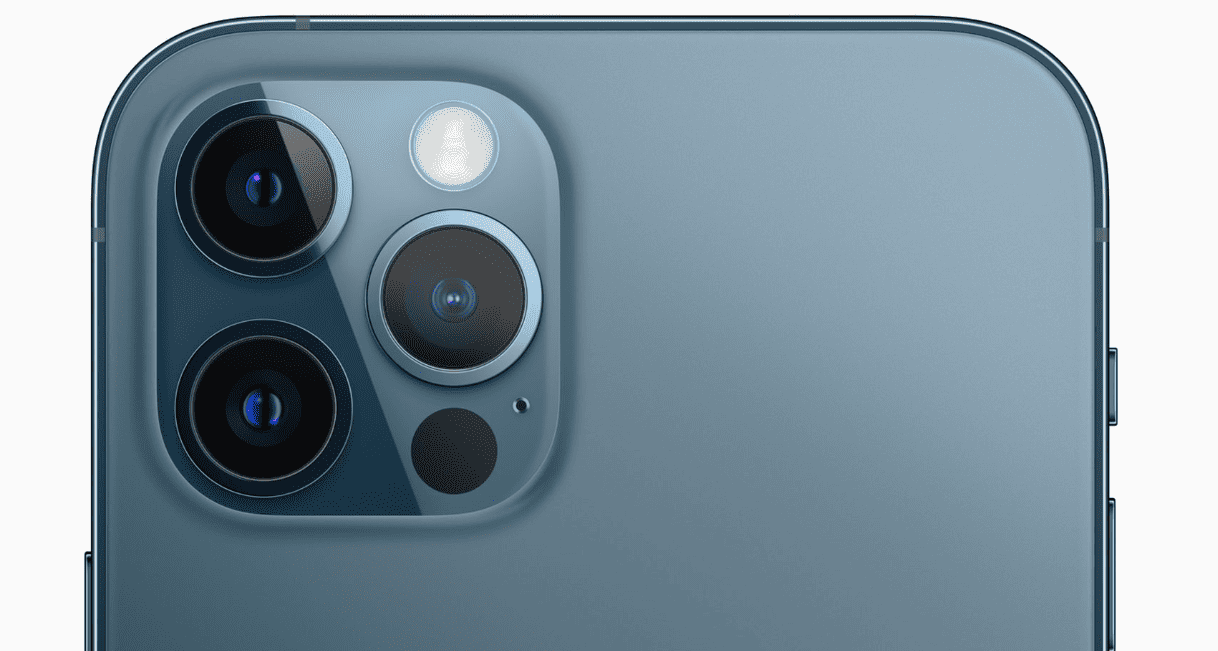
The iPhone 13 Pro camera lens is a crucial component for capturing stunning photos and videos. When this lens gets damaged, it can significantly impact image quality. Replacing the iPhone 13 Pro camera lens requires specific tools and careful steps to avoid further damage to the device.
Replacing the camera lens on an iPhone 13 Pro involves opening the device, removing internal components, and installing a new lens. This process demands precision and patience. Users should consider their technical skills before attempting this repair at home.
Professional repair services offer an alternative for those uncomfortable with DIY repairs. These experts have the necessary tools and experience to replace the camera lens safely. Weighing the costs and benefits of professional repair versus self-repair is important for iPhone 13 Pro owners facing this issue.
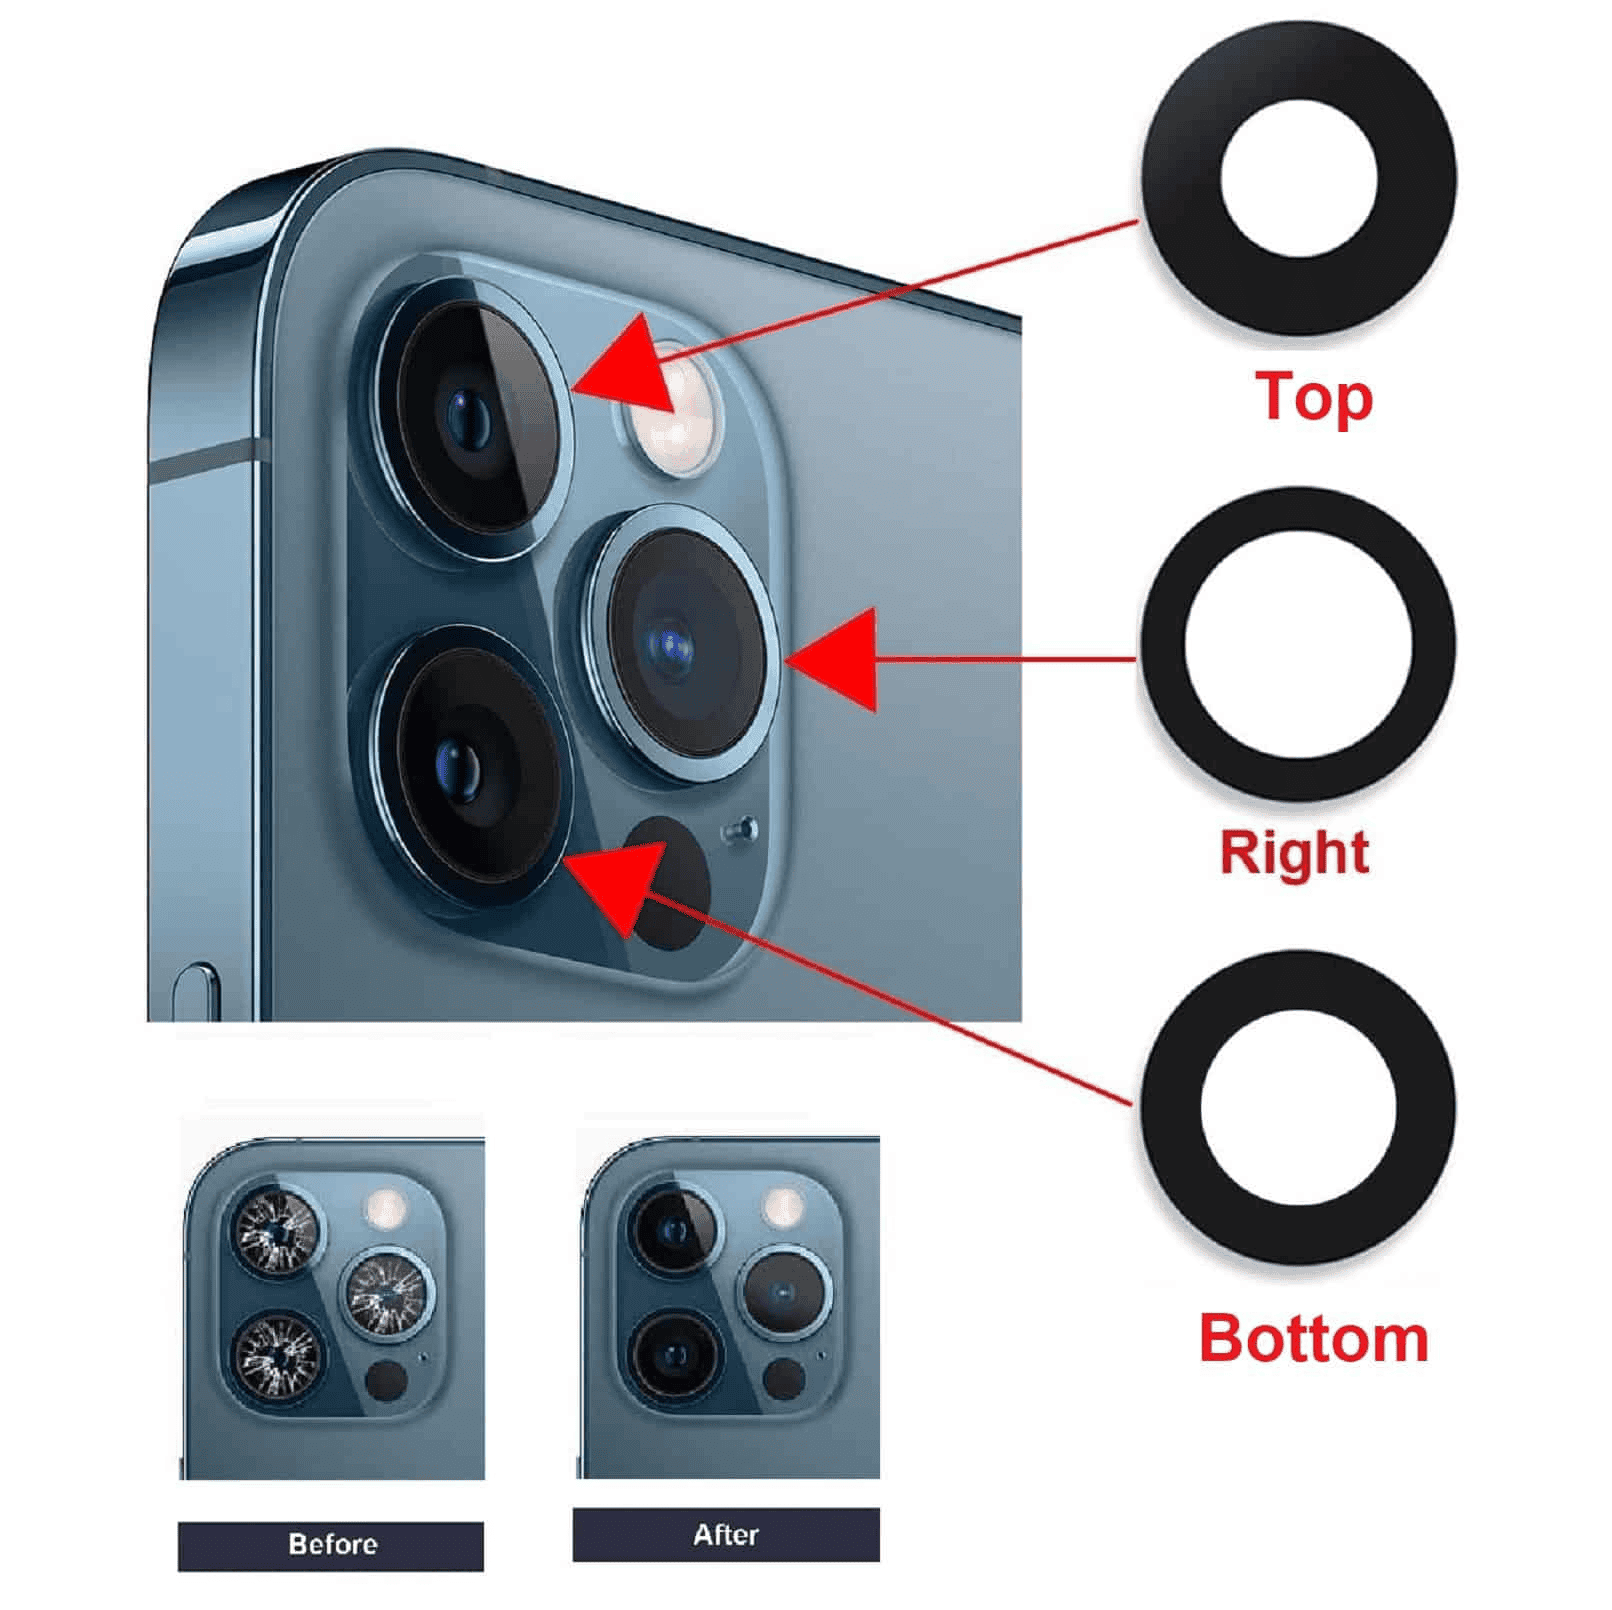
iPhone 13 Pro Camera Lens Replacement: A DIY Guide
Replacing a cracked or damaged camera lens on your iPhone 13 Pro can be a cost-effective alternative to professional repair. While it requires careful handling, it’s achievable with the right tools and guidance. Here’s a step-by-step guide:
Disclaimer: This guide is for informational purposes only. Proceed with caution, as improper handling could cause further damage to your device. If you’re uncomfortable with the process, seek professional assistance.
1. Gather Your Tools
- Replacement camera lens: Ensure it’s compatible with the iPhone 13 Pro.
- Precision screwdriver set: Includes pentalobe and tri-point screwdrivers.
- Suction cup: To help lift the screen.
- Plastic opening tools: For prying and separating components.
- Heat gun or hair dryer: To soften adhesive.
- Tweezers: For handling small parts.
- Isopropyl alcohol: For cleaning.
- Microfiber cloth: For wiping.
2. Power Off Your iPhone
Completely power off your iPhone 13 Pro before starting the repair.
3. Remove the Display
- Apply heat: Use a heat gun or hair dryer to gently warm the edges of the display to soften the adhesive.
- Create a gap: Use a suction cup and plastic opening tool to carefully create a gap between the display and the frame.
- Detach the display: Slowly work your way around the edges, detaching the display cables. Be careful not to damage the fragile connectors.
4. Access the Camera Module
- Remove screws: Unscrew the screws securing the metal shield covering the camera module.
- Detach connectors: Carefully disconnect the camera module connectors from the logic board.
5. Replace the Camera Lens
- Remove the damaged lens: If the lens is shattered, carefully remove any remaining glass fragments.
- Clean the camera housing: Use isopropyl alcohol and a microfiber cloth to clean the camera housing.
- Install the new lens: Align the new lens with the camera housing and gently press it into place.
6. Reassemble Your iPhone
- Reconnect the camera module: Carefully reconnect the camera module connectors to the logic board.
- Replace the metal shield: Secure the metal shield with the screws.
- Reattach the display: Align the display with the frame and gently press it down to reattach the adhesive.
- Reconnect the display cables: Carefully reconnect the display cables to the logic board.
- Secure the screws: Reattach the two pentalobe screws at the bottom of the iPhone.
7. Test the Camera
Power on your iPhone and test the camera to ensure the new lens is working correctly.
Tips for a Successful Repair
- Work in a clean, well-lit environment: This will help prevent dust and debris from entering your device.
- Take your time: Avoid rushing the process, as this can lead to mistakes and damage.
- Refer to online resources: Watch videos or consult online guides for visual instructions.
- Consider professional repair: If you’re unsure about any step or encounter difficulties, it’s best to seek professional help.
By following these steps and taking necessary precautions, you can successfully replace your iPhone 13 Pro’s camera lens and restore its picture-perfect quality.
Key Takeaways
- Camera lens replacement requires specific tools and careful handling
- DIY repair demands technical skills and precision
- Professional services offer a safer alternative for lens replacement
Required Tools and Preparatory Steps
Replacing the camera lens on an iPhone 13 Pro requires specific tools and careful preparation. Safety measures and understanding device variations are crucial for a successful repair.
Gathering the Necessary Tools
A Pentalobe P2 screwdriver is essential for removing the bottom screws of the iPhone 13 Pro. A Y000 screwdriver handles the internal screws. A suction cup helps lift the screen from the frame. A heat gun or hair dryer loosens the adhesive.
Plastic pry tools and tweezers aid in separating components. An anti-static wrist strap protects against electrical discharge. Magnetic screw mats keep tiny screws organized.
A set of precision screwdrivers covers various screw types. Replacement adhesive strips ensure proper resealing. Isopropyl alcohol and microfiber cloths clean components.
Understanding iPhone 13 Series Variants
The iPhone 13 series includes four models: iPhone 13 mini, iPhone 13, iPhone 13 Pro, and iPhone 13 Pro Max. Each variant has different dimensions and camera setups.
The iPhone 13 Pro features a triple-lens rear camera system. It has a 6.1-inch display and stainless steel frame. The Pro Max has a larger 6.7-inch screen.
Camera lens placement varies slightly between models. The Pro and Pro Max have an additional LiDAR scanner. These differences affect the repair process and required tools.
Safety Precautions Before Beginning
Power off the iPhone completely before starting the repair. Remove the SIM card to prevent damage. Work in a well-lit, clean area with a soft, static-free surface.
Wear safety glasses to protect eyes from small parts. Use an anti-static mat to prevent electrostatic discharge. Keep a record of screw locations and sizes during disassembly.
Handle the device gently to avoid damaging internal components. Be cautious of sharp edges on the frame. Preserve the waterproof seals for reassembly. Follow proper disposal guidelines for any replaced parts.
Opening the iPhone 13 Pro
Opening an iPhone 13 Pro requires careful steps to avoid damage. The process involves removing screws, softening adhesive, and gently lifting the screen.
Removing Pentalobe P2 Screws
The first step is to remove the two Pentalobe P2 screws at the bottom of the iPhone 13 Pro. These screws are located on either side of the charging port. A Pentalobe P2 screwdriver is essential for this task. The screws are very small, so it’s crucial to keep them in a safe place. A magnetic screwdriver or screw tray can be helpful.
Once the screws are removed, set them aside in a labeled container. This will make reassembly easier later.
Softening the Adhesive
The iPhone 13 Pro’s screen is held in place by strong adhesive. This adhesive needs to be softened before the screen can be safely lifted. A heat gun or hair dryer can be used for this purpose. Apply heat evenly across the edges of the screen for about 1-2 minutes.
It’s important not to overheat the device. Move the heat source constantly to avoid concentrating heat in one spot. Wearing safety glasses is recommended when using a heat gun.
Lifting the Screen
After softening the adhesive, it’s time to lift the screen. A suction cup is the tool of choice for this step. Place the suction cup near the bottom edge of the screen, avoiding the home button area.
Apply firm pressure to create a seal. Gently pull upward on the suction cup to create a small gap between the screen and the frame. An opening pick can be inserted into this gap to further separate the screen.
Work the opening pick around the edges of the phone, carefully breaking the adhesive seal. The Ceramic Shield glass on the iPhone 13 Pro is durable but can still crack if too much force is applied.
As the screen is lifted, be mindful of the flex cables connecting it to the logic board. These cables are delicate and should not be stretched or torn.
Replacing the Camera Lens
Replacing the camera lens on an iPhone 13 Pro requires careful handling of delicate components. The process involves accessing internal parts, removing the old lens, and installing the new one.
Disconnecting the Battery and Display
Start by powering off the iPhone 13 Pro. Remove the two pentalobe screws at the bottom of the device using a P2 screwdriver. Apply heat to loosen the adhesive around the screen edges. Use a suction cup to lift the display slightly.
Carefully disconnect the battery connector with a spudger tool. This prevents electrical damage during repairs. Next, unplug the display cables. These are fragile, so use caution when handling them.
Set the screen aside in a safe place to avoid scratches or damage. The internal components are now accessible for the lens replacement procedure.
Accessing the Camera Module
Locate the rear camera module in the upper left corner of the iPhone. Remove any screws securing the camera assembly using a Y000 screwdriver. Gently lift the camera module to expose the connecting cables underneath.
Disconnect the camera flex cables with a spudger or tweezers. Take care not to tear or damage these delicate connectors. The camera module can now be fully removed from the iPhone housing.
Place the camera module on a clean, soft surface to prevent scratches on the lenses. Identify the specific lens that needs replacement on the multi-lens array.
Removing and Replacing the Camera Lens
Examine the camera lens for any visible damage or debris. If replacing due to scratches, note their location for reference. Use a heat gun or hair dryer to soften the adhesive holding the lens in place.
Carefully pry off the old lens using plastic tools to avoid scratching the surrounding area. Clean the lens housing thoroughly, removing any leftover adhesive or debris.
Apply a thin layer of adhesive to the new lens. Align it precisely in the camera module, ensuring it sits flush. Press firmly to secure the lens in place. Allow the adhesive to cure fully before reassembly.
Reconnect the camera flex cables and secure the module back in the iPhone housing. Reattach the display cables and battery connector. Carefully seal the screen, applying pressure around the edges.
Reassembly and Post-Installation Checks
After replacing the iPhone 13 Pro camera lens, proper reassembly and testing are crucial. These steps ensure the device functions correctly and maintains its water resistance.
Reconnecting Internal Components
Carefully reattach the flex cables to their respective connectors on the logic board. Use tweezers for precision. Secure each connection with gentle pressure. Double-check the Face ID and TrueDepth selfie camera connections.
Reposition the battery and press it down firmly. Reconnect the battery connector to the logic board. This restores power to the device.
Place the display assembly back onto the iPhone frame. Align it carefully to avoid pinching any cables. Ensure the Retina Flash is properly seated.
Testing Camera Functionality
Power on the iPhone 13 Pro. Open the Camera app to test all lenses. Verify focus, zoom, and image quality for each camera.
Test video recording capabilities. Check slow-motion and time-lapse features. Ensure the TrueDepth camera works for Face ID and selfies.
Try Portrait mode and Night mode photos. Confirm proper exposure and color balance. Test the flash and Live Photos functionality.
Sealing the iPhone 13 Pro Back Cover
Clean the frame and back cover thoroughly. Remove any dust or debris that could compromise the seal.
Apply a new adhesive strip around the iPhone’s frame. Ensure even coverage for proper water resistance.
Align the back cover carefully. Press firmly around the edges to activate the adhesive. Use a rubber roller for uniform pressure.
Reinstall the bottom screws using a Pentalobe P2 screwdriver. Tighten them gently to avoid stripping.
Frequently Asked Questions
iPhone 13 Pro camera lens replacement involves several common queries. Users often seek information on repair methods, costs, and professional services.
How can one replace the camera lens on an iPhone 13 Pro?
Replacing the iPhone 13 Pro camera lens requires specific tools and careful handling. Users need a Pentalobe P2 screwdriver, Y000 screwdriver, suction cup, and heat gun or hair dryer. The process involves removing screws, lifting the screen, and carefully detaching the camera module.
Proper alignment of the new lens is crucial for optimal performance. Apple recommends professional repair services for best results.
What is the cost for repairing an iPhone 13 Pro camera lens?
Repair costs vary depending on the service provider and location. Apple’s out-of-warranty repair service typically charges more than third-party shops. DIY repairs can be cheaper but carry risks of further damage.
Where can I find a service to repair my iPhone 13 Pro camera lens?
Apple Stores and Authorized Service Providers offer official repair services. Many third-party repair shops also handle iPhone camera lens replacements. Online repair services are available in some areas.
Users can check Apple’s website for nearby authorized repair locations. Local tech repair shops often advertise iPhone camera lens replacement services.
Is a DIY camera lens repair possible for the iPhone 13 Pro?
DIY repair is possible but challenging for those without experience. It requires specialized tools and careful handling of delicate components. Risks include damaging other parts or voiding the warranty.
Online tutorials and repair guides are available for those who choose to attempt DIY repairs. Careful consideration of skill level and potential risks is advisable before proceeding.
What should I do if my iPhone 13 Pro camera lens is cracked?
A cracked camera lens can affect photo quality and potentially damage internal components. Users should avoid using the camera to prevent further damage. Covering the lens with tape can protect it temporarily.
Seeking professional repair or replacement is recommended. Using the phone normally may allow debris to enter through the crack.
Are there official repair kits available for the iPhone 13 Pro camera lens?
Apple does not offer official repair kits for the iPhone 13 Pro camera lens. Third-party kits are available online but may not meet Apple’s quality standards.
Using non-official parts can affect camera performance and may void the warranty. Professional repair services use Apple-certified parts for best results.

