Have you ever wanted a keyboard that perfectly fits your typing style and preferences? Building your own keyboard from scratch is a rewarding project that gives you complete control over how your keyboard looks, feels, and functions. Creating a custom mechanical keyboard allows you to choose everything from the layout and switches to the keycaps and case, resulting in a typing experience tailored specifically to you.
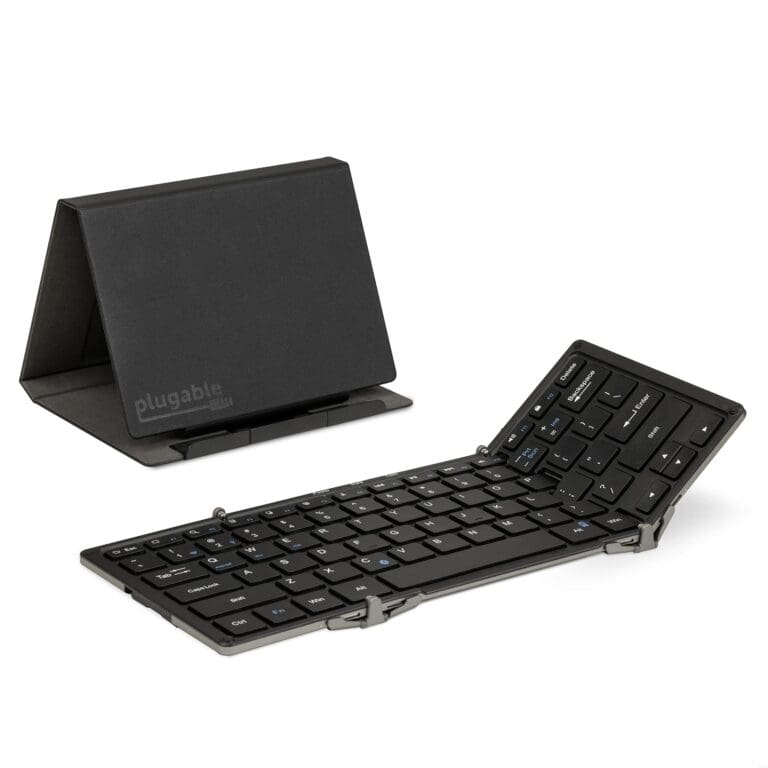
Getting started with custom keyboards might seem overwhelming at first, but the process is simpler than you might think. The keyboard community has grown tremendously in recent years, making components more accessible than ever. With hotswappable options available, you don’t even need soldering skills to build your first keyboard. Many companies like CHERRY XTRFY and Glorious Gaming now offer user-friendly keyboard builders to guide you through the process.
The best part about creating a custom keyboard is the satisfaction of typing on something you’ve built with your own hands. You can select switches based on your preferred feel and sound, choose keycaps that match your aesthetic, and even program custom key functions. Many enthusiasts find that once they’ve built their first custom keyboard, they never want to go back to mass-produced models.
Build Your Own Keyboard Guide
Building your own mechanical keyboard can be a fun and rewarding project, allowing you to customize every aspect from the switches to the keycaps. Here’s a straightforward guide to get you started.
1. Understand the Basics
A mechanical keyboard consists of several key components:
- Switches: The mechanism beneath each keycap that registers your press.
- Keycaps: The tops of the keys you press.
- PCB (Printed Circuit Board): The board that connects switches to the controller.
- Case: The frame that holds everything together.
- Stabilizers: Used for larger keys like the spacebar to keep them balanced.
- Controller: The microcontroller that processes key presses.
2. Choose Your Layout and Size
Decide on the keyboard size and layout you want:
- Full-size (104 keys)
- Tenkeyless (TKL, no number pad)
- 75%, 65%, 60% (smaller, compact layouts)
- Custom layouts
Smaller layouts are more portable but may lack some keys.
3. Select Your Components
Switches
Switches vary by feel and sound:
- Linear: Smooth keystroke, no tactile bump (e.g., Cherry MX Reds)
- Tactile: Noticeable bump on actuation (e.g., Cherry MX Browns)
- Clicky: Bump + audible click (e.g., Cherry MX Blues)
Consider actuation force, travel distance, and sound.
Keycaps
Choose keycaps based on profile (shape), material (ABS or PBT), and legends (printed or engraved).
PCB and Case
- Make sure the PCB supports your chosen layout.
- Cases come in plastic, aluminum, or wood.
4. Gather Tools and Accessories
You will need:
- Soldering iron and solder (for soldered PCBs)
- Keycap puller
- Switch puller (if hot-swappable PCB)
- Screwdriver
- Tweezers
- Lubricant (optional, for smoother switches)
5. Assemble Your Keyboard
Step 1: Install Stabilizers
Clip and lube stabilizers, then mount them on the PCB.
Step 2: Mount Switches
- For hot-swappable PCBs, simply push switches into the sockets.
- For soldered PCBs, insert switches and solder each pin to the PCB.
Step 3: Assemble Case
Place PCB with switches into the case and screw it together.
Step 4: Attach Keycaps
Press keycaps onto the switches.
6. Test Your Keyboard
Plug your keyboard into your computer and test every key using software like VIA, QMK Configurator, or online keyboard testers.
7. Customize Firmware (Optional)
If your keyboard supports it, customize key mappings, macros, and lighting using firmware tools like QMK or VIA.
Additional Tips
- Research switch sound and feel before buying.
- Consider pre-built kits if you’re new.
- Take your time soldering for clean results.
- Watch tutorial videos for visual guidance.
Resources
- How to Build a Custom Mechanical Keyboard – HowToGeek
- Step-by-Step Keyboard Building Guide – Switch and Click
- Beginner’s Guide to Mechanical Keyboards – PCMag
Building your own keyboard is a great way to get a personalized typing experience that matches your preferences perfectly. Enjoy the process and happy typing!
Key Takeaways
- Building a custom keyboard gives you complete control over feel, sound, and appearance that mass-produced keyboards simply cannot match.
- You can start with beginner-friendly hotswap options that require no soldering while still creating a professional and personalized result.
- The keyboard community offers extensive resources, components, and tutorials to help you create the perfect keyboard for your specific needs and preferences.
Understanding Keyboard Basics
Before diving into building your own keyboard, it’s important to understand what sets different keyboards apart and the key components that make up a mechanical keyboard. This knowledge will help you make informed decisions when selecting parts for your custom build.
Mechanical Keyboards vs. Other Keyboards
Mechanical keyboards differ significantly from membrane or rubber dome keyboards found in most standard devices. While membrane keyboards use a single rubber sheet under the keys, mechanical keyboards feature individual switches for each key. This design gives you a more tactile typing experience with better feedback.
The main benefits of mechanical keyboards include:
- Durability: Can withstand 30-100 million keystrokes per switch
- Customizability: Ability to change switches, keycaps, and other components
- Typing feel: More precise feedback and consistent actuation
- Sound: Distinctive sounds that many enthusiasts enjoy
Membrane keyboards tend to feel mushy and less responsive, while mechanical keyboards offer a crisp, satisfying typing experience that can improve your typing speed and reduce fatigue.
Mechanical Keyboard Components
A mechanical keyboard consists of several essential parts that you’ll need to understand before building your own.
Switches: These are the mechanisms under each key that register your keystrokes. Mechanical keyboard switches come in three main types:
- Linear: Smooth keypress with no bump or click
- Tactile: Provides a bump you can feel when activated
- Clicky: Gives both tactile feedback and an audible click
Keycaps: These are the plastic tops that you actually press with your fingers. They come in different profiles (shapes), materials, and colors for customization.
Plate: The keyboard plate sits between the switches and PCB, providing structural support and affecting the typing feel and sound.
Stabilizers (or “stabs”): These keep larger keys like the spacebar and shift keys from wobbling. Quality stabilizers are crucial for a good typing experience.
PCB (Printed Circuit Board): This is the “brain” of your keyboard where switches connect to register keystrokes.
Choosing the Right Components
Building a custom keyboard means selecting parts that match your preferences for feel, sound, and appearance. Each component affects how your keyboard performs and how long it lasts.
Selecting the PCB
The PCB (Printed Circuit Board) is the brain of your keyboard. When choosing a PCB, consider what layout you want—60%, 65%, TKL, or full-size. PCBs come in hotswap and soldered versions.
Hotswap PCBs let you change switches without soldering, making them perfect for beginners or if you like to experiment with different switches. They use sockets that hold switches in place.
Soldered PCBs offer more layout flexibility and sometimes better durability. They require permanently attaching switches with solder.
Look for features like RGB lighting, programmability, and USB-C connectivity. Some PCBs support QMK or VIA firmware, which allows customizable layouts and macros.
PCB compatibility with your case and plate is crucial. Always check measurements and mounting points before purchasing.
Types of Key Switches
Switches determine how your keyboard feels and sounds when typing. They come in three main types:
Linear switches: Smooth keypresses with no tactile bump or click. Popular options include Cherry MX Reds and Gateron Yellows. These are ideal for gaming due to their consistent feel.
Tactile switches: Provide a noticeable bump when pressing down. Cherry MX Browns and Gateron Browns offer moderate tactile feedback without being too loud.
Clicky switches: Deliver both tactile feedback and an audible click. Cherry MX Blues and Gateron Blues are common choices but may be too loud for office settings.
Switch characteristics to consider:
- Actuation force (measured in grams)
- Pre-travel distance
- Total travel distance
- Sound profile
Many enthusiasts customize their keyboards by lubing switches for smoother operation or swapping springs for different typing resistance.
Case and Plate Materials
Your keyboard’s case and plate affect both aesthetics and typing experience.
Case materials:
- Plastic: Affordable, lightweight, and comes in many colors. ABS and PBT are common options.
- Aluminum: Provides a premium feel with better durability and sound dampening.
- Wood: Offers unique aesthetics and warm feel but requires special care.
- Acrylic: Allows for RGB light diffusion and interesting layered designs.
The plate sits between the switches and PCB, providing structural support. Plate materials include:
| Material | Characteristics | Sound Profile |
|---|---|---|
| Aluminum | Rigid, durable | Higher-pitched |
| Brass | Very rigid, heavy | Deep, resonant |
| FR4 (PCB material) | Flexible | Softer, muted |
| Polycarbonate | Flexible | Deeper, thocky |
A stiffer plate (metal) gives a more consistent typing experience, while flexible plates (PC or FR4) allow for more switch movement and a softer feel.
Stabilizers and Their Importance
Stabilizers (often called “stabs”) prevent larger keys like the space bar, shift, and enter from wobbling. Good stabilizers are crucial for a premium typing experience.
Types of stabilizers:
- Screw-in: Most secure and preferred by enthusiasts
- Plate-mount: Clip directly into the plate
- PCB-mount: Snap into the PCB
Leading brands include Cherry, Durock, and C³ Equalz. Quality stabilizers should be your priority, as they affect the feel of your largest keys.
To improve stabilizer performance:
- Clip the legs to reduce rattle
- Apply lubricant to reduce friction
- “Band-aid mod” to cushion the landing
- “Holee mod” to eliminate wire rattle
Poor stabilizers can ruin an otherwise excellent build with rattling and inconsistent feel. Spending extra time tuning your stabilizers pays dividends in the final typing experience.
Keycap Materials and Profiles
Keycaps are the physical interface between you and your keyboard. They come in various materials, profiles, and printing methods.
Common materials:
- ABS: Smooth texture, prone to shine over time, allows vibrant colors
- PBT: Textured feel, resistant to shine, more durable
- POM: Smooth with a unique feel, less common
Keycap profiles determine the shape and height of your keys:
- Cherry: Low profile, slightly cylindrical top
- OEM: Taller than Cherry, standard on many pre-built keyboards
- SA: Very tall with spherical tops, vintage look
- DSA: Uniform height, spherical tops
- KAT/KAM: Medium height with wider tops
Legends (the letters/symbols) are applied through dyesub, doubleshot, or laser etching techniques. Doubleshot offers the most durability as the legends are a separate piece of plastic.
Your choice should balance aesthetics with comfort. Consider your typing style and whether you prefer a uniform or sculpted feel across rows.
Design and Layout
Choosing the right keyboard design is crucial for both comfort and functionality. Your layout decisions will impact typing experience, desk space, and even programming efficiency.
Understanding Form Factors
Keyboard form factors refer to the physical size and arrangement of your keyboard. The most common options include full-sized, tenkeyless (TKL), and compact layouts.
Full-sized keyboards contain all standard keys including the numpad, function row, and navigation cluster. These are ideal if you work with numbers frequently or prefer having all keys available.
Tenkeyless (TKL) keyboards remove the numpad section, giving you more desk space and allowing your mouse to sit closer to your body. This can improve ergonomics and reduce shoulder strain.
Even smaller form factors like 75%, 65%, and 60% progressively remove more keys, requiring function layers to access missing keys. These compact designs are popular for portability and minimalist setups.
Customizing Keyboard Layout
When designing your keyboard, you can choose between different key layouts beyond just the physical form factor.
The most common layouts include:
- QWERTY: Standard layout in most English-speaking countries
- DVORAK: Designed for typing efficiency and reduced finger movement
- Colemak: Modern alternative that’s easier to learn than DVORAK
You can also customize key placement for special functions or macros. Many custom keyboard builders allow you to select region-specific layouts like US, UK, Nordic, or German.
Split keyboards separate the left and right sides for improved ergonomics. These designs help align your wrists and shoulders in a more natural position to reduce strain during long typing sessions.
Assembling Your Keyboard
Putting together your mechanical keyboard requires attention to detail and patience. Each step builds on the previous one to create a keyboard that feels and sounds exactly how you want it.
Soldering Techniques
Soldering connects your switches to the PCB permanently. Start by gathering the right equipment: a temperature-controlled soldering iron (preferably 300-350°C), thin solder wire (60/40 or lead-free), and flux.
Position your PCB in a holder to keep it stable. When soldering, touch the iron to both the switch pin and PCB pad simultaneously for 2-3 seconds, then add solder until it flows around the joint smoothly.
A good solder joint looks shiny and cone-shaped. If you see a ball or dull surface, that’s a “cold joint” and needs to be redone.
For beginners, practice on spare components first. Keep your iron tip clean with a damp sponge or brass cleaner between joints for the best results.
Aligning and Placing Stabilizers
Stabilizers (or “stabs”) keep larger keys like space bars and shift keys from wobbling. Install these before mounting any switches.
Most custom keyboards use screw-in or snap-in stabilizers. Screw-in offers better stability but requires more assembly time.
Begin by lubricating your stabilizers with a thin coat of dielectric grease on the wire and housing. This eliminates rattle and improves sound quality dramatically.
When inserting stabilizers, ensure they’re oriented correctly—the wire should be on the bottom side of the PCB. For plate-mount builds, snap the stabilizers into the plate; for PCB-mount, secure them directly to the circuit board.
Double-check all stabilizer placements before proceeding. Removing them after soldering switches is nearly impossible without damage.
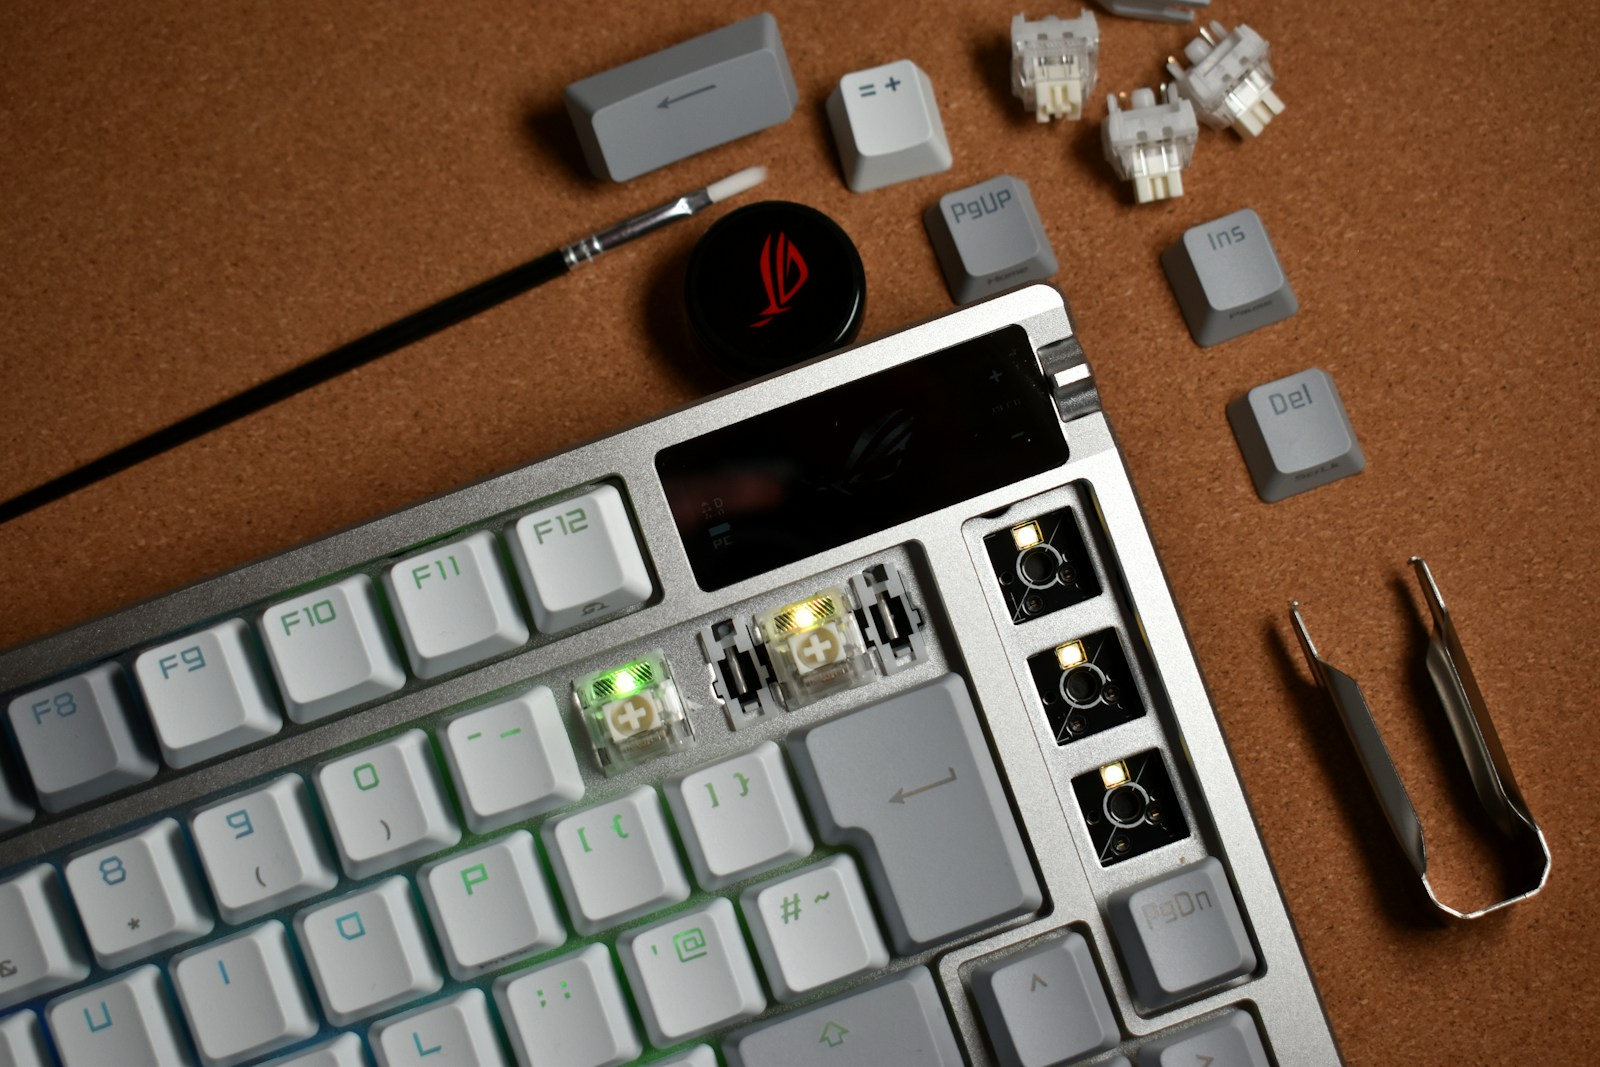
Mounting Switches
Before permanently mounting your mechanical switches, test each one in the PCB to ensure functionality. This prevents the frustration of discovering dead switches after soldering.
For hot-swap PCBs, simply press switches firmly into the sockets until they click into place. No soldering required!
For solder-required PCBs, start by placing a few switches in the corners of your plate+PCB assembly. These anchor points ensure proper alignment throughout the board.
Insert the remaining switches, making sure they sit flush against the plate. Any tilted switch will feel different and look uneven.
If you’re using clicky switches like Cherry MX Blues or tactile switches like Browns, handle them carefully to avoid damaging the internal mechanisms.
Installing Keycaps and Final Touches
Keycaps are the final and most visible component of your custom keyboard build. Before installation, arrange them according to their row profiles and positions.
Install keycaps by aligning them with the switch stems and pressing down firmly until seated. Start with modifier keys (shift, ctrl, etc.) and the space bar to establish a reference point.
For Cherry profile keycaps, note that each row has a different shape. Installing them in the wrong row will feel awkward and look uneven.
After placing all keycaps, test every key using a keyboard tester software to ensure proper functionality.
Add finishing touches like custom cables or wrist rests to complete your build. Clean your keyboard with compressed air to remove any debris or fingerprints.
Remember that your first typing experience might feel strange until you adjust to the new switch feel and layout. Give yourself time to adapt to your custom creation.
Personalizing Your Keyboard
Making your keyboard truly yours goes beyond just the layout and switches. You can enhance both the visual appeal and sound profile of your keyboard to match your preferences.
Backlighting and RGB Options
RGB lighting can transform your typing experience from ordinary to extraordinary. Many custom keyboard builds now include backlighting options that let you express your style. You can choose from:
- Static colors: Single-color backlighting for a clean, professional look
- Dynamic effects: Breathing, wave, or reactive lighting that responds to your typing
- Per-key programming: Different colors for different keys or zones
RGB controllers vary in sophistication. Basic models offer preset patterns, while advanced ones let you program custom light shows. Some keyboards include software that syncs lighting with your games or music.
When choosing backlighting, consider power consumption. Brighter settings drain batteries faster on wireless boards. Many enthusiasts opt for subtle backlighting during day use and more vibrant effects for evening sessions.
Acoustic Customization
The sound of your keyboard matters just as much as how it looks. You can fine-tune your keyboard’s acoustics through several modifications.
Case dampening reduces unwanted noise. Try adding:
- Foam inserts between the PCB and case
- Sound-absorbing mats on the case bottom
- Silicone pour molds for premium builds
Switch choice dramatically affects sound profile. Lubing your switches eliminates scratchy sounds and creates smoother keypresses. Apply a thin layer of lubricant to the stems and springs for best results.
Keycap material also impacts acoustics. PBT caps produce deeper sounds than ABS. Thicker caps generally create fuller, more satisfying typing sounds.
Mounting style affects both feel and sound. Gasket mounts offer a more isolated typing experience with less case ping compared to tray mounts. Each style creates a unique sound signature that contributes to your keyboard’s personality.
Maintaining Your Custom Keyboard
Taking proper care of your custom mechanical keyboard ensures it will last for years to come. Regular maintenance not only extends your keyboard’s lifespan but also preserves its performance.
Daily Maintenance:
- Keep drinks and food away from your keyboard
- Use a keycap puller to remove keycaps for easier cleaning
- Dust between keys with a small brush or compressed air
Cleaning should be done every 3-6 months depending on usage. You can remove all keycaps and clean them separately with warm water and mild soap. Let them dry completely before reattaching.
Deep Cleaning Tips:
- Take clear photos before disassembly to remember placement
- Use a switch puller for hot-swap keyboard kits
- Clean the plate with isopropyl alcohol and a microfiber cloth
- Re-lubricate switches and stabilizers if needed
Issues like key chatter or unresponsive keys often indicate it’s time for maintenance. Most problems with mechanical keyboards can be fixed through proper cleaning or part replacement.
Store your keyboard in a dust-free area when not in use. A keyboard sleeve or case provides excellent protection during transport.
If you notice switches feeling scratchy or inconsistent, consider re-lubing them. This process improves the typing experience and extends switch life.
Remember that custom keyboards are designed to be repairable, which is one of their major advantages over mass-produced models.
Frequently Asked Questions
Many keyboard enthusiasts have common questions when diving into their first custom keyboard build. These questions cover everything from essential components to personalization options that make your keyboard uniquely yours.
What components are necessary for assembling a custom mechanical keyboard?
To build a custom keyboard, you’ll need several key components. These include a PCB (printed circuit board), a case, switches, stabilizers, keycaps, and a cable.
The PCB serves as the brain of your keyboard, while the case houses all components. Stabilizers are required for larger keys like the spacebar to prevent wobbling.
You’ll also need basic tools like a soldering iron (unless using a hot-swap PCB), screwdriver, switch puller, and keycap puller.
How can one choose the right switches for a DIY keyboard build?
Switches determine how your keyboard feels and sounds when typing. They generally fall into three categories: linear (smooth with no bump), tactile (with a noticeable bump), and clicky (with both a bump and audible click).
Consider your typing style and environment when choosing. If you work in a quiet office, you might prefer linear or tactile switches rather than loud clicky ones.
Many keyboard enthusiasts recommend testing switches before committing. Switch testers are available that let you try various options before buying in bulk.
What are the steps involved in programming a custom keyboard layout?
Programming your keyboard typically involves using software like QMK Firmware or VIA. First, you’ll need to install the appropriate software for your PCB.
Next, you’ll create a keymap file that defines what each key does. This can include basic typing functions, macros, or even complex layers of commands.
After creating your keymap, you’ll compile the firmware and flash it to your keyboard using a USB connection. Most PCBs have a reset button to enter programming mode.
Where can one find high-quality keycaps for a personalized keyboard?
High-quality keycaps are available from specialty vendors, group buys, and certain online marketplaces. Look for keycaps made from PBT or ABS plastic with dye-sublimated or double-shot legends for durability.
Custom keyboard communities often recommend vendors like Kinetic Labs, Drop, NovelKeys, and KBDfans for quality keycaps.
Group buys offer unique designs but require patience as production can take months. For immediate options, in-stock keycaps from reputable vendors provide good quality and faster shipping.
What are the advantages of building a keyboard with a hot-swappable PCB?
Hot-swappable PCBs allow you to change switches without soldering, making it ideal for beginners or those who like to experiment. You can simply pull out switches with a switch puller and push in new ones.
This feature lets you try different switch types without committing to a permanent build. It’s perfect for finding your preferred typing feel or changing switches when they wear out.
Hot-swap builds are also more beginner-friendly since they don’t require soldering skills, making them an excellent entry point to the hobby.
How does the form factor of a keyboard affect its ergonomics and functionality?
The form factor (size and layout) of your keyboard impacts both comfort and efficiency. Common sizes include full-size (100%), TKL (tenkeyless), 75%, 65%, and 60%, each offering different key arrangements.
Smaller keyboards reduce hand movement and save desk space but require learning layer shortcuts for missing keys. Many custom keyboard builders prefer 65% or 75% layouts for a balance between compactness and functionality.
Consider your typical usage patterns when choosing a form factor. Programmers might prefer layouts with dedicated arrow keys, while gamers might prioritize having macro keys or a compact design for more mouse space.