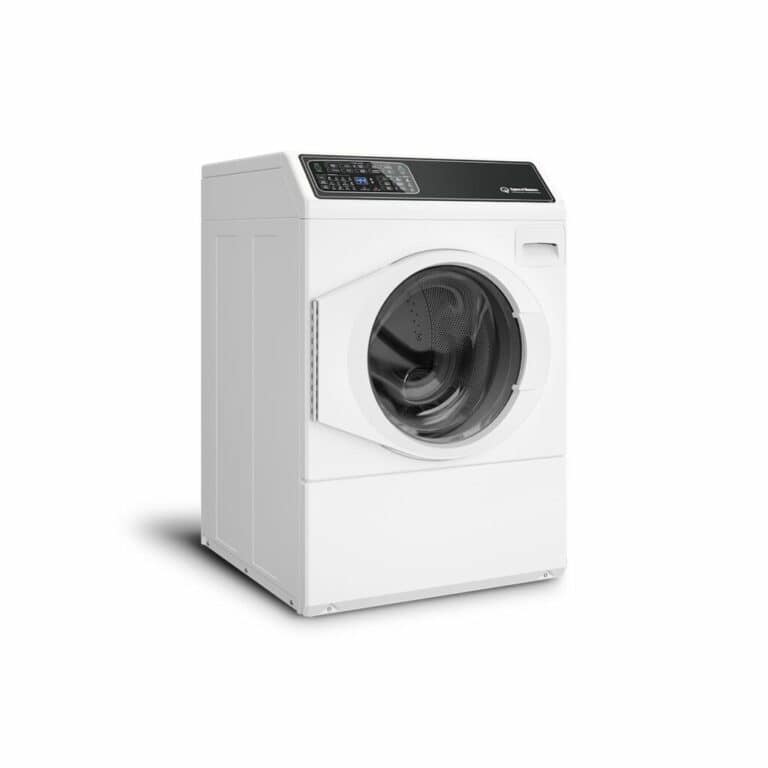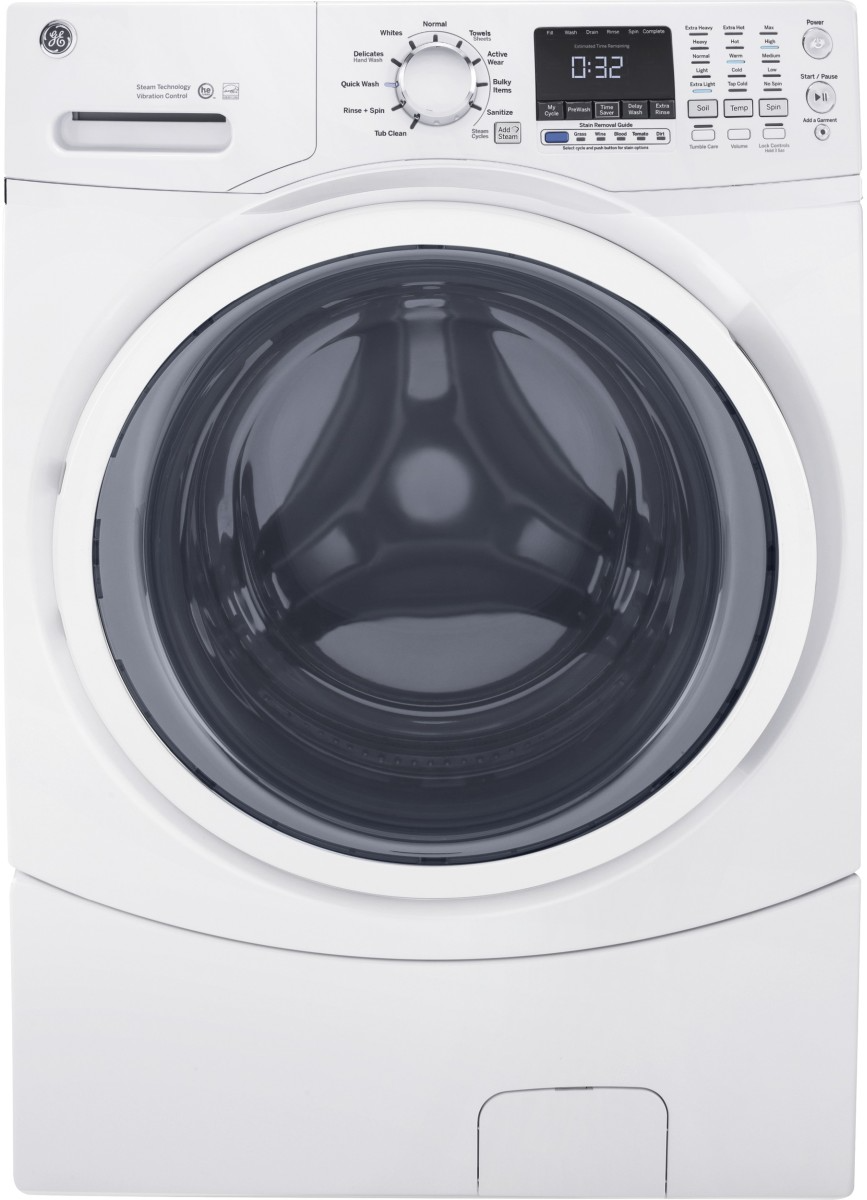
Finding your GE washer stuck with a tub of water can be frustrating and concerning. This common problem happens to many homeowners and often has simple solutions you can try before calling a repair service. Most GE washer drainage issues are caused by clogged drain pumps, kinked hoses, or items trapped in the filter that can be fixed through basic troubleshooting steps.
Your washer might stop draining due to several reasons including a clogged drain filter, pump failures from sand or debris, or a drain hose that’s inserted too far down the standpipe. Sometimes, a simple reset by unplugging the washer for a minute and then quickly opening and closing the lid six times can solve the problem.
Before panicking about repair costs, check for common culprits like coins, buttons, or small clothing items that might be blocking the drain system. Many drainage problems can be resolved with basic tools and a bit of patience, saving you from an expensive service call.
GE Washer Not Draining
If your GE washer won’t drain, it usually means water isn’t flowing properly through the drain system — often due to a clog, faulty pump, or control issue. Follow these steps to diagnose and fix the problem safely.
⚠️ Safety First
Before starting:
- Unplug the washer or turn off power at the breaker.
- Turn off the water supply.
- Keep a towel or bucket handy — water may spill when disconnecting hoses.
🔍 Step 1: Check for Drain Hose Kinks or Clogs
- Pull the washer slightly away from the wall.
- Inspect the drain hose at the back of the washer.
- Make sure:
- It’s not kinked or crushed.
- The end of the hose isn’t inserted too far into the standpipe (should be about 6–8 inches).
- Detach the hose and flush it with water to remove any lint or debris.
👉 A blocked or improperly positioned drain hose is one of the most common causes of poor drainage.
⚙️ Step 2: Clean the Drain Pump Filter (if accessible)
Some GE models have a drain pump filter behind a small access panel at the bottom front of the machine.
- Open the panel and place a towel underneath.
- Slowly unscrew the filter cap — water will drain out.
- Remove lint, coins, or debris from the filter.
- Reinstall and tighten the cap securely.
If your model doesn’t have a visible filter, skip to the next step.
💧 Step 3: Check the Drain Pump
If the hose and filter are clear, the drain pump might be blocked or faulty.
- Listen for a humming sound when the washer tries to drain.
- Humming but no draining: likely a clog.
- No sound at all: the pump motor may have failed.
- Remove the pump (consult your user manual) and inspect for debris like lint, socks, or small objects.
- If the pump impeller is broken or the motor doesn’t run, replace the pump.
🧠 Step 4: Inspect the Lid Switch (Top-Load Models)
On top-load GE washers, the lid switch prevents draining or spinning when the lid is open.
- Open and close the lid — listen for a click.
- If there’s no click, the switch might be faulty.
- Use a multimeter to test continuity or have it replaced if defective.
🔌 Step 5: Reset the Washer
Sometimes, a control board glitch can stop the drain cycle.
To reset:
- Unplug the washer for 1–2 minutes.
- Plug it back in.
- Open and close the lid six times within 12 seconds (for top-load models).
- Restart a drain/spin cycle.
🧼 Step 6: Check for Clogs in the Standpipe or Home Drain
If your washer still won’t drain, the issue might be in your home’s plumbing.
- Run water into the standpipe using a bucket or hose.
- If it backs up, the house drain is clogged — you’ll need to clear it or call a plumber.
🧩 Step 7: Test a Drain/Spin Cycle
After checking all components:
- Reconnect everything securely.
- Run a Drain & Spin cycle.
- Observe whether the washer drains fully and spins normally.
🛠️ When to Call a Professional
If:
- The pump motor doesn’t run,
- You’ve cleared all hoses and filters but water still won’t drain, or
- The control board shows an error code (like “E23” or “E46”),
…it’s time to contact GE Appliances Factory Service or a certified technician.
You can schedule service directly at GE Appliance Repair.
✅ Quick Summary
| Problem | Likely Cause | Quick Fix |
|---|---|---|
| Water not draining | Clogged drain hose | Clean or straighten hose |
| Washer hums but no drain | Blocked pump | Clear debris from pump |
| No sound or drain | Faulty pump motor | Replace pump |
| Lid won’t click | Broken lid switch | Replace switch |
| All parts OK but still no drain | Control glitch | Reset washer |
💡 Pro Tip:
Run monthly maintenance cycles with hot water and a washer cleaner (like Affresh) to prevent buildup in the pump and hoses.
Key Takeaways
- Check for clogs in the drain filter and pump, as trapped debris is the most common cause of GE washer drainage problems.
- Inspect your drain hose for kinks, proper installation, and ensure it’s not inserted too far into the standpipe.
- Try resetting your washer by unplugging it and operating the lid before attempting more complex repairs.
Understanding the GE Washer Drain System
The drain system in your GE washer plays a crucial role in removing water during and after wash cycles. Understanding how this system works can help you identify and fix problems when your washer won’t drain properly.
Components of the Drain System
Your GE washer’s drain system consists of several key parts that work together to remove water:
Drain Hose: This flexible tube carries water from the washer to your home’s drainage system. It typically connects to the back of the machine and runs to a standpipe or sink drain.
Drain Filter/Trap: Located usually at the front bottom of front-loading machines, this component catches small objects like coins, buttons, and lint that could otherwise clog the system.
Drain Pump: The heart of the drainage system that actively pushes water out of the machine.
Internal Drain Lines: These connect the wash tub to the pump and carry water through the machine.
If your GE washer isn’t draining, a clog in the drain hose or a problem with one of these components is likely the cause.
Function of the Drain Pump
The drain pump in your GE washer creates the force needed to expel water from the machine. Here’s how it works:
The pump contains an impeller (a rotating component) that creates pressure to move water through the drain system. When functioning properly, it spins rapidly to force water out through the drain hose.
Your GE washer’s drain pump typically activates automatically during specific cycle points. It runs during the drain and spin cycles to remove water from the tub.
Common pump issues include:
- Foreign objects jamming the impeller
- Sand or debris getting behind the pump impeller, causing it to fail
- Motor failure preventing the pump from running
- Worn bearings creating noise or reducing efficiency
If water collects in your washer, the drain pump is often the culprit and may need cleaning or replacement.
Common Reasons for a GE Washer Not Draining
When your GE washer will not drain, it’s typically caused by a physical obstruction or a mechanical failure. Identifying the specific issue can save you time and potentially avoid an expensive service call.
Obstructions in the Drain Hose
The drain hose is often the first place to check when your GE washer will not drain properly. This hose carries water from your machine to your home’s drain pipe.
A kinked or bent drain hose can restrict water flow, preventing proper drainage. Check the entire length of the hose for any pinches or sharp bends that might block water passage.
Improper installation can also cause problems. If your drain hose is placed too far down the standpipe, it can create a siphoning effect that pulls dirty water back into the washer.
Debris like lint, tissues, or small clothing items can build up inside the hose over time. Disconnect the hose from both the washer and drain pipe to check for blockages. Use a straightened coat hanger to gently clear any obstructions you find.
Drain Pump Blockage or Failure
Your washer’s drain pump is critical for removing water from the tub. When it fails, water remains trapped in the machine.
Foreign objects like coins, buttons, or small clothing items can get past the drum and become trapped in the pump. These blockages prevent the impeller from turning properly, stopping water flow.
Sand and sediment are particularly problematic as they can work their way behind the pump impeller and cause damage over time.
To check the pump:
- Unplug the washer
- Locate the pump filter (usually behind a small access panel at the bottom front)
- Place a shallow pan underneath to catch water
- Open the filter and remove any debris
If cleaning doesn’t resolve the issue, the pump motor may have failed and need replacement. Listen for unusual noises during the drain cycle, as a humming sound without draining often indicates pump failure.
Lid Switch Malfunction
GE washers have a safety feature that prevents operation when the lid is open, including during the drain cycle.
If the lid switch is broken or malfunctioning, your washer might think the lid is open even when it’s closed. This prevents the drain cycle from activating properly.
You can test the lid switch by:
- Ensuring the lid is completely closed
- Listening for a clicking sound when pressing and releasing the switch
- Checking for visible damage to the switch mechanism
On some models, you can temporarily bypass the switch for testing by pressing it down with tape. If this allows the washer to drain, you’ve identified the faulty component.
Lid switches are relatively inexpensive and can be replaced without professional help in most cases. Always unplug the machine before attempting any repairs involving electrical components.
Troubleshooting a GE Washer Not Draining
When your GE washer won’t drain properly, there are several components you can check before calling a professional. Finding wet clothes at the end of a cycle is frustrating, but many drainage issues can be fixed with basic troubleshooting.
Initial Inspection Steps
Before diving into complex repairs, start with some simple checks. First, make sure your washer is actually completing its cycle. Sometimes the machine might pause or stop due to power fluctuations.
Check if the control panel shows any error codes. Many GE washers display specific codes that can help identify drainage problems. Write down any codes you see for reference.
Next, inspect the drain hose connection at the back of the machine. Ensure it’s properly secured to both the washer and your home’s drain pipe.
Look for a drain filter access panel on the front of your machine. Not all models have this, but if yours does, opening this panel allows you to check for obstructions.
Try running a spin-only cycle to see if the problem persists. This helps determine if the issue is with washing or draining specifically.
How to Check the Drain Hose
The drain hose is often the culprit when a GE washer won’t drain. Start by unplugging your washer and pulling it away from the wall to access the hose completely.
Check if the hose is kinked, twisted, or pinched between the washer and wall. Even small bends can restrict water flow and prevent proper draining.
Remove the drain hose from the standpipe or sink and inspect it for clogs. Small items like socks, coins, or built-up lint can create blockages. Use a flashlight to look inside.
Make sure your drain hose isn’t inserted too far down the standpipe. This can cause siphoning issues where water flows back into the machine. The ideal insertion depth is only 4-6 inches.
Flush the hose with water from a faucet to clear any hidden debris. If water doesn’t flow freely through the hose, you may need to replace it.
Inspecting the Drain Pump and Impeller
The drain pump and impeller work together to force water out of your machine. GE washers are prone to pump failures, often caused by foreign objects.
To access the pump:
- Unplug the washer
- Remove the front or back panel (depending on your model)
- Locate the drain pump (usually a small motor with hoses attached)
Look for visible damage or debris around the pump. The impeller (spinning blade inside the pump) often gets sand or small objects caught behind it, preventing proper rotation.
Use a towel to catch water, then disconnect the hoses from the pump. Remove any visible debris like coins, bobby pins, or built-up lint that might be clogging the system.
Test the pump by turning the impeller manually. It should move freely without resistance. If it’s stuck or makes grinding noises, you’ll likely need to replace the pump.
Testing the Lid Switch
For top-loading GE washers, a faulty lid switch can prevent draining. The machine thinks the lid is open and won’t drain for safety reasons.
Locate the lid switch near the door frame of your washer. It’s usually a small plastic tab that gets pressed when the lid closes.
Test the switch by pressing it manually while listening for a clicking sound. No click could indicate the switch is broken.
Try this simple test: place a magnetic refrigerator magnet near the lid switch area. If the washer starts draining, your lid switch may be faulty.
For a more thorough check, use a multimeter to test for continuity when the switch is pressed. Zero or infinite resistance readings indicate the switch needs replacement.
Many common draining issues can be solved by replacing this inexpensive part. The switch typically costs $20-30 and can be replaced with basic tools.
Step-by-Step GE Washer Drain Pump Repair
Repairing a GE washer’s drain pump can solve most draining issues without calling a professional. With the right tools and careful approach, you can complete this repair yourself and save money.
Preparation and Safety
Before starting any washer repair, safety must be your priority. Unplug your GE washer from the electrical outlet to prevent shock hazards. If you recently used the machine, wait 30 minutes for components to cool down.
Gather these essential tools before beginning:
- Phillips screwdriver
- Pliers
- Towels or shallow pan (for water collection)
- Flashlight
- Work gloves
Place towels around the work area to catch any water that might leak during the repair process. Take a photo of any connections you’ll be removing to help with reassembly later.
Consider reviewing your GE washer manual for model-specific information. Different models may have slight variations in the repair process.
Accessing the Drain Pump
Most GE washers have the drain pump located at the bottom of the machine. To access it, you’ll need to remove the front or lower panel depending on your model.
For front-loading GE washers:
- Remove the bottom kick panel by unscrewing the Phillips screws
- Some models require removing the dispenser drawer first
- Once opened, locate the pump at the bottom right or center
For top-loading models:
- Tilt the washer back carefully against a wall (with help)
- Support it securely with blocks
- Remove the bottom panel screws
Once exposed, you’ll see the drain pump connected to hoses. Check for any visible debris or blockages in the pump area. Sometimes the issue is simply a sock or coin trapped in the pump housing!
Replacing the Drain Pump
Before removing the old pump, take a photo of how the hoses connect to it. Disconnect the electrical connector by pressing the tab and pulling it away from the pump.
Remove the drain hoses by:
- Loosening the clamps with pliers
- Pulling hoses away from the pump
- Having towels ready to catch water
Unscrew the mounting bolts holding the pump to the washer frame. There are typically 2-3 bolts. Pull the old pump out carefully.
Install the new pump by reversing these steps. Ensure all hose connections are tight and the electrical connector clicks into place. Many GE washer pumps have an impeller that can come loose from the motor shaft, so check that it’s secure on your new pump.
Test your repair by running a short cycle and checking for proper drainage. If the washer still won’t drain, you may need to check the drain hose for clogs.
Maintaining Your GE Washer to Prevent Drainage Issues
Regular maintenance can help you avoid the frustration of a GE washer that won’t drain. Taking proactive steps today will save you time and money on repairs tomorrow.
Regular Cleaning and Care
Your GE washer needs routine cleaning to prevent drainage problems. Every month, run an empty hot water cycle with two cups of white vinegar to eliminate soap buildup and mineral deposits that can clog the system.
Check and clean the drain pump filter every 1-2 months. For most GE models, you can access this filter through a small door at the bottom front of the machine. Remove any coins, buttons, or debris that could block the pump.
Don’t forget about the detergent dispenser! Remove and rinse it thoroughly to prevent residue buildup that can eventually find its way into the drainage system.
Use only HE (High Efficiency) detergent in the recommended amounts. Too much detergent creates excess suds that can interfere with proper draining.
Avoiding Drain Hose Blockages
Inspect your drain hose regularly for kinks or visible damage. A kinked drain hose is one of the most common causes of drainage issues in GE washers.
Position the drain hose properly – it should not be inserted more than 4-6 inches into the standpipe or sink drain. Going deeper can create a siphoning effect that disrupts normal drainage.
Make sure the drain height is appropriate. GE washers typically cannot drain properly if the hose must push water more than 8 feet above floor level.
Pro tip: Install a drain hose screen to catch lint and small items before they enter the drainage system. Clean this screen monthly to prevent buildup.
Empty pockets before washing! Small items like tissues, paper, and hair ties can travel through the washer and create serious drain blockages over time.
Identifying Your GE Washer Model
Before troubleshooting your GE washer’s drainage problems, you need to know exactly which model you own. The model number helps you find the right parts and repair instructions specific to your machine.
Locating the Model Number
On most GE washers, the model number is printed on a label or metal plate attached to the appliance. For top-loading washers, look for the label:
- Under the lid
- Along the top edge of the control panel
- On the back of the machine
For front-loading models, check:
- Inside the door opening
- Along the door frame
- On the bottom edge of the door opening
The model number typically starts with letters like “GTW” or “GFW” followed by several numbers. Take a photo of the label with your phone for easy reference when purchasing parts or searching for repair information online.
Why Model Number Matters for Repairs
Different GE washer models have unique drain systems and components that can malfunction. Knowing your exact model helps you:
Purchase the correct replacement parts – Drain pumps vary between models, and installing the wrong pump won’t fix your drainage issue.
Follow accurate repair guides – GE has dozens of washer designs with different access points to reach the drain pump or hose.
Understand common issues – Some models are prone to specific problems like pump failures due to sand or debris build-up.
You can use your model number to search online repair databases or contact GE customer service for targeted troubleshooting steps specific to your machine.
Frequently Asked Questions
GE washers may experience drainage issues due to several common problems that homeowners can troubleshoot. These solutions range from simple fixes to more complex repairs depending on the specific model and issue.
What steps should be followed to troubleshoot a GE washer that won’t drain?
Start by checking the drain hose for kinks or clogs as this is often the simplest cause of drainage problems. Remove the hose and inspect it for any blockages or debris.
Make sure the drain hose isn’t positioned too high, as GE washers cannot drain more than 8 feet higher than the floor. Verify that the drain hose is properly inserted into your home’s drain pipe without extending too far.
Check the drain pump filter for lint, coins, or other items that might be blocking water flow. This typically requires accessing the lower front panel of the machine.
Is there a way to manually trigger the drain function on a GE washing machine?
You can manually trigger drainage by selecting the “Drain & Spin” cycle on most GE washers. This bypasses the regular wash cycle and focuses only on removing water from the tub.
For models without this specific cycle, you can often turn the dial to the spin portion of any cycle. Some newer digital models may have a “Cancel” function that will automatically initiate a drain sequence.
If these options don’t work, you might need to manually drain the washer using the drain hose access point near the bottom of the machine, typically behind a small panel.
What could cause a GE front load washer to stop draining?
Front load GE washers commonly experience drainage issues due to a clogged pump filter. This filter catches small items like coins, buttons, and lint that can block water flow.
A faulty door lock can prevent the washer from draining since the machine won’t operate if it detects the door isn’t securely closed. Check if the door lock mechanism clicks properly when closing.
The drain pump may be damaged or have failed. Listen for unusual sounds when the machine attempts to drain, as a humming noise without water movement often indicates pump problems.
Why might a GE washer make a clicking noise and fail to drain?
A clicking noise during drainage attempts often indicates a problem with the drain pump. The pump may be trying to operate but is obstructed by a foreign object or has worn out bearings.
Some GE models have a known issue with their drain pumps that causes clicking sounds. This is sometimes referred to as a “Factory Fix” problem that may require pump replacement.
Loose items like coins or buttons caught between the drain pump and impeller can also create clicking noises while preventing proper drainage. Accessing and cleaning the pump area can resolve this issue.
How can one reset a GE top loader washer that is not draining?
Unplug your GE top loader washer for at least one minute to perform a basic power reset. This can clear temporary electronic glitches that might prevent proper drainage.
For digital models, try pressing specific button combinations according to your model’s manual. Many newer GE washers have specific reset sequences, often involving holding certain buttons for 3-5 seconds.
After resetting, run a drain and spin cycle to see if the issue is resolved. If the problem persists, the issue may be mechanical rather than electronic.
What should be checked if a GE washer is not spinning or draining, with no error codes displayed?
Verify that your wash load is balanced properly, as an unbalanced load can trigger safety features that prevent spinning and draining. Redistribute the clothes evenly in the drum.
Inspect the drain hose and pump for any blockages. Even without error codes, physical obstructions remain the most common cause of drainage issues.
Check your home’s circuit breaker to ensure the washer is receiving full power. Sometimes a partial power loss can allow the washer to run but not complete high-power functions like spinning and draining.

