Transferring pictures from Android to iPhone is a common task for users switching between mobile platforms. The easiest method to transfer photos is using the Move to iOS app, which allows for seamless transfer during iPhone setup. This app simplifies the process by automatically moving photos, contacts, and other data from Android to iPhone.
For those who have already set up their iPhone, alternative methods exist. Users can utilize cloud services like Google Drive or iCloud to sync photos between devices. These options provide flexibility and allow for selective photo transfer.
Manual transfer methods are also available for users who prefer more control. Connecting the Android device to a computer, copying photos to a folder, and then syncing that folder with the iPhone through iTunes offers a straightforward approach. This method ensures all chosen photos are transferred without relying on internet connectivity.
How to Transfer Pictures from Android to iPhone: Quick and Easy Steps (2026 Guide)
Switching from Android to iPhone? One of the first things you’ll want to move is your photos. Fortunately, transferring pictures from Android to iPhone is easier than ever — and you don’t need to be tech‑savvy to do it.
This guide covers quick, easy, and reliable methods to transfer your photos safely.
Before You Start
Make sure:
- ✅ Both phones are charged
- ✅ You’re connected to Wi‑Fi
- ✅ You know your Google account login
- ✅ Your iPhone has enough storage
Method 1: Use Apple’s “Move to iOS” App (Best for New iPhones)
✅ Best if you’re setting up your iPhone for the first time
✅ Transfers photos, videos, contacts, and more
Step-by-Step Instructions:
On Your Android:
- Download Move to iOS from Google Play.
- Open the app and tap Continue.
On Your iPhone:
- Turn on your iPhone.
- During setup, select Move Data from Android.
- A code will appear.
Back on Android:
- Enter the code shown on your iPhone.
- Select Photos & Videos.
- Tap Continue.
Wait for the transfer to finish.
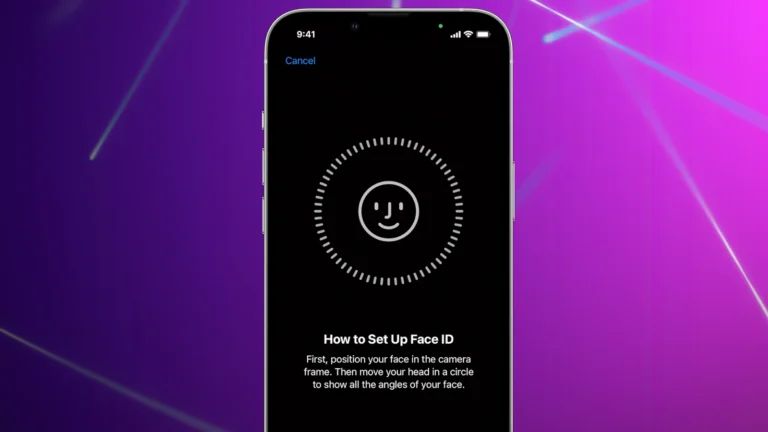
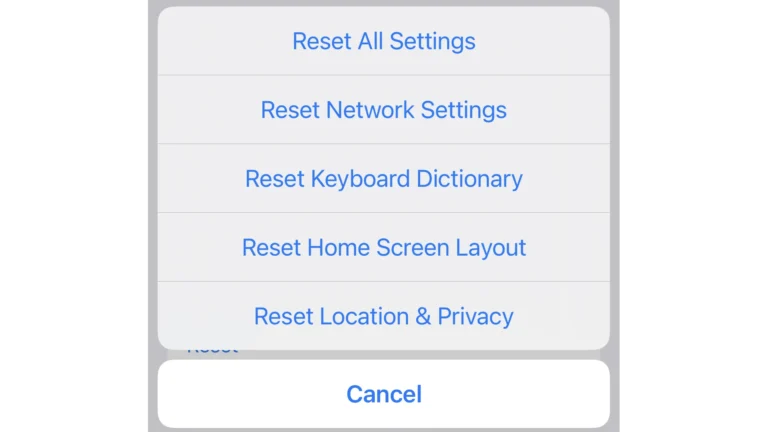
⚠️ Note: This only works during initial iPhone setup. If your iPhone is already set up, you’ll need to reset it to use this method.
Method 2: Transfer Photos Using Google Photos (Easiest Method)
✅ No cables required
✅ Works even if iPhone is already set up
Step 1: Upload Photos on Android
- Open Google Photos.
- Sign in to your Google account.
- Tap your profile icon → Turn on Backup.
- Wait for photos to upload.
Step 2: Download on iPhone
- Install Google Photos from the App Store.
- Sign in with the same Google account.
- Access all your uploaded photos.
To save photos to your iPhone:
- Select photos → Tap Share → Save to Device
✅ Simple and wireless
✅ Keeps a cloud backup
Method 3: Transfer Using a Computer (Manual Method)
✅ Good for large photo libraries
✅ No cloud storage needed
Step 1: Transfer from Android to Computer
- Connect Android to computer via USB.
- Open File Explorer (Windows) or Finder (Mac).
- Go to DCIM > Camera.
- Copy photos to your computer.
Step 2: Transfer to iPhone
On Mac:
- Open Photos app.
- Drag photos into the library.
- Connect iPhone.
- Sync photos via Finder.
On Windows:
- Install or open iTunes.
- Connect iPhone.
- Sync selected photo folders.
✅ Fast for large transfers
✅ No internet required
Method 4: Use Cloud Storage (Google Drive, Dropbox, OneDrive)
✅ Flexible option
✅ Works across devices
Steps:
- Upload photos to cloud storage on Android.
- Install the same app on iPhone.
- Download photos to your device.
Best for:
- Selective transfers
- Sharing albums
Method 5: Send via Messaging Apps (Small Batches Only)
Apps like:
- Telegram
⚠️ Not ideal for large albums
⚠️ May reduce image quality
Best for transferring just a few pictures quickly.
Quick Comparison Table
| Method | Best For | Requires Reset? | Internet Needed? |
|---|---|---|---|
| Move to iOS | New iPhone setup | ✅ Yes | ✅ Yes |
| Google Photos | Easiest wireless transfer | ❌ No | ✅ Yes |
| Computer Transfer | Large libraries | ❌ No | ❌ No |
| Cloud Storage | Flexible backup | ❌ No | ✅ Yes |
| Messaging Apps | Small transfers | ❌ No | ✅ Yes |
What About Live Photos and Metadata?
- Google Photos preserves most metadata (date, location).
- Computer transfer keeps original file quality.
- Messaging apps may compress images.
If photo quality matters, use:
- Move to iOS
- Computer transfer
Troubleshooting Tips
Photos Not Showing on iPhone?
- Check iCloud Photos settings
- Restart device
- Confirm sync is complete
Transfer Stuck?
- Ensure both devices are on the same Wi‑Fi
- Disable mobile data
- Restart both phones
Not Enough Storage?
- Delete unused apps
- Upgrade iCloud storage
- Transfer in batches
Final Thoughts
The easiest way to transfer pictures from Android to iPhone is:
- ✅ Move to iOS (for brand‑new setup)
- ✅ Google Photos (for already‑set‑up devices)
If you have thousands of photos, a computer transfer may be fastest.
No matter which method you choose, your memories can move with you safely and easily.
Key Takeaways
- Move to iOS app provides the simplest transfer method during iPhone setup
- Cloud services offer flexible photo transfer options for already set-up iPhones
- Manual transfer through a computer gives users more control over the process
Preparing Your Devices for Transfer
Before transferring pictures from Android to iPhone, it’s crucial to set up both devices properly. This involves configuring iCloud on the iPhone and updating apps and operating systems on both devices.
Setting Up iCloud on iPhone
iCloud plays a key role in photo storage and syncing on iPhones. To set it up:
- Go to Settings on the iPhone
- Tap on the user’s name at the top
- Select “iCloud”
- Toggle on “Photos”
This enables automatic photo backup and syncing. Users should ensure they have enough iCloud storage space. Apple offers 5GB for free, with paid plans for more storage.
Updating Apps and Operating Systems
Keeping both devices up-to-date ensures smooth transfer and compatibility. For Android:
- Open Google Play Store
- Tap the profile icon
- Select “Manage apps & device”
- Choose “Update all”
For iPhone:
- Go to Settings
- Tap “General”
- Select “Software Update”
- Download and install if available
Users should also update the Google Photos app on Android and the Photos app on iPhone. These steps help prevent issues during the transfer process.
Choosing the Transfer Method
Transferring photos from Android to iPhone can be done through various methods. Each approach offers different benefits depending on the user’s needs and technical capabilities.
Using Move to iOS App
Apple’s Move to iOS app simplifies the transfer process. Users install the app on their Android device and follow the setup instructions on their new iPhone. The app creates a private Wi-Fi network to transfer data securely.
To use Move to iOS:
- Download the app from Google Play Store
- Open it during iPhone setup
- Enter the code displayed on iPhone
- Select “Camera Roll” to transfer photos
This method works best for users switching to a new iPhone. It transfers not just photos, but also contacts, messages, and other data.
Manual Transfer via Computer
For those who prefer a hands-on approach, manual transfer via computer is an option. This method uses a computer as an intermediary between devices.
Steps for manual transfer:
- Connect Android to computer via USB
- Copy photos to a folder on the computer
- Connect iPhone to computer
- Use iTunes or Finder to sync photos
This method gives users more control over which photos to transfer. It’s useful for transferring specific albums or selections of photos.
Cloud-Based Transfer Services
Cloud services offer a wireless alternative for transferring photos. Popular options include Google Photos, iCloud Photos, Dropbox, and OneDrive.
To use cloud services:
- Upload photos from Android to chosen cloud service
- Download the service’s app on iPhone
- Sign in and access uploaded photos
Cloud transfers are convenient for large photo collections. They allow access to photos across multiple devices and provide backup storage.
Executing the Transfer
Transferring photos from Android to iPhone can be done through several methods. Each approach offers unique advantages depending on your specific needs and technical setup.
Wireless Transfer with Move to iOS
The Move to iOS app simplifies the transfer process. Install the app on your Android device from the Google Play Store. During iPhone setup, select “Move Data from Android” and enter the code displayed on your iPhone into the Move to iOS app. Choose “Camera Roll” to transfer your photos.
The app creates a private Wi-Fi network between devices. This method works best for new iPhones or after a factory reset. It transfers not just photos, but also contacts, messages, and other data.
Keep both devices plugged in and close together during transfer. Large photo libraries may take considerable time to transfer completely.
Physical Transfer via USB Cable
For a direct transfer, use a USB cable and a computer as an intermediary. Connect your Android device to the computer and locate the DCIM folder. This folder typically contains your Camera Roll photos.
Copy the desired photos to a new folder on your computer. Then, connect your iPhone and sync the photos using iTunes or Finder. Select your iPhone in iTunes, go to the Photos section, and choose the folder containing your transferred photos.
This method allows selective transfer of specific photos. It’s useful for large libraries or when wireless transfer is impractical.
Syncing with iCloud
iCloud offers a seamless way to transfer photos. First, upload your Android photos to Google Photos. Then, on your iPhone, download the Google Photos app and sign in. Select the photos you want to transfer and save them to your iPhone’s Camera Roll.
Enable iCloud Photos on your iPhone to automatically sync these photos across all your Apple devices. Go to Settings > [Your Name] > iCloud > Photos and turn on iCloud Photos.
This method is ideal for users already invested in the Apple ecosystem. It provides continuous syncing and backup of your photo library across devices.
Managing and Organizing Photos Post-Transfer
After transferring photos from Android to iPhone, effective organization ensures easy access and optimal storage use. The Photos app offers powerful tools for managing images, while storage options help balance space and accessibility.
Using the Photos App on iPhone
The Photos app on iPhone provides a central hub for organizing transferred images. Users can create albums to group related photos. The app automatically sorts pictures by date, location, and people.
To make specific photos easier to find, users can add keywords or descriptions. The search function allows quick retrieval of images based on these tags, as well as objects or scenes in the photos.
The Photos app also offers editing tools. Users can crop, adjust colors, or apply filters without leaving the app. For more advanced edits, third-party apps can be accessed directly from Photos.
Adjusting Storage Space and Backup Options
iCloud Photos syncs images across Apple devices, freeing up local storage. Users can enable this feature in Settings > [Your Name] > iCloud > Photos.
With iCloud Photos on, the “Optimize iPhone Storage” option keeps smaller versions of photos on the device while full-resolution versions stay in iCloud. This saves space on the iPhone.
For users who prefer local storage, the Files app offers an alternative. Photos can be moved to Files and organized in folders. This method doesn’t sync automatically but gives more control over storage.
Regular backups protect photos from loss. iCloud automatically backs up the iPhone, including photos. Users can also back up to a computer using iTunes or Finder on Mac.
Frequently Asked Questions
Transferring photos from Android to iPhone can be done through various methods. These include wireless options, cable connections, and third-party apps.
How can I transfer photos from an Android device to an iPhone using Bluetooth?
Bluetooth is not a direct option for transferring photos between Android and iPhone. The two operating systems use different Bluetooth protocols. Users should explore alternative methods like cloud services or apps designed for cross-platform transfers.
What are the steps to wirelessly transfer images from Android to iPhone?
- Install Google Photos on both devices.
- Back up Android photos to Google Photos.
- Sign in to Google Photos on iPhone.
- Download desired photos to iPhone.
This method ensures a seamless wireless transfer without quality loss.
Can I transfer photos from Android to iPhone without using a computer?
Yes, users can transfer photos without a computer. The Move to iOS app simplifies this process during initial iPhone setup. For transfers after setup, cloud services or third-party apps offer computer-free solutions.
Is it possible to send pictures from Android to iPhone without losing quality?
Full-quality transfers are possible. Use Google Photos with original quality backup enabled. Alternatively, transfer via USB cable to maintain original image quality. Cloud storage services often preserve image quality during transfers.
How to use a cable to transfer photos from Android to iPhone?
- Connect Android to computer via USB.
- Copy photos to computer.
- Connect iPhone to computer.
- Use iTunes or Finder to sync photos to iPhone.
This method ensures a direct transfer with minimal quality loss.
What is the process to transfer data from Android to iPhone after the initial setup?
For post-setup transfers:
- Use cloud services like Google Drive or Dropbox.
- Upload photos from Android to the cloud.
- Download the cloud service app on iPhone.
- Sign in and download photos to iPhone.
Third-party apps like Send Anywhere also facilitate easy transfers between devices.