Struggling with WiFi dead zones in your home? Placing a WiFi extender properly can make all the difference between frustrating disconnections and seamless internet throughout your house. Many homeowners install extenders incorrectly, putting them too close to the router or in locations that block the signal.
For optimal WiFi extender placement, position it midway between your router and the area where you need better coverage, ideally maintaining line-of-sight to both locations. This strategic placement allows the extender to receive a strong signal from your router and effectively broadcast it to the dead zone areas. The front side of the extender should face toward the main router for the best reception.
If you have a multi-level home, consider placing the extender on a staircase, landing, or hallway for better coverage between floors. Remember that physical barriers like concrete walls can significantly reduce signal strength, so you may need to experiment with different locations to find the sweet spot where your extender maintains a good connection while extending coverage where you need it most.
Why Placement Matters
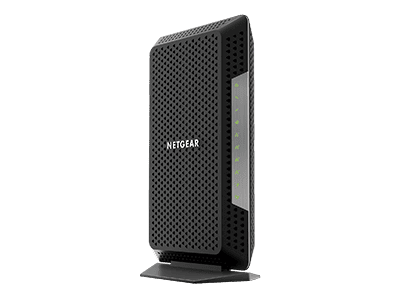
A WiFi extender (or range extender) works by receiving your router’s signal and rebroadcasting it to areas where the signal is weak. Placing it in the right spot ensures that it gets a strong enough signal to extend—if it’s too far from the router, it won’t have a good signal to amplify.
📍 1. Find the Midpoint Between Router and Dead Zone
The best general rule is to place the extender halfway between your router and the area with poor WiFi coverage.
- If your router is in the living room and your weak spot is the bedroom, put the extender in a hallway or room between the two.
- Make sure the extender still has at least 50% signal strength from the router.
⚙️ 2. Keep It in Line of Sight (If Possible)
WiFi signals travel best when there are fewer obstacles like walls, floors, or large furniture.
- Avoid corners, closets, or behind TVs.
- Try to keep the extender in an open area, ideally elevated on a shelf or table.
(source: PCMag)
🚫 3. Avoid Interference
Certain devices and materials can weaken WiFi signals. Keep your extender away from:
- Microwaves, cordless phones, and baby monitors
- Metal objects and thick concrete or brick walls
- Bluetooth devices and large mirrors
(source: WifiBooster Pro)
📶 4. Use the Extender’s Signal Indicators
Most modern extenders have LED indicators showing signal strength:
- Green or 3+ bars: Good placement
- Amber or 1–2 bars: Too far from router — move closer
- Red or no light: Out of range
Check your extender’s app or admin page for real-time signal strength feedback.
🧭 5. Consider Multi-Story Homes
If you’re extending WiFi across floors:
- Place the extender near the stairwell or on the ceiling/floor boundary between floors.
- WiFi travels downward better than upward, so if your router is upstairs, try placing the extender slightly above the lower floor (like on a shelf or high table).
🧠 6. Test and Adjust
After setup:
- Walk around with your phone and check signal strength.
- Run a speed test (e.g., Speedtest.net) in different rooms.
- Move the extender slightly if needed until you find the sweet spot.
(source: SoftHandTech)
✅ Quick Summary
| Goal | Placement Tip |
|---|---|
| Extend coverage | Halfway between router and dead zone |
| Maintain strong signal | At least 50% signal from router |
| Reduce interference | Keep away from metal, microwaves, and thick walls |
| Multi-floor coverage | Near stairwell or ceiling/floor boundary |
| Optimize performance | Test and adjust placement |
Key Takeaways
- Position your WiFi extender halfway between your router and the target area with minimal physical barriers.
- The ideal extender location provides line-of-sight to both the router and devices needing stronger signals.
- WiFi extenders can be adjusted and relocated at any time to optimize performance as your connectivity needs change.
Understanding Wifi Extenders
Wifi extenders help solve the common problem of dead zones in homes and offices by boosting your existing wireless signal. These devices communicate with your router and rebroadcast the signal to areas with poor connectivity.
How Wifi Extenders Work
Wifi extenders work by receiving your router’s wireless signal and then amplifying and retransmitting it to areas with weak coverage. They essentially create a second network that your devices can connect to when the main router’s signal becomes too weak.
The extender communicates with your router on one frequency band and then broadcasts to your devices on either the same band or a different one. This is why placement is crucial—the extender needs a strong enough signal from your router to be effective.
Most modern extenders use dual-band technology, which helps minimize interference and maximize throughput. They receive data on one band and transmit on another, preventing the signal loss that happens when the same band is used for both tasks.
Wifi Extender vs. Range Extender
While the terms “wifi extender” and “range extender” are often used interchangeably, there are subtle differences worth noting:
- Wifi extenders typically connect wirelessly to your router and rebroadcast the signal
- Range extenders sometimes use your home’s electrical wiring (powerline technology) to extend coverage
Both devices serve the same fundamental purpose: improving wifi coverage in areas with weak signals. The key difference lies in their connection method.
Range extenders might offer more stable connections in homes with thick walls or significant interference since they can use electrical wiring to bypass obstacles that might block wireless signals. However, wireless extenders are generally easier to install and don’t require outlets in specific locations.
Benefits of Using Wifi Extenders
Wifi extenders offer several advantages for homes and offices struggling with connectivity issues:
Elimination of dead zones: They can provide coverage to areas previously unreachable by your router’s signal, such as upstairs bedrooms or basement offices.
Cost-effective solution: Extenders are typically less expensive than replacing your router or installing a mesh network system.
Easy setup: Most modern extenders feature simple setup processes with WPS buttons or user-friendly mobile apps.
Flexible placement: You can position the extender wherever it’s most needed, adjusting as necessary for optimal performance.
Extenders also allow you to maintain your existing router setup while improving its functionality. This means you don’t need to learn a new system or reconfigure all your connected devices.
Optimal Placement of Wifi Extenders
Positioning your wifi extender correctly can dramatically improve your home internet performance. The right placement helps eliminate dead spots, boost signal strength, and provide consistent coverage throughout your living space.
Assessing Your Space for Extender Placement
Start by identifying the dead zones in your home where the wifi signal is weak or non-existent. Use your phone or laptop to test signal strength in different areas. Pay attention to rooms where you frequently use internet-connected devices.
For multi-level homes, consider positioning the extender on a middle floor. This strategy provides more balanced coverage between levels. A spot on a staircase or landing often works well.
Height matters significantly. Place the extender about 4 feet high for optimal reception – approximately the same height as your router. This elevation helps the extender receive and broadcast signals more effectively.
Consider the locations of your smart home devices. If you have multiple devices in certain areas (like a smart TV, speakers, and gaming consoles), prioritize good coverage for these areas.
Finding the Right Distance from the Router
The ideal location for an extender is halfway between your router and the area needing better coverage. This midpoint placement maximizes the extender’s effectiveness.
Distance limitations are important to understand. Most wifi extenders can be placed up to 120 feet inside and 250 feet outside from the router. However, these numbers assume ideal conditions.
The extender must receive a strong enough signal from the router to be effective. If placed too far, it can’t amplify what it can’t receive properly.
Look for signal strength indicators on your extender. Many devices have LED lights showing connection quality. Aim for at least 50% signal strength from the router to the extender for reliable performance.
Avoiding Interference and Obstacles
Physical barriers can significantly impact wireless signals. Avoid placing extenders behind or near these common obstacles:
- Thick walls and concrete – These materials severely block wifi signals
- Large metal objects – Refrigerators, file cabinets, and metal doors
- Mirrors and glass tanks – These can reflect signals in unwanted directions
- Other electronic devices – Microwaves, baby monitors, and Bluetooth speakers
Line-of-sight positioning between the extender and router is ideal but not always possible. When direct line-of-sight isn’t feasible, minimize the number of walls the signal must pass through.
Keep extenders away from water sources, as water absorbs wifi signals. This includes fish tanks, water heaters, and even plants with high moisture content.
Electronic interference can come from unexpected sources. Even LED lights and some dimmer switches can create noise that disrupts wifi signals.
Setting Up Your Wifi Extender
Proper setup of your wifi extender involves several key technical steps that ensure optimal performance and seamless integration with your existing network. The process requires attention to detail with both physical placement and software configuration.
Configuring Network Settings
To begin setting up your wifi extender, you’ll need to connect it to your existing network. Most extenders offer two configuration methods: WPS (Wi-Fi Protected Setup) or manual setup through a web browser.
For WPS setup:
- Place the extender in an outlet near your router
- Press the WPS button on your router
- Press the WPS button on your extender within 2 minutes
- Wait for the connection LED to become solid
For manual setup:
- Connect to the extender’s temporary network (usually printed on the device)
- Open a web browser and enter the extender’s IP address (typically 192.168.0.1 or 192.168.1.1)
- Follow the on-screen setup wizard
Many extenders also offer smartphone apps that simplify the configuration process. These apps walk you through each step of connecting your extender to your main network.
Network Name and Security
Your extender can either broadcast the same network name (SSID) as your main router or use a different name. Each approach has benefits.
Using the same SSID creates a seamless experience where devices automatically connect to the strongest signal. However, this can sometimes cause connection issues as devices don’t always switch properly between the router and extender.
Using a different SSID (like “HomeNetwork_EXT”) gives you more control over which access point your devices connect to. This is helpful when troubleshooting connection problems.
For security, ensure your extender uses the same encryption type as your main router (WPA2 or WPA3 recommended). The extender needs your main network’s password during setup to establish the connection.
Always change the default admin password for your extender’s configuration page to prevent unauthorized access to your network settings.
IP Address and DHCP Considerations
Most wifi extenders operate in one of two modes: as access points or as DHCP clients. Understanding these configurations helps prevent network conflicts.
In access point mode, the extender simply relays traffic between your devices and the main router. The router handles all IP address assignments through its DHCP server. This is the most common and hassle-free setup.
Some advanced extenders can function in router mode with their own DHCP server. In this case, you’ll need to ensure the extender uses a different IP subnet than your main router to avoid conflicts. For example:
- Main router: 192.168.1.x
- Extender: 192.168.2.x
The extender itself needs an IP address on your network. Most operate as DHCP clients and automatically obtain an address from your router. You can typically find this address in your router’s connected devices list if you need to access the extender’s settings later.
Maximizing Wifi Extender Performance
Proper placement and configuration of your wifi extender can dramatically improve your home network’s performance. Taking time to optimize these settings will help eliminate dead zones and ensure consistent connectivity throughout your home.
Adjusting for Optimal Signal Strength
The ideal position for a wifi extender is halfway between your router and the dead zone you want to cover. Don’t place the extender directly in the dead zone itself, as it needs to receive a strong signal from the main router.
For best results, place your extender at a similar height as your main router, approximately 4 feet high. Height plays a critical role in signal reception and transmission.
Signal strength indicators on most extenders help with proper placement:
- Green light: Excellent connection
- Yellow light: Adequate connection
- Red light: Poor connection, reposition needed
Experts recommend placing the extender in a location that receives at least -60db signal or better from the main router. Performance degrades significantly with weaker signals.
Strategies to Reduce Buffering and Improve Speed
To maximize speed, users should select the optimal frequency band for their needs. The 5GHz band offers faster speeds but shorter range, while 2.4GHz provides better coverage at slower speeds.
Tri-band mesh systems provide the best performance by dedicating one band specifically for communication between the router and extender. Though more expensive, these systems minimize the speed loss typically experienced with standard extenders.
Avoid physical obstacles between the extender and router:
- Walls (especially concrete)
- Large metal objects
- Microwave ovens
- Fish tanks
Position the extender’s antennas vertically for horizontal coverage or horizontally for multi-floor coverage. This simple adjustment can significantly reduce buffering during streaming or gaming sessions.
Regular Maintenance and Firmware Updates
Keeping firmware updated on wifi extenders is crucial for optimal performance. Manufacturers regularly release updates that fix bugs, enhance security, and improve speed.
Most modern extenders offer automatic update options through their management apps. Enable this feature to ensure the device always runs the latest firmware without manual intervention.
Simple maintenance practices:
- Restart the extender weekly
- Clean dust from vents monthly
- Check for firmware updates quarterly
- Reposition if home layout changes
Signal interference changes over time as neighbors adjust their networks. Using the extender’s management interface to scan for the least congested channel can help maintain peak performance. Many extenders will automatically select the best channel, but manual adjustment sometimes yields better results.
Advanced WiFi Extender Features for Enhanced Connectivity
Modern WiFi extenders offer sophisticated features that go beyond simply boosting your signal. These advanced capabilities can dramatically improve your home network performance, security, and flexibility.
Band Steering and Load Balancing
WiFi extenders with band steering technology automatically direct devices to the optimal frequency band (2.4GHz or 5GHz) based on their capabilities and current network conditions. This enhances performance by reducing congestion on any single band.
Load balancing distributes connected devices evenly across available networks to prevent any single access point from becoming overwhelmed. When multiple devices connect simultaneously, the extender intelligently manages the traffic.
Some premium models offer real-time traffic analysis that prioritizes bandwidth for demanding applications like video streaming or gaming. This ensures smooth performance for critical tasks even during peak usage times.
Users can typically configure these features through the extender’s management interface, allowing customization based on specific household needs and device priorities.
Guest Networking and Access Control
WiFi extenders with guest networking capabilities create separate network names (SSIDs) for visitors. This provides internet access without sharing the main network password or exposing smart home devices to potential security risks.
Advanced access control features allow:
- Time-based restrictions: Limit guest access to specific hours
- Bandwidth limitations: Ensure guests don’t consume excessive data
- Content filtering: Block inappropriate websites or content
- Device quantity limits: Control how many guest devices can connect
Many extenders include easy-to-use QR codes that guests can scan to connect instantly without typing complicated passwords. This streamlines the connection process while maintaining security.
For homes with children, parental controls can be implemented through the extender to manage internet access schedules and content filtering for specific devices.
Mesh Network Integration
Modern WiFi extenders often support mesh network integration, creating a seamless networking experience throughout the home. Unlike traditional extenders, mesh-compatible units work together to form a unified network rather than creating separate networks.
The primary benefits include:
- Single network name: Devices automatically connect to the strongest signal without manual switching
- Seamless roaming: Move throughout the home without connection interruptions
- Centralized management: Control all network aspects through one interface
- Automatic updates: Firmware updates deploy across all connected devices
For smart home environments, mesh-integrated extenders provide consistent connectivity for IoT devices that might otherwise struggle with network transitions. This prevents disconnections when devices are at the edge of a signal range.
Setup typically requires minimal technical knowledge, with many systems offering smartphone apps that guide users through optimal placement and configuration. Some advanced models even incorporate AI to continually optimize performance based on usage patterns.
Frequently Asked Questions
Wi-Fi extender placement involves specific considerations based on building layout, desired coverage area, and technical factors. Proper positioning dramatically impacts signal strength and network performance.
What are the optimal placement strategies for Wi-Fi extenders in multi-story buildings?
For multi-story buildings, place extenders on staircase landings or central hallways to maximize coverage between floors. This central positioning helps signals reach multiple levels effectively.
Avoid positioning extenders in corners or areas surrounded by thick walls. The ideal height is approximately 4 feet from the floor, similar to the height of the main router.
Consider using multiple extenders for very large homes, with one dedicated to each floor for comprehensive coverage.
How can one determine the ideal position for a Wi-Fi extender to ensure basement coverage?
Basement coverage requires placing the extender midway between the router and the basement area that needs signal. Often, the ground floor location closest to the basement entrance works well.
Signal strength indicators on extenders help find the optimal spot. Users should look for at least 50% signal strength at the installation point before finalizing placement.
Avoid placing extenders near concrete walls or metal objects that can block signals to the basement area.
What factors should be considered when placing a Wi-Fi extender in outdoor areas?
For outdoor coverage, extenders should be positioned near windows or exterior walls facing the outdoor space. Weather-resistant models are recommended for direct outdoor installation.
Distance limitations remain crucial – even outdoor extenders need to maintain line-of-sight with the main router when possible.
Consider potential interference from landscaping features, pool equipment, or outdoor electrical systems when choosing the placement location.
How does the proximity of a Wi-Fi extender to the main router impact its performance?
The extender must be close enough to the router to receive a strong signal, but far enough to meaningfully extend coverage. Placing it halfway between the router and the dead zone typically yields the best results.
Too close to the router wastes the extender’s potential range. Too far away results in the extender receiving a weak signal, which it can only rebroadcast at the same reduced quality.
Signal quality diminishes with each “hop,” so minimizing the number of extenders in a chain optimizes overall network performance.
In what ways does the positioning of a Wi-Fi extender’s antennas affect signal distribution?
Vertical antenna positioning generally provides the widest horizontal coverage pattern, ideal for single-story spaces. Angled antennas can direct signals to specific areas or between floors.
For multi-directional coverage, alternating antenna positions (one vertical, one horizontal) often creates the most balanced signal distribution.
Adjusting antennas after installation based on signal testing helps fine-tune coverage to address specific dead zones or weak spots.
What steps are involved in properly connecting a Wi-Fi extender to the existing router?
First, users should identify an appropriate location midway between the router and the target area. The extender should be plugged in and powered on in this location.
Most modern extenders offer WPS (Wi-Fi Protected Setup) for easy connection – simply press the WPS button on both the router and extender within two minutes.
For manual setup, connect to the extender’s temporary network using a computer or smartphone, then follow the guided setup to input the main network’s name and password.