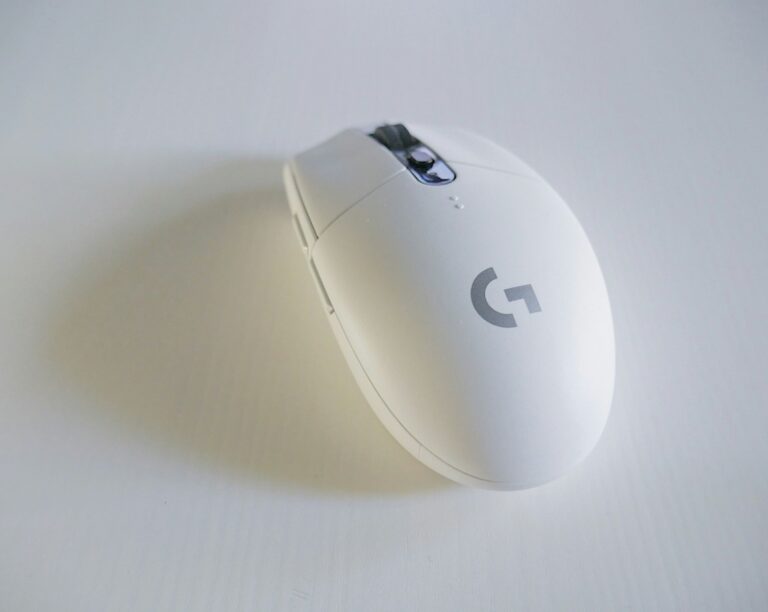
Is your wireless mouse getting sluggish or sticky? A dirty mouse can lead to poor performance and shortened lifespan. Dust, oils from your hands, and food crumbs can build up over time, affecting how well your cursor moves and buttons click. Cleaning your wireless mouse regularly with simple household items like a soft cloth and warm water can improve its responsiveness and extend its useful life.
Taking a few minutes to properly clean your mouse can make a huge difference in your computing experience. You don’t need fancy tools or expensive cleaning solutions – most wireless mice can be cleaned effectively with items you already have at home. Regular maintenance prevents dirt buildup that can damage internal components and ensures your mouse continues working smoothly.
How to Clean Your Wireless Mouse
What You’ll Need
- Microfiber cloth or soft lint-free cloth
- Cotton swabs (Q-tips)
- Toothpick or soft brush
- Mild dish soap or isopropyl alcohol (70% or higher)
- A small bowl of warm water
- Compressed air (optional)
- Paper towel
Step 1: Power Off and Remove Batteries
Before cleaning, turn off your wireless mouse and remove the batteries or USB receiver. This prevents accidental clicks and protects the internal electronics.
Step 2: Wipe the Exterior
- Lightly dampen a microfiber cloth with a mix of water and mild soap or rubbing alcohol.
- Gently wipe the top, sides, and bottom of the mouse.
- Avoid letting moisture seep into openings like the scroll wheel or sensor.
💡 Tip: Alcohol-based cleaners are great for removing oils and disinfecting without leaving residue.
Step 3: Clean the Scroll Wheel and Buttons
- Use a cotton swab dipped in alcohol to clean around the scroll wheel and button crevices.
- Rotate the wheel while cleaning to remove grime from all sides.
- If needed, use a toothpick or soft brush to dislodge stubborn dirt.
Step 4: Clean the Sensor and Underside
- Flip the mouse over and gently blow away dust from the sensor using compressed air.
- Wipe the underside with a dry cloth — avoid pressing directly on the sensor lens.
Step 5: Dry and Reassemble
- Let the mouse air dry completely for 5–10 minutes.
- Reinsert the batteries and reconnect the USB receiver.
- Power it on and test the buttons and scroll wheel.
Step 6: Regular Maintenance Tips
- Clean your mouse every 2–4 weeks if used daily.
- Wash your hands before use to reduce oil buildup.
- Keep your mouse pad clean — dust and debris from it often cause tracking issues.
✅ Signs Your Mouse Needs Cleaning
- Sticky or unresponsive buttons
- Erratic cursor movement
- Scroll wheel skipping or sticking
- Visible grime or discoloration
Key Takeaways
- Regular cleaning with a soft, lint-free cloth moistened with warm water prevents performance issues and extends mouse lifespan.
- Always unplug or turn off your wireless mouse before cleaning to avoid accidental clicks or damage.
- Use compressed air to remove dust from hard-to-reach areas without disassembling the device.
Understanding Your Wireless Mouse
A wireless mouse works through several key technologies and components that affect its performance and maintenance needs. Knowing these elements helps you clean and maintain your device properly.
Types of Wireless Mice
Wireless mice come in various designs to suit different needs. The most common types include optical and laser mice, which differ in their tracking technology.
Optical mice use an LED light and a small camera to detect movement across a surface. They work well on most surfaces but may struggle with glass or very shiny materials. These mice are generally less sensitive to dust on the surface but still need regular cleaning.
Laser mice use laser technology instead of an LED, offering higher precision and the ability to work on more surfaces. These are preferred by graphic designers and gamers who need precise control.
Ergonomic mice are designed to reduce wrist strain during extended use. They often have contoured shapes that fit naturally in your hand.
Common Wireless Mouse Components
A typical wireless mouse contains several components that may need cleaning:
- Buttons: Left and right click buttons, plus additional programmable buttons on gaming or productivity models
- Scroll wheel: Used for vertical scrolling, sometimes with side-to-side functionality
- Optical or laser sensor: Located on the bottom, this tracks movement
- Battery compartment: Houses batteries or rechargeable power source
- Receiver port: Where the dongle is stored on some models
The areas around buttons and the scroll wheel often collect dust and debris. The sensor area is especially important to keep clean, as dirt here directly affects tracking performance.
Wireless Technologies and Interference
Wireless mice connect to computers using one of two main technologies:
RF (Radio Frequency) mice use a small USB dongle or receiver that plugs into your computer. They typically operate at 2.4GHz and can work from up to 30 feet away. These are more common and generally less expensive.
Bluetooth mice connect directly to your computer’s built-in Bluetooth. They don’t require a USB port but may have slightly more input lag than RF mice.
Both types can experience interference issues from other electronic devices. Common sources of interference include:
- Wi-Fi routers
- Cordless phones
- Microwave ovens
- Metal objects between the mouse and receiver
This interference can cause jerky cursor movement or connection drops, which are sometimes mistaken for dirt-related problems.
Pre-Cleaning Preparation
Before cleaning a wireless mouse, proper preparation ensures effective cleaning without damaging the device. The right materials and safety steps protect both the user and the mouse during the cleaning process.
Gathering Necessary Materials
To clean a wireless mouse properly, you’ll need to collect several specific items:
- Microfiber cloth (lint-free)
- Cotton swabs for reaching small crevices
- Isopropyl alcohol (70-99%)
- Compressed air can with fine nozzle
- Small brush (soft bristled)
- Clean container for temporary battery storage
Having these materials ready before starting ensures a smooth cleaning process. The microfiber cloth prevents scratches, while cotton swabs reach tight spaces around buttons and seams.
Compressed air helps remove dust without opening the mouse. For stubborn dirt, isopropyl alcohol works effectively without damaging electronic components.
Safety Measures Before Cleaning
The first safety step is to unplug your wireless mouse and remove the batteries. This prevents electrical shorts and accidental clicks during cleaning.
Place the batteries in a clean, dry container away from the cleaning area. This protects them from moisture and prevents accidental reactivation of the mouse.
Always work on a clean, flat surface with good lighting. This helps spot dirt accumulation and ensures no small parts are lost during cleaning.
Never spray liquids directly onto the mouse. Instead, apply isopropyl alcohol to the cloth or cotton swab first, and ensure it’s only slightly damp, not wet.
Allow the mouse to dry completely before reinstalling batteries or reconnecting to the computer. Moisture trapped inside can cause corrosion or short circuits.
Cleaning Steps for Wireless Mouse
Regular cleaning of your wireless mouse ensures optimal performance and extends its lifespan. Dust, oils, and debris can interfere with tracking, scrolling, and button functions if not properly maintained.
Exterior Cleaning
Start by disconnecting your wireless mouse and removing the batteries to prevent any electrical issues. Take a soft, lint-free cloth slightly dampened with water or a gentle cleaner. Avoid soaking the cloth—it should be just moist enough to pick up dirt.
Gently wipe the entire surface of the mouse, paying special attention to areas where your fingers rest. These spots often accumulate oils and dirt from regular use.
For stubborn grime, a solution of mild dish soap and water works well. Apply a small amount to the cloth—never directly to the mouse—and wipe carefully.
Recommended cleaning supplies:
- Microfiber cloth
- Mild dish soap (if needed)
- Water (minimal amount)
Allow the mouse to dry completely before reconnecting batteries and using it again.
Cleaning the Scroll Wheel
The scroll wheel often collects the most debris due to its recessed location and constant contact with fingers. To clean effectively, first examine the wheel to assess how much dirt has accumulated.
Use a cotton swab lightly moistened with isopropyl alcohol to clean around the edges of the scroll wheel. The alcohol evaporates quickly and won’t damage internal components.
For debris stuck inside the wheel mechanism, try using:
- Compressed air to blow out loose particles
- A toothpick wrapped with a thin layer of cotton to reach tight spaces
- Tweezers to carefully remove larger debris
Roll the wheel back and forth during cleaning to dislodge dirt from different sections. This helps expose hidden debris that might be affecting smooth scrolling.
Test the wheel after cleaning by scrolling up and down. It should move freely without sticking or making unusual noises.
Maintaining the Optical Sensor
The optical sensor on the bottom of your mouse is crucial for accurate tracking. Even small particles can cause jumping or erratic cursor movement. Turn the mouse over and locate the sensor—it’s typically a small lens in the center.
Use compressed air to gently blow away dust from the sensor area. Hold the can upright and use short bursts to avoid moisture damage.
For more precise cleaning, dip a cotton swab in isopropyl alcohol and very gently clean the sensor lens. Use minimal pressure to avoid damaging this sensitive component.
The tracking surfaces around the sensor also need attention. Clean these areas with a slightly damp cloth, being careful to avoid getting liquid near the sensor itself.
After cleaning, test the mouse on different surfaces to ensure proper tracking. A clean sensor should provide smooth, consistent cursor movement.
Cleaning the Mouse Buttons
Mouse buttons collect oils and dirt from fingertips that can affect their responsiveness over time. Clean buttons require attention to both the visible surfaces and the gaps around the edges.
Use a cotton swab lightly dampened with isopropyl alcohol to clean the surface of each button. Pay special attention to textured areas where dirt can become trapped.
For the narrow gaps around buttons, try these techniques:
- Use a folded corner of a microfiber cloth to reach tight spaces
- Apply compressed air at an angle to blow out debris
- Gently work a dry toothpick along the seams to loosen stuck particles
Test each button after cleaning by clicking multiple times. The clicks should feel crisp and responsive without sticking or requiring extra pressure.
For mice with removable button panels, consult the manufacturer’s guide for safe disassembly instructions if deeper cleaning is needed.
Removing Dust and Debris from the Receiver
The small USB receiver that connects your wireless mouse to your computer also needs occasional cleaning. Dust in the receiver can cause connection problems and performance issues.
First, carefully disconnect the receiver from the USB port. Inspect it for visible dust or debris, particularly around the metal connector portion.
Use compressed air in short, gentle bursts to clean the metal contacts. For stubborn dirt, a cotton swab very lightly dampened with isopropyl alcohol can be used to clean the metal portion only.
Important: Never insert wet cleaning tools into your computer’s USB ports.
After cleaning the receiver, make sure it’s completely dry before reinserting it. Test the connection by moving the mouse and checking for responsive cursor movement.
Store spare receivers in a dust-free location, such as the mouse’s battery compartment if it has a dedicated storage space.
Post-Cleaning Maintenance
Properly maintaining your wireless mouse after cleaning ensures optimal performance and extends its lifespan. Taking a few simple steps can prevent future issues and keep your device working smoothly.
Reassembling Parts
After thoroughly cleaning your wireless mouse, reassemble all components carefully. Make sure each part fits securely in its proper position. Pay special attention to buttons and scroll wheels, ensuring they click back into place correctly.
For mice with removable covers, align them properly before snapping them back on. Check that battery compartments close completely and securely. If your mouse has removable weights, return them to their designated slots if you wish to maintain the same feel.
Some wireless gaming mice have additional parts like side buttons or customizable panels. These should be reattached according to the manufacturer’s design. Be gentle when pressing parts together to avoid damaging any delicate connectors or internal components.
Testing Mouse Functionality
Once reassembled, it’s crucial to test your wireless mouse to ensure everything works properly. First, reinsert fresh batteries if they were removed during cleaning. Check that the power switch is in the “on” position.
Reconnect the USB receiver to your computer if you disconnected it. Make sure it’s plugged into a functioning USB port. Wait a few moments for your computer to recognize the device.
Test all buttons, including left and right clicks, scroll wheel, and any additional programmable buttons. Move the mouse around to verify smooth movement across your mousepad or surface.
If you notice any performance issues like cursor jumping, delayed response, or buttons not working, try these quick fixes:
- Replace batteries with new ones
- Move closer to the receiver
- Restart your computer
- Reinstall mouse drivers if needed
Troubleshooting Common Issues
Even well-maintained wireless mice can experience performance problems that frustrate users. These issues typically stem from connectivity disruptions or power-related concerns that can be resolved with proper troubleshooting steps.
Resolving Connectivity Problems
If a wireless mouse becomes unresponsive or experiences jumpy cursor movements, the issue often lies with the connection. Users should first try reconnecting the mouse through Bluetooth settings or reinserting the USB receiver. Moving the receiver closer to the mouse can significantly improve signal quality.
Interference from other electronic devices frequently causes mouse performance issues. Try these solutions:
- Move the receiver away from USB 3.0 ports, external hard drives, and wireless speakers
- Switch to a USB port closer to where the mouse is used
- Use a USB extension cable to position the dongle in an optimal location
If problems persist, clean the mouse sensor with a cotton swab lightly dampened with isopropyl alcohol. Dust and debris on the sensor lens can cause erratic cursor behavior.
Addressing Battery Related Concerns
Many wireless mouse issues stem from power problems. When a mouse becomes sluggish or stops working entirely, replacing or recharging the batteries should be the first troubleshooting step.
For optimal performance, consider these battery maintenance tips:
| Battery Type | Maintenance Approach | Expected Lifespan |
|---|---|---|
| Alkaline | Replace when low | 4-6 months |
| Rechargeable | Charge regularly | 300-500 cycles |
Battery contacts can develop corrosion over time, causing connection issues. Users should periodically inspect battery compartments and gently clean contacts with a dry cotton swab.
Some mice include power-saving features that may need adjustment. Check if the mouse has an on/off switch and ensure it’s turned off when not in use. Advanced maintenance of batteries includes removing them during extended periods of non-use to prevent potential leakage.
Ergonomics and Cleaning
Regular cleaning of a wireless mouse is essential for maintaining its ergonomic benefits. When dirt and debris accumulate, they can interfere with the smooth operation of the device and compromise its ergonomic design advantages.
A clean wireless mouse provides better grip and control, reducing strain on wrist and finger muscles. Users who clean their mice regularly report more comfortable usage and less hand fatigue during long work sessions.
Cleaning with Ergonomics in Mind:
- Focus on grip surfaces – these areas collect oils from hands
- Clean scroll wheels thoroughly – they affect finger movement efficiency
- Remove debris from sensor area – ensures precise tracking
- Wipe down side buttons – maintains tactile feedback
When cleaning a wireless mouse, always remember to power it off first. This prevents accidental clicks or movements during the cleaning process.
Ergonomic mice have more contours and crevices than standard models. These areas require special attention with cotton swabs dipped in isopropyl alcohol to remove accumulated dirt.
The textured surfaces on ergonomic mice need gentle cleaning to preserve their grip-enhancing properties. Harsh chemicals can damage these textures, reducing the ergonomic benefits they provide.
Maintenance should be performed at least monthly, with more frequent cleaning for heavy users. This schedule helps preserve both the functional and ergonomic qualities of the wireless mouse.
Frequently Asked Questions
Keeping your wireless mouse clean is essential for optimal performance and longevity. Here are answers to common questions about proper cleaning techniques for different parts of your mouse.
What are the best methods to clean the wheel of a computer mouse?
The mouse wheel often collects dust and debris that can affect scrolling. To clean it properly, use a clean cloth with warm water to wipe away dirt.
For stubborn dirt, a cotton swab slightly dampened with isopropyl alcohol can help remove buildup in the wheel crevices. Gently roll the wheel as you clean to reach all areas.
Make sure the mouse is turned off and batteries are removed before cleaning the wheel to prevent accidental inputs or damage.
Can alcohol wipes be safely used to clean a wireless mouse?
Alcohol wipes can be used safely on most external mouse surfaces but should be used carefully. Isopropyl alcohol (70%) is effective for disinfecting and removing oils from a mouse.
Avoid using alcohol wipes near charging ports or openings where liquid could seep inside. As recommended by cleaning experts, always make sure your mouse is unplugged or turned off before cleaning.
Use alcohol wipes sparingly and never saturate the mouse with liquid, as excess moisture can damage internal components.
What steps should be followed to clean a gaming mouse effectively?
For gaming mice, start by disconnecting the device and removing batteries if applicable. Use compressed air to blow out dust from crevices and buttons.
Wipe down the exterior with a microfiber cloth slightly dampened with warm water. Reddit users recommend using an air compressor to blow out dust from the sensor and mouse feet.
For textured surfaces common on gaming mice, use a soft toothbrush to gently scrub away built-up grime. Pay special attention to frequently touched areas like side grips.
How can one remove dirt and dead skin from a mouse surface?
To remove accumulated dirt and dead skin, start with a slightly damp microfiber cloth to wipe down the entire surface. A mild solution of dish soap and water on a cloth works well for removing oils and stubborn residue.
For textured surfaces, use a soft toothbrush or cotton swab to gently scrub away debris from crevices. Avoid harsh cleaners that might damage the mouse material.
Allow the mouse to completely dry before reconnecting or using it to prevent moisture damage to internal components.
What is the proper way to clean the sensor of a wireless mouse?
The sensor is delicate and requires careful cleaning. Use compressed air or a camera air blower to remove dust without touching the sensor itself.
If the mouse is responding erratically, a gentle wipe with a microfiber cloth may help. Avoid using liquids directly on the sensor area.
Check for hair or debris that might be blocking the sensor light. Using a wooden toothpick can help remove stuck particles without scratching the sensor.
How to maintain and clean the inside components of a wireless mouse?
Cleaning internal components should be approached with caution. Most users should limit internal cleaning to using compressed air through vents and openings.
For more thorough cleaning, some mice can be disassembled, but this should only be done if you’re comfortable with electronics and after consulting the manufacturer’s guidelines. Experts advise using the fine nozzle of canned air to spray sideways underneath buttons.
Regular external cleaning will minimize the need for internal maintenance. If experiencing persistent issues after cleaning, consider consulting the manufacturer or replacing the mouse.