Controller drift can quickly turn your immersive Quest experience into a frustrating ordeal. When your virtual hands start moving on their own or your character walks off a cliff without your input, you’re dealing with the all-too-common issue of controller drift. You can fix Quest controller drift by first trying simple solutions like pushing down and blowing into the joystick, removing and reinserting the battery, or adjusting the thumbstick deadzone settings in your Quest’s menu.
Many Quest users have found success with quick fixes before resorting to more involved repairs. The issue often stems from dust or debris that gets trapped under the joystick. Sometimes it’s just a matter of recalibrating your controller through the Quest settings menu, where you can adjust the thumbstick range and deadzone under Devices > Controllers as recommended by Meta.
For persistent drift problems, cleaning the controller with compressed air or contact cleaner might be necessary, though this provides temporary relief in some cases. More adventurous users might consider removing the controller faceplate to access and properly clean the joystick mechanism, but this should be approached with caution.
How to Fix Oculus Quest Controller Drift
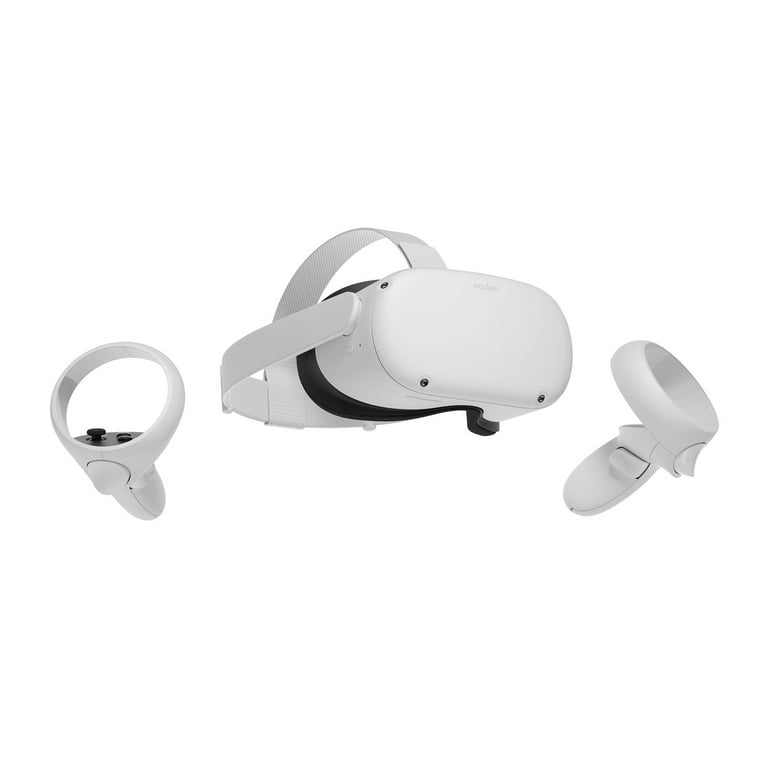
Controller drift is a common issue where your Oculus Quest controller’s joystick or thumbstick registers movement even when you’re not touching it. This can cause your in-game character or view to move unintentionally, disrupting your VR experience.
Causes of Controller Drift
- Dust or debris inside the joystick mechanism
- Wear and tear from extended use
- Calibration or software glitches
- Hardware failure in the joystick sensor
Step-by-Step Solutions to Fix Controller Drift
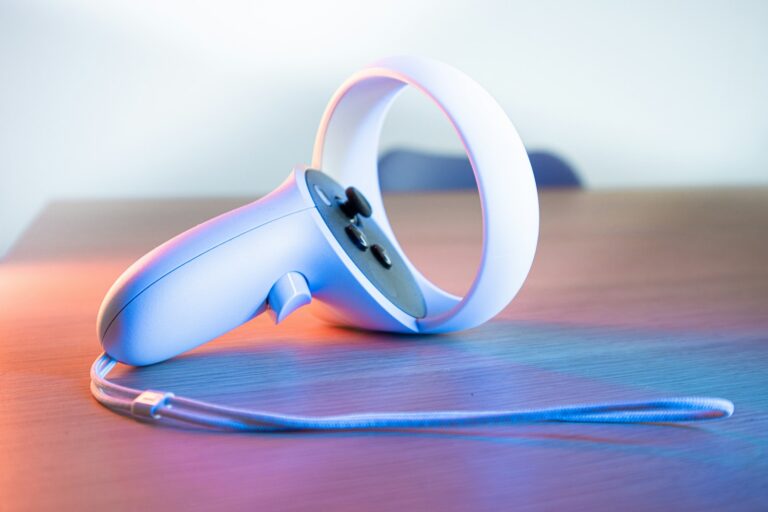
1. Clean the Controller Joystick
- Power off your Oculus Quest headset and controllers.
- Use compressed air to blow gently around the base of the joystick to remove dust and debris.
- Alternatively, use a soft brush or a cotton swab lightly dampened with isopropyl alcohol (avoid soaking).
- Move the joystick around to loosen any particles trapped inside.
- Let it dry completely before powering back on.
2. Recalibrate the Controller
- Sometimes recalibrating the controller can fix drift:
- Turn off the controller.
- Press and hold the Oculus button and the Menu button simultaneously until the controller vibrates.
- This resets the controller’s calibration.
3. Restart the Oculus Quest and Controllers
- Restart your headset and controllers to clear temporary glitches:
- Hold the power button on the headset and select Restart.
- Remove and reinsert the batteries in the controllers.
4. Update Firmware
- Ensure your Oculus Quest and controllers have the latest firmware:
- Connect your headset to Wi-Fi.
- Go to Settings > About > Software Update.
- Install any available updates.
5. Factory Reset (Last Resort)
- If the drift persists, consider a factory reset of your Oculus Quest:
- Back up your data as this will erase all content.
- Go to Settings > System > Factory Reset.
- Follow the prompts to reset your device.
6. Replace the Controller or Joystick Module
- If none of the above work, the joystick hardware may be faulty.
- Contact Oculus Support or an authorized repair service.
- Some users opt to open the controller and replace the joystick module themselves, but this requires technical skill and voids warranty.
Tips to Prevent Controller Drift
- Keep controllers clean and free from dust.
- Avoid excessive force or rough handling of joysticks.
- Store controllers in a safe place when not in use.
- Regularly update your device firmware.
Summary
| Step | Description |
|---|---|
| 1. Clean Joystick | Remove dust/debris with compressed air or alcohol swab |
| 2. Recalibrate Controller | Reset calibration via button combo |
| 3. Restart Devices | Restart headset and controllers |
| 4. Update Firmware | Install latest software updates |
| 5. Factory Reset | Reset device as last resort |
| 6. Hardware Repair/Replacement | Contact support or repair joystick |
References
- Meta Help: Troubleshoot Controller Drift
- iFixit Guide: Fix Oculus Quest 2 Controller Drift
- WikiHow: How to Fix Oculus Quest 2 Controller Drift
Key Takeaways
- Pushing down on the joystick and blowing into it can quickly resolve drift issues in many cases.
- Adjusting thumbstick deadzone settings in your Quest menu provides a software solution without opening the controller.
- When simple fixes fail, physical cleaning with compressed air or opening the controller might be necessary for longer-lasting results.
Understanding Controller Drift
Controller drift affects VR experiences by causing unwanted movement without user input. This issue can be frustrating when playing games or using apps on your Oculus Quest.
Defining Controller Drift
Controller drift occurs when your Oculus Quest controller’s joystick registers movement even when you’re not touching it. The character or cursor might move in a certain direction on its own, making precise control difficult.
This problem isn’t unique to Oculus headsets. Similar issues affect other gaming controllers like the Nintendo Switch Joy-Cons (commonly called “Joy-Con drift“), Xbox One controllers, PS4 and PS5 DualShock/DualSense controllers, and even Xbox 360 controllers.
The most common symptom is unexpected movement in VR applications. You might notice your character slowly moving forward or your view gradually shifting to one side without any input from you.
Common Causes of Oculus Quest Controller Drift
Dust and dirt are primary culprits of controller drift. Tiny particles can get trapped under the joystick and interfere with the internal sensors. This is especially common in controllers used frequently or in dusty environments.
Normal wear and tear also contributes to drift problems. The springs and components inside the joystick mechanism gradually wear down with use, affecting their ability to return to center position properly.
Hardware issues like faulty potentiometers (the sensors that detect joystick position) can cause persistent drift problems. These electronic components have a limited lifespan and may fail over time.
Software calibration problems sometimes cause what appears to be physical drift. The controller’s “dead zone” settings might need adjustment through the Oculus settings menu.
Preventive Measures
Preventing controller drift before it happens saves time and frustration. Taking proper care of your Quest controllers can significantly extend their lifespan and maintain optimal performance.
Proper Handling and Storage
Store your Quest controllers in a clean, dust-free environment when not in use. A protective case provides excellent protection against dust particles that can work their way into the joystick mechanism.
Never eat greasy foods while using your controllers. Oil and food particles are common culprits for drift issues. If you must snack, consider using controller covers that can be easily removed and cleaned.
Keep controllers away from extreme temperatures. Heat can warp plastic components, while cold environments may cause condensation inside the controller when brought to room temperature.
The original packaging offers excellent protection when storing for extended periods. If you no longer have it, consider a dedicated VR storage case.
Avoid dropping controllers or applying excessive force to the joysticks during gameplay. Physical impact can damage the internal mechanisms.
Regular Calibration and Maintenance
Perform routine controller calibration through the Quest settings menu. Navigate to “Menu > Devices > Controllers > Deadzone” to recalibrate your controllers monthly, even if you’re not experiencing drift.
Clean around the joystick area regularly with compressed air. This prevents dust and debris from building up before it becomes a problem.
Check battery contacts regularly and clean them with a dry cloth if necessary. Poor battery connections can sometimes cause controller performance issues that mimic drift.
Use the guardian setup process periodically to ensure your play space is properly mapped. This helps maintain accurate controller tracking.
Consider a quarterly deep clean by blowing air into the joystick area while rotating the stick. This preventive measure removes particles before they cause issues.
Troubleshooting Basics
Controller drift is a common issue that affects Quest headset users, causing virtual movements even when the physical thumbstick remains in a neutral position. Before seeking replacement, several troubleshooting steps can often resolve the problem.
Initial Diagnosis
Controller drift typically appears as unexpected movement in VR when the thumbstick isn’t being touched. To confirm drift is occurring, check if your VR character or cursor moves on its own while the controller sits on a flat surface.
First, examine the controller for physical damage or debris. Visible dirt around the thumbstick area is often the culprit.
Check your battery levels through the Quest menu. Low batteries can cause erratic controller behavior that mimics drift.
Testing the controller in different VR applications can help determine if the problem is software-specific or hardware-related. If drift only occurs in one app, it may be an app issue rather than a controller problem.
Simple Fixes
Clean the thumbstick area using a dry cotton swab to remove dust and debris that might be interfering with proper movement. Never use alcohol or abrasive cleaners as they can damage the controller components.
Try the “spinning technique” where you hold the thumbstick down and rotate it in full circles several times. This can help redistribute lubricant and dislodge particles.
Remove the controller batteries for at least 20 seconds to perform a hard reset. This simple fix often resolves temporary electronic glitches.
Replace batteries with fresh ones, as weak batteries can cause erratic behavior. Using high-quality batteries can prevent recurring issues.
Software Calibration
Access the Quest’s controller settings menu to recalibrate the thumbstick deadzones. The deadzone is the area where small thumbstick movements are ignored.
If drift continues after basic calibration, try setting a larger deadzone. This reduces sensitivity but can eliminate false inputs.
Make sure your Quest software is updated to the latest version. Meta regularly releases firmware updates that address controller issues.
Some users find success by unpairing and then re-pairing their controllers through the device settings menu. This refreshes the connection and can reset abnormal behavior patterns.
Advanced Repair Techniques
When basic solutions fail to fix controller drift, these advanced techniques can help solve stubborn problems. These methods require more technical skill but often provide lasting results when simpler fixes don’t work.
Internal Component Adjustment
The joystick mechanism inside Quest controllers contains a small spring that helps center the stick after movement. Over time, this spring can become misaligned or lose tension. To adjust it, carefully open the controller using a small Phillips screwdriver to remove the five screws on the battery compartment side.
Once inside, locate the joystick assembly at the center. The spring that surrounds the joystick can be gently adjusted to increase tension. Use fine-tipped tweezers to carefully reposition or slightly stretch the spring.
Be extremely cautious not to disconnect ribbon cables or damage circuit boards. This adjustment often resolves drift caused by mechanical issues rather than electronic ones.
After making adjustments, reassemble the controller and test before fully tightening all screws. Some controllers manufactured in Guangdong, China may have slightly different internal layouts.
Contact Cleaning
Dirt, sweat, and dead skin cells can accumulate on electrical contacts inside the controller, causing erratic signals. For thorough cleaning, you’ll need:
- 99% isopropyl alcohol
- Cotton swabs
- Compressed air
- Anti-static brush
Open the controller as described above. Use compressed air to blow out loose debris first. Then slightly dampen (not wet) a cotton swab with alcohol and gently clean around the joystick base and contacts.
Pay special attention to the potentiometer connections and the circular track beneath the joystick. Let everything dry completely before reassembly—usually 10-15 minutes is sufficient.
For persistent issues, consider using electronic contact cleaner specifically designed for potentiometers. Apply a tiny amount and move the joystick in circular motions to distribute the cleaner evenly.
Potentiometer Replacement
When all else fails, the potentiometer itself may need replacement. This component translates joystick movement into electrical signals and wears out over time. This repair requires:
- Replacement potentiometer (matching model)
- Soldering iron and solder
- Desoldering pump or wick
- Heat-resistant workspace
After opening the controller, locate the potentiometer attached to the joystick assembly. Carefully desolder the three connection points, noting their positions for reinstallation.
Remove the old potentiometer and replace it with the new one. Advanced repair guides for this process can be found online. The most common potentiometer models used in Quest controllers are manufactured to standard specifications, making replacements possible.
Test the controller before reassembling completely. This repair has the highest success rate for permanent drift resolution but requires technical skill and the right tools.
Replacement Parts and Where to Find Them
When your Quest 2 controller develops drift issues, replacing the affected components can be a cost-effective solution. Finding the right parts ensures a successful repair and extended controller life.
Identifying Quality Components
The most commonly needed replacement part for fixing controller drift is the joystick module. Quality joystick replacements should match the original specifications with smooth movement and proper resistance. Look for parts explicitly labeled for Quest 2 controllers, as generic versions may not fit properly.
A complete repair kit for Meta Quest 2 controllers typically includes joysticks, a T5 torx screwdriver, tweezers, and a pry tool. These kits often come with additional thumbstick grips to protect your new components.
When selecting thumbstick components, check for metal rather than plastic shafts for improved durability. The potentiometer quality is crucial as this is the part that often fails when drift occurs.
Trusted Suppliers
AliExpress has become a popular source for Quest 2 controller parts, offering various components at competitive prices. Most parts ship from Guangdong, China, with shipping options including ePacket for more affordable delivery or DHL/UPS for faster service.
For those seeking faster delivery, Amazon stocks several third-party repair kits with quick shipping options. These typically cost more but arrive within days rather than weeks.
Electronic repair shops in larger cities sometimes carry VR controller components or can order them specifically. This option provides professional guidance but usually at premium prices.
When ordering from overseas suppliers, expect 2-4 weeks for standard shipping methods. Express options like FedEx or EMS can reduce this to 5-7 days but significantly increase shipping costs.
Professional Repair Services
Sometimes controller drift issues are too stubborn for DIY fixes. Professional repair services offer specialized solutions when your Quest 2 controllers need expert attention.
When to Seek Professional Help
Consider professional repair if you’ve tried all the common fixes without success. If your controller shows severe drift that persists after cleaning with isopropyl alcohol or recalibrating the thumbsticks, it’s time to contact experts.
Physical damage to the controller’s outer ring or visible damage to the thumbstick mechanism also warrants professional attention. Many users report that drift problems sometimes indicate internal component failure that requires specialized tools to fix.
If your Quest 2 is still under warranty, contact Meta support first. For out-of-warranty devices, third-party repair services can be more cost-effective than purchasing new controllers, which typically cost $69-$99 each.
Persistent drift problems significantly impact gaming experiences and can make some applications unusable. Don’t waste time with repeated temporary fixes when professional solutions offer lasting results.
Choosing a Repair Service
Look for repair providers with specific experience fixing VR controllers. Companies like FixMyOculus specialize in Quest 2 controller repairs, offering services from motherboard replacement to outer ring repair.
When selecting a service, consider these factors:
- Repair guarantees – Look for warranties on repair work
- Turnaround time – Confirm how long repairs typically take
- Pricing transparency – Ensure all costs are clearly stated upfront
- Secure payment options – Verify they use SSL encryption for transactions
Read customer reviews to assess reliability and repair quality. Most reputable services offer detailed descriptions of their repair process and clear communication throughout.
For peace of mind, choose companies that provide tracking information and insurance for your controllers during shipping. The best services will diagnose the specific cause of drift rather than applying generic fixes.
Purchasing a New Controller
When all repair methods fail, buying a replacement controller might be the best solution. Meta offers official replacements that ensure compatibility and quality.
Considerations for Replacement
Before purchasing a new Quest controller, check which model you need. Controllers for Quest 1, 2, and Quest Pro are not interchangeable. Right and left controllers are also different, so identify which one has drift issues.
Controller Compatibility Chart:
| Headset Model | Compatible Controller |
|---|---|
| Quest 1 | Original Touch Controllers |
| Quest 2 | Quest 2 Touch Controllers |
| Quest Pro | Pro Touch Controllers |
The average price for an official Meta Quest 2 controller ranges from $69-$99 depending on whether it’s left or right-handed. Third-party alternatives exist but may lack the same quality or features as official ones.
Warranty is an important factor. New controllers typically come with a 1-year manufacturer warranty. Always verify this before purchasing, especially from non-official retailers.
Finding the Best Deals
The Meta official store offers the most reliable source for authentic controllers. They implement SSL encryption and PCI DSS data protection standards for secure transactions.
Third-party retailers like Amazon, Best Buy, and Walmart sometimes offer competitive prices. Look for sales events like Black Friday, Cyber Monday, or gaming conventions when prices often drop by 10-25%.
For international customers, additional shipping costs may apply. Some countries have regional Meta distributors that may offer better deals than direct imports.
Money-saving tips:
- Join VR communities to find flash sales
- Consider certified refurbished options (typically 15-30% cheaper)
- Check for bundle deals if you need both controllers
- Compare prices across multiple authorized retailers
Frequently Asked Questions
Controller drift can frustrate Oculus Quest 2 users, but several solutions exist for this common problem. Here are answers to the most common questions about fixing controller drift issues.
What are the steps to recalibrate the Oculus Quest 2 joystick to address controller drift issues?
To recalibrate your Oculus Quest 2 joystick, first access your device menu. Navigate to “Menu > Devices > Controllers > Deadzone” and follow the on-screen instructions to recalibrate the thumbstick deadzones.
If drift persists after initial calibration, try setting a larger deadzone in the same menu. This adjustment creates a wider area where small joystick movements won’t register, helping to eliminate unwanted drift.
Is there a way to correct drift in the Oculus Quest 2 controllers using software settings?
Yes, adjusting the deadzone settings in the Oculus software can effectively address minor drift issues. The deadzone feature creates a non-responsive area around the joystick’s center position.
Increasing this zone helps prevent small, unintentional movements from registering during gameplay. This software solution is particularly useful for addressing minor drift problems without physical intervention.
Can applying electrical contact cleaner resolve drifting problems in Oculus Quest 2 controllers?
Electrical contact cleaner can be effective for cleaning controller internals, but a simpler method often works just as well. Many users report success with a surprisingly simple technique: pushing down on the joystick and blowing into it.
For a more directed approach, some users recommend using a straw to blow air through the crack from multiple directions. Try this 10-20 times from different positions with firm blowing pressure.
What are the warranty options for Oculus Quest 2 controller drift?
Meta (formerly Oculus) typically provides a one-year limited warranty covering manufacturing defects for Quest 2 controllers. Controller drift may qualify for warranty service if it develops within this period.
Contact Meta Support with your controller’s serial number and purchase information to determine eligibility. Even outside the warranty period, Meta sometimes offers discounted replacement options for controller issues.
How does one troubleshoot controller drift on the Oculus Quest 2 after a firmware update?
After a firmware update, first restart both the headset and controllers. Remove the batteries from the controllers for at least 30 seconds, then reinsert them to perform a soft reset.
If drift persists, check if the update changed your controller sensitivity settings. Navigate to the controller settings menu and readjust deadzone settings as needed to compensate for any firmware-related changes.
What is the best method to repair a drifting left controller on an Oculus Quest 2?
For a drifting left controller, start with the quick and easy fix of pressing the joystick down and blowing into the crack around the joystick base. This often dislodges dust or debris causing the drift.
If this doesn’t work, try recalibrating the controller’s deadzone settings. For persistent issues, some users carefully disassemble the controller to clean internal components, though this may void warranty and should be attempted only as a last resort.