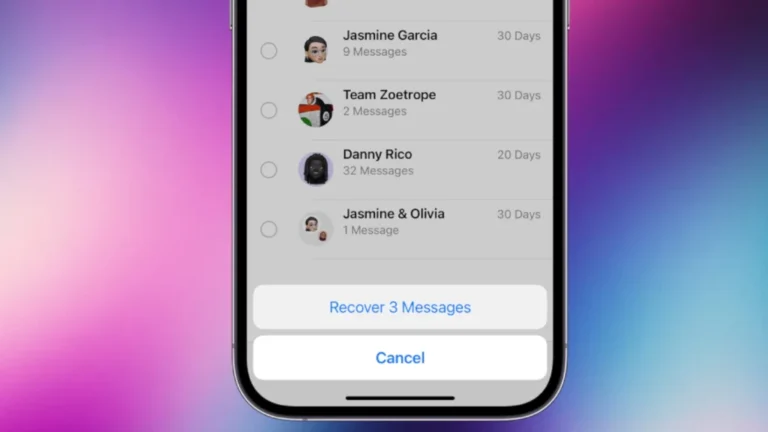
Recording FaceTime calls with audio can be useful for various purposes. You can record a FaceTime call with sound on your iPhone by adding the Screen Recording button to Control Center and using it during a call. This feature allows users to capture important conversations, create content, or save memorable video chats.
Apple has made it easy to record FaceTime calls on iOS devices. The built-in screen recording function captures both video and audio from FaceTime calls. Users should be aware of the legal and ethical considerations when recording calls, as consent may be required depending on local laws.
For those using Mac computers, QuickTime offers a simple method to record FaceTime calls. By selecting the appropriate audio input and initiating a screen recording, users can capture their FaceTime conversations on macOS devices. These recordings can be saved, edited, and shared as needed.
Record FaceTime with Audio: A Complete Guide
Recording FaceTime calls with audio can be useful for saving important conversations, interviews, or moments. However, because of privacy and security reasons, Apple does not provide a built-in one-tap feature to record FaceTime calls with audio on iPhone or Mac. Below are methods and tips to help you record FaceTime calls with audio effectively and legally.
Important Note on Legality
Before recording any call, ensure you have the consent of all participants, as recording calls without permission may be illegal in your jurisdiction.
Method 1: Record FaceTime with Audio on iPhone Using Screen Recording
Step 1: Enable Screen Recording in Control Center
- Open Settings > Control Center.
- Scroll down and tap the + button next to Screen Recording to add it.
Step 2: Start Screen Recording with Microphone Audio
- Open Control Center (swipe down from the top-right corner on Face ID iPhones or swipe up from the bottom on Touch ID models).
- Press and hold the Screen Recording button.
- Tap the Microphone Audio icon to turn it On.
- Tap Start Recording (after a 3-second countdown, recording begins).
- Start your FaceTime call.
Step 3: Stop Recording
- Open Control Center and tap the red Screen Recording icon to stop.
- The video with audio will be saved to the Photos app.
Limitations:
- Internal audio from FaceTime may not always be captured clearly due to iOS restrictions.
- The microphone captures external sounds, so background noise may be recorded.
Method 2: Record FaceTime with Audio on Mac Using QuickTime Player
Step 1: Open QuickTime Player
- Launch QuickTime Player from the Applications folder.
Step 2: Start New Screen Recording
- Click File > New Screen Recording.
- Click the arrow next to the record button and select your microphone (e.g., Built-in Microphone) to capture audio.
- Click the Record button.
Step 3: Record FaceTime Call
- Select the screen or window area to record and start your FaceTime call.
- QuickTime will record both video and microphone audio.
Step 4: Stop Recording
- Click the Stop button in the menu bar.
- Save your recording via File > Save.
Note:
- QuickTime records microphone audio, so it captures your voice and any sound from speakers picked up by the mic.
- To capture internal system audio clearly, you may need third-party software like Loopback or Soundflower.
Method 3: Use Third-Party Apps or External Devices
- Some third-party apps for Mac can capture system audio along with screen recording.
- Alternatively, use an external recorder or another device to record the FaceTime call audio and video.
Summary
| Device | Recording Method | Audio Capture Capability | Notes |
|---|---|---|---|
| iPhone | Screen Recording (with mic) | Microphone audio only | Internal audio may be limited due to iOS privacy |
| Mac | QuickTime Player + mic | Microphone audio only | For internal audio, third-party tools are needed |
| Both | Third-party apps or external gear | Varies | Can capture higher quality internal audio |
Recording FaceTime calls with audio requires workarounds since Apple prioritizes privacy. Using the built-in screen recording with microphone enabled is the easiest method on iPhone and Mac, but for professional quality, third-party software or external devices may be necessary.
Key Takeaways
- Screen Recording in Control Center enables FaceTime call recording on iOS devices
- QuickTime provides a straightforward method for recording FaceTime on Mac computers
- Users should consider legal and ethical implications before recording calls
Preparations for Recording Facetime Calls
Before starting a Facetime recording, users need to set up their devices properly. This involves accessing specific features and tools on iOS and macOS systems.
Accessing the Control Center
On iOS devices, the Control Center houses important functions. Users swipe down from the top-right corner on newer iPhones or up from the bottom on older models. This reveals quick-access toggles and tools.
The Control Center includes a Screen Recording button. If it’s not visible, users can add it through the Settings app. They navigate to Control Center > Customize Controls. Then, they tap the green plus icon next to Screen Recording to add it.
Once added, the Screen Recording icon appears as a circle inside another circle. This makes it easy to spot and use when needed.
Activating Screen Recording Feature on iOS Devices
To start recording a Facetime call on iOS, users tap the Screen Recording icon in Control Center. A 3-second countdown begins before recording starts. Users can choose to record the entire screen or select a portion.
For audio capture, users press and hold the Screen Recording icon. This brings up additional options. They tap the Microphone icon to turn it on, ensuring it’s red. This allows the device to record internal and external audio.
Users then tap “Start Recording” and quickly open the Facetime app. The recording captures everything on screen, including the Facetime call.
Setting Up QuickTime for Facetime Recording on Mac
Mac users can use QuickTime Player to record Facetime calls. They open QuickTime Player from the Applications folder or using Spotlight search. In QuickTime, they select File > New Screen Recording.
A small recording window appears. Users click the arrow next to the record button to select the audio input source. They choose the built-in microphone or an external one if connected.
For video, users decide between recording the entire screen or a selected portion. They click the red record button and select the area to capture. Then, they open Facetime and start the call. QuickTime records both video and audio of the Facetime conversation.
Initiating and Managing a Facetime Call Recording
Recording FaceTime calls with audio involves a few key steps. Users can easily capture their conversations using built-in features on their devices.
Using the Record Button to Start
To begin recording a FaceTime call, access the Control Center on your iOS device. Locate the Screen Recording button, which looks like a solid circle inside another circle. Press and hold this button to reveal additional options. Tap the microphone icon to enable audio recording. A 3-second countdown will appear before the recording starts. This process allows users to seamlessly capture both video and audio during their FaceTime calls.
Utilizing Audio Recording Capabilities
FaceTime call recordings can include audio from both parties. The iPhone’s built-in microphone records the user’s voice by default. To capture the other person’s audio, enable speaker mode during the call. This ensures clear audio from both sides of the conversation. For Mac users, select the computer’s built-in microphone as the audio source in the recording options.
Stopping the Recording with Stop Button
To end a FaceTime call recording, look for the red time indicator at the top of the screen. Tap this indicator to reveal the Stop button. Pressing Stop will immediately finish the recording and save it to your device. On a Mac, click the Stop button in the menu bar. The recorded file will be automatically saved to your chosen location, typically the Photos app or a designated folder.
After Recording: Saving and Editing Your Facetime Call
Saving and editing Facetime calls involves choosing storage locations, exploring recording options, and using editing tools. Proper management of recorded calls enhances their usefulness for various purposes.
Choosing a Save to Location
After recording a Facetime call, users must select a suitable storage location. The Photos app automatically saves screen recordings on iPhones. Users can access these recordings in the “Recent” or “Screen Recordings” albums. For Mac users, QuickTime Player offers options to save recordings directly to the desktop or a chosen folder.
Cloud storage services provide another option for saving Facetime recordings. These services offer easy access across devices and extra security features. Users should consider available storage space and privacy settings when choosing a save location.
Overview of Recording Options
Facetime call recording options vary by device and operating system. On iPhones, the built-in screen recorder captures both video and audio. Users can access this feature through the Control Center. Mac users can use QuickTime Player for recording Facetime calls.
Third-party apps offer additional recording features. These apps may provide higher quality recordings or extra editing tools. Some options allow users to record only audio, which can be useful for interviews or podcasts.
Editing and Transcription of Recorded Facetime Calls
Editing Facetime recordings enhances their quality and usefulness. Basic editing tools in the Photos app allow users to trim video length and adjust playback speed. For more advanced editing, video editing software offers features like adding text, transitions, and filters.
Transcription services convert spoken content in Facetime recordings to text. This feature proves valuable for creating meeting minutes or searchable archives. Some transcription tools use AI to generate accurate text quickly.
Audio enhancement tools can improve sound quality in Facetime recordings. These tools reduce background noise and balance audio levels. Users can apply these enhancements to make conversations clearer and more professional.
Frequently Asked Questions
Recording FaceTime calls with audio involves specific steps and considerations across different devices. Users often encounter technical issues and legal concerns when attempting to capture these conversations.
What are the steps to record a FaceTime call with audio on an iPhone?
To record a FaceTime call with audio on an iPhone, first add Screen Recording to the Control Center. Start the recording before initiating the FaceTime call. Ensure the microphone is enabled for audio capture. End the recording after the call to save the video with sound.
Can audio be captured when screen recording FaceTime on an iPhone 13, and if so, how?
Audio can be captured when screen recording FaceTime on an iPhone 13. Long-press the Screen Record button in Control Center and enable the microphone. This allows both the device’s audio and microphone input to be recorded during the FaceTime call.
What methods are available for recording FaceTime with audio on a Mac?
Mac users can record FaceTime calls with audio using the built-in QuickTime Player. Open QuickTime, select “New Screen Recording,” choose the internal microphone as the audio source, and start recording. Alternatively, use keyboard shortcuts Command + Shift + 5 to access screen recording options.
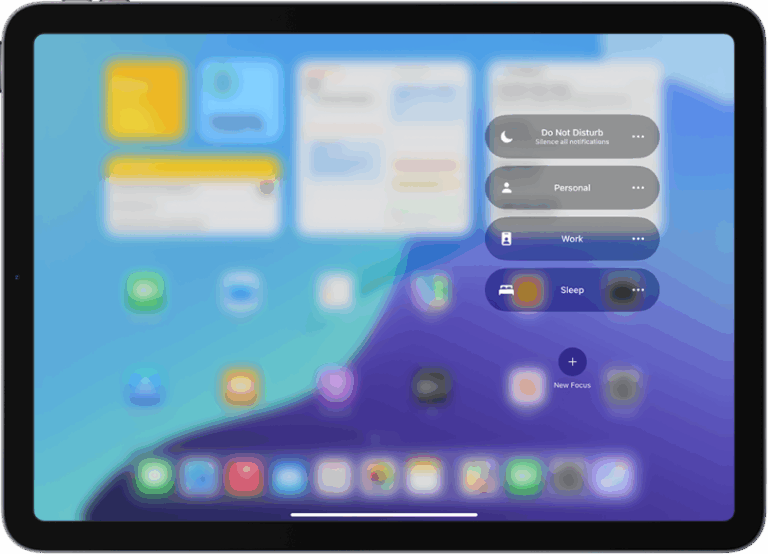
Is there a way to screen record FaceTime with sound on an iPad?
Screen recording FaceTime with sound on an iPad follows a similar process to iPhones. Add Screen Recording to Control Center, long-press to enable microphone, then start recording before the FaceTime call. The iPad will capture both video and audio of the conversation.
Which third-party apps are recommended for recording FaceTime calls with audio?
Third-party apps like EcamM Live and Riverside offer advanced features for recording FaceTime calls with audio. These apps provide higher quality recordings, separate audio tracks, and additional editing options. However, users should verify app compatibility and security before installation.
What could be the reason for no sound being recorded during a FaceTime screen recording session?
No sound during a FaceTime screen recording often results from not enabling the microphone. Check if the microphone is turned on in the Screen Recording options. Other causes include outdated software, privacy settings blocking microphone access, or hardware issues with the device’s microphone.