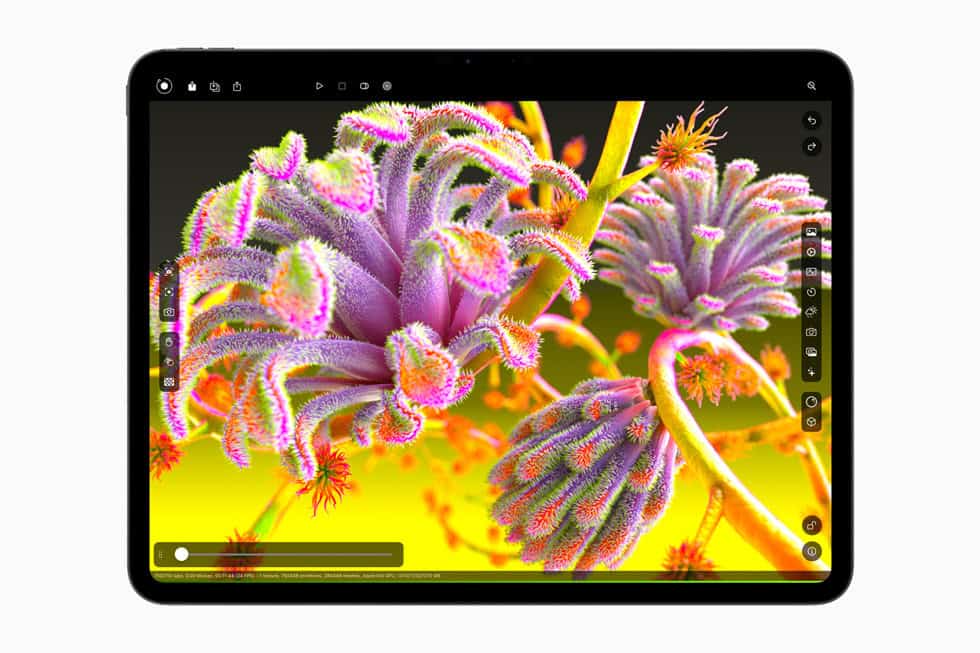
The iPad has transformed from a simple tablet into a powerful tool for creative professionals. With the right apps and techniques, you can now create stunning 3D renders directly on your iPad without needing a high-end desktop computer. iPad rendering offers incredible flexibility and power, allowing you to create photorealistic 3D visualizations anywhere you go.
Whether you’re an architect looking to show clients realistic representations of buildings or a product designer wanting to visualize your concepts, iPad rendering apps have evolved tremendously. Apps like SketchUp for iPad now include AI rendering capabilities that let you generate impressive images from your 3D models in minutes. Other solutions provide real-time rendering abilities that were previously only possible on dedicated workstations.
The process has become more accessible too. You don’t need to be a tech expert to create photorealistic 3D renderings anymore. Using tools like CLEO, you can utilize both real-time and full ray-tracing on your iPad with surprising ease, making professional-quality renders achievable in as little as two hours.
Rendering On iPad
Rendering on an iPad typically involves using specialized apps that can handle 3D models, apply textures and lighting, and generate a final image or animation. The “steps” can vary significantly depending on the type of rendering you want to do (e.g., architectural, product design, character design) and the specific app you choose.
Here’s a general outline of the steps involved in rendering on an iPad, along with some popular app categories:
General Steps for Rendering on an iPad:
- Choose a Rendering App: This is the most crucial first step. The iPad has a growing ecosystem of powerful apps for various rendering needs. Some popular options include:
- 3D Modeling & Rendering Apps: Shapr3D, uMake, SketchUp, Nomad Sculpt (for sculpting), Cadmio, Verto Studio 3D, Prisma3D. These apps often combine modeling tools with rendering capabilities.
- 2D Drawing & Painting Apps (for artistic rendering): Procreate, Adobe Fresco, Clip Studio Paint, Artstudio Pro. While not true 3D renderers, these are excellent for adding realistic shading, textures, and lighting to 2D drawings to create a rendered look.
- Architectural/Interior Design Apps: Morpholio Trace, Live Home 3D, RoomSketcher, HomeByMe, Planner 5D, BIMx. These are often geared towards creating floor plans and visualizing spaces with built-in rendering features.
- Create or Import Your 3D Model (if applicable):
- In-app Modeling: Many 3D rendering apps allow you to create your models directly within the app using touch controls and Apple Pencil.
- Import Existing Models: If you’ve created a model in another software (like Blender, Maya, AutoCAD), you’ll need to import it into your chosen iPad rendering app. Common import formats include OBJ, STL, USDz, SKP, STEP, IGES. Check the app’s compatibility.
- Apply Materials and Textures:
- Material Libraries: Most rendering apps have built-in libraries of materials (wood, metal, glass, fabric, etc.). Select and apply these to different parts of your model.
- Custom Textures: You can often import your own image textures (e.g., for specific wood grains, patterns, or decals) to add more detail and realism.
- Adjust Properties: Fine-tune material properties like color, shininess, roughness, transparency, and bump maps to achieve the desired look.
- Set Up Lighting:
- Light Sources: Add different types of light sources (e.g., directional lights for sun, point lights for bulbs, area lights for soft illumination).
- Environment Lighting (HDRIs): Many apps support High Dynamic Range Images (HDRIs) to create realistic environmental lighting and reflections.
- Adjust Intensity and Color: Control the brightness and color of your lights to create the mood and emphasize different elements of your scene.
- Define Camera Views:
- Perspective: Choose the camera angle and perspective that best showcases your model or scene.
- Camera Settings: Adjust focal length, depth of field, and other camera parameters to control the visual impact.
- Render the Image/Animation:
- Rendering Settings: Configure rendering quality (resolution, anti-aliasing), output format (JPEG, PNG, EXR, video), and other options. Higher quality settings will take longer to render.
- Initiate Render: Start the rendering process. The app will calculate the light and material interactions to produce the final image or animation.
- Post-Processing (Optional):
- In-App Tools: Some rendering apps have basic post-processing tools (e.g., brightness, contrast, color correction).
- External Apps: For more advanced adjustments, export your rendered image to a dedicated photo editing app like Adobe Photoshop Express, Affinity Photo, or even Procreate, to refine colors, add effects, or compose with other elements.
Tips for Rendering on iPad:
- Apple Pencil: For many apps, the Apple Pencil is invaluable for precise modeling, sketching, and detailing.
- iPad Pro with M-series Chip: For demanding 3D rendering tasks, an iPad Pro with an M-series chip will offer significantly better performance and faster rendering times.
- Storage: Rendering files can be large, so ensure your iPad has sufficient storage.
- Battery Life: Rendering is computationally intensive and can drain your battery quickly. Keep your iPad charged or plugged in.
- Learn the App: Each app has its own unique interface and workflow. Take time to learn the specific tools and features of your chosen rendering software. Many apps offer tutorials or have active user communities.
Key Takeaways
- Your iPad can produce professional-quality 3D renders without requiring a desktop computer or complex software.
- Modern iPad rendering apps offer both real-time previews and detailed ray-tracing capabilities for photorealistic results.
- You can complete impressive rendering projects in just a few hours using the right apps and techniques on your iPad.
Understanding Rendering on the iPad
The iPad has evolved into a powerful platform for rendering visual content. Modern iPads combine portability with impressive processing capabilities that make them suitable for various rendering tasks.
Rendering Basics
Rendering on iPad refers to the process of generating a digital image from a model or scene. This involves calculations for lighting, shadows, textures, and other visual elements to create realistic or stylized images.
iPads use specialized graphics hardware to handle rendering tasks. Most rendering apps utilize the device’s GPU through frameworks like Metal or OpenGL to accelerate the process.
You’ll encounter two main types of rendering on iPad: real-time and ray-traced. Real-time rendering processes images instantly as you work, while ray-tracing creates more photorealistic results but takes longer.
Apps like Procreate offer specialized rendering tools for digital art, while others like Cadmio bring real-time rendering specifically for product visualization.
Advantages of iPad Rendering
Portability is the most obvious benefit. You can render projects anywhere without being tied to a desk.
The touch interface provides intuitive control over rendering parameters. Using the Apple Pencil gives you precise adjustments that feel natural and responsive.
Recent iPad Pro models feature M-series chips that deliver desktop-class performance. This allows you to complete complex renderings in just hours rather than days.
Battery efficiency means you can work on rendering projects without constantly searching for power outlets.
The ecosystem integration is seamless. Your iPad rendering projects can easily move between Apple devices or integrate with cloud services.
Limitations and Considerations
Processing power, while impressive, still has constraints compared to high-end desktop workstations. Complex scenes with numerous light sources may strain your iPad’s capabilities.
Thermal management is important. Intensive rendering can cause your iPad to heat up, potentially triggering thermal throttling that reduces performance.
Storage space requires careful planning. Rendering projects and their associated assets can quickly consume available storage on your device.
RAM limitations might affect your ability to work with extremely detailed models or large scene files.
Battery life decreases significantly during intensive rendering tasks. Always keep your charger handy for extended sessions.
Software availability can be limiting. While options are expanding, including AI rendering in SketchUp for iPad, not all professional rendering tools have iPad versions yet.
Choosing the Right Applications
Selecting the perfect rendering apps for your iPad can dramatically improve your workflow and final results. The right tools allow you to transform simple sketches into stunning visualizations with surprising speed and efficiency.
Procreate
Procreate stands as one of the most powerful drawing and rendering tools available for iPad. This app offers exceptional brush customization and layer management that makes it ideal for detailed architectural and interior renderings.
At $9.99 as a one-time purchase, Procreate provides excellent value compared to subscription-based alternatives. The intuitive interface allows you to sketch and paint with precision, creating professional-quality visualizations directly on your iPad.
Key features include:
- 256 customizable brushes
- Advanced layer controls
- 4K canvas resolution
- Time-lapse recording of your process
- Powerful selection tools
Procreate works best with the Apple Pencil for pressure sensitivity, giving you detailed control over line weight and shading.
SketchUp
SketchUp for iPad brings 3D modeling capabilities to your tablet with surprising effectiveness. The app allows you to create, edit, and visualize 3D models on the go.
The touch interface has been well-optimized for iPad, letting you manipulate models with gestures. This makes SketchUp particularly useful for quick conceptual modeling and space planning.
SketchUp offers:
- Solid modeling tools
- Materials library
- Shadow studies
- Sectional views
- Cloud synchronization with desktop version
While not as feature-complete as the desktop version, the iPad app provides enough functionality for most architectural visualization needs. The subscription starts at $119/year but includes access across all your devices.
Morpholio Trace
Morpholio Trace transforms your iPad into a digital tracing paper with powerful rendering capabilities. This app excels at bridging the gap between hand sketching and digital rendering.
You can import photos or 3D models and sketch over them, adding color, texture, and lighting effects. This makes it particularly valuable for interior renders and design presentations.
Morpholio Trace features:
- Custom brushes and pens
- Scale-aware drawing tools
- Perspective grids
- Lighting effects
- Easy export to common formats
The free version offers basic functionality, while the Pro subscription ($7.99/month) unlocks additional brushes, templates, and export options.
Other Noteworthy Apps
Several other iPad apps deserve consideration depending on your specific rendering needs.
Shapr3D offers precision 3D modeling with CAD capabilities, making it excellent for technical renderings and product visualization. It’s particularly easy to use compared to traditional CAD software.
Concepts provides an infinite canvas for sketching and rendering with vector-based tools. Its flexibility makes it ideal for concept development and iteration.
The latest iPad Pro reportedly includes Octane rendering software, bringing professional-grade rendering capabilities directly to your tablet.
For a comprehensive approach, consider combining multiple apps in your workflow—using SketchUp for modeling, Procreate for texturing, and Morpholio for presentation.
Setting Up Your Workspace
Creating an efficient workspace on your iPad is essential for quality rendering results. The right setup will help you work faster and produce better artwork with fewer frustrations.
iPad User Interface Customization
The iPad rendering interface can be customized to match your workflow needs. Start by organizing your favorite tools in the quick access menu. Most rendering apps like Procreate and Cadmio allow you to create custom tool arrangements.
Adjust your screen brightness to about 75% for the most accurate color representation. Too bright, and you’ll create overly dark renders; too dim, and your colors will appear washed out when viewed elsewhere.
Consider using Split View to reference images while you work. This feature lets you keep your reference material visible without switching between apps.
Turn on True Tone display for more natural colors, but disable it when color accuracy is critical for client work.
Working with the Apple Pencil
The Apple Pencil transforms your iPad into a powerful rendering tool. Many designers rely on it for precision work. Double-tap functionality lets you quickly switch between tools without disrupting your workflow.
Adjust your pencil sensitivity in Settings → Apple Pencil. Higher sensitivity works well for detailed line work, while lower settings provide better control for shading.
Try these Apple Pencil techniques for rendering:
- Light pressure for subtle details and highlights
- Medium pressure for most drawing work
- Heavy pressure for dark shadows and emphasis
Keep a microfiber cloth nearby to clean your screen regularly – fingerprints can distort how you perceive your rendering colors.
Purchase a pencil grip if you work for extended periods to reduce hand fatigue.
Managing Layers and Files
Effective layer management is crucial for complex renderings. Create a simple organization system:
- Background layer (locked)
- Main elements layer
- Detail layer
- Highlight/shadow layer
- Annotation layer
Name each layer clearly for easy navigation. Use folders to group related layers in complex projects.
Many iPad artists recommend saving incremental versions rather than overwriting your file. This creates a safety net if you need to revert changes.
Set up automatic cloud backups through iCloud or Dropbox to protect your work. Most rendering apps allow background syncing while you work.
Consider file formats carefully. Save working files in the native app format but export finished renders as PNG for sharing.
Creating and Importing Models
Before diving into rendering, you need a 3D model to work with. iPads offer flexible options for both creating models directly and importing them from other sources.
SketchUp Model Preparation
When working with SketchUp for iPad, ensure your models are optimized before rendering. Start by keeping your geometry simple—excessive detail can slow down your iPad. Group related elements together and create components for items you’ll use repeatedly.
For best results on your iPad Pro or iPad Air, apply materials and textures within SketchUp before exporting. These textures will carry over to your rendering apps.
Clean up your model by removing hidden geometry and unnecessary lines—this improves both performance and final render quality. Check that all faces are properly oriented, as backward-facing surfaces might render incorrectly.
Save your work frequently, as complex models can tax your iPad’s resources. Consider reducing polygon count for smoother operation if you experience any lag.
Importing Options for iPad
Your iPad offers several methods to import existing 3D models. For direct transfers, use AirDrop from your Mac or access files through iCloud Drive. Many apps support common formats like OBJ, STL, and USDZ.
Procreate now supports importing 3D models for painting and rendering. To use this feature:
- Open Procreate and create a new canvas
- Tap the wrench icon → Add → Import 3D Model
- Select your file from Files, iCloud, or another source
For more complex needs, consider specialized apps like Nomad Sculpt or Shapr3D. These allow you to import and modify existing models before rendering.
You can also create 3D models directly on your iPad using apps like Morpholio Trace, which lets you sketch in 2D and convert to 3D. Some apps even let you transform real objects into 3D models using your iPad’s camera—perfect for custom projects.
Executing Render Techniques
Mastering render techniques on your iPad requires understanding several key processes that transform basic sketches into polished, realistic visuals. Proper execution of these techniques will significantly enhance the quality of your work and streamline your creative workflow.
Line Drawing and Illustration
Start with clean line work as your foundation for any rendering project. In apps like Procreate, use the technical pen brush for precise outlines or the 6B pencil for a more organic feel.
Create your line drawings on a separate layer from your render work. This separation gives you flexibility to adjust either component without affecting the other.
Pay attention to line weight variation to create depth. Thicker lines in the foreground and thinner lines in the background help establish spatial relationships in your work.
For architectural or product renderings, use the symmetry tools to maintain perfect balance where needed.
Work with the QuickShape feature to create perfect geometric forms that serve as the basis for more complex structures.
Scale Operations for Precision
Proper scaling ensures your renderings maintain accurate proportions throughout your project. Use the transform tool to resize elements while maintaining their relative relationships.
Key Scaling Shortcuts:
- Pinch with two fingers to zoom in/out for detail work
- Two-finger twist to rotate your canvas as needed
- Use the cursor guide for precise measurements
When working with architectural or interior design renders, establish a consistent scale before beginning. This approach ensures all elements remain proportionally correct.
For product design renders, consider setting up a reference grid in the background. This grid helps maintain accurate perspective and scale throughout your work process.
Use numeric input when available to specify exact dimensions rather than eyeballing sizes.
Applying Materials and Textures
Materials and textures bring life and realism to your renderings. Create a dedicated layer for each material type to maintain control over your composition.
Experiment with brush opacity settings to achieve different material effects. Lower opacity works well for glass and transparent materials, while full opacity suits solid surfaces.
For realistic metal surfaces, use a combination of hard and soft edges with highlight and shadow layers to create convincing reflectivity.
Add texture overlays to simulate materials like wood, fabric, or concrete. Adjust the blending mode to “Overlay” or “Soft Light” for natural integration.
Use alpha lock on layers to contain your texturing within specific shapes, preventing spillover into other areas of your rendering.
Rendering with RT
RT brings powerful real-time rendering capabilities to your iPad. This technology allows you to see lighting changes and material adjustments instantly.
To begin using RT, first import your basic model or drawing. The system supports various file formats including OBJ and USDZ for 3D models.
RT Workflow Steps:
- Set up your lighting environment
- Apply materials to different surfaces
- Adjust camera angle and perspective
- Fine-tune render settings for quality
Real-time ray-tracing on the iPad provides professional-level results without requiring constant exports to desktop software. The latest iPad Pro models include this capability by default.
For product visualization, apps like Cadmio leverage RT technology to create photorealistic images directly on your device. This eliminates the need for expensive desktop setups in many cases.
Optimizing Performance for Rendering
When rendering on iPad, performance optimization is crucial for smooth workflows and high-quality output. Getting the best performance requires thoughtful management of device resources and careful configuration of rendering settings.
Memory Management
iPads have powerful hardware but limited memory compared to desktop workstations. To avoid crashes during complex rendering tasks, you should close background apps before starting resource-intensive projects.
Use lower-resolution textures during the modeling and setup phases, then switch to higher resolutions only for final renders. Many professional rendering apps include optimization tools that help monitor memory usage.
For complex 3D models, consider these memory-saving techniques:
- Use instance duplicates instead of full copies
- Employ level-of-detail (LOD) models
- Keep polygon counts reasonable (under 1 million for smooth performance)
When assigning materials and colors, use compressed textures whenever possible. JPEG formats at 2K resolution or lower will significantly reduce memory demands.
Rendering Settings
iPads with M-series chips deliver impressive rendering power, sometimes outperforming desktop systems. To maximize this performance, adjust your rendering settings thoughtfully.
Start with these optimization strategies:
- Use Metal instead of OpenGL where available (OpenGL is deprecated on iOS)
- Enable hardware acceleration options
- Lower sample counts during test renders
- Reduce shadow and reflection quality during setup
For real-time rendering applications, consider using deferred rendering techniques. This approach can dramatically improve performance when dealing with multiple light sources.
You can also optimize SwiftUI and UIKit elements that appear alongside your rendered content. Apple provides detailed guidance for spatial computing optimizations that apply to many rendering scenarios.
Frequently Asked Questions
iPad rendering raises many common questions about apps, capabilities, and techniques. These answers will help you navigate the most effective tools and approaches for your specific rendering needs.
What are the best apps for interior design rendering on an iPad?
For interior design rendering, Procreate offers excellent stylistic capabilities for concept sketches. However, for more realistic rendering, Cadmio brings real-time rendering capabilities specifically designed for product and interior visualization.
Another popular option is Morpholio Trace, which allows you to layer over existing photos and plans to create detailed interior concepts.
Shapr3D paired with rendering apps gives you a complete 3D modeling to rendering workflow that works entirely on iPad.
How can you perform architectural rendering effectively on an iPad?
Concepts app provides vector-based drawing tools perfect for architectural sketching that can later be refined. For more detailed work, you can use techniques that combine multiple apps for impressive results.
Architectural rendering on iPad works best when you break the process into stages: modeling, material application, lighting setup, and final rendering.
Cloud rendering services like Enscape can work with iPad apps to handle the processing-intensive final render while you design on your device.
Are there any professional-grade applications for 3D rendering on iPad Pro?
Yes, several professional 3D rendering apps exist for iPad Pro. Nomad Sculpt offers powerful 3D sculpting tools with rendering capabilities built in.
Shapr3D provides CAD-level precision modeling with rendering features that leverage the iPad Pro’s powerful chip.
uMake offers a comprehensive 3D design environment with cloud rendering options to produce professional results while managing the iPad’s processing limitations.
Can KeyShot be used for rendering projects on an iPad, and if so, how?
KeyShot itself doesn’t have a native iPad app. However, you can use KeyShot Web Viewer to view and interact with KeyShot scenes on your iPad.
For a more integrated workflow, you can model on your iPad using compatible apps, export the files to KeyShot on your computer, and then use KeyShot Cloud to access renders on your iPad.
Some users employ remote desktop applications to control their desktop KeyShot installation from their iPad when mobility is required.
What are the capabilities of rendering SketchUp models on an iPad?
SketchUp offers SketchUp for iPad which provides basic modeling capabilities, but its native rendering is somewhat limited. For better results, you can export your SketchUp models to dedicated rendering apps.
Augment for iPad can import SketchUp files and provide AR visualization, which is useful for presenting designs in real environments.
Alternatively, you can use SketchUp Viewer to view your models, then capture and enhance them with rendering apps like Procreate for final presentation.
Does the iPad support Vray for advanced rendering tasks?
Vray doesn’t have a dedicated iPad app for rendering. The processing power required for Vray’s advanced rendering algorithms generally exceeds iPad capabilities.
However, you can utilize Vray Cloud services to render your models remotely and then view the results on your iPad.
Some workflows involve modeling on iPad, exporting to desktop applications with Vray plugins, rendering there, and then transferring the rendered images back to iPad for presentation or minor touch-ups.

