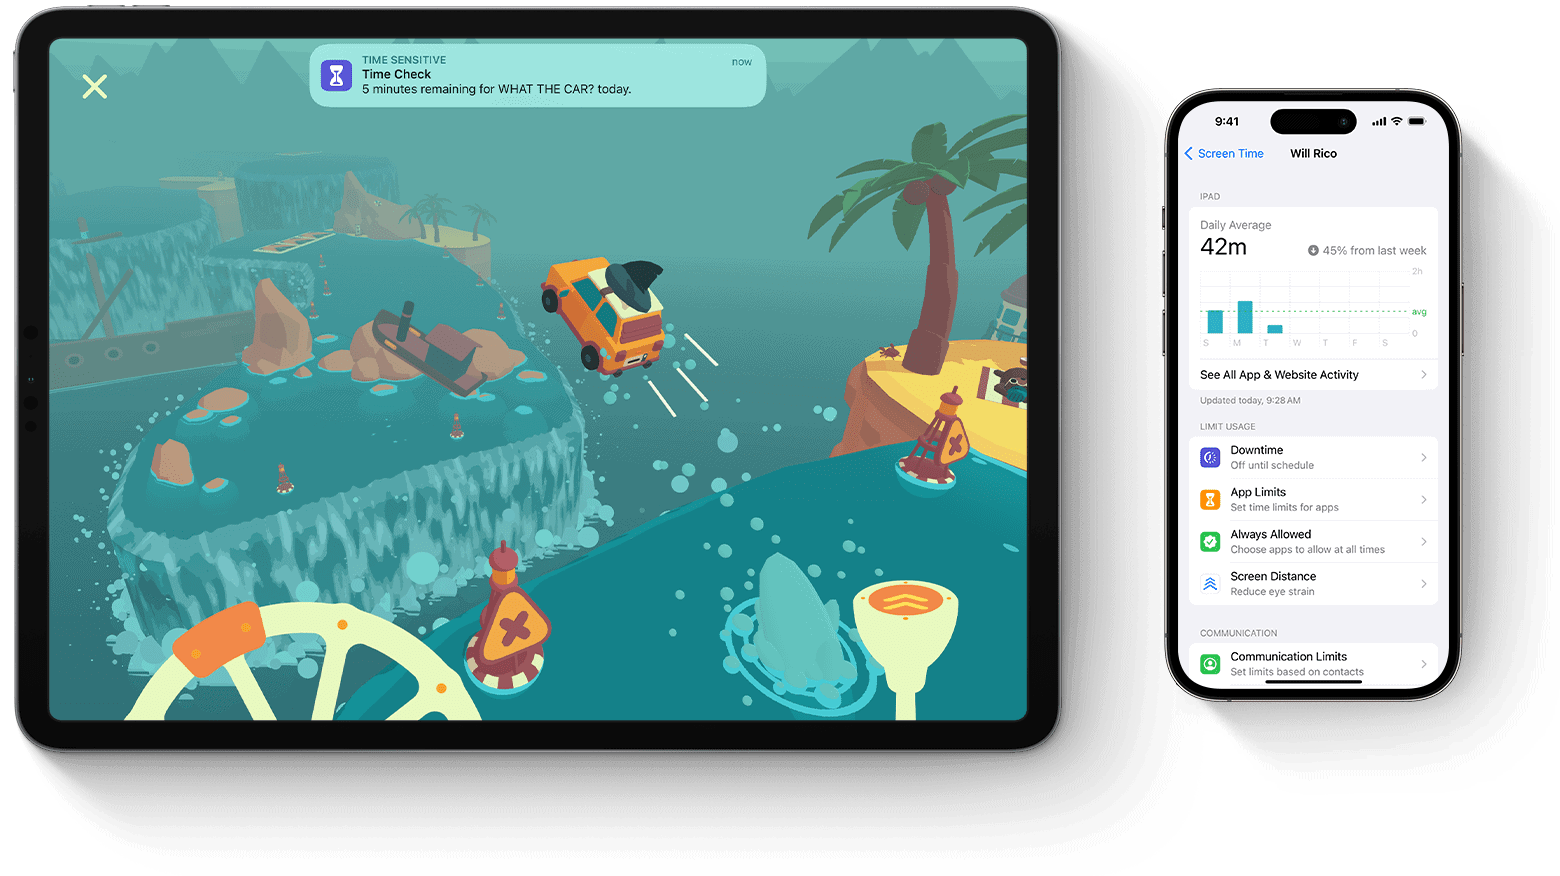
Have you ever needed to capture what’s happening on your iPad screen? Whether you’re creating a tutorial, sharing gameplay, or troubleshooting an issue, screen recording is a handy feature built right into your iPad. You can easily record your iPad screen by adding the Screen Recording button to Control Center, then swiping down from the top-right corner and tapping that button to start capturing everything happening on your device.
The process is straightforward and doesn’t require any third-party apps. Your iPad has a built-in screen recording tool that captures both video and audio. You can even choose to record your voice along with the screen activity, making it perfect for creating instructional videos or narrated demonstrations.
With screen recording on iPad, you can save time explaining complex processes and instead show exactly what you’re doing step by step. The recordings are automatically saved to your Photos app, where you can edit, trim, or share them with others through messages, email, or social media platforms.
How to Screen Record on an iPad: Step-by-Step Guide
Screen recording on an iPad lets you capture everything happening on your screen, whether it’s for tutorials, gaming, or sharing content. Here’s how to easily enable and use screen recording on your iPad.
Step 1: Add Screen Recording to Control Center
Before you start recording, make sure the Screen Recording button is available in your Control Center.
- Open the Settings app on your iPad.
- Tap Control Center.
- Scroll down to More Controls.
- Find Screen Recording and tap the green + button to add it to the Included Controls list.
Step 2: Start Screen Recording
- Swipe down from the top-right corner of the screen to open Control Center (on iPads with Face ID).
On iPads with a Home button, swipe up from the bottom edge of the screen. - Tap the Screen Recording button — a circle within a circle.
- After a 3-second countdown, the recording will start, and a red bar or red clock will appear at the top of your screen indicating that recording is active.
- Navigate through your iPad and perform the actions you want to record.
Step 3: Stop Screen Recording
- Open the Control Center again and tap the Screen Recording button to stop.
Alternatively, tap the red status bar or red clock at the top of the screen and confirm to stop recording. - The recorded video will be saved automatically to the Photos app.
Optional: Record Screen with Sound
To include audio from your microphone during recording:
- Open Control Center.
- Press and hold the Screen Recording button.
- Tap the Microphone Audio icon to turn it On.
- Tap Start Recording.
Tips for Best Results
- Make sure you have enough storage space on your iPad for the recording.
- Use Do Not Disturb mode to prevent notifications from interrupting your recording.
- Edit your recordings easily in the Photos app after finishing.
Key Takeaways
- Access screen recording by adding it to Control Center and swiping down from the top-right corner of your iPad screen.
- You can capture both screen video and audio, including the option to record your voice narration.
- Screen recordings save automatically to your Photos app where you can edit and share them through various platforms.
Understanding iPad Screen Recording Capabilities
iPads offer powerful screen recording features that let you capture everything happening on your screen with just a few taps. This built-in functionality works across apps and can be customized to fit your specific needs.
What Is Screen Recording on iPad?
Screen recording on iPad is a built-in feature that allows you to capture video of everything displayed on your screen. Unlike screenshots, which only capture still images, screen recording creates a video file of your actions.
You can access this feature through Control Center. If it’s not already visible there, you’ll need to add it first in your Settings app.
The iPad screen recorder captures everything visible on your display, including animations, transitions between apps, and any content you interact with. You can even include audio narration by enabling the microphone option.
Once completed, recordings are automatically saved to your Photos app where you can edit, share, or export them. The quality of these recordings can be quite high, making them suitable for tutorials, demonstrations, or troubleshooting.
Benefits of iPad Screen Recording Feature
The built-in screen recording feature offers several advantages for iPad users. First, it requires no additional apps or subscriptions, saving you money and storage space.
Creating instructional content becomes effortless. You can record step-by-step tutorials for friends, family, or colleagues who need guidance with apps or features.
Screen recording is perfect for:
- Capturing gameplay footage
- Creating app demonstrations
- Recording online presentations
- Saving important video calls
- Documenting technical issues for support
The ability to record with audio narration makes explanations clearer and more personal. You can toggle this option on or off depending on your needs.
File sizes are manageable, especially for shorter recordings, making sharing via email or messaging apps convenient. For professional use, the high-quality capture is suitable for educational content or business presentations.
Preparing Your iPad for Screen Recording
Before you can start recording your iPad screen, you need to set up a few things. Getting your iPad ready takes just a few simple steps to ensure smooth recordings.
Customize Controls in the Control Center
To record your screen on iPad, you first need to add the Screen Recording button to your Control Center. This makes it easy to start and stop recordings whenever you need.
To add this feature, open the Settings app on your iPad. Tap on “Control Center” from the left sidebar or main menu. Look for the Screen Recording option in the “More Controls” section.
Tap the green plus icon next to Screen Recording to add it to your Control Center. Once added, it will appear in the “Included Controls” section. You can rearrange the position by dragging the three horizontal lines next to it.
You can also customize other controls while you’re here to make your iPad more efficient for your recording needs.
Ensuring Sufficient Storage Space
Screen recordings can take up significant storage space on your iPad, especially for longer videos. Check your available storage before starting.
To check storage, go to Settings > General > iPad Storage. The colored bar at the top shows your used and available space. If you’re running low, consider these options:
- Delete unused apps or large files
- Transfer old recordings to your computer
- Use cloud storage like iCloud
- Reduce recording length to essential content only
A one-minute screen recording typically uses about 40-60MB of storage. Check the file size of a short test recording to estimate how much space you’ll need for your project.
For optimal quality without storage issues, close unnecessary apps before recording to free up both storage and processing power.
How to Start and Stop Recording
Recording your iPad screen is simple once you know the right steps. The process involves using the Control Center to start and stop your recordings.
Steps to Initiate Screen Recording
First, you need to make sure the Screen Recording feature is added to your Control Center. If it’s not there yet, go to Settings > Control Centre and tap the green “+” icon next to Screen Recording to add the control.
To begin recording:
- Swipe down from the top-right corner of your iPad screen to open Control Center
- Tap the gray Record button (looks like a circle inside another circle)
- Wait for the three-second countdown to finish
Want to record with audio? Press and hold the Screen Recording button before tapping Start Recording, then tap the microphone icon to turn it on. This is perfect for tutorials or when you need to explain what’s happening on screen.
Your iPad will now capture everything that appears on your screen.
How to Stop Recording the iPad Screen
When you’re finished recording and want to stop, you have two easy options:
Option 1: Tap the red status bar or red clock at the top of your screen. A popup will appear asking if you want to stop recording. Tap “Stop” to end the recording.
Option 2: Open Control Center again by swiping down from the top-right corner, then tap the red Record button.
After stopping, your iPad will automatically save the recording to your Photos app. You can find it in your camera roll or the Recently Added album.
You can edit your screen recording right in the Photos app. Trim the beginning or end by tapping “Edit” and using the trim tools at the bottom of the screen.
Screen Recording with Audio on iPad
Recording your iPad screen with sound adds a new dimension to your tutorials, gameplay videos, or demonstrations. You can capture both internal app audio and your own voice commentary.
How to Include Sound in Your Screen Recording
To record your iPad screen with audio, first make sure Screen Recording is added to your Control Center. Go to Settings > Control Center and add Screen Recording if it’s not already there.
When you’re ready to record, swipe down from the top-right corner to open Control Center. Instead of tapping the record button immediately, long-press it to reveal additional options.
You’ll see a microphone button appear. When the microphone is on, it will be highlighted in red. This allows you to record with sound.
After selecting your audio preferences, tap “Start Recording” and wait for the 3-second countdown. Your iPad will now capture both screen activity and audio.
Microphone Recording During Screen Capture
By default, the iPad records your voice through the microphone, not the internal app audio. This is perfect for creating narrated tutorials or adding commentary to your recordings.
If you need to capture internal audio from your iPad (like game sounds or music from apps), make sure the microphone is enabled when you start recording.
For the best audio quality:
- Record in a quiet environment
- Speak clearly and at a consistent volume
- Position yourself close to the iPad’s microphone
- Consider using external microphones for professional recordings
Your screen recordings with audio are automatically saved to the Photos app when you stop recording by tapping the red status bar and confirming.
Advanced Screen Recording Tips
Take your iPad screen recording skills to the next level with these specialized techniques. These tips will help you capture exactly what you need with better quality and less hassle.
Recording Specific Apps like Excel and Word
When recording Microsoft Office apps on your iPad, tap the Screen Recording button in Control Center and navigate to your Excel or Word document before the recording starts.
For Excel spreadsheets, zoom to the specific cells you want to highlight before recording. This makes formulas and data easier to see. You can use Apple Pencil to point to important information while recording.
In Word, consider enabling “Read Mode” for cleaner recordings without toolbars. This gives your recording a more professional look.
To capture audio explanations with your Office app recordings, long-press the Screen Recording icon and tap the microphone icon to enable audio before starting.
Pro tip: Close unnecessary notifications before recording to avoid interruptions. Use Do Not Disturb mode by swiping into Control Center and tapping the Focus mode icon.
Capturing Gameplay Footage Effectively
For high-quality gameplay recordings, adjust your iPad settings before starting. First, enable Screen Recording in Control Center if you haven’t already.
Free up memory by closing background apps. This prevents lag during intensive gaming sessions. To close apps, swipe up from the bottom and hold, then swipe up on app cards.
For better visual quality:
- Set screen brightness to 70-100%
- Turn on Low Power Mode only if necessary
- Position yourself in good lighting if using facecam
Connect to power while recording longer gameplay sessions to avoid battery drain interruptions. The built-in screen recording feature can record up to several hours, but your storage space will be the limiting factor.
Consider using a Bluetooth controller instead of touching the screen to avoid recording your fingers during gameplay.
Editing Your iPad Screen Recordings
After capturing your screen recording, you can enhance it with basic edits or more advanced features depending on your needs. iPad offers both built-in options and third-party alternatives for editing your recordings.
Using iPad’s Built-In Editing Tools
Once you’ve completed your screen recording, you can find it in your Photos app. Tap on the recording to open it, then tap “Edit” in the top-right corner to access the basic editing tools.
The simplest edit you can make is trimming your video. Tap the trim icon, then drag the yellow handles at either end of the timeline to remove unwanted portions from the beginning or end of your recording. This is helpful for cutting out mistakes or preparation time.
You can also adjust your recording using the Photos app’s built-in tools:
- Adjust lighting and color: Tap the adjustment icon to modify brightness, contrast, and saturation
- Add filters: Apply preset filters to change the visual style
- Crop or rotate: Remove unwanted portions or reframe your recording
When you’re satisfied with your edits, tap “Done” to save your changes.
Third-Party Video Editing Applications
For more advanced editing capabilities, consider using third-party apps that offer professional-grade tools.
iMovie comes pre-installed on your iPad and provides more editing features than the Photos app. With iMovie, you can:
- Combine multiple screen recordings
- Add text overlays and titles
- Insert transitions between clips
- Include background music or voiceovers
- Apply more sophisticated filters and effects
Other powerful third-party options include LumaFusion, Adobe Premiere Rush, and CapCut, which offer even more robust editing features for your screen recordings.
When choosing an editing app, consider your skill level and project needs. Basic trimming might be sufficient for simple tutorials, while more complex instructional videos might benefit from text annotations and professional transitions.
External Screen Recording Options
iPads offer several ways to capture what happens on external displays connected to your device. These options can help you create tutorials, demonstrations, or save content from secondary screens.
Using a USB Cable for Screen Recording
You can connect your iPad to a computer using a USB cable to record your iPad’s screen on a larger display. This method provides better quality than the built-in screen recording feature.
To set this up, you’ll need:
- A compatible USB cable (Lightning or USB-C depending on your iPad model)
- A computer with recording software installed
- The appropriate drivers if needed
First, connect your iPad to your computer with the USB cable. On Mac computers, you can use QuickTime Player to record. Open QuickTime, choose “File” > “New Movie Recording,” then select your iPad from the source dropdown menu.
For Windows computers, you might need to install additional software to recognize your iPad as a video source. Once connected, you can record your iPad screen through your computer’s recording program.
Third-Party iPad Screen Recording Software
Several third-party apps offer enhanced recording capabilities, especially for external monitors. These apps can capture your iPad screen when connected to external displays.
Movavi Screen Recorder provides professional-level recording features for iPad users. It allows you to capture your iPad screen when connected to external monitors and offers editing tools for your recordings.
DU Recorder is another popular option that some users recommend for external screen recording. While the built-in iOS screen recording tool only captures the iPad’s main display, these third-party solutions can help you record content from external monitors.
When choosing third-party software, consider factors like recording quality, editing features, and compatibility with your specific iPad model and iOS version.
Frequently Asked Questions
Screen recording on an iPad can sometimes be tricky. Here are answers to common questions to help you capture perfect screen recordings every time.
What steps are required to enable screen recording on an iPad?
To enable screen recording on your iPad, first go to Settings, then Control Center. Look for the Screen Recording option and tap the plus icon next to it to add it to your Control Center.
This one-time setup ensures the screen recording button will be available whenever you need it. After enabling it, you can simply swipe down from the top-right corner of your screen to access the Control Center and start recording.
Why is there no sound when I screen record on my iPad?
If your screen recording has no sound, you likely haven’t enabled audio recording. Before starting your recording, press deeply or long-press on the screen recording button in Control Center to access additional options.
Make sure the microphone audio option is turned on (it will be red when active). This allows your iPad to capture sound along with the video.
Remember that some apps restrict audio recording due to copyright protections.
How can I add the screen record button to the Control Center on my iPad?
If the screen record button doesn’t appear in your Control Center, you need to add it manually. Open Settings, then tap Control Center.
Under “More Controls,” find and tap the plus icon next to “Screen Recording.” This moves the option to your included controls. The button will now appear when you open the Control Center by swiping down from the top-right corner of your screen.
What should I do if my iPad screen recording feature is not working?
If screen recording isn’t working, try restarting your iPad first. This often resolves temporary glitches in the system.
Make sure your iPad’s software is up to date by checking Settings > General > Software Update. Outdated software can cause features to malfunction.
Check if the app you’re trying to record has restrictions. Some apps block screen recording for security or copyright reasons.
How do I record both system audio and microphone sound on my iPad?
To capture both system audio and your microphone, long-press the screen recording button in Control Center. When the expanded menu appears, tap the microphone button to turn it on.
When the microphone is enabled, your iPad will record both the system audio (sounds from apps) and your voice commentary simultaneously. This is perfect for creating tutorials or demonstrations.
Can I edit the video after recording the screen on my iPad?
Yes, you can edit your screen recordings directly on your iPad. After stopping the recording, a notification will appear that you can tap to open the video.
The Photos app offers basic editing tools like trimming, adding filters, and adjusting color and exposure. For more advanced editing, you can use iMovie (free on iPads) or download third-party video editing apps from the App Store.
You can also transfer your recordings to a Mac for more extensive editing in apps like iMovie or Final Cut Pro.


