Getting started with a Cricut machine can feel overwhelming at first, but this crafting powerhouse is actually quite user-friendly once you understand the basics. Your Cricut machine opens up a world of creative possibilities, from custom t-shirts and greeting cards to intricate home decor and personalized gifts. Learning how to use your Cricut properly will save you time, materials, and frustration while unlocking your full creative potential.
The journey begins with understanding your specific Cricut model and setting up Cricut Design Space on your computer or mobile device. This software is where the magic happens—allowing you to design, edit, and prepare your projects before sending them to your machine. While it might seem complicated at first, there are plenty of beginner-friendly tutorials that break down the process into manageable steps.
How to Use a Cricut: A Guide for Beginners in 2025
Cricut machines are powerful cutting tools that let you create custom crafts, decals, cards, and more with precision and ease. Whether you’re new to crafting or upgrading to the latest model, this beginner-friendly guide will help you get started with your Cricut in 2025.
1. Unbox and Set Up Your Cricut Machine
- Remove the machine and accessories from the box.
- Plug in the power cord and connect the Cricut to your computer or mobile device via USB or Bluetooth.
- Download and install Cricut Design Space, the free software/app used to create and send designs to your machine.
2. Create or Choose a Design
- Open Cricut Design Space.
- Start a new project by selecting “New Project”.
- You can:
- Upload your own images or SVG files.
- Choose from thousands of free and premium ready-to-make designs.
- Use text tools to add custom lettering.
3. Prepare Your Material and Mat
- Select the material you want to cut (paper, vinyl, fabric, etc.).
- Place the material on a Cricut cutting mat, aligning it with the top-left corner.
- Use the appropriate mat type (LightGrip, StandardGrip, StrongGrip) depending on material thickness.
4. Load the Mat into the Cricut Machine
- Press the Load/Unload button to load the mat.
- Make sure the material is securely adhered to the mat to avoid shifting during cutting.
5. Set Material and Tool Settings
- In Design Space, select the material type.
- The software will automatically suggest blade and pressure settings.
- Ensure the correct blade (Fine Point, Deep Point, Rotary, etc.) is installed in the machine.
6. Start Cutting
- Press the “Make It” button in Design Space.
- Confirm the settings and click “Go” to start cutting.
- The machine will cut your design precisely.
7. Unload and Weed Your Design
- Press the Load/Unload button to remove the mat.
- Carefully peel away excess material (weeding) to reveal your design.
- Use tools like a weeding hook for intricate designs.
8. Apply Your Design
- For vinyl or iron-on materials, use transfer tape or a heat press to apply your design to your project surface.
- Follow material-specific instructions for best results.
Additional Tips for Beginners
- Watch tutorial videos like Master Cricut Design Space in 2025 to get comfortable with the software.
- Start with simple projects to build confidence.
- Join Cricut communities for inspiration and help.
- Keep blades sharp and mats clean for optimal cutting.
By following these steps, you’ll be crafting beautiful projects with your Cricut in no time. For detailed beginner guides and project ideas, check out The Ultimate Cricut Beginner Guide.
Key Takeaways
- Your Cricut machine requires both hardware familiarity and software skills to create successful projects.
- Cricut Design Space is essential for preparing your designs before cutting or drawing with your machine.
- Starting with simple beginner projects helps build confidence and understanding of your machine’s capabilities.
Understanding Your Cricut Machine
Cricut machines are versatile cutting devices that can handle various materials from paper to fabric. They function through a combination of precise blades and digital designs that tell the machine exactly what to cut.
Different Models of Cricut Machines
The Cricut family includes several models designed for different needs and skill levels. The Cricut Joy is the smallest option, perfect for quick, simple projects and tight spaces.
The Cricut Explore series, including the popular Explore Air 2, offers more versatility. These machines can cut over 100 materials and are ideal for most crafters. They include a Fine Point Blade as standard equipment.
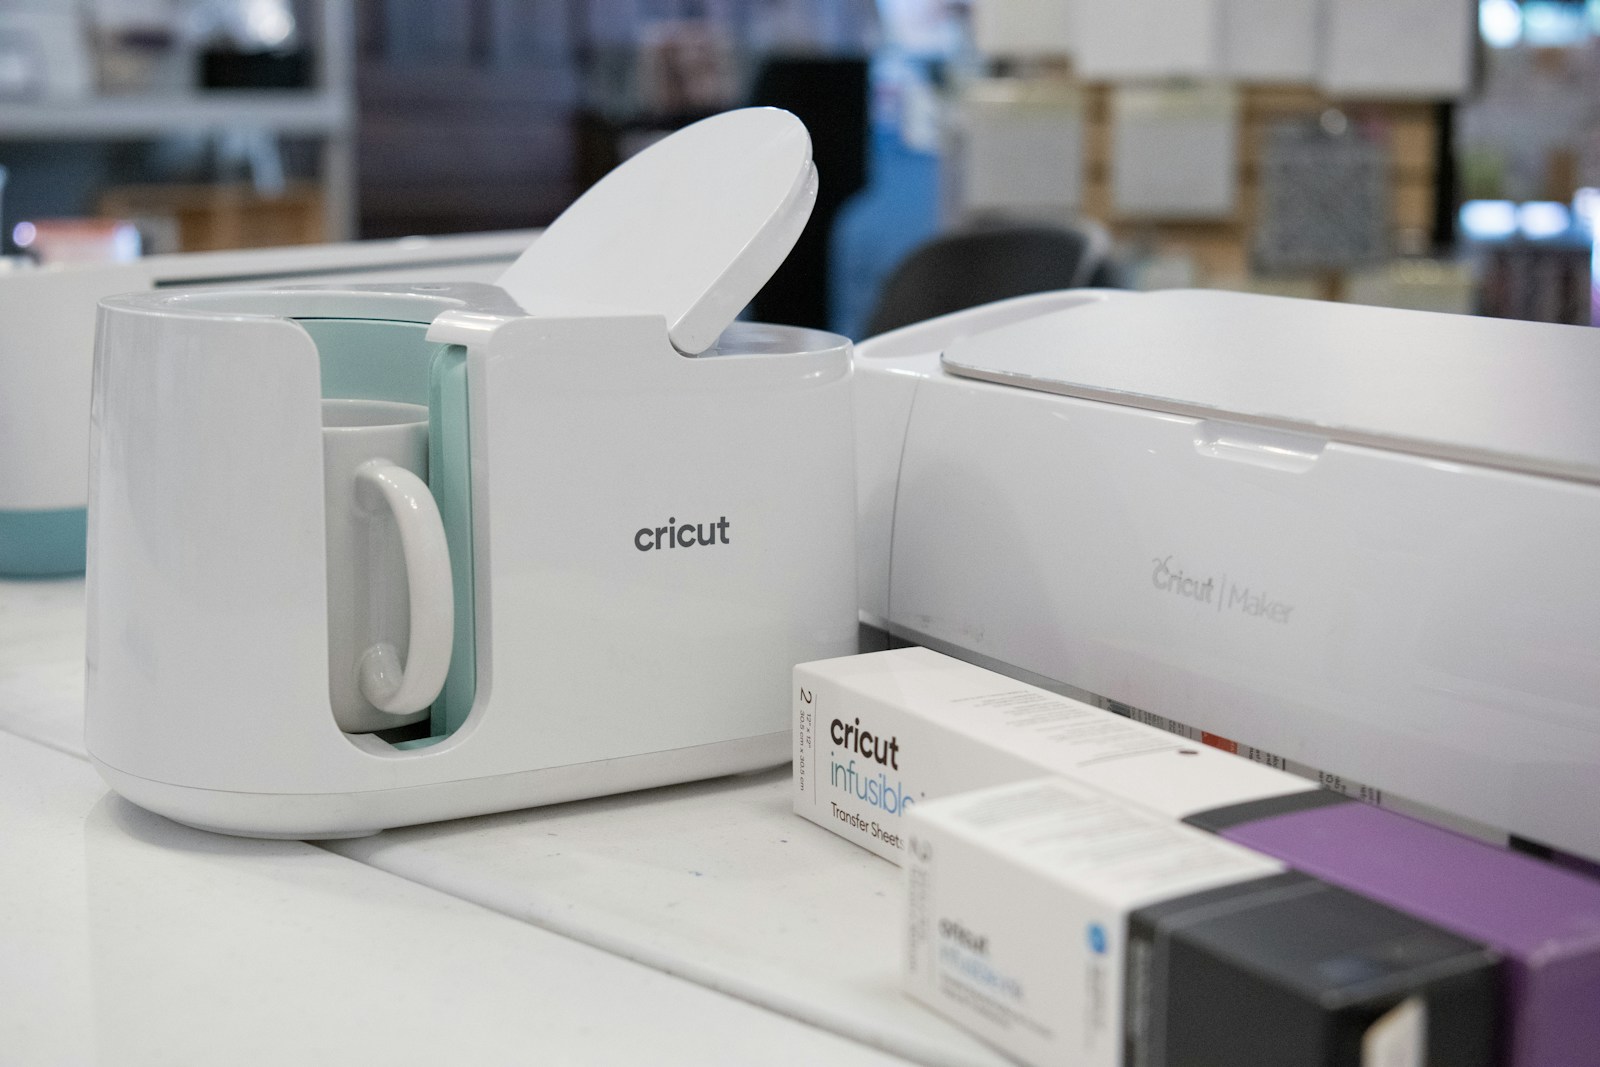
The Cricut Maker and Maker 3 are the premium models with the most cutting force and compatibility with the widest range of tools. These machines can handle thicker materials like balsa wood and leather using specialized blades like the Knife Blade and Rotary Blade.
Each model connects to Design Space software, but they differ in cutting width, speed, and tool compatibility.
Key Features and Accessories
Your Cricut’s capabilities expand significantly with the right tools and accessories:
Essential Blades:
- Fine Point Blade: Standard blade for paper, cardstock, and vinyl
- Rotary Blade: Designed for fabrics (Maker models only)
- Knife Blade: For thick materials like chipboard (Maker models only)
Specialty Tools:
- Scoring Wheel/Stylus: Creates fold lines for 3D projects
- Engraving Tip: Etches designs into metal and other surfaces
- Wavy Blade: Creates decorative edges
- Perforation Blade: Makes tear-off sections
Must-Have Accessories:
- StandardGrip mat for most materials
- LightGrip mat for thin papers
- StrongGrip mat for thick materials
- Weeding tools for vinyl work
These tools transform your Cricut from a simple cutter into a versatile crafting system.
Setting Up Your Cricut
Setting up your new Cricut is straightforward. First, unbox your machine and remove all packaging materials and protective tape. Place it on a stable surface with enough room around it.
Next, download and install Cricut Design Space software on your computer or mobile device. This is the interface you’ll use to create and send projects to your machine.
Connect your Cricut to power and turn it on. Follow the on-screen prompts to connect it to your computer via USB or Bluetooth. For newer models, you can also use your smartphone or tablet.
Create a free Cricut account if you don’t already have one. This lets you save projects and access Cricut’s design library. Complete the machine setup process through Design Space, which includes a test cut to ensure everything works properly.
Getting Started with Cricut Design Space
Cricut Design Space is the software that powers your creative projects with your Cricut machine. This user-friendly platform allows you to design, customize, and prepare your projects before sending them to your cutting machine.
Creating an Account
To begin using Cricut Design Space, you’ll need to create a free account. Visit the Cricut website or download the Cricut Design Space app on your device. Click the “Sign Up” button and follow the prompts to create your account.
The account setup requires:
- Email address
- Password (create a secure one)
- Basic personal information
Once registered, you can access Design Space from multiple devices. Your projects will sync across platforms, allowing you to start a project on your computer and continue on your tablet or phone.
Remember to verify your email address to activate all features. Cricut offers both free and premium subscription options. The free version provides access to basic features, while Cricut Access subscription unlocks thousands of additional images and fonts.
Navigating the Design Space Interface
When you first open Design Space, you’ll see a clean, intuitive interface with several key areas. The main canvas is your workspace where you’ll create and edit designs.
The top menu bar contains essential functions:
- New Project: Start fresh
- Templates: Pre-sized canvases for specific projects
- Projects: Access saved designs
- Images: Browse the Cricut image library
- Text: Add and format text elements
On the left side, you’ll find your layers panel showing all elements in your project. The right side houses properties panels that change based on what you’ve selected.
The bottom toolbar provides access to common actions like cut, copy, paste, and alignment tools. Learning these basics will help you navigate Design Space confidently as you create your first projects.
Importing and Managing SVG Files
SVG (Scalable Vector Graphics) files are essential for Cricut users because they maintain quality at any size. To import SVG files, click “Upload” in the left sidebar, then select “Upload Image.”
Follow these steps:
- Choose the SVG file from your computer
- Select “Vector Upload” for SVG files
- Name your file and add tags for easy searching
- Save to your library
Your uploaded SVG files appear in your uploads library for future use. You can organize them with tags and favorites for quick access. When working with SVG cut files, Design Space automatically separates the layers based on the file’s structure.
For complex designs, you may need to ungroup the SVG and make adjustments to individual elements. Right-click on the imported design and select “Ungroup” to separate components. This gives you complete control over each piece of your design.
Material Basics
Choosing the right materials for your Cricut projects is essential for successful crafting. Understanding what materials work best for different projects will help you achieve professional results every time.
Types of Materials and Their Uses
Cricut machines can cut a wide variety of materials, each suited for specific projects.
Permanent vinyl is perfect for outdoor projects or items that will be washed frequently. This water-resistant vinyl adheres strongly to surfaces like mugs, tumblers, and car windows. Once applied, it’s designed to last for years without peeling.
Removable vinyl works best for temporary decorations or items you might want to change seasonally. It’s ideal for wall decals, laptop stickers, or temporary labels. You can remove it without damaging surfaces or leaving sticky residue behind.
Iron-on vinyl (also called HTV or heat transfer vinyl) is designed for fabric projects. Use it to customize t-shirts, tote bags, pillowcases, and other textiles. Iron-on vinyl requires heat application with an EasyPress or household iron.
Other popular materials include cardstock for cards and paper crafts, glitter vinyl for sparkly effects, and specialty materials like cork, leather, and wood veneer for unique projects.
Working with Smart Materials
Smart Materials are specially designed for newer Cricut models like the Maker 3 and Explore 3. These innovative materials don’t require a cutting mat, saving you time and extending your cutting length capabilities.
Smart Materials include Smart Vinyl (both permanent and removable), Smart Iron-On, Smart Paper Sticker Cardstock, and Smart Label Writable Paper. They feature a special backing that allows your Cricut to grip and feed the material directly.
The key benefit is the ability to cut projects up to 12 feet long without a mat! This is perfect for creating large wall decals, banners, or multiple designs in one cutting session.
To use Smart Materials, simply load them directly into your compatible machine and select the appropriate material setting in Cricut Design Space. The machine will automatically detect the material type and adjust cutting pressure accordingly.
Using Transfer Tape and Transfer Paper
Transfer tape and transfer paper are essential tools for applying vinyl designs to your projects with precision and ease.
Transfer tape is a clear, sticky sheet used with regular vinyl designs. After cutting and weeding your design (removing unwanted vinyl pieces), place transfer tape over your vinyl design, burnish (rub firmly), then peel up. Your design sticks to the tape, allowing you to position and apply it perfectly to your project surface.
For delicate or intricate designs, use light-grip transfer tape to prevent tearing. For textured surfaces, strong-grip transfer tape provides better adhesion.
Transfer paper is specifically designed for iron-on vinyl projects. Unlike transfer tape, it’s heat-resistant and protects your iron-on vinyl during the heat application process. It comes included with most Cricut iron-on vinyl products.
When applying designs, work slowly and use a scraper tool or credit card to remove air bubbles. Peel the transfer material away at a 45-degree angle for best results.
Preparing Your Designs for Cutting
Getting your designs ready for cutting is a crucial step in the Cricut crafting process. Proper preparation ensures clean cuts and professional-looking results for your projects.
Understanding Kiss Cuts and Full Cuts
When preparing designs in Cricut Design Space, you’ll encounter two main cutting options: kiss cuts and full cuts. A kiss cut only cuts through the top layer of material (like vinyl) while leaving the backing intact. This is perfect for vinyl decals and stickers.
Full cuts slice completely through all layers of your material. Use these for paper crafts, cardstock projects, or when you need to remove the entire design from the sheet.
To specify your cut type in Design Space:
- Select your design
- Click on “Linetype” in the top menu
- Choose “Cut” for full cuts or adjust pressure settings for kiss cuts
For layered designs, you can adjust each element individually to create complex projects with multiple cut depths.
Weeding Techniques and Tools
After cutting your design, you’ll need to weed it—removing the excess material to reveal your final design. This step requires patience and the right tools.
Essential weeding tools include:
- Fine-point weeding tool
- Tweezers
- X-Acto knife
- Weeding rings
For intricate designs, try the “reverse weeding” technique. Apply transfer tape to your entire design first, then remove the backing and weed from the backside. This keeps small pieces from shifting.
Work in good lighting and take your time with detailed areas. For complex designs, weed small sections at a time rather than tackling the entire project at once. This methodical approach prevents accidental removal of parts you want to keep.
Applying Designs with Transfer Tape
Transfer tape is essential for moving your vinyl designs from their backing to your final surface. This clear adhesive sheet temporarily holds your design in place during application.
To use transfer tape effectively:
- Cut a piece slightly larger than your design
- Apply it over your weeded design, pressing firmly with a scraper tool
- Rub thoroughly to ensure the design adheres to the tape
- Slowly peel away the backing, checking that the design sticks to the tape
- Position over your project surface and press firmly
- Peel the transfer tape away at a sharp angle
For stubborn vinyl that doesn’t want to release from the transfer tape, try applying heat with a hair dryer for a few seconds. Different projects may require specific types of transfer tape—standard strength for most projects, strong grip for textured vinyl, or light grip for delicate designs.
Mastering the Cutting Process
The secret to perfect Cricut projects lies in understanding the cutting fundamentals. Proper preparation and technique ensure clean cuts and professional results every time.
Choosing the Right Cutting Mat
Your cutting mat is the foundation of every Cricut project. Different materials require different mats for optimal results:
- StandardGrip (green) – Perfect for medium-weight materials like cardstock, patterned paper, and vinyl
- LightGrip (blue) – Ideal for thin materials like printer paper and vellum
- StrongGrip (purple) – Best for thick materials like chipboard and glitter cardstock
- FabricGrip (pink) – Specifically designed for fabrics
Keep your sticky mat clean by wiping it with a baby wipe after each use. When the adhesive weakens, clean with soap and water, then let it air dry completely.
To extend mat life, rotate which portions you use for cutting. Store mats flat with the protective cover in place to maintain stickiness and prevent dust buildup.
Calibrating Your Blades for Precision
Your Cricut blade is crucial for achieving clean, precise cuts. The fine point blade comes standard with most machines and handles most materials, but proper calibration is essential.
Check your blade housing regularly for material buildup. Remove the blade and clean with aluminum foil by gently pressing it into the foil several times.
For optimal performance:
- Always insert the blade housing completely into the clamp
- Secure it firmly with the clamp lever
- Adjust pressure settings in Design Space based on material thickness
Pro tip: Replace your fine point blade after 3-6 months of regular use. A dull blade causes tearing and incomplete cuts.
When cutting intricate designs, consider using specialized blades like the scoring wheel for creasing or the deep-cut blade for thicker materials.
Executing a Test Cut
Before committing to your full project, always perform a test cut. This simple step can save materials and prevent frustration.
In Design Space, click the “Make It” button, then look for the test cut option on the cut screen. The machine will cut a small triangle within a square.
When examining your test cut, look for:
- Clean edges without tearing
- Complete cuts through the material
- Easy weeding without material lifting
If your test cut isn’t perfect, adjust your pressure settings. Too much pressure can cut through your mat, while too little results in incomplete cuts.
For delicate or expensive materials, test on a scrap piece first. You can also master small, intricate cuts by slowing down your cutting speed in the material settings menu.
Additional Tools and Techniques
Beyond the basic Cricut functions, specialized tools can elevate your crafting experience and help you achieve professional-looking results. These accessories help with precision application and creative design options.
Using Scraper and Burnishing Tools
The Cricut scraper tool is essential for clean project completion. When working with vinyl or transfer materials, use the scraper to remove air bubbles and ensure proper adhesion to your surface. Hold it at a 45-degree angle and apply firm, even pressure across your project.
Burnishing tools work alongside scrapers to perfect your transfers. After placing your vinyl design, use the burnishing tool with moderate pressure to secure the material to transfer tape. This crucial step prevents lifting or misalignment during the final application.
For delicate materials like foil or intricate vinyl cuts, the burnishing tool provides precision that fingers alone can’t achieve. Keep both tools clean between uses to prevent transferring adhesive between projects.
Pro tip: Store your scraper and burnishing tools in a designated spot to prevent damage to their edges, which can affect performance over time.
Creative Uses of Cricut Pens
Cricut pens transform your cutting machine into a precise drawing tool. They come in various tip sizes (0.3mm to 1.0mm) and styles including gel, metallic, and glitter finishes.
Try using multiple pen colors within a single project by pausing your machine between color changes. This technique creates dimension in greeting cards, illustrations, and lettering projects without additional tools.
For unique effects, combine pen work with cut functions. Draw intricate patterns with pens, then have your Cricut cut around or within the design for layered, professional results.
You can also create custom fonts by using the “Write” function instead of “Cut” in Design Space. This allows for personalized text styles that maintain your handwriting aesthetic while ensuring perfect alignment.
Beginner Cricut users should start with basic black pens before investing in specialty colors to master pressure and alignment techniques.
Project Execution and Finishing Touches
Once your design is ready in Cricut Design Space, it’s time to bring your project to life. The execution phase is where your digital creation transforms into a physical item through proper cutting, assembly, and finishing.
Print Then Cut Technique
The Print Then Cut feature allows you to print designs on your home printer, then use your Cricut to cut them out precisely. Start by selecting “Print Then Cut” in Design Space and send your design to your printer.
Your Cricut will recognize the printed design using special registration marks—black lines forming a box around your image. These marks help your machine know exactly where to cut.
For best results, use quality cardstock or printable vinyl. Make sure your printer settings match your material type for vibrant colors and clear edges.
When placing your printed sheet on the cutting mat, align it carefully within the marked areas. The machine will scan for registration marks before cutting, so proper alignment is critical.
Assembling and Layering Elements
After cutting all your project pieces, proper assembly brings everything together. Start by organizing all cut elements before assembly to ensure nothing is missing.
For vinyl projects, use transfer tape to lift your design from its backing and apply it to your surface. Press firmly with a scraper tool to eliminate air bubbles and ensure proper adhesion.
When layering materials:
- Work from bottom to top
- Use adhesive appropriate for your materials
- Allow proper drying time between layers
For 3D projects, use scoring lines as folding guides. A bone folder helps create clean, professional creases without damaging your material.
Consider adding embellishments like rhinestones or ribbon as final touches. These small details can elevate your project from good to extraordinary.
Inspiring Project Ideas and Tutorials
Your Cricut machine opens up a world of creative possibilities. From personalized gifts to home décor, these projects can showcase your creativity while being functional and beautiful at the same time.
Creating Custom Cards and Invitations
Making custom cards and invitations with your Cricut is both rewarding and cost-effective. You can create professional-looking designs for any occasion without the high price tag of store-bought options.
Start with glitter card stock for special occasions like weddings or birthdays. The Cricut cuts intricate designs that would be impossible to achieve by hand. Try these quick project ideas:
- Layered birthday cards with pop-up elements
- Wedding invitations with delicate cutouts
- Thank you cards with personalized messages
- Holiday cards with 3D elements
For beginners, try simple designs with two layers of cardstock. As you gain confidence, experiment with more complex designs using the ready-to-make projects available through Cricut Design Space.
Remember to calibrate your machine before cutting delicate materials. This ensures clean, precise cuts especially when working with intricate designs.
Home Decor and Organization Projects
Transform your living space with custom home décor that perfectly matches your style. Your Cricut can help create organization systems that are both functional and beautiful.
Wall art is one of the most popular Cricut project ideas. Create custom vinyl decals for walls, frames, or canvas. These can range from inspirational quotes to decorative patterns.
For organization, try these practical projects:
- Labeled storage containers for pantry items
- Custom drawer dividers with vinyl labels
- Decorative wall calendars
- Personalized growth charts for children’s rooms
Cut vinyl works perfectly for most home projects, especially for labeling. It’s durable, water-resistant, and comes in hundreds of colors and finishes.
Create custom throw pillows by using iron-on vinyl with simple designs. These make great seasonal décor that can be changed throughout the year.
Personalized Clothing and Accessories
Adding personal touches to clothing and accessories is where your Cricut truly shines. From custom t-shirts to monogrammed bags, these projects make perfect gifts or unique additions to your wardrobe.
Start with simple iron-on vinyl projects:
- Custom t-shirts with favorite quotes
- Monogrammed tote bags
- Personalized baby onesies
- Sports team gear with names and numbers
For more advanced projects, try layering different colored vinyls or combining materials. Mind-blowing DIY accessories like personalized phone cases and custom jewelry can be created with specialty materials.
When working with fabrics, always use a heat press or iron with the correct temperature settings for your material. Test on a small piece of similar fabric first to avoid damaging your project.
Remember to mirror your design when using iron-on vinyl. This simple step ensures your text and images appear correctly when transferred to your item.
Frequently Asked Questions
Many Cricut users have common questions when starting their crafting journey. These answers will help you understand how to use your machine, what supplies you need, and how to create your first projects.
How do I start using my Cricut machine for the first time?
To begin using your Cricut machine, first unbox it and remove all packaging materials. Place your machine on a flat, stable surface with enough room around it.
Next, download and install Cricut Design Space on your computer or mobile device. This software is essential for creating and sending designs to your machine.
Connect your Cricut to power and turn it on. Then connect it to your device either via Bluetooth or USB cable. Follow the on-screen prompts in Design Space to complete setup and calibration.
Try a test cut with the materials that came with your machine before starting your own projects.
What are the essential supplies needed to begin working with a Cricut?
The basic supplies you’ll need include your Cricut machine, cutting mats in various stickiness levels, and blades that came with your machine.
You’ll also need materials to cut, such as cardstock, vinyl, iron-on vinyl, or fabric depending on your projects. These materials come in many colors and patterns.
Cricut tools like weeding tools, scraper tools, and transfer tape are valuable for vinyl projects. For fabric projects, add heat-resistant tape and an EasyPress or iron.
A computer or mobile device with Design Space installed rounds out your essential supply list.
What are the capabilities and limitations of a Cricut machine?
Cricut machines excel at cutting precise shapes from materials like paper, cardstock, vinyl, iron-on, and some fabrics. The machines can draw with pens and some models can also score, deboss, and engrave.
Most Cricut machines can cut materials up to 12 inches wide and virtually unlimited length using the roll holder. Material thickness capability varies by model.
Limitations include the learning curve for Design Space software and the need for a device connection to operate. The Cricut Maker has the widest material compatibility, while other models have more restrictions.
Cricut machines aren’t industrial equipment, so they aren’t designed for high-volume production or extremely thick materials.
Can you provide step-by-step instructions for creating a shirt with a Cricut?
First, create or upload your design in Design Space. Size it appropriately for your shirt and mirror the image (this is crucial for iron-on vinyl).
Cut your iron-on vinyl with the shiny side down on your mat. Select the correct material setting in Design Space and let your Cricut cut the design.
After cutting, weed away excess vinyl using weeding tools to remove everything that isn’t part of your design.
Preheat your shirt with an iron or EasyPress to remove moisture. Position your design shiny side up on your shirt and press according to the vinyl manufacturer’s temperature and time guidelines.
Let it cool slightly before peeling off the carrier sheet. For best results, wash your shirt inside-out after waiting 24 hours.
What is the difference between the various Cricut machine models, such as the Explore Air 2, Maker, and Joy?
The Explore Air 2 is a versatile mid-range machine that cuts over 100 materials including vinyl, paper, and some fabrics. It features dual tool holders and Bluetooth connectivity.
The Cricut Maker is the premium model with more power and versatility for cutting thicker materials like balsa wood and leather. It offers an expanded suite of tools including rotary blades for fabrics and engraving tools.
The Cricut Joy is the compact portable option ideal for small projects like cards, labels, and small decals. It’s designed for quick, simple cuts and can use Smart Materials without a cutting mat.
The newer Maker 3 and Explore 3 models add the ability to use Smart Materials for matless cutting and faster cutting speeds.
Is there a beginner’s guide for operating the Cricut Maker 3 specifically?
To start with your Maker 3, first ensure it’s connected to power and paired with your device via Bluetooth or USB. Open Design Space and complete the initial setup if you haven’t already.
The Maker 3 uses Smart Materials for matless cutting or traditional materials with a mat. Insert your material by aligning it with the guides and pressing the load button.
In Design Space, select your project and material type from the settings menu. The software will guide you through which tools to insert in which clamp.
Practice with simple designs first. The Maker 3 comes with sample materials and projects in Design Space labeled “For Beginners” to help you learn the basics.

