Setting up meetings in Microsoft Outlook helps streamline your scheduling process and keeps your team organized. With just a few clicks, you can create calendar events, invite attendees, and even add Microsoft Teams integration for virtual gatherings. Creating a meeting in Outlook only takes a minute – simply go to Calendar view and select “New Meeting” or “New Event,” then add your title, attendees, location, and time details.
Outlook offers several helpful features that make meeting coordination easier. You can check attendee availability, set reminders, and create recurring meetings for regular team check-ins. The platform also allows you to include meeting agendas directly in the invitation, ensuring everyone arrives prepared and making your meetings more productive.
1. Setting Up a Meeting (Desktop App – Windows/Mac)
The desktop version is the most feature-rich way to schedule.
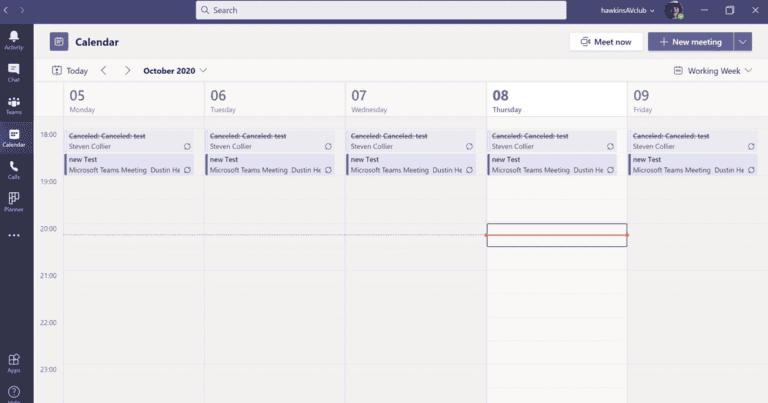
- Open the Calendar: Click the Calendar icon in the bottom-left (or side) navigation bar.
- Start a New Meeting: Click New Meeting in the top ribbon.
- Note: A “Meeting” includes other people; an “Appointment” is just for your own calendar.
- Fill in the Details:
- Title: Give the meeting a clear, concise name.
- Required: Add the email addresses of people who must attend.
- Optional: Add people who are welcome but not required.
- Set the Time: Choose the date and start/end times.
- Make it an Online Meeting: If your organization uses Teams or Zoom, click the Teams Meeting (or Zoom) button in the ribbon to automatically generate a link.
- Write the Agenda: In the large text box at the bottom, include the purpose of the meeting or any documents needed.
- Send: Click Send.
2. Using the “Scheduling Assistant” (Highly Recommended)
To avoid the “Does this time work for you?” back-and-forth, use the Scheduling Assistant to see when your colleagues are free.
- While in the “New Meeting” window, click the Scheduling Assistant tab at the top.
- You will see a grid showing the “Free/Busy” status of all your attendees (if they are in your organization).
- Green means everyone is free; Red means there is a conflict.
- Click on a white space in the grid to automatically move your meeting to that time.
3. Setting Up a Meeting (Outlook Web / Outlook.com)
- Go to your Outlook Calendar.
- Click New Event in the top left.
- Invite Attendees: Type the names or email addresses in the “Invite attendees” box.
- Suggested Times: Outlook Web will automatically suggest times at the bottom of the window based on when the invited people are free.
- Toggle Teams/Skype: Switch the Teams meeting toggle to “On” if you want a virtual link.
- Save/Send: Click Send.
4. Setting Up a Meeting (Mobile App – iOS/Android)
- Open the Outlook app and tap the Calendar icon in the bottom right.
- Tap the (+) plus sign icon.
- Enter the Title and tap People to add attendees.
- Toggle Teams Meeting to “On” if necessary.
- Tap the Checkmark or Send in the top right corner.
5. Advanced Features & Tips
Create a Recurring Meeting
If you have a weekly sync, don’t schedule it every week manually.
- In the meeting window, click Recurrence.
- Choose the frequency (Daily, Weekly, Monthly) and the end date.
- Tip: Avoid “No End Date”—it’s better to set it for 6 or 12 months to keep your calendar clean.
Tracking Responses
Once you’ve sent the invite, you can see who has accepted:
- Open the meeting from your calendar.
- Click the Tracking button in the ribbon.
- It will show you a list of who has Accepted, Declined, or is Tentative.
Meeting Polls (FindTime)
If you are trying to schedule a meeting with people outside your organization and can’t see their calendars:
- In a new email or meeting, look for the Scheduling Poll (formerly FindTime) button.
- This allows you to propose several times, and attendees can vote on which one works best for them.
Best Practices for Outlook Meetings
- Give “Buffer Time”: Instead of an hour, try scheduling for 50 minutes. This gives people 10 minutes to get to their next meeting.
- Attach Files: You can drag and drop PDF or Word files directly into the meeting invite so everyone has the materials beforehand.
- Set a Reminder: By default, Outlook reminds people 15 minutes before. For important meetings, you can change this to 1 hour or 1 day in the “Options” group.
Key Takeaways
- Outlook simplifies meeting creation through the Calendar feature where users can quickly set up events with all necessary details in one place.
- Meeting invitations can include Teams integration for virtual connections, availability checking, and customizable reminder settings.
- Outlook’s scheduling tools help professionals manage their time efficiently by providing options for recurring meetings and attendee coordination.
Understanding Outlook
Microsoft Outlook serves as the central hub for email, calendar, and contact management for millions of professionals worldwide. Its robust meeting scheduling features integrate seamlessly with other Microsoft 365 applications to enhance productivity and streamline communication.
Overview of Microsoft Outlook
Outlook is a personal information manager from Microsoft that functions primarily as an email client but offers much more. Beyond handling emails, it provides a comprehensive calendar system for scheduling meetings and appointments. Users can create appointments and meetings directly from the calendar view.
The platform uses a familiar ribbon interface that makes navigation intuitive for most users. The calendar feature displays days, weeks, or months at a glance, helping professionals manage their time effectively.
When scheduling meetings, Outlook allows users to:
- Check attendee availability with the Scheduling Assistant
- Reserve meeting rooms and resources
- Set up recurring meetings
- Send automatic reminders
Outlook synchronizes across devices, ensuring professionals have access to their schedule whether at their desk or on the go.
Comparison with Other Productivity Tools
Outlook stands out among productivity tools for its deep integration with the Microsoft ecosystem. While Google Calendar and Apple Calendar offer similar functionality, Outlook provides more robust features for corporate environments.
Key advantages over competitors:
- Seamless integration with Exchange Server and SharePoint
- Advanced email management alongside calendar functions
- Comprehensive meeting tracking with acceptance statistics
- Superior delegation capabilities for executive assistants
Unlike standalone calendar applications, Outlook combines communication and scheduling into one interface. This integration reduces context-switching between applications, creating a more efficient workflow.
For teams already using Microsoft 365, the familiar environment reduces training time and improves adoption rates compared to third-party alternatives.
Getting Started with Outlook
Microsoft Outlook offers a robust platform for managing emails, calendars, and meetings across different devices. Before scheduling meetings, users need to properly set up their accounts and understand the basic navigation of the Outlook interface.
Setting Up Your Outlook Account
To begin using Outlook, users must first set up their account. This process varies slightly depending on whether they’re using Outlook.com, Outlook for Windows, or Outlook for macOS.
For Outlook.com, users simply need to:
- Visit outlook.com
- Select “Create account”
- Follow the step-by-step instructions
For Outlook desktop applications, the setup involves:
- Opening the application
- Clicking “File” > “Add Account”
- Entering email address
- Following the automatic setup prompts
Most work accounts use Microsoft 365 or Exchange, which typically configure automatically once the email address is entered. Personal accounts like Gmail or Yahoo may require additional server information.
Navigating the Outlook Interface
The Outlook interface consists of several key elements that help users manage their communications efficiently.
The navigation pane appears on the left side, displaying folders like Inbox, Sent Items, and Calendar. Users can switch between these views by clicking the appropriate icon.
The ribbon at the top contains commands organized into tabs. Each tab reveals different tools relevant to specific tasks. For example, the Calendar tab offers options for creating new appointments and meetings.
The reading pane displays the content of selected items. Users can customize this view through View settings to show previews on the right or bottom, or turn it off completely.
The quick access toolbar provides one-click access to frequently used commands like New Email, Reply, or Delete.
Understanding Outlook Calendar
Outlook Calendar is the central hub for managing meetings and appointments. It offers various views to help users organize their schedules effectively.
Users can access the Calendar by clicking the calendar icon in the navigation pane. The default view shows the current month, but users can switch to daily, weekly, or monthly views using the options at the top of the calendar.
To create new calendar items, users can:
- Click “New Appointment” or “New Meeting” in the ribbon
- Double-click a time slot in the calendar view
- Press Ctrl+N while in Calendar view
Calendar items are color-coded to help distinguish between different types of events. Blue typically represents meetings with others, while purple shows appointments.
The calendar allows users to schedule events with reminders, set recurring meetings, and view free/busy status of colleagues when planning meetings.
Scheduling Meetings in Outlook
Microsoft Outlook provides powerful tools to organize and schedule meetings efficiently. The process involves creating a meeting request, adding essential details, and inviting the right people to attend.
Creating a New Meeting Request
To start scheduling a meeting in Outlook, you need to create a new meeting request. In the new Outlook for Windows, go to your calendar view and select New Event from the top menu.
If you’re using classic Outlook, navigate to your calendar and click New Meeting on the Home tab.
For those who prefer keyboard shortcuts, pressing Ctrl+Shift+Q will also create a new meeting request.
When scheduling an online meeting, Outlook integrates with platforms like Microsoft Teams. You can create an online meeting by selecting the appropriate option in the meeting window.
Adding Meeting Details
Once you’ve created a meeting request, you’ll need to add important details. Start by giving your meeting a clear, descriptive title that helps attendees understand the purpose.
Next, set the date and time for your meeting. Outlook allows you to specify both start and end times to help with time management.
The location field can be used for physical meeting rooms or virtual meeting links. For in-person meetings, you can use the Room Finder feature to find available rooms.
In the meeting body, include an agenda and any relevant information attendees should know beforehand. Adding context helps participants prepare effectively.
Don’t forget to set up reminders to notify you and the attendees before the meeting starts.
Inviting Attendees
To invite people to your meeting, add their email addresses to the Required or Optional attendee fields. Required attendees are those whose presence is essential, while optional attendees may attend if available.
You can also add attendees as Resources if they’re providing specific services or equipment for the meeting.
Outlook’s Scheduling Assistant helps find times when all required attendees are available. This tool shows everyone’s availability side by side, making it easier to pick a suitable time.
When sending the invitation, attendees will receive an email with options to Accept, Tentatively Accept, or Decline the meeting. This feedback helps you track who will attend.
For large meetings, consider using the bcc feature to keep the attendee list private or to avoid cluttering everyone’s inbox with responses.
Advanced Meeting Scheduling
Outlook offers powerful features beyond basic appointment creation to enhance productivity and streamline collaboration. These tools help manage complex scheduling scenarios, connect remote teams, and find optimal meeting times for busy groups.
Setting Up Recurring Meetings
Recurring meetings save time by automating regular appointments in Outlook. To create one, open a new meeting request and click the Recurrence button in the ribbon.
Users can select from common patterns like daily, weekly, or monthly. For example, a team can schedule a standing Monday morning meeting that repeats every week automatically.
The recurrence dialog provides flexible options:
- End date: Set a specific end date or number of occurrences
- Day selection: Choose specific weekdays for weekly meetings
- Custom patterns: Create monthly meetings that occur on the “first Monday” or “last Friday”
Changes to individual instances are possible without affecting the entire series. Users can also cancel single occurrences while maintaining the recurring pattern.
Organizing Online Meetings
Outlook integrates seamlessly with collaboration tools for virtual meetings. Users can schedule Microsoft Teams meetings directly from Outlook by clicking the Teams Meeting button in the ribbon.
This integration automatically adds join links, dial-in numbers, and meeting IDs to invitations. Recipients can join with a single click from their calendar.
For online meetings, users can:
- Add meeting agendas directly in the body of the invitation
- Attach relevant documents for pre-meeting review
- Set meeting options like lobby controls and presenter roles
Outlook’s mobile app also supports virtual meeting scheduling, allowing users to create and manage Teams meetings on the go. This ensures consistent meeting management across devices.
Using Scheduling Assistant
The Scheduling Assistant helps find optimal meeting times when coordinating multiple attendees. It displays everyone’s availability side-by-side, with color-coding to identify free and busy periods.
To access this tool, create a new meeting and click the Scheduling Assistant button. Add required and optional attendees to compare calendars automatically.
Key features include:
- Free/busy indicators: Green for available, blue for tentative, purple for busy
- Room finder: Locate available meeting rooms based on capacity and equipment
- Suggested times: Outlook can recommend times when all participants are free
Users can also check scheduling conflicts for resources like conference rooms or equipment. The tool even works across organizations when free/busy information is shared.
For complex meetings, users can poll attendees about preferred times using the “New Meeting Poll” option in Outlook. This feature helps schedule meetings efficiently when calendars aren’t shared.
Enhancing Meeting Productivity
Effective meetings in Outlook require thoughtful planning and strategic use of built-in features. The right approach to scheduling, reminders, and follow-up can significantly increase team productivity and meeting outcomes.
Utilizing Reminders
Setting up effective reminders is crucial for meeting productivity. Outlook allows users to customize reminder times for different types of meetings based on their importance and preparation needs.
For critical meetings, configure reminders 24 hours in advance to ensure adequate preparation time. Standard meetings might need only 15-30 minute alerts.
Use these reminder settings:
- High-priority meetings: 1 day + 1 hour before
- Standard meetings: 15 minutes before
- Recurring team check-ins: 5 minutes before
Outlook also allows for multiple reminders for a single meeting. This tiered approach helps meeting participants prepare materials in advance and be punctual for the actual meeting time.
Meeting Time Management
Effective time management starts with strategic scheduling. Outlook’s scheduling assistant helps find optimal meeting times that work for all participants.
Using color-coding in the Outlook calendar creates visual organization. Assign specific colors to different meeting types or projects for quick visual reference.
Consider these time management techniques:
- Schedule meetings in 25 or 50-minute blocks instead of 30 or 60 minutes
- Build in 5-10 minute buffers between meetings
- Designate meeting-free blocks for focused work
Calendar templates can save time when scheduling recurring meetings. Create templates with pre-filled agendas and attendance lists for regular team check-ins.
Follow-Up Best Practices
Meeting productivity extends beyond the scheduled time slot. Outlook provides several tools to manage effective follow-up processes.
After each meeting, send summary emails with action items clearly marked. Use Outlook’s flagging feature to mark emails requiring responses or actions from team members.
Create follow-up tasks directly from emails by dragging messages to the Tasks section. This maintains connection between the original communication and assigned work.
Task integration between Outlook calendar and to-do lists helps track meeting outcomes. Teams can use shared task lists to monitor progress on action items from previous meetings.
Schedule brief check-in meetings between major project discussions to ensure progress continues and address any obstacles promptly.
Delegating Access in Outlook
Delegating access in Outlook allows you to grant someone permission to manage your email and calendar. This feature is especially useful for executives, managers, or anyone who needs assistance with managing their communications.
Granting Delegate Permissions
To set up a delegate in Outlook, start by accessing the Delegate Access settings. In Outlook for Windows, click on File, then select Account Settings → Delegate Access. Click the Add button to choose delegates from your organization’s address book.
When adding a delegate, you can specify their permission levels for different folders:
- Calendar: Editor, Author, or Reviewer
- Inbox: Editor, Author, Reviewer, or None
- Tasks, Notes, and other folders: Various permission levels
Delegates can be granted permissions to read items or to read, create, modify, and delete items. For security reasons, consider limiting access to only what’s necessary for the delegate’s role.
Managing Meetings as a Delegate
Delegates with appropriate permissions can schedule and respond to meetings on behalf of the person they assist. When composing an email or meeting request, delegates can select “From” to specify they’re acting on someone else’s behalf.
To schedule a meeting as a delegate:
- Open the calendar of the person you’re assisting
- Create a new meeting request
- Add attendees, subject, location, and time
- Send the invitation
The meeting invitation will indicate it was sent by a delegate on behalf of the calendar owner. Recipients will see “on behalf of” in the sender field.
Delegates can also respond to meeting invitations, though currently there are limitations with delegating specific occurrences of recurring meetings.
Integrations and Add-Ins
Outlook’s power extends beyond basic email and calendar functions through strategic integrations with communication platforms. These connections streamline workflows and enhance productivity without requiring users to switch between multiple applications.
Connecting RingCentral with Outlook
RingCentral integration with Outlook creates a seamless communication experience for business users. The RingCentral add-in for Outlook enables users to schedule and join meetings directly from their Outlook calendar.
Installation is straightforward through the Microsoft AppSource or via administrative deployment for organizations. Once installed, the add-in appears in the Outlook ribbon.
Users can schedule RingCentral meetings while creating calendar events, eliminating the need to toggle between platforms. Meeting details automatically populate in the invitation, including join links and dial-in numbers.
For RingSense customers, this integration offers enhanced analytics on communication patterns. The system can track meeting frequency, duration, and participant engagement without manual data entry.
Enhancing Outreach with Text Messages
SMS capabilities within Outlook provide an efficient alternative when email isn’t the optimal communication channel. Through specialized add-ins, users can send text messages directly from their Outlook interface.
These integrations typically connect to mobile carriers or messaging platforms. Users select recipients from their Outlook contacts and compose messages without switching to their phones.
For time-sensitive communications, text messages often achieve higher engagement rates than emails. Meeting reminders delivered via SMS can reduce no-show rates significantly.
Business users particularly benefit from this functionality when confirming appointments or sending quick updates. The system maintains a record of all communications, creating a comprehensive history of client interactions across both email and text channels.
Account Management and Growth
Effective management of your Outlook account enhances your meeting scheduling capabilities and overall productivity. Implementing the right strategies can help streamline your workflow and maximize the benefits of Outlook’s meeting features.
Monitoring Your Account Performance
Regular assessment of your Outlook account usage provides valuable insights for optimization. Outlook Calendar offers tools to track meeting attendance, response rates, and scheduling patterns.
Check your calendar statistics to identify peak meeting times and potential scheduling conflicts. This information helps in planning more efficient meetings.
Review meeting acceptance rates to understand attendee engagement levels. Low acceptance may indicate scheduling issues or meeting relevance problems.
Monitor your storage usage, especially if you frequently include attachments in meeting invites. Exceeding storage limits can impact calendar functionality.
Setting up automatic calendar analytics reports can provide monthly insights about your meeting habits. These reports highlight opportunities for better time management.
Strategies to Grow Your Account
Expanding your Outlook meeting capabilities requires intentional action and knowledge of advanced features. Begin by fully utilizing the meeting scheduling assistant to find optimal meeting times automatically.
Create meeting templates for recurring events to save time and maintain consistency. Templates can include standard agendas, required attendees, and resources.
Integrate Outlook with other Microsoft 365 applications like Teams for enhanced online meetings. This integration improves collaboration during virtual gatherings.
Develop a system for categorizing meetings with color coding. This visual organization helps prioritize commitments and identify meeting types at a glance.
Consider upgrading to premium Outlook features for additional meeting tools like advanced analytics and expanded storage options.
Frequently Asked Questions
Managing meetings in Outlook involves several key features that help users organize their schedules efficiently. Here are answers to common questions about setting up different types of meetings and appointments in Outlook.
How do you schedule a recurring meeting using Outlook?
To create a recurring meeting in Outlook, start by creating a new meeting from the calendar view. After filling in the meeting details, click the “Recurrence” button in the ribbon.
Select the desired pattern (daily, weekly, monthly, or yearly) and specify how often it should repeat. Users can also set an end date or determine how many occurrences to schedule.
Once all recurrence settings are configured, click “OK” to return to the meeting window, then send the invitation to attendees.
What are the steps to invite external participants to an Outlook meeting?
To invite external participants, create a new meeting and add their complete email addresses in the “To” field. Outlook will recognize external addresses and send invitations even to people outside the organization.
For security reasons, some organizations may have restrictions on sharing meeting details with external participants. Users should check their company policies before sending sensitive information.
External participants will receive an email invitation they can respond to, even if they don’t use Outlook themselves.
How can you find participant availability when organizing a meeting in Outlook?
Outlook offers a Scheduling Assistant that displays the availability of all participants. After creating a new meeting, click the “Scheduling Assistant” button in the ribbon.
The assistant shows a visual grid of when each person is free or busy. Free times appear as white space, while busy times show in color blocks.
Users can also add required and optional attendees directly within the Scheduling Assistant. The tool suggests optimal meeting times based on when all required attendees are available.
What is the process for setting up a Microsoft Teams meeting through Outlook?
To create a Teams meeting in Outlook, open the calendar and click “New Meeting”. Then click the “Teams Meeting” button in the ribbon to add Teams information.
Fill out the meeting details including title, time, and attendees. Outlook automatically adds a Teams meeting link to the invitation.
When recipients receive the invitation, they can join the meeting by clicking the Teams link at the scheduled time. The meeting organizer doesn’t need to take any additional steps to start the meeting.
How can one create and manage appointment slots using Outlook’s Calendar?
To create appointment slots in Outlook Calendar, users can block time on their calendar as “Available” or “Tentative” rather than “Busy.” This helps indicate when they’re open for appointments.
Some organizations use the Bookings feature integrated with Outlook to allow others to schedule appointments during designated times. This requires additional setup but provides a self-service scheduling system.
Users can also share their calendars with specific people, allowing colleagues to see available times and coordinate meetings more efficiently.
What is the procedure for adding a meeting link to an Outlook calendar invite?
To add a meeting link to an Outlook invitation, users can select either Teams Meeting or Skype Meeting options in the ribbon when creating a new meeting. This automatically inserts the appropriate link.
For other platforms like Zoom or WebEx, users need to create the meeting in that platform first. Then copy the generated meeting link and paste it into the Outlook invitation body.
Including clear instructions with the link helps attendees understand how to join, especially if they’re unfamiliar with the platform being used.