Is your PS4 not displaying on your TV? You’re not alone. Many PlayStation 4 owners face HDMI port problems at some point. The small connector on the back of your console is surprisingly fragile and can break from regular use or accidental damage.
Looking at a blank TV screen with a “No Signal” message can be frustrating. A damaged HDMI port is often the culprit when your PS4 won’t connect to your TV, and fixing it might be simpler than you think. Before rushing to buy a new console or paying for expensive repairs, try checking the HDMI port for visible damage or bent pins.
Sometimes the solution is as simple as trying a different HDMI cable or gently pushing down the tabs inside the port to create a tighter connection. For more serious damage, you might need to consider a complete HDMI port replacement, which can save you hundreds compared to buying a new system.
How to Fix a PS4 HDMI Port
If your PlayStation 4 shows “No Signal”, flickering video, or distorted images, the HDMI port may be loose, bent, or broken.
This is one of the most common PS4 hardware failures — but it can be repaired with the right tools and patience.
⚙️ Common Signs of a Damaged HDMI Port
Before you open the console, confirm that the HDMI port is the issue.
| Symptom | Likely Cause |
|---|---|
| “No Signal” on TV | Broken or loose HDMI pins |
| Flickering or distorted image | Partially connected port |
| No audio | Damaged HDMI data lines |
| Bent or missing pins inside port | Physical damage |
| Cable feels loose or won’t insert fully | Port housing damage |
If you’ve tried multiple cables and TVs with no improvement, the port itself is likely faulty.
(Source: GamerAfter)
🧰 What You’ll Need
Tools
- Phillips #0 and #1 screwdrivers
- Torx T8 or T9 security screwdriver
- Plastic prying tools
- Tweezers
- Soldering iron (fine tip, 25–40W)
- Desoldering braid or pump
- Flux and lead-free solder
- Isopropyl alcohol (90%+) and cotton swabs
- ESD-safe mat and wrist strap (optional but recommended)
Replacement Part
- New PS4 HDMI port (specific to your PS4 model — Fat, Slim, or Pro)
- Available from electronics suppliers or repair sites like iFixit or Amazon.
(Source: Clever Creations)
⚠️ Important Safety Notes
- Unplug the PS4 completely before opening it.
- Ground yourself to prevent static discharge.
- If you’re not comfortable soldering, consider taking it to a professional repair shop — HDMI port replacement involves precision.
🧩 Step-by-Step: Repairing the PS4 HDMI Port
Step 1: Diagnose the Problem
- Test your PS4 with a known working HDMI cable and TV.
- Inspect the HDMI port with a flashlight:
- Look for bent pins, debris, or metal damage inside.
- If the pins are damaged or the cable feels loose, proceed with the replacement steps.
Step 2: Disassemble the PS4
- Remove the top cover:
- Use a T8 or T9 security screwdriver to remove the screws on the back.
- Gently lift the top panel off.
- Remove the power supply and optical drive:
- Unscrew and disconnect the ribbon cables carefully.
- Keep all screws organized.
- Access the motherboard:
- Remove the metal shielding.
- The HDMI port is soldered directly onto the motherboard near the rear I/O section.
(Source: Robots.net – Repair HDMI Port on PS4)
Step 3: Remove the Damaged HDMI Port
- Apply flux to the HDMI port’s solder joints.
- Use a soldering iron and desoldering braid to heat and remove the old solder.
- Once the solder is melted, gently lift the HDMI port from the board using tweezers.
- Be careful not to damage the surrounding traces or pads.
💡 Tip: If the port doesn’t come off easily, reheat the joints evenly. Don’t force it.
Step 4: Clean and Prepare the Area
- Use isopropyl alcohol and a cotton swab to clean the solder pads.
- Inspect the area for lifted pads or damaged traces — repair with thin jumper wires if necessary.
Step 5: Install the New HDMI Port
- Align the new HDMI port with the board’s solder pads.
- Apply a small amount of flux to help the solder flow.
- Solder the anchor points (the metal legs) first to secure the port in place.
- Solder each data pin carefully:
- Use a fine-tipped soldering iron.
- Apply minimal solder to avoid bridging pins.
💡 Tip: Use magnification (like a jeweler’s loupe) to inspect solder joints for shorts.
Step 6: Reassemble the PS4
- Reinstall the metal shielding, optical drive, and power supply.
- Reconnect all ribbon cables.
- Reattach the top and bottom covers.
- Plug in the console and reconnect the HDMI cable.
Step 7: Test the HDMI Connection
- Power on the PS4.
- Check for a signal on your TV.
- If the display appears normally, the repair was successful.
If there’s still no signal:
- Double-check the solder joints on the HDMI pins.
- Inspect for any bridged connections or lifted pads.
- Ensure the HDMI cable and TV input are working.
🧠 Alternative Fixes (If the Port Isn’t Physically Broken)
If the HDMI port looks fine but still doesn’t output video:
- Try Safe Mode: Hold the power button until two beeps → connect controller → choose Change Resolution.
- Replace the HDMI IC chip (Panasonic MN86471A) — handles HDMI signal processing.
(This requires advanced soldering and should be done by professionals.)
(Source: DiskSpaceFan – Fix PS4 HDMI Port)
🧾 Summary: PS4 HDMI Port Repair Overview
| Step | Task | Tools Needed |
|---|---|---|
| 1 | Diagnose issue | Flashlight, test cable |
| 2 | Disassemble PS4 | Torx, Phillips screwdrivers |
| 3 | Remove old port | Soldering iron, desoldering braid |
| 4 | Clean area | Isopropyl alcohol |
| 5 | Install new port | Flux, solder, tweezers |
| 6 | Reassemble console | Screwdrivers |
| 7 | Test HDMI output | TV + HDMI cable |
🧰 Helpful Resources
- Clever Creations – PS4 HDMI Port Repair Guide
- Asurion – How to Fix PS4 HDMI Port Issue
- GamerAfter – Ultimate PS4 HDMI Port Repair Guide
- Robots.net – Repair HDMI Port on PS4
✅ Final Takeaway
A broken HDMI port is one of the most common PS4 hardware issues — but with patience and the right tools, it’s fixable.
If you’re not experienced with soldering, professional repair shops can replace the port for $80–$150, often restoring full functionality in under an hour.
Key Takeaways
- Check for visible damage and try basic fixes like using a different HDMI cable before assuming you need a repair.
- You can sometimes fix connection issues by carefully adjusting the metal tabs inside the HDMI port for a tighter fit.
- For severely damaged ports, replacement is possible as a DIY project or through professional repair services.
Understanding the PS4 HDMI Port
The HDMI port is a critical component of your PlayStation 4 console. It serves as the main connection point between your PS4 and your TV or monitor, making it essential for gameplay.
The Role of the HDMI Port in PS4 Functionality
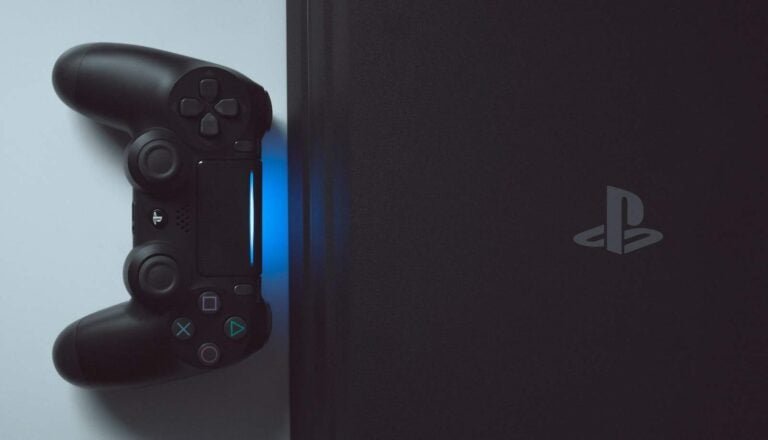
The HDMI port on your PS4 is located on the upper center of the back of your console. This small but mighty connector transmits both high-definition video and audio signals to your display device in a single cable.
Without a properly functioning HDMI port, you won’t be able to see or hear anything from your PS4. The port contains several small pins that must make proper contact with your HDMI cable to successfully transfer data.
The PS4’s HDMI port supports various resolutions, including 720p, 1080p, and on the PS4 Pro, 4K output. This allows you to experience games and media with crystal-clear visuals and immersive sound.
Common Issues with PS4 HDMI Ports
PS4 HDMI ports frequently develop problems due to their frequent use and fragile design. One common issue is pins being forced through the back when cables are inserted incorrectly or with too much force.
Physical damage can occur when consoles are moved while cables remain connected, putting stress on the port. You might notice a loose HDMI port, which can cause intermittent signal or no display at all.
Some users experience “no signal” errors even when cables appear properly connected. This often happens because internal connections have broken or the port has become misaligned.
Bent pins inside the port can also prevent proper connection. Sometimes, the two tabs at the top of the port may need to be slightly adjusted to improve connection.
Diagnosing HDMI Port Problems
When your PS4 isn’t displaying on your TV, the HDMI port is often the culprit. Proper diagnosis will save you time and potentially money before attempting repairs or replacement.
Signs of a Damaged HDMI Port
The HDMI port on your PS4 is located on the upper center of the back of your console. Physical damage is often visible upon inspection. Look for:
- Bent pins inside the port
- Loose connection when the HDMI cable is inserted
- Visible cracks or damage to the port’s exterior
- Missing metal pieces inside the port
You might also notice the port feels wobbly when you insert a cable. This indicates the port may be loose and not making a secure connection with your HDMI cable.
A damaged port often results in intermittent signal issues rather than a complete failure. If your display cuts in and out during gameplay, this suggests a port problem.
Testing Your HDMI Connection
Start with the simplest tests to rule out cable issues before assuming the port is damaged:
- Try a different HDMI cable – cables can fail internally while looking fine externally
- Test your PS4 on a different TV to eliminate the TV as the source of problems
- Connect another device to the same TV HDMI port to verify the TV input works
Pay attention to how the connector fits into the PS4. If it feels loose or wobbly, this suggests port damage. A properly functioning port should provide a firm, secure connection.
Try gently wiggling the connector while the PS4 is on. If the display flickers or cuts out, this confirms a physical connection problem.
Verifying TV and PS4 Console Settings
Before concluding the hardware is damaged, check your settings:
TV Settings:
- Ensure you’ve selected the correct HDMI input on your TV
- Try adjusting your TV’s resolution settings
- Disable any HDMI-CEC features temporarily (called different names by different manufacturers)
PS4 Settings:
If you get any display at all, even intermittently:
- Go to Settings → Sound and Screen → Video Output Settings
- Try setting Resolution to 480p temporarily
- Disable HDCP in the video settings
Sometimes your PS4 displays a “No Signal” message because of a resolution mismatch. You can reset video settings by holding the power button for 7 seconds until you hear two beeps, which boots the console in safe mode.
Preparation for HDMI Port Repair
Fixing a PS4 HDMI port requires proper preparation to ensure a successful repair. Taking time to gather the right tools and create a safe workspace will significantly increase your chances of success.
Gathering the Necessary Tools and Materials
You’ll need several specialized tools for this delicate repair job:
- Soldering iron (temperature-controlled preferred)
- Hot air station (for removing the damaged port)
- Solder wire (preferably leaded for easier working)
- Flux (helps solder flow properly)
- Solder wick (for cleaning up excess solder)
- Precision screwdrivers (both Phillips and Torx)
- Tweezers (for handling small components)
- Replacement HDMI port (exact match for PS4)
- Isopropyl alcohol (90%+ concentration)
- Cotton swabs and microfiber cloths
- Magnifying glass or microscope
- Grinding tool (in case pins are severely damaged)
Quality tools make a big difference. A good soldering station with temperature control will help prevent damage to the motherboard during repair work.
Ensuring a Safe Repair Environment
Create a clean, well-lit workspace before beginning your repair. Static electricity can damage sensitive components, so work on an anti-static mat if possible.
Make sure your area has good ventilation as soldering produces fumes. Open windows or use a small fan pointed away from your work area.
Organize your tools within easy reach to avoid frustration during critical moments. A damaged HDMI port is often surrounded by small components that can be easily lost.
Protect your work surface with a heat-resistant mat. Take photos of the original HDMI port before removal to reference during installation of the new one.
Ensure you have at least 2-3 hours of uninterrupted time. Rushing this repair often leads to mistakes and potential bridged pins on the new port.
Step-by-Step Guide to Fixing the HDMI Port
Fixing a damaged PS4 HDMI port requires careful disassembly, precise soldering work, and proper reassembly. This repair will restore your console’s ability to connect to your TV or monitor.
Opening the PS4 Console
Before starting, gather these tools:
- Phillips screwdriver
- Torx T8 and T9 screwdrivers
- Plastic pry tools
- Anti-static wristband
First, unplug all cables and place your PS4 on a clean, well-lit workspace. Flip the console over and remove the warranty stickers covering the screws on the back.
Remove these screws and set them aside in a container to avoid losing them. The number of screws varies depending on your PS4 model.
Next, carefully slide off the glossy top cover by pushing it towards the side of the console. For original PS4 models, you’ll need to remove the upper center section from the back first.
After removing the top cover, unscrew the internal power supply and carefully disconnect its cables. Then remove the additional screws holding the motherboard in place.
Removing the Damaged HDMI Port
Examine your HDMI port for visible damage like bent pins or looseness. You’ll need these additional tools:
- Soldering iron (temperature-controlled)
- Solder wick/desoldering braid
- Flux
- Heat gun (optional)
- Tweezers
Apply flux around the existing HDMI port connections to help with heat transfer. Heat the pins on the underside of the motherboard with your soldering iron.
Use the solder wick to remove excess solder. For stubborn connections, a heat gun can help loosen the port, but be careful not to overheat nearby components.
Once all pins are free, gently remove the damaged port. Clean the area with isopropyl alcohol and inspect the motherboard for any damage that might need additional repair.
Installing the New HDMI Port
Place the new HDMI port in the exact position on the motherboard. Make sure all pins align perfectly with their respective holes.
Apply flux to the pins and pads before soldering. Begin by tacking down two opposite corners of the port to secure it in position.
Check alignment again before soldering the remaining pins. Use appropriate temperature (around 350°C) and don’t hold the iron on any single pin for more than 3 seconds.
The anchor points need extra solder for stability. These are the larger connections that secure the port to the board. Take your time with these – they provide structural support for the port.
After soldering, clean away any excess flux with isopropyl alcohol and inspect your work with a magnifying glass to ensure there are no solder bridges between pins.
Reassembling the PS4 Console
Return the motherboard to its proper position in the console housing. Secure it with the screws you removed earlier, being careful not to overtighten them.
Reconnect the power supply and all internal cables, making sure each connection is secure. Double-check that you haven’t left any cables disconnected.
Replace the top cover by sliding it back into position. Insert and tighten all case screws in their original locations.
Before fully reassembling, you may want to test the connection by temporarily connecting power and an HDMI cable to confirm your repair was successful.
Apply new thermal paste to the CPU and GPU if you disturbed the heatsink during disassembly. This ensures proper cooling after reassembly.
Finally, reconnect your PS4 to your display and power source to test if the HDMI port is functioning properly. If successful, you should see the PS4 startup screen on your TV.
Testing and Troubleshooting Post-Repair
After fixing your PS4 HDMI port, proper testing is crucial to ensure the repair was successful and to identify any lingering issues that might need attention.
Ensuring Proper Functionality
Start by connecting your PS4 to your TV with a known working HDMI cable. Power on both devices and check if your TV detects the signal. If you see the PS4 interface, that’s a good sign your repair worked!
Try different HDMI inputs on your TV to confirm the connection is stable. Test video quality by playing a game or video for at least 15-20 minutes.
Check for these common signs of success:
- Clear, stable picture without flickering
- No “No Signal” messages appearing
- Audio works properly
- Resolution appears correct
If possible, test with different TVs or monitors to ensure the port works universally and not just with one display.
Solving Common Post-Repair Issues
If you’re still experiencing the dreaded “No Signal” message, try booting your PS4 in Safe Mode. Hold the power button for 7 seconds until you hear two beeps, then select “Change Resolution” or “Reset Video Output.”
Sometimes the HDMI port may appear loose after repair. In this case, you might need to:
- Check if the port is properly secured to the motherboard
- Examine if any solder joints broke during testing
- Ensure no debris is inside the port
If you notice intermittent signal loss, wiggle the cable gently to see if the connection improves. This could indicate the port isn’t fully secured or some pins aren’t making proper contact.
Try different cable brands if problems persist. Sometimes thinner cables create less strain on a newly repaired port.
Alternative Solutions and Prevention
If your PS4 HDMI port is damaged beyond repair or you want to avoid future issues, there are several workarounds and preventive measures you can take. These options can save you money and extend the life of your console.
Using HDMI Converters and Filters
When your PS4 HDMI port is damaged but the console still works, HDMI converters can be a lifesaver. These devices connect to your PS4’s motherboard and provide an external HDMI port.
Types of converters available:
- Internal HDMI port replacements
- USB to HDMI adapters
- Component to HDMI converters
HDMI filters can also help prevent signal interference that sometimes causes display issues. These small devices sit between your HDMI cable and the port, reducing electromagnetic interference.
For PS4s with partially working HDMI ports, signal amplifiers can boost the connection and stabilize a flickering or intermittent display. These cost around $20-30 and are much cheaper than a full repair.
Tips for Preventing HDMI Port Damage
The best solution is preventing damage in the first place. Be careful when checking your PS4’s HDMI port for signs of damage or debris.
Daily preventive measures:
- Never force an HDMI cable into the port
- Avoid moving the console while cables are connected
- Use high-quality, properly sized HDMI cables
- Label your cables to avoid confusion
When connecting cables, always look at the port to ensure proper alignment. Pushing blindly can bend pins or damage the port housing.
Consider using an HDMI port saver, which is a small extension that remains in your PS4. This transfers wear and tear to the inexpensive adapter rather than your console’s built-in port.
Additional Resources
If you need more help with your PS4 HDMI port repair, there are several resources available to support your efforts. These include places to buy quality parts, professional repair services, and detailed tutorials.
Where to Find Replacement Parts
Finding quality replacement HDMI ports for your PS4 is crucial for a successful repair. Here are some reliable options:
Online Electronics Retailers:
- Amazon and eBay offer various PS4 HDMI port replacements, but check seller ratings before purchasing
- TronicsFix sells quality replacement parts specifically for gaming consoles
- Console5 and iFixit provide both parts and tools designed for console repairs
What to Look For:
- Ensure the port matches your specific PS4 model (original, Slim, or Pro)
- Look for ports with pre-applied flux to make soldering easier
- Quality parts typically cost between $5-15 depending on the seller
For bulk orders or wholesale pricing, you can contact suppliers directly via email for quotes.
Professional Repair Services
When the repair seems too complex, professional services can help:
Local Repair Shops:
- Check local electronics repair shops that specialize in gaming consoles
- Ask about their experience with PS4 HDMI port replacements specifically
- Request quotes upfront (typically $50-100 for HDMI port repairs)
Mail-in Services:
- Asurion offers nationwide repair services with tracking
- Sony’s official repair service can fix your console, though often at higher prices
- Independent specialists like TronicsFix accept mail-in repairs for HDMI issues
Most services offer 30-90 day warranties on their repairs. Ask about turnaround times, which typically range from 3-7 business days depending on their workload.
Online Guides and Tutorials
Learning to fix your PS4 HDMI port yourself can save money and teach valuable skills:
Video Tutorials:
- YouTube tutorials show both basic HDMI fixes without soldering and more advanced repairs
- TronicsFix channel provides detailed walkthroughs of the complete repair process
- iFixit offers step-by-step video guides specific to each PS4 model
Written Guides:
- Reddit’s r/consolerepair community offers troubleshooting advice and repair tips
- Quora has answers from experienced technicians about common HDMI port issues
- Console repair forums provide detailed repair methods with images
Look for guides that match your skill level. Some fixes like pin straightening require minimal tools, while full port replacements need soldering equipment and more technical skill.
Frequently Asked Questions
PlayStation 4 HDMI port issues can be frustrating, but many problems have straightforward solutions. These common questions address repair options, alternatives, costs, and troubleshooting steps for various PS4 models.
What are the steps to repair a non-functioning HDMI port on my PlayStation 4?
Repairing a PS4 HDMI port typically involves several technical steps. First, you need to check the HDMI port for visible damage, such as bent pins or debris.
For minor issues, you might try cleaning the port with compressed air or carefully straightening bent pins with tweezers. Be extremely gentle to avoid causing further damage.
For more serious problems, the repair requires desoldering the damaged HDMI port and replacing it with a new one. This process demands specialized tools including a soldering iron, flux, and a replacement port.
Is it possible to use a PlayStation 4 without an HDMI port, and if so, how?
Yes, you can use a PS4 without a functioning HDMI port, though with limitations. Remote Play is the primary alternative, allowing you to stream your PS4 to a computer, smartphone, or PS Vita.
You’ll need to set up Remote Play before your HDMI port fails. If you didn’t, you might need temporary access to a working display to configure it.
Another option is using a capture card connected to your PS4’s working USB ports to display the output on a computer, though this method works best for gameplay rather than system navigation.
What is the estimated cost for professional PlayStation 4 HDMI port repair services?
Professional PS4 HDMI port repairs typically cost between $50 and $150 depending on your location and the repair shop. Specialized gaming repair shops might charge more than general electronics repair services.
The exact price depends on several factors including labor costs, parts, and whether additional components were damaged. Some shops offer flat-rate pricing while others charge based on time spent.
Online repair services may offer competitive rates, but you’ll need to factor in shipping costs and the time without your console.
How can I troubleshoot issues with my PlayStation 4 HDMI port?
Start troubleshooting by ensuring both your TV and PS4 are powered off. Disconnect the HDMI cable, then turn on your TV first, followed by your PS4.
Try a different HDMI cable as your current one might be damaged. Also test different HDMI ports on your TV to rule out problems with the display rather than the console.
Check if your PS4 HDMI port has bent or pushed-out pins, which is a common cause of connection issues. A flashlight can help you see inside the port better.
Where can I find a service provider that performs HDMI port repairs for PlayStation 4 consoles?
You can find PS4 HDMI port repair services at several places. Local electronics repair shops often handle game console repairs, with many specifically advertising PlayStation repairs.
Authorized Sony service centers can repair your console, though they might be more expensive than independent shops. They do use official parts and provide warranties on repairs.
Online repair services like uBreakiFix, TronicsFix, and others specialize in console repairs. Check customer reviews before sending your device to ensure reliable service.
Can a PlayStation 4 Slim HDMI port be repaired, and what process is involved?
Yes, a PS4 Slim HDMI port can be repaired, though the process differs slightly from the original PS4. The PS4 Slim uses a more compact design, making the repair more delicate.
The basic repair process involves disassembling the console, removing the damaged port through desoldering, installing a new port, and reassembling the system. The Slim’s smaller form factor requires extra care.
Unlike the original PS4, the Slim’s internal layout is more condensed, so there’s a higher risk of damaging nearby components during repair. Professional repair is recommended unless you have experience with fine electronics work.