Creating lifelike 3D creatures has never been easier with the powerful combination of ZBrush, Maya, and Substance 3D. These industry-standard tools work together seamlessly to help you bring your wildest creature concepts to life. By mastering the workflow between ZBrush’s organic sculpting capabilities, Maya’s precise modeling tools, and Substance 3D’s advanced texturing features, you can create professional-quality creatures for games, films, or personal projects.
The journey begins with concept sculpting in ZBrush, where you can quickly build up forms using ZSpheres or basic shapes. Many artists find success by sculpting a rough armature first, then adding detail layers progressively. Once your high-resolution sculpt is complete, you’ll need to decimate and retopologize in Maya to create game-ready assets or film-quality models.
The final stage involves bringing your creation to life with realistic textures in Substance 3D. This is where your creature truly develops character through skin details, color variations, and surface properties. Following this pipeline allows you to create impressive creatures like the reptilian Crocodylus project or detailed iguanas that blend seamlessly into modern 3D productions.
Here’s a concise guide on how to sculpt a creature using ZBrush, Maya, and Substance 3D:
Step 1: Concept and Reference Gathering
Start by collecting references and concept art for your creature. Understand anatomy, shapes, textures, and details you want to include.
Step 2: Base Sculpting in ZBrush
- Open ZBrush and begin with a base mesh or a simple sphere.
- Use digital sculpting tools like DynaMesh to block out the primary shapes and silhouette of your creature.
- Refine the form using various brushes to add muscles, wrinkles, and finer details.
- Utilize masking tools and ZRemesher to control geometry flow and optimize the mesh.
Step 3: Retopology and UV Unwrapping in Maya
- Export your high-res sculpt from ZBrush.
- Import it into Maya for retopology to create a clean, game-ready or animation-friendly mesh.
- Perform UV unwrapping in Maya to prepare the model for texturing, ensuring seams and layout are optimized.
Step 4: Texturing in Substance 3D Painter
- Import your low-poly mesh with UVs into Substance 3D Painter.
- Bake maps from the high-res sculpt (normal, ambient occlusion, curvature, etc.).
- Use Substance Painter’s brushes and smart materials to paint detailed textures such as skin scales, color variations, and surface imperfections.
- Export texture maps for use in your rendering engine or game.
Step 5: Final Touches and Rendering
- Bring your textured model back into Maya or another 3D software for posing and rendering.
- Set up lights, materials, and shaders to showcase your creature.
- Render high-quality images or animations.
This workflow leverages ZBrush’s powerful sculpting tools, Maya’s precise modeling and UV capabilities, and Substance 3D Painter’s advanced texturing features to create detailed and realistic creatures efficiently.
Key Takeaways
- ZBrush excels at organic sculpting, allowing you to build creature forms quickly before adding fine details and textures.
- Maya provides essential retopology tools to transform high-resolution sculpts into optimized models with proper edge flow.
- Substance 3D enables realistic skin texturing with layered materials that give your creature believable surface qualities and visual depth.
Understanding the Fundamentals of Creature Sculpting
Before diving into digital sculpting tools, you need to grasp the core principles that make fantasy creatures believable. These principles blend anatomical knowledge with creative vision and narrative elements.
Anatomy of Mythical Creatures
When sculpting creatures, you must understand real-world anatomy first, then learn how to bend these rules. Learn to sculpt creatures in ZBrush by starting with familiar anatomical structures.
Study how muscles connect to bone structures, even in fantasy beings. This knowledge helps create believable movement potential in your creature.
Consider these anatomical principles:
- Muscle groups: How they overlap and interact
- Skeletal structure: What supports your creature’s weight
- Surface details: Scales, skin folds, or fur patterns
Your creature’s unique features (wings, extra limbs, etc.) should follow logical anatomical rules. Think about how these features would realistically attach to the body.
Using a good drawing tablet with pressure sensitivity will help you sculpt these details with precision in ZBrush.
Concept Art and Preliminary Sketches
Before opening ZBrush or Maya, you should develop your creature concept through sketches and reference boards. Many professionals use 3D creature concepting techniques to build initial forms.
Your concept art should explore:
- Multiple angles (front, side, back views)
- Motion studies showing how it moves
- Key feature close-ups
- Color and texture explorations
These preliminary sketches don’t need to be perfect but should communicate your vision clearly. They’ll serve as blueprints when you start building in ZBrush.
Try creating quick ZSphere armatures based on your sketches to test proportions. This approach helps validate your concept before committing to detailed sculpting.
Lore and Backstory Integration
Creature design becomes more compelling when informed by a backstory. Your creation’s environment, evolution, and purpose should influence its physical characteristics.
Ask yourself:
- Where does your creature live? (This affects skin texture, coloration)
- What does it eat? (Shapes teeth, jaw structure)
- Is it predator or prey? (Determines sensory organ development)
The narrative elements translate directly into physical features you’ll sculpt in ZBrush. A desert dweller might have thick skin and water-storage adaptations, while an aquatic creature needs streamlined forms.
Consider creating a brief document detailing your creature’s world and habits. This reference will guide your sculpting decisions and help maintain consistency throughout the complex creature creation process.
Setting Up the Workspace
Creating an efficient workspace is crucial for a smooth creature sculpting workflow. The right setup can save you time and help you focus on bringing your creature to life rather than fumbling with technical issues.
Choosing the Right Software
Start with the core applications for your creature pipeline. ZBrush is essential for organic sculpting with its powerful brush system and subdivision workflow. Its dynamic sculpting capabilities make it perfect for creating detailed creature forms.
For retopology and rigging, Maya offers precise polygon modeling tools and an industry-standard rigging system. The combination allows you to transform high-poly sculpts into game-ready assets.
Substance Painter handles texturing with physically-based rendering workflows. For additional texture work, consider:
- Photoshop: For texture painting and 2D concept work
- Mari: When dealing with extremely high-resolution textures
- Blender: A free alternative that can handle parts of the pipeline
Choose software based on your project requirements and budget constraints.
Customizing Interface for Sculpting Efficiency
In ZBrush, arrange your interface to minimize clicking. Create custom shelves with your most-used brushes and alphas. Try these specific customizations:
- Custom UI layouts: Save different layouts for concept, detailing, and polypainting phases
- Hotkeys: Set up hotkeys for brush switching, symmetry toggling, and masking
- Custom menus: Create personalized menus with your frequently used tools
For Maya, customize shelf tabs dedicated to modeling and UV tools. Set up custom marking menus for rapid access to sculpting and retopology tools.
Substance Painter works best with a customized shelf of smart materials and brushes for creature texturing. Organize your workspace based on workflow stages rather than software defaults.
Essential Tools and Techniques
Your digital sculpting toolkit should include these fundamental tools:
ZBrush essentials:
- Clay Buildup and Standard brushes for primary forms
- DamStandard for creating wrinkles and scales
- Smooth brush for blending transitions
- ZRemesher for automatic topology
Maya must-haves:
- Quad Draw for manual retopology
- UV tools for proper texture mapping
- Smooth Preview to visualize subdivision levels
Substance techniques:
- Smart materials for realistic skin and scales
- Mask generators for creating variation
- Height-based wear for adding realism to your creature
Learn to use ZSpheres for quick armature creation. They provide an excellent starting point for organic modeling without time-consuming base mesh creation.
Modeling in ZBrush
ZBrush offers powerful tools for creating detailed creature models through digital sculpting. The software’s intuitive approach allows you to build complex organic forms using various techniques that simulate traditional clay sculpting.
Starting with ZSpheres
ZSpheres provide an excellent starting point for creating your creature’s basic structure. To begin, select the ZSphere tool from the toolbar and create your initial sphere.
You can add additional ZSpheres by clicking and dragging from existing ones to create a skeletal armature. This technique is particularly useful for building creature frameworks that establish proper proportions.
Use the Move, Scale, and Rotate tools to adjust your ZSpheres. Position them carefully to match your concept design.
When you’re satisfied with the basic form, press A to preview the mesh. This gives you a sense of how your final base mesh will look.
Finally, convert your ZSphere armature to a workable mesh using the Adaptive Skin feature. Select an appropriate resolution based on your project needs.
Using DynaMesh for Base Mesh Creation
DynaMesh is a powerful feature that creates a uniform mesh from your rough sculpt. To activate it, press the DynaMesh button in the Tool palette.
Set an appropriate resolution value – lower for early stages (128-256) and higher for more detail (512-1024). The resolution affects both detail capacity and system performance.
Begin sculpting with basic brushes like Standard, Clay Buildup, and Move. DynaMesh automatically retopologizes your mesh when you hold Ctrl and drag in the canvas, maintaining consistent polygon distribution.
This technique is ideal for creature concepting as it allows you to focus on form without worrying about topology. Add and remove mass freely to explore different shapes.
For asymmetrical creatures, disable the symmetry option to create unique features on each side.
Refining Details and Adding Complexities
Once your base is established, increase the DynaMesh resolution or switch to ZRemesher for a cleaner topology. This prepares your model for detailed sculpting.
Use specialized brushes like Dam_Standard for creating wrinkles and Clay tubes for organic textures. The Snake Hook brush works well for pulling out appendages like horns or tentacles.
Add secondary forms such as scales, skin folds, or muscle definition using alpha maps. These can be accessed through the Alpha palette or created from custom textures.
For intricate details, utilize layers to work non-destructively. This allows you to adjust feature intensity without starting over.
Masking techniques help isolate specific areas for detailed work. Hold Ctrl and paint to mask areas you want to protect while sculpting other regions.
Remember to regularly decimate your concept sculpt to maintain good performance as detail increases.
Retopology in Maya
After sculpting your creature in ZBrush, retopology in Maya is the crucial next step to prepare your model for animation. This process transforms your high-poly sculpt into a workable, animation-ready mesh with proper topology flow.
Understanding Topology Flow
Topology flow refers to how polygons are arranged across your 3D model. Good topology follows the natural muscle and bone structure of your creature.
For creatures, focus on creating edge loops around movable areas like the mouth, eyes, and joints. These loops help your model deform naturally during animation.
Pay special attention to the face, where edge loops should follow muscle groups. This ensures your creature can express emotions realistically when animated.
Quadrangular polygons (quads) are preferable to triangles or n-gons because they:
- Deform predictably during animation
- Create cleaner UV unwraps
- Allow for easier subdivision
Remember that proper topology isn’t about having the lowest polygon count, but rather having polygons in the right places.
Retopology Tools and Techniques in Maya
Maya offers several powerful tools for retopology work on your creature models. The Quad Draw tool is particularly useful, allowing you to place vertices directly on your high-poly surface.
Begin by importing your decimated ZBrush model as a reference mesh. In the Modeling toolkit, select Quad Draw to start building your low-poly topology.
Key techniques to speed up your workflow:
- Use symmetry when possible
- Create guides with the Multi-Cut tool
- Utilize edge flow tools to adjust topology directions
For complex areas like the creature’s face or claws, the Snap to Surface option ensures your new topology follows the high-poly details exactly.
Many 3D artists supplement Maya’s native tools with plugins like Quad Draw Pro or NEX for more specialized retopology functions on creature models.
Optimizing Mesh for Animation
The ultimate goal of retopology is creating a mesh that animates well while maintaining the essence of your original sculpt.
For a creature designed for games, aim for a balance between polygon count and detail. Focus detail in areas that will be most visible or animate frequently.
Key optimization considerations:
- Joint areas need extra edge loops for smooth bending
- Level of detail should match the creature’s importance and screen time
- Polygon density should vary based on visibility and deformation needs
Test your topology by creating a simple rig and posing the model in extreme positions. If you see unwanted deformation, adjust your edge flow in those areas.
Before finalizing, make sure your mesh has proper UVs for texturing in Substance 3D, as this will impact the final look of your creature sculpt.
UV Mapping and Texture Preparation
Before applying textures to your creature, you need proper UV mapping to ensure textures appear correctly on your 3D model. UV mapping is like creating a flat blueprint of your 3D model that shows exactly where each texture pixel will appear.
Creating Efficient UV Layouts
Start by unwrapping your model in Maya after completing the reptopology process. Select your mesh and open the UV Editor. Use automatic unwrapping as a starting point, then manually adjust seams to hide them in less visible areas of your creature.
Break your UVs into logical sections based on your creature’s anatomy. For example, separate the head, torso, limbs, and any armor pieces into different UV shells.
Make sure your UV shells don’t overlap and maximize texture space usage. Leave small gaps between UV shells to prevent texture bleeding when mipmaps are generated. This is especially important for game-ready creatures.
Check for texture stretching by applying a grid pattern to your UVs. Areas where the grid appears distorted indicate potential problem spots that need adjustment.
Texture Map Basics
Different texture maps serve specific purposes in your creature’s appearance. The base color (albedo) map defines the surface color, while normal maps create the illusion of fine details without extra geometry.
Roughness maps control how light scatters across surfaces – useful for distinguishing between slimy and dry areas of your creature. Metallic maps identify which parts should reflect light like metal, perfect for armor or weapons.
Ambient occlusion maps enhance depth by darkening crevices. For advanced creatures, consider creating displacement maps for major geometric details that can’t be captured with normal maps alone.
Organize your texture maps in a structured folder system. Standard resolution for creature textures ranges from 2048×2048 to 4096×4096 pixels, depending on your project requirements.
3D Painting in Substance Painter
Import your UV-mapped model into Substance Painter to begin texturing. Set up material layers based on your creature’s anatomy – skin, scales, claws, etc. This layered approach makes texturing straightforward.
Use Substance Painter’s smart materials as starting points. These pre-made materials can be customized to fit your creature’s specific look. Smart masks help you automatically paint based on surface angles and cavities.
Add wear and tear to make your creature look realistic. Subtle dirt in crevices, scratches on hard surfaces, and color variations create believable textures.
Utilize photo references by importing them as alphas or stencils. This technique is excellent for organic textures like skin pores, scales, or creature-specific details.
Export your maps in the format required by your rendering engine. Common formats include PNG and TGA. Don’t forget to maintain consistent naming conventions across all your texture maps.
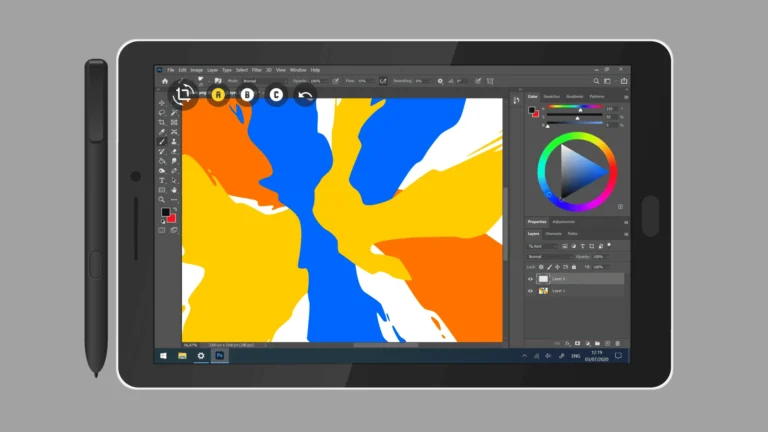
Detailing and Texturing in Substance 3D
After sculpting your creature in ZBrush and retopologizing in Maya, bringing it to life with textures is where Substance 3D truly shines. This powerful toolset offers both pre-made materials and custom options to create realistic skin, scales, or any surface your creature needs.
Advanced Texturing Techniques
Start by importing your mesh with proper UVs into Substance Painter. Set up a PBR workflow with base color, roughness, normal, and height maps for your creature. The layer system in Substance works similarly to Photoshop, allowing you to build textures incrementally.
Use smart masks to target specific areas like wrinkles or skin folds. For reptilian creatures, the Grunge Map generator can create realistic scale patterns that respond to your mesh topology.
Add subtle color variations with the Color Selection tool. Paint redness around sensitive areas like the eyes or mouth to add biological realism. Remember that real creatures rarely have uniform textures.
Try using height-based wear to automatically create worn edges or dirt accumulation in recessed areas. This technique adds realism without manual painting.
Utilizing Substance 3D’s Material Library
Substance 3D’s material library provides excellent starting points for your creature textures. Browse categories like Organic or Animal to find base materials that match your vision.
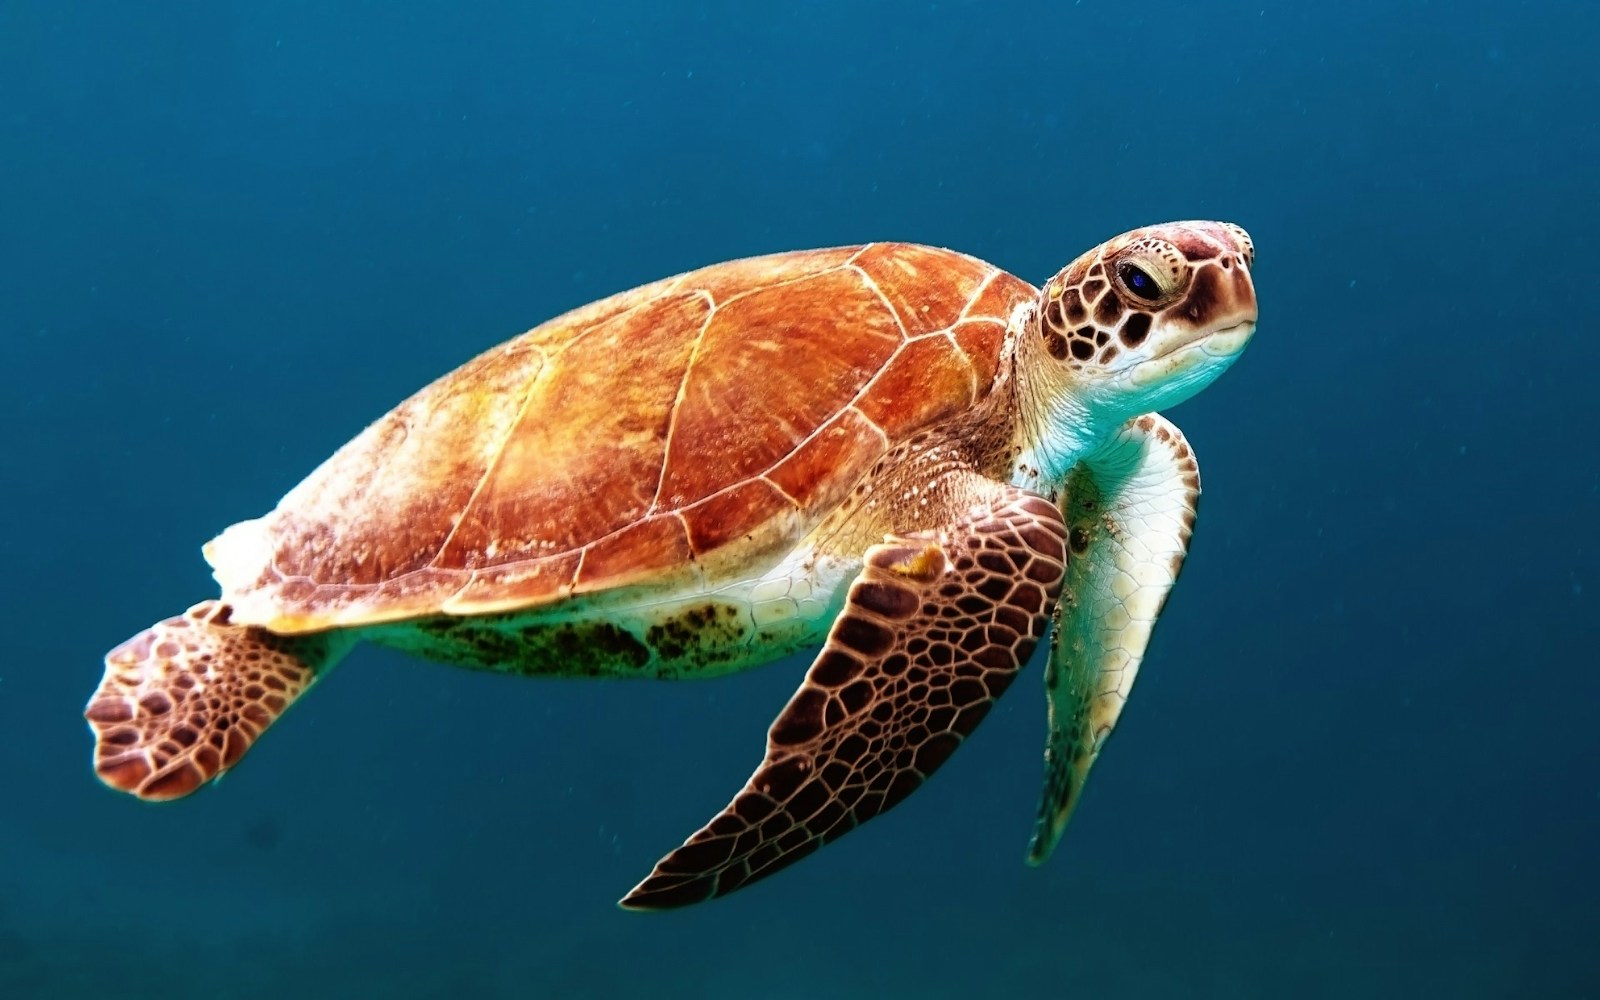
You can combine multiple materials using masks to create complex surfaces. For example, mix leathery skin with harder scales for a crocodilian creature.
Adjust parameters like Scale Size or Pattern Variation to make the material unique to your creature. Even pre-made materials should be customized to fit your specific design.
Try these material combinations for different creature types:
- Amphibian: Glossy Skin + Subtle Bump + Low Roughness
- Reptile: Scale Material + Edge Wear + Height Variation
- Mammal: Fur Alpha Maps + Subsurface Scattering + Color Variation
Creating Custom Textures
For truly unique creatures, you’ll want to create custom textures. Start by hand-painting key features in the Base Color channel. Use a graphics tablet for more natural brush strokes and pressure sensitivity.
Export your texture work-in-progress to Photoshop to add photographic elements. You can photograph real textures or use stock images as reference. Import these back as separate layers in Substance.
Create displacement maps by painting height information in the Height channel. This adds three-dimensional detail without changing your mesh topology. Subtle height variations can suggest pores, wrinkles, or tiny scales.
Build a material ID map to separate distinct texture zones like “belly,” “back,” and “claws.” This organization helps you apply different materials to specific body parts efficiently.
Rigging for Animation in Maya
Once your creature model is sculpted and refined, rigging becomes the critical step that brings it to life. A well-designed rig serves as the digital skeleton that enables natural movement and expression.
Skeleton Setup and Skin Binding
Start by creating a skeleton structure in Maya that matches your creature’s anatomy. Use joints that follow the natural bone structure of your design. For quadrupeds, pay special attention to the spine hierarchy, as it affects the overall movement flow.
In Maya’s rigging workspace, you can create joints by selecting Skeleton > Joint from the menu. Place each joint carefully at anatomical pivot points.
After completing the skeleton, use the Smooth Bind option to attach your model to the skeleton. This creates the initial skin weighting, but you’ll need to refine it.
Use the Paint Skin Weights tool to adjust how much influence each joint has on surrounding vertices. Focus on areas like joints and muscle groups where deformation is most noticeable.
Create control curves for easier animation by selecting Create > Curve in Maya. These should be placed at key movement points and connected to your joints using constraints.
Rigging Facial Expressions
For facial rigging, start with a blend shape system for your creature’s expressions. Create duplicate meshes with different facial poses and connect them to your base mesh.
Use the Blend Shape deformer in Maya to transition between neutral and expression states. Common blend shapes include:
- Jaw open/close
- Eye blinks
- Brow movements
- Snarl or smile
For more complex creatures, consider a joint-based facial rig with control nodes for finer expression control. This allows animators to create subtle emotional changes.
Set up control attributes using the Channel Box to make the rig intuitive. Group similar controls together to create a user-friendly animation interface.
Test facial deformations in extreme poses to ensure your rig handles all necessary expressions without mesh distortion.
Incorporating Rigging in the Workflow
Integrate your rigging process with the overall 3D creature pipeline. After completing high-resolution sculpting in ZBrush, import your retopologized model into Maya for rigging.
Consider creating a proxy version of your character for rigging tests. This lower-resolution model helps you validate movement before applying the rig to your final mesh.
Set up custom attributes for frequently needed animations. For example, create attributes that control multiple joints with a single slider for complex movements like wing flaps or tail curls.
Use set-driven keys to establish relationships between controls. This technique is particularly useful for quadruped models where leg movement needs to coordinate with body positioning.
Save your rig as a reference file so you can update the model later if needed without affecting animation work already completed.
Final Touches and Presentation
The finishing stages of your creature project demand attention to lighting, rendering, compositing, and presentation strategies. These elements transform good work into exceptional portfolio pieces that stand out to clients and studios.
Lighting and Rendering with Arnold
Setting up proper lighting is crucial for showcasing your creature’s details. In Maya, create a three-point lighting setup with key, fill, and rim lights to highlight the form and textures of your model.
Arnold renderer offers powerful options for creating photorealistic renders of your creature. Configure your Arnold settings with these considerations:
- Sampling: Start with 3-4 camera samples and increase only if needed
- Subsurface Scattering: Essential for skin and translucent materials
- Ambient Occlusion: Adds depth to crevices and detailed areas
Experiment with HDRI environments to create natural lighting scenarios. For creature VFX work, try both neutral lighting to show textures and dramatic lighting to create mood. Render multiple passes (beauty, AO, depth) to give yourself flexibility in compositing.
Compositing for VFX
After rendering, enhance your creature’s visual impact through compositing. Import your render passes into software like After Effects or Nuke to blend them effectively.
Add subtle effects to integrate your creature into its environment:
- Color grading to match the scene’s mood
- Depth of field to create focus on key features
- Atmospheric effects like fog or particles
3D character assets benefit greatly from proper compositing. Consider rendering your creature against a green screen if you plan to place it in different environments.
For game-ready creatures, you might also test your asset in Unreal Engine to see how it performs with real-time lighting. This demonstrates versatility to potential employers.
Portfolio Presentation Tips
Your creature design needs proper presentation to impress clients and studios. Create turntable animations showing your model from all angles with smooth camera movement.
Include breakdown images showing:
- Wireframe views
- Texture maps
- Clay renders
- Progressive steps in your workflow
As a freelance 3D artist, presentation can make or break your opportunities. Label your work clearly with technical specifications such as poly count, texture resolution, and software used.
Provide context for your creature by including concept art or a brief description of its backstory and purpose. This shows you think beyond technical execution into character design.
Consider creating an Artstation or personal website showcase with consistent formatting across projects. High-quality thumbnails and organized galleries make your portfolio more navigable and professional.
Integration into Game Engines
After creating your creature in ZBrush, Maya, and Substance 3D, you need to prepare it for game engines. This critical step ensures your detailed models work correctly in real-time environments while maintaining visual quality and performance.
Exporting Assets for Unreal Engine
To export your creature for Unreal Engine, you’ll need to prepare proper file formats and settings. Start by exporting your low-poly mesh from Maya as an FBX file with the correct scale settings (typically centimeters for Unreal). Make sure to include your UV layouts and skeletal rig if your creature is animated.
For textures from Substance 3D, export them as individual maps (diffuse, normal, roughness, metallic) in either PNG or TGA format at appropriate resolutions. Unreal Engine prefers the following setup:
- Base Color: RGB, 8-bit
- Normal Map: RGB, 16-bit (DirectX format)
- Roughness/Metallic: Grayscale, 8-bit
When importing to Unreal, use the built-in asset processing tools to create material instances. This allows you to adjust parameters without recreating everything.
Optimizing for Performance in Games
Game engines require highly optimized assets to maintain frame rates. Your creature model should have appropriate polygon counts based on its importance – main characters might use 15,000-30,000 triangles, while background creatures should use fewer.
Use LOD (Level of Detail) systems to create multiple versions of your creature at different resolutions. This allows the engine to swap models based on distance from the camera. Set up 3-4 LOD levels with each reducing polycount by roughly 50%.
Texture optimization is equally important. Consider these guidelines:
- Main characters: 2048×2048 textures
- Secondary creatures: 1024×1024 textures
- Background entities: 512×512 textures
Properly decimate your concept sculpt while preserving silhouette and important details. Test your creature in actual gameplay scenarios to identify performance bottlenecks and visual issues that need addressing.
Frequently Asked Questions
Creating creatures with ZBrush, Maya, and Substance 3D involves specific workflows and techniques that beginners often have questions about. Here are answers to some common questions that might help you in your creature development journey.
What are the primary differences in creature design workflow among ZBrush, Maya, and Substance 3D?
ZBrush excels at organic sculpting with its brush-based tools that allow you to create highly detailed creature forms. It’s where you’ll spend most of your time creating skin textures, muscles, and other organic details.
Maya serves as the technical backbone for your creature, handling tasks like retopology, rigging, and animation. It’s also excellent for creating hard-surface elements that might be part of your creature design.
Substance 3D focuses on texturing, enabling you to add realistic materials to your creature. Here you’ll create skin shaders, color variations, and surface properties that make your creature look believable.
What are the best practices for integrating ZBrush, Maya, and Substance 3D when sculpting a creature?
Start with a low-poly base mesh in Maya before moving to ZBrush for detailed sculpting. This approach ensures proper topology for later animation.
Keep your folders organized with clear naming conventions. Each software requires different file formats, so maintaining a structured workflow prevents confusion.
Create reference geometry in Maya for scale comparisons. This helps maintain consistent proportions when you move between different programs.
Export lower subdivision levels from ZBrush when sending models to Maya to keep your scene manageable. You can always bring back details later with displacement maps.
Can you describe the process of transferring sculpts from ZBrush to Maya for rigging and animation?
First, retopologize your high-poly ZBrush sculpt to create an animation-friendly mesh. Tools like ZRemesher can help create a good starting point.
Export your low-poly mesh and high-poly sculpt, then use Maya’s Transfer Attributes or normal map baking to capture details from the high-resolution model.
Set up proper UVs in Maya before sending your model to Substance 3D. Good UV layouts are crucial for texturing and will save you headaches later.
When rigging in Maya, use influence objects to control deformations in areas with complex creature anatomy like joints or muscle bulges.
What techniques are recommended for generating realistic textures for a ZBrush sculpt within Substance 3D?
Use ZBrush’s Polypaint feature to create base color information that can be exported as texture maps for refinement in Substance 3D.
Layer multiple materials in Substance 3D to create complex creature skin. Start with a base layer and add details like scales, wrinkles, or veins as separate layers.
Utilize height and normal maps baked from your high-poly ZBrush sculpt to preserve fine details in Substance 3D. This preserves all your careful sculpting work.
Create realistic creature textures by referencing real-world animals. Photos of reptile skin, amphibian textures, or mammalian hide can provide valuable reference.
How do you manage high-polygon models from ZBrush when importing them into Maya for further development?
Use ZBrush’s decimation tools to create optimized versions of your sculpt for Maya. This reduces polygon count while preserving visual details.
Work with displacement maps rather than extremely dense geometry. Maya can display these maps at render time without slowing down your viewport.
Consider using proxy geometry for animation and layout work. You can swap in higher-resolution models only when needed for final renders.
Create LOD (Level of Detail) versions of your creature for different purposes. A simplified version works well for rigging, while detailed versions can be used for close-up shots.
What is the most efficient way to bake maps in Substance 3D for a creature modelled in ZBrush and optimized in Maya?
Prepare proper cage meshes in Maya to control the baking process in Substance 3D. This helps prevent artifacts in your normal and displacement maps.
Use the high-poly sculpt from ZBrush as your source mesh and your optimized Maya model as your target mesh when baking in Substance 3D.
Bake in passes, focusing on one map type at a time. Start with normal maps, then height, ambient occlusion, and finally color information.
For complex creatures, consider baking maps for different body parts separately. This allows for higher resolution in important areas like the face and hands.