Is your PlayStation 4 display cutting off parts of the screen or not filling your TV properly? Many PS4 users face this common problem when setting up their console. To adjust your PS4 screen size, go to Settings > Sound and Screen > Display Area Settings, then use the controller to expand or shrink the display area until all four arrows are visible at the screen edges.
This screen size issue often happens because of a setting called “overscan” on your TV or because the PS4’s display area needs adjustment. Different TV brands handle this differently, which can make fixing it confusing. Some newer TVs automatically detect and adjust to your PS4, but older models might need manual changes.
Getting your screen size right makes games more enjoyable and ensures you can see all important information. A properly calibrated display prevents missing crucial game elements like health bars or map details that might get cut off at the edges of your screen.
Steps To Adjust Your PlayStation 4 Screen Size
If your PlayStation 4 screen doesn’t fit your TV properly — whether parts are cut off or there’s a black border — you can easily adjust the display area using built-in settings. Here’s how to fix screen size issues on your PS4.
Step 1: Turn On Your PS4 and Go to Settings
From the home screen:
- Press the PS button on your controller
- Scroll up and select Settings (the toolbox icon)
Step 2: Navigate to Sound and Screen
Once in the Settings menu:
- Scroll down and select Sound and Screen
- Then choose Display Area Settings
Step 3: Adjust the Display Area
You’ll now see your screen’s current display area with arrows in the corners.
- Use the D-Pad or left analog stick to adjust the size
- Expand the area until the arrows touch the edges of your TV screen
- Press X to confirm when finished
This ensures that the image fits your TV exactly, without cutting off elements of the user interface or leaving unwanted borders.
Optional: Calibrate Your TV As Well
Some TVs have overscan settings that can affect how your PS4 display looks. To get the best fit:
- Set your TV’s aspect ratio to “Just Scan,” “1:1,” or “Full Pixel” (depending on the brand)
- Disable overscan if it’s enabled
You can usually find these options under your TV’s Picture Settings > Advanced Settings menu.
Why Screen Size Adjustments Matter
If the display is not properly set:
- Important HUD elements in games can be cut off
- System menus may appear cropped or misaligned
- Streaming apps might not show subtitles or controls correctly
Making this quick adjustment ensures you’re seeing everything as intended by game developers and system designers.
Key Takeaways
- Adjust PS4 screen size through the Sound and Screen settings menu to ensure all content displays properly on your television.
- TV overscan settings often cause display issues and may need to be turned off in your television’s menu for optimal PS4 viewing.
- Proper screen calibration improves gaming experience by ensuring UI elements and game information remain visible.
Understanding Screen Size on PS4
Screen size settings on PlayStation 4 can affect your gaming experience significantly. Proper calibration ensures game elements appear correctly and prevents important visual information from being cut off at the edges.
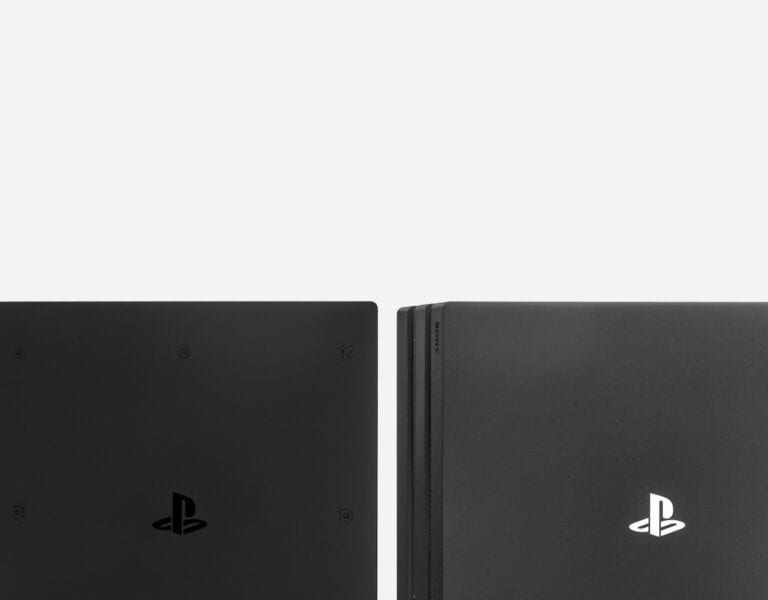
Difference Between PS4 and PS4 Pro Screen Capabilities
The standard PS4 and PS4 Pro have notable differences in their display capabilities. The base PS4 model supports output resolutions up to 1080p (Full HD), which works well for most standard TVs and monitors.
PS4 Pro, released as an upgraded version, supports resolutions up to 4K and offers enhanced graphics processing. This means games can be displayed with more detail and clarity on compatible screens.
Both systems include display area settings that allow users to adjust how content appears on screen. These settings help fix “overscan” issues where parts of the game interface might be cut off at the edges.
To access these settings on either console, navigate to Settings > Sound and Screen > Display Area Settings.
The Relevance of 4K Resolution and HDR
4K resolution provides four times the pixel count of standard HD, creating sharper images and more detailed textures in games. This is particularly noticeable on larger TV screens where pixelation becomes more apparent at lower resolutions.
HDR (High Dynamic Range) is another important feature supported by both PS4 Pro and later standard PS4 models. It enhances contrast and color accuracy, making bright areas brighter and dark areas darker with more detail visible in both.
Many players don’t realize that proper TV settings are crucial for these features to work correctly. Some TVs have “overscan” turned on by default, which can interfere with the PS4’s display area.
For optimal results, TVs should be set to “Just Scan,” “1:1,” or “Screen Fit” options. These settings ensure the PS4 output matches your screen’s native resolution without unwanted scaling.
Getting Started with Screen Adjustments
Properly adjusting your PlayStation 4 screen size ensures you can see all game elements clearly without any content being cut off at the edges. The right settings prevent the frustration of missing important game information or having black borders around your display.
Location of Display Area Settings
The PlayStation 4 system makes screen size adjustments accessible through the main settings menu. To begin, power on your PS4 console and navigate to the main dashboard. From there, select the Settings icon, which appears as a toolbox or suitcase symbol.
Within Settings, scroll down and select Sound and Screen. This menu contains all audio and visual configuration options for your system.
Next, choose Display Area Settings from the menu. This specific setting allows you to adjust how much of your TV screen the PS4 will use for display. The system will present a screen with arrows at each corner.
Use the directional buttons on your controller to resize the display area until all four arrows are clearly visible on your screen. Press the X button to confirm your settings once properly adjusted.
Necessary Equipment for Adjustments
A properly connected HDMI cable is essential for accurate screen adjustments. Ensure the HDMI cable is securely plugged into both your PS4 and TV. A loose connection can cause display issues that no amount of software adjustment can fix.
Your television remote control may also be needed, as some TVs have overscan settings that affect how the PS4 image appears. Look for picture size options in your TV menu labeled as:
- Just Scan
- Screen Fit
- 1:1 Pixel Mapping
- Overscan Off
Different TV brands use different terminology, so consult your television manual if needed. Modern TVs typically allow these adjustments through the Picture or Display settings menu.
The PS4 controller is the final essential tool, as you’ll use it to navigate menus and confirm your new display settings.
Adjusting Display Area and Aspect Ratio
Properly configuring your PlayStation 4’s display settings ensures you get the best visual experience without missing important parts of the game screen. These settings help eliminate annoying black borders or prevent screen elements from being cut off.
Navigating the PS4 Menu
To adjust your screen size on PS4, you’ll need to access the system settings. First, go to the PlayStation 4 dashboard and select “Settings” from the main menu. Scroll down and select “Sound and Screen” options.
Within this menu, you’ll find Display Area Settings. This is where you can adjust how much of your screen the PS4 uses.
When you select this option, the system will show a screen with arrows at each corner. Use your controller to adjust the borders until all four arrows are clearly visible on your screen.
If you’re experiencing a screen that’s too large or small, these settings can fix most common display problems without changing your TV settings.
Setting the Correct Aspect Ratio
The aspect ratio determines the proportional relationship between your screen’s width and height. Most modern TVs use a 16:9 widescreen ratio, which the PS4 is designed to work with by default.
Some display issues occur because of a setting called “overscan” on your TV. This feature cuts off the edges of the image, which can hide important game elements or menu options. To fix this, you’ll need to turn off overscan in your TV settings.
TV manufacturers label this setting differently:
- Samsung: Picture Size or Aspect Ratio
- LG: Aspect Ratio or Just Scan
- Sony: Screen Format or Display Area
For optimal results, set your TV to “Just Scan,” “1:1,” or “Screen Fit” mode. This ensures the PS4’s output matches your display exactly without unwanted scaling or cropping.
Optimizing Video Output Settings
Getting the right visual experience on your PS4 means fine-tuning both image quality and performance. The right settings can make games look sharper and respond better during gameplay.
Customizing Video Output for Image Quality
To access video output settings, navigate to Settings > Sound and Screen > Video Output Settings. Here you can adjust the display resolution based on your TV’s capabilities.
For optimal color accuracy, PS4 owners should set RGB Range to “Full” rather than “Limited” when using an HDTV. This provides deeper blacks and more vibrant colors for a better visual experience.
HDR (High Dynamic Range) settings should be enabled for compatible displays. This setting dramatically improves contrast and color depth in supported games. Players can verify HDR is working properly through the “Adjust HDR” option.
Screen size adjustments can fix games that don’t fit properly on the display. Using the “Display Area Settings” option allows users to resize the display boundaries until all corners of the game screen are visible.
Adjusting Frame Rate and Resolution Settings
Resolution and frame rate represent a critical balance in gaming performance. PS4 Pro users can choose between higher resolution or better frame rates in many games.
For competitive gaming, many players prefer setting their displays to 120Hz (if available) and lowering resolution to prioritize smoother gameplay. The standard PS4 typically runs at 30-60fps, while the PS4 Pro can achieve higher frame rates in select titles.
Game-specific settings often allow choosing between:
- Performance Mode: Prioritizes frame rate for smoother action
- Resolution Mode: Emphasizes visual clarity with higher pixel counts
- Balanced Mode: Attempts to maintain both decent resolution and frame rate
Adjusting these settings based on the game type provides the best experience. Fast-paced games benefit from higher frame rates, while slower-paced titles often look better with increased resolution.
Dealing with Common Screen Issues
PlayStation 4 users often encounter display problems that affect gameplay experience. These issues typically involve incorrect screen sizing or image cutoff that can be fixed through system settings or TV adjustments.
Troubleshooting Zoom and Overscan Problems
Many screen size issues on PS4 stem from TV overscan settings rather than the console itself. Overscan is a feature that zooms the picture to hide edges, but it can cut off important game elements.
To fix overscan issues:
- Check your TV settings first and look for options labeled “Just Scan,” “Screen Fit,” or “1:1” in the picture settings menu
- Disable any setting called “Overscan” if available
- Some TVs hide this setting under Picture Size, Aspect Ratio, or Display Area options
If your TV settings don’t solve the problem, adjust the PS4 display area by going to Settings > Sound and Screen > Display Area Settings. Use the controller’s directional buttons to adjust the screen borders until all corners are visible.
How to Reset Screen Size to Default
Sometimes the simplest solution is to reset your display settings to their original state. This can solve issues created by accidental changes or software glitches.
To reset your PS4 screen size:
- Power off your PS4 completely (not rest mode)
- Hold the power button until you hear two beeps (about 7 seconds)
- Connect your controller via USB cable
- Select “Change Resolution” from the Safe Mode menu
- Choose the recommended resolution for your display
Alternatively, you can adjust screen settings through the normal interface by navigating to Settings > Sound and Screen > Video Output Settings. Here you can reset resolution, RGB Range, and HDR settings.
For persistent issues, try a different HDMI cable or port on your TV. Sometimes hardware connections cause display problems that appear as sizing issues.
Using PS4 Accessories to Enhance Experience
The right accessories can significantly improve your PlayStation 4 screen experience beyond basic display adjustments. Quality connections and proper audio settings work together to create an optimal gaming environment.
Impact of Using a High-Quality HDMI Cable
A high-quality HDMI cable makes a noticeable difference in your PS4’s visual performance. Standard cables that come with the console work adequately, but premium HDMI cables can provide clearer image quality and more stable connections.
Look for HDMI 2.0 or higher cables that support 4K resolution and HDR if your TV has these capabilities. These cables allow for higher refresh rates and better color depth than basic models.
Many players notice reduced screen flickering and signal drops after upgrading their HDMI cable. This is particularly important for fast-paced games where visual clarity matters.
When connecting, ensure the HDMI cable is firmly seated in both the PS4 and your display. Loose connections can cause intermittent display issues that may be mistaken for screen sizing problems.
Audio Adjustments with Microphone Settings
Proper audio setup complements your visual experience when playing PS4 games. The console offers several options to fine-tune microphone and headset performance.
To access these settings, navigate to Settings > Devices > Audio Devices on your PS4 dashboard. Here you can adjust microphone levels and output volume.
For optimal performance:
- Set appropriate microphone input volume
- Adjust sidetone settings to hear your own voice
- Configure output device based on your setup
Noise-cancelling gaming headsets provide the best experience, especially for competitive gameplay. They help isolate game sounds and enhance communication with other players.
Test your microphone settings in a party chat before important gaming sessions to ensure clear communication with teammates.
Cross-Compatibility with PS5
The display settings process differs between PS4 and PS5, but both systems offer ways to adjust screen boundaries for optimal gaming experience. Understanding these differences helps players who upgrade to the new console.
Display Area Settings when Transitioning to PS5
When moving from PS4 to PS5, some players might notice screen fitting issues, including UI elements being clipped off the edges. This problem occurs because the display area settings don’t automatically transfer between consoles.
To fix this on PS5, users need to access the display area settings through a different menu path. First, navigate to the home screen and select Settings. Then go to the Screen and Video option instead of the Display settings used on PS4.
Within this menu, players can adjust the display area to ensure all UI elements appear properly on screen. The PS5 offers more advanced video output options, including the ability to change resolution settings for 4K displays.
Some games that were played on PS4 might require reconfiguration of their individual display settings after being installed on PS5. This helps ensure optimal visual experience across different titles.
Frequently Asked Questions
Many PS4 users face common screen size issues that can be fixed through proper settings adjustments. These problems often relate to overscan, display boundaries, and game-specific settings that affect how content appears on different TVs.
How can I resize the display area of my PS4 to fit my TV screen?
To resize your PS4 display area, go to the PS4 dashboard and enter Settings. Select “Sound and Screen” and then choose “Display Area Settings.”
Use the directional buttons on your controller to adjust the screen boundaries until all four corners are visible on your TV. Press X to confirm your settings when everything fits properly.
Some TVs may also have an overscan setting that needs to be turned off in your TV’s picture settings menu for optimal display.
What steps are required to correct a PS4 screen that is zoomed in too far?
When your PS4 screen appears zoomed in, first check the “Display Area Settings” under “Sound and Screen” in your PS4 settings menu. Adjust the boundaries to fit your screen.
If the problem persists, check your TV settings. Look for picture size options labeled as “Just Scan,” “Screen Fit,” or “1:1” which disable overscan.
For severe cases, you might need to reset your video output settings by turning off your PS4 completely, then holding the power button until you hear two beeps to enter safe mode.
Is it possible to modify the aspect ratio on a PlayStation 4?
The PS4 doesn’t have direct aspect ratio controls like some other devices. It automatically outputs at 16:9 widescreen format, which is standard for modern TVs.
You can, however, make your screen display smaller with black borders by adjusting the Display Area Settings as mentioned earlier.
Any other aspect ratio changes would need to be made through your TV’s settings rather than the PS4 itself.
What is the procedure to change the screen size for a game like Fortnite on PS4?
For Fortnite-specific screen size issues, first try adjusting your PS4’s Display Area Settings in the console’s main settings menu.
If Fortnite still doesn’t fit properly, check the game’s own settings menu. Look under “Video” or “Display” options for any screen boundary or safe zone adjustment tools.
Fortnite has specific display settings that let you adjust the HUD scale and safe zone, which can help fit all game elements properly on your screen.
How do I adjust the display settings for Roblox on my PlayStation 4?
For Roblox on PS4, start by checking your console’s Display Area Settings to ensure your screen boundaries are correct.
Within Roblox itself, go to the Settings menu and look for display or video options. Some Roblox experiences have their own screen adjustment settings.
If text or UI elements appear cut off, you may need to reduce the zoom in your PS4 display settings for better visibility.
Where can I find the option to alter the screen boundaries for The Sims 4 on PS4?
The Sims 4 screen boundaries can be adjusted first through the PS4’s main Display Area Settings in the Sound and Screen menu.
Within The Sims 4 game itself, check the Options menu, then look for “Game Options” and “Display” settings. The game includes safe zone adjustment options specifically for console players.
If menu elements or UI components are cut off, try the fast method for screen size adjustment by holding the PlayStation button and adjusting settings through the quick menu.