Bookmarking websites on your iPad is a simple way to save your favorite pages for quick access later. Whether you’re using Safari or Google Chrome, the process is straightforward and takes just a few taps. You can bookmark any webpage on your iPad by tapping the share icon and selecting “Add to Bookmarks” in Safari, or by tapping the three-dot menu and selecting the star icon in Chrome.
Bookmarks on the iPad are more than just saved links – they can be organized into folders, synced across your Apple devices, and even displayed on your Favorites page for one-tap access. This feature is particularly useful when researching topics, shopping online, or keeping track of interesting articles you want to revisit later.
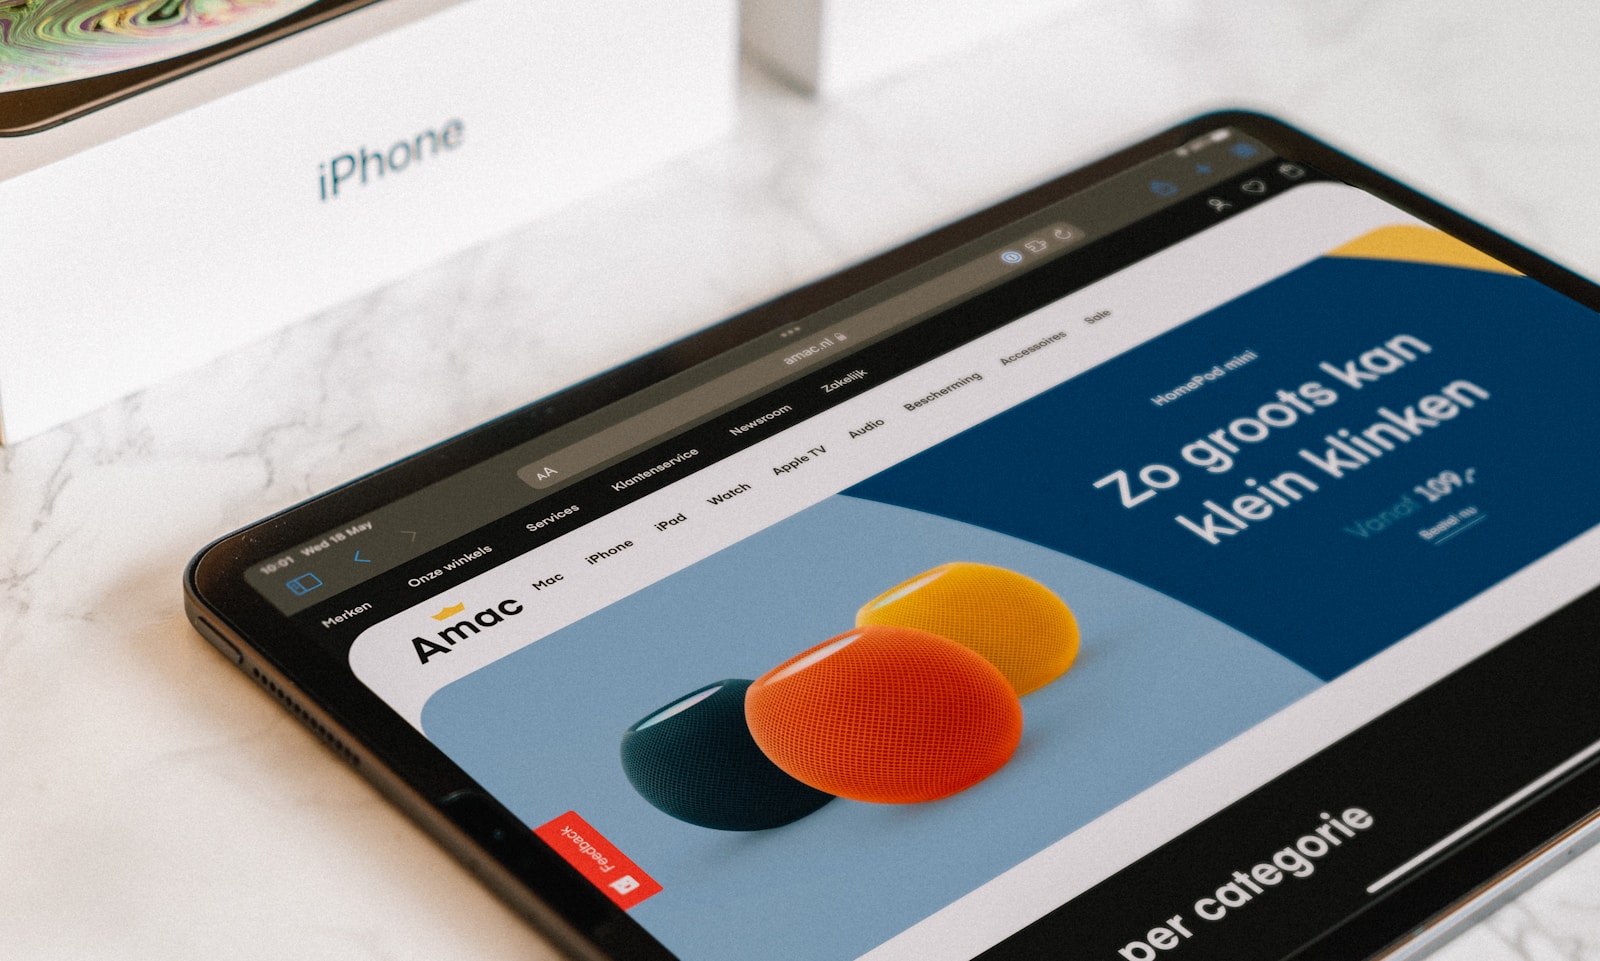
How to Bookmark a Website on iPad
Bookmarking a website saves it so you can quickly return later without typing the URL again. On iPad, this is done through the Safari browser.
Step 1: Open Safari
- Tap the Safari app on your iPad.
- Navigate to the website you want to bookmark.
Step 2: Open the Share Menu
- Look at the top of the screen (or bottom, depending on iPadOS version).
- Tap the Share button (a square with an upward arrow).
Step 3: Add Bookmark
- In the menu that appears, tap Add Bookmark.
- A window will pop up with:
- The website’s name (you can edit it if you want).
- The location where the bookmark will be saved.
Step 4: Choose a Location
You can save the bookmark in:
- Favorites → shows up on your Safari start page.
- Bookmarks folder → saved in your bookmarks library.
- Custom folder → you can create your own folders (e.g., “Recipes,” “Work,” “Shopping”).
Step 5: Save
- Tap Save in the top-right corner.
- Done! 🎉 Your bookmark is now stored.
How to Access Your Bookmarks
- Open Safari.
- Tap the Bookmarks icon (open book symbol).
- Select the folder or bookmark you want.
Extra Tips
- Add to Home Screen: If you want the website to appear like an app, tap Share → Add to Home Screen.
- Organize Bookmarks: In the bookmarks menu, tap Edit to rename, delete, or move bookmarks into folders.
✅ That’s it! Now you can quickly save and revisit your favorite websites on your iPad.
Key Takeaways
- Bookmarking saves your favorite websites for quick access through the Safari sidebar or Chrome menu.
- You can organize bookmarks into custom folders and edit them by tapping the “Edit” button in your bookmarks list.
- Bookmarks sync across all your Apple devices when you’re signed into the same Apple ID and have iCloud sync enabled.
Understanding Bookmarks on iPad
Bookmarks on iPad help you save and organize websites you want to revisit. They save you time and make browsing more efficient by eliminating the need to search for the same websites repeatedly.
What is a Bookmark?
A bookmark on your iPad is a saved shortcut to a specific webpage that allows you to quickly return to it later. When you bookmark a webpage in Safari, your iPad stores the web address so you don’t need to remember or type it again.
Bookmarks are stored in the Safari browser and can be organized into folders. You can access your bookmarks by tapping the Sidebar icon in Safari, then selecting the Bookmarks tab.
There are two main types of bookmarks on iPad:
- Regular bookmarks: Stored in your bookmark list
- Favorites: Special bookmarks that appear when you open a new tab
You can add, edit, delete, and rearrange your bookmarks anytime to keep your browsing organized.
Benefits of Bookmarking on iPad
Bookmarking websites on your iPad offers several advantages that enhance your browsing experience. First, it saves you significant time by providing instant access to sites you visit frequently without typing web addresses or using search engines.
Organizing your bookmarks into folders helps you keep track of different categories like news, recipes, or work-related sites. This creates a personalized browsing system tailored to your needs.
Your bookmarks can sync across all your Apple devices through iCloud, giving you access to the same saved sites on your iPhone and Mac. This seamless integration is especially useful when switching between devices.
Bookmarks also work offline, letting you view the list of saved sites even without an internet connection. When you’re back online, you can quickly navigate to any bookmarked page with a single tap.
Setting Up Bookmark Basics
Bookmarking websites on your iPad helps you quickly access favorite sites without typing the URL each time. The process is straightforward once you understand the basic tools and options available.
Navigating the Safari Browser
To begin bookmarking sites on your iPad, you’ll first need to open the Safari browser. This is typically found on your home screen with a compass icon. Tap to launch the app.
Once Safari is open, you can visit any website you’d like to bookmark. The address bar appears at the top of the screen where you can type website URLs or search terms.
Safari on iPad has a slightly different layout than on iPhone, with more screen space and additional features. The toolbar at the top contains navigation controls including back/forward arrows and the refresh button.
If you’ve set up your iCloud account, your bookmarks will sync across all your Apple devices automatically.
Locating the Bookmark Icon on iPad
The bookmark icon on iPad Safari appears as a small book or open book symbol. It’s located in the toolbar, either at the top of the screen or sometimes at the bottom, depending on your iPad model and iOS version.
To access all your existing bookmarks, tap the Sidebar icon (looks like a book) and then select the Bookmarks tab. This opens a panel showing all your saved bookmarks and folders.
If you don’t see the bookmark icon, try tapping the “AA” icon in the address bar first. This reveals additional options, including the bookmark icon.
Safari allows you to organize bookmarks into folders for better management. You can create new folders by tapping “Edit” when viewing your bookmarks.
Bookmark Icon Vs. Add to Favorites
There’s an important distinction between standard bookmarks and favorites on your iPad. Regular bookmarks save websites to your collection, while favorites appear in the Favorites bar for even quicker access.
To add a page as a regular bookmark, tap the share icon (square with up arrow), then select “Add Bookmark.” To add to favorites instead, choose “Add to Favorites” from the same menu.
Your Favorites bar appears below the address bar when you open a new tab. You can customize the appearance of your Favorites bar by going to Settings > Safari > Favorites Bar Appearance.
For a cleaner look, you can set your Favorites bar to “Show Icons Only” instead of showing the full website names. This allows more favorites to fit on screen at once.
How to Add Bookmarks on iPad
Bookmarking websites on your iPad saves time and helps you quickly access your favorite pages. The process is simple and can be done in just a few taps using Safari, which is the default browser on iPad.
Steps to Add a Bookmark
To add a bookmark on your iPad, first open the Safari app. Navigate to the website you want to save for later. Once you’re on the page, look for the Share icon (a square with an arrow pointing upward) at the top of the screen.
Tap the Share icon and a menu will appear with various options. Find and tap the “Add Bookmark” option from this menu.
A dialog box will appear allowing you to edit the bookmark details. You can change the name of the bookmark to something more memorable and select where to save it.
Choose a folder to store your bookmark. By default, it will save to the “Favorites” folder, but you can tap “Location” to select a different folder or create a new one.
Bookmarking Websites
You can organize your bookmarks into different folders based on topics or importance. To view your saved bookmarks, tap the Sidebar icon and then tap Bookmarks in the Safari app.
Your bookmarked websites appear in a list format. You can easily edit, delete, or reorganize them by tapping “Edit” in the bottom right corner.
To make your frequently visited sites more accessible, you can display them in the Favorites bar. Go to Settings > Apps > Safari and turn on Show Favorites Bar under the General section.
This will display a row of your favorite bookmarks at the top of Safari whenever you open a new tab, making it even faster to access your most-visited websites.
Using the Share Icon for Bookmarking
The Share icon is your main tool for creating bookmarks on iPad. Besides the standard bookmarking option, the Share menu offers additional ways to save websites.
You can add a website directly to your Home Screen by tapping “Add to Home Screen” in the Share menu. This creates an icon that opens the website with one tap.
Another option is to add the page to your Reading List by tapping “Add to Reading List.” This saves the page for offline reading later without creating a permanent bookmark.
If you use Google Chrome instead of Safari, the bookmarking process is similar. Tap the three dots in the upper right corner, then select the star icon to bookmark the current page.
Organizing Your Bookmarks
Keeping your Safari bookmarks organized on your iPad helps you quickly find your favorite websites. With a few simple steps, you can create a system that works for your browsing habits.
Creating Bookmark Folders
To create a new folder for your bookmarks, tap the Bookmarks icon in Safari. Then tap the Edit button at the top of the screen. Look for the “New Folder” option at the bottom left corner and tap it.
Give your folder a descriptive name like “News,” “Shopping,” or “Research.” You can create folders inside other folders for more detailed organization.
To move bookmarks into your new folder, tap Edit again, then press and hold the three horizontal lines next to a bookmark. Drag it into your desired folder. This drag-and-drop method makes organizing quick and intuitive.
Your bookmark folders will sync across all your Apple devices through iCloud, keeping your organization consistent everywhere.
Renaming Bookmarks and Folders
Safari often saves long website titles as bookmark names. To rename them, tap the Bookmarks icon, then tap Edit. Select the bookmark you want to rename and tap its name. Type your preferred shorter, more descriptive name.
For folders, the process is similar. Tap Edit, select the folder, and tap its name to change it.
Using clear, specific names helps you identify sites quickly. For frequently visited sites, consider adding them to Favorites for even faster access.
Your renamed bookmarks will automatically update across all devices connected to your iCloud account.
Sorting Bookmarks within Folders
Once your bookmarks are in folders, you can arrange them in any order you prefer. Tap the Bookmarks icon, then Edit. Use the three horizontal lines next to each bookmark as a handle to drag bookmarks up or down to reorder them.
Consider sorting your bookmarks alphabetically or by how often you use them. Place your most-used bookmarks at the top for quicker access.
Safari doesn’t offer automatic sorting, so you’ll need to manually arrange your bookmarks. This gives you complete control over your organization system.
For quick access to select bookmarks, you can organize them in the Favorites folder, which appears when you open a new tab.
Managing Bookmarks
Organizing your Safari bookmarks on iPad helps you access favorite websites quickly and efficiently. Proper bookmark management keeps your browsing experience streamlined and your important websites easily accessible.
Editing Bookmark Details
To modify the details of your existing bookmarks, first open Safari on your iPad. Tap the Show Sidebar button and then select Bookmarks. Tap Edit in the lower corner of the sidebar.
Now you can make several changes to your bookmarks:
- Rename a bookmark by tapping its name and typing a new one
- Change a bookmark’s URL by tapping the address field
- Move bookmarks by dragging the three horizontal lines to the right of each bookmark
You can also organize your bookmarks into folders for better categorization. Simply tap New Folder while in Edit mode, name your folder, and drag bookmarks into it.
This organization helps you find websites faster, especially if you have many bookmarks saved.
How to Delete Bookmarks
Removing unwanted bookmarks keeps your collection tidy and relevant. To delete a single bookmark, open Safari and access your bookmarks through the sidebar icon.
Tap Edit at the bottom of the bookmark list. You’ll now see red deletion circles appear next to each bookmark. To remove one:
- Tap the red circle next to the bookmark you want to delete
- Tap Delete to confirm
For removing multiple bookmarks at once, enter Edit mode, tap several red circles, and then hit Delete once you’ve selected all unwanted items.
If you want to delete an entire folder of bookmarks, the process is similar – tap the red circle next to the folder name and confirm deletion. Remember that this removes all bookmarks within that folder.
Syncing Bookmarks with iCloud
Keep your bookmarks consistent across all your Apple devices by syncing them through iCloud. This ensures you have access to the same saved websites whether you’re using your iPad, iPhone, or Mac.
To enable bookmark syncing:
- Go to Settings on your iPad
- Tap your Apple ID at the top
- Select iCloud
- Find Safari in the list of apps and toggle it on
Once activated, your bookmarks will automatically sync between devices using the same Apple ID. Any additions, edits, or deletions will update across your devices.
This feature is particularly useful if you frequently switch between devices. You can bookmark a site on your iPad and later access it from your iPhone or Mac without having to search for it again.
Advanced Bookmark Functions
iPad bookmarking features go beyond basic saving, offering powerful ways to enhance your browsing experience. These advanced functions help you access favorite sites faster and make online activities more efficient.
Adding Bookmarks to the Home Screen
You can add your most important bookmarks directly to your iPad’s Home Screen for instant access. This feature saves you from opening Safari first.
To add a bookmark to your Home Screen:
- Open the website you want to add in Safari
- Tap the share icon (square with arrow) at the top
- Scroll down and select “Add to Home Screen”
- Customize the name if needed
- Tap “Add” in the upper right corner
The website will now appear as an icon on your Home Screen. Tapping it opens the site directly in Safari. This works especially well for sites you visit daily like news, banking, or social media.
You can organize these web shortcuts just like regular apps by dragging them into folders or different Home Screen pages.
Using Bookmarks for Online Shopping
Bookmarks can transform your online shopping experience on iPad, making it more organized and efficient.
Create a dedicated Shopping folder in your Bookmarks list to keep all your favorite stores in one place. You can make subfolders for different categories like clothing, electronics, or groceries.
For products you’re tracking, bookmark the specific item pages to monitor price changes. This helps you spot deals without relying on email notifications.
When comparison shopping:
- Bookmark similar products from different retailers
- Use Safari’s tab groups to organize shopping research
- Add price notes to bookmark names (iPad $329 – March)
Many shopping sites allow you to add items to wish lists or carts that stay saved when you return. Bookmarking these pages saves you from searching for items again.
Sharing Bookmarks with Other Devices
Your iPad bookmarks don’t have to stay on just one device. You can sync and share them across your entire Apple ecosystem.
To enable bookmark syncing:
- Go to Settings on your iPad
- Tap your Apple ID at the top
- Select iCloud
- Toggle on Safari
Once activated, all your bookmarks will automatically sync to your iPhone, Mac, and other Apple devices using the same Apple ID. Changes made on any device reflect everywhere.
You can also share specific bookmarks with friends or family. Open Safari, tap the Bookmarks icon, locate the bookmark, then use the share icon to send it via Messages, AirDrop, or email.
For work collaborations, consider creating a shared bookmark folder using third-party apps that integrate with Safari’s bookmark system.
Tips and Tricks for Efficient Bookmarking
When you use your iPad for browsing, keeping track of your favorite websites can save you time. You can bookmark a website in Safari with just a few taps.
To save multiple tabs at once, pinch closed with three fingers to view all your tabs. Then touch and hold one tab and tap “Add Bookmarks” for all open tabs. This is perfect when researching a topic across several sites.
Create organized bookmark folders to keep things tidy. While in Safari, tap the bookmarks icon, then tap “Edit.” You can now create new folders to group similar websites together.
Name your bookmarks carefully for quick recognition later. Short, descriptive names work best. Instead of keeping the full webpage title, rename it to something you’ll easily remember.
Try this time-saving trick: bookmark entire tab groups when working on specific projects. Tap and hold the bookmarks icon, then choose “Add Bookmarks for XX Tabs.”
You can also organize your bookmarks by rearranging them. In bookmark view, tap “Edit” and then drag bookmarks up or down to reorder them.
Create a “Reading List” for articles you want to save for later. This special bookmark type lets you read content even when offline.
Place your most-used bookmarks in the Favorites folder so they appear on your start page whenever you open a new tab in Safari on iPad.
Frequently Asked Questions
Bookmarking websites on your iPad saves time and makes navigation easier. These common questions address specific bookmark features across different browsers and iPad models.
What are the steps to create a bookmark in Safari on iPad?
To bookmark a website in Safari on your iPad, open the Safari app and navigate to the website you want to save.
Tap the Share button located to the right of the search field.
Select “Add Bookmark” from the options that appear. You can then edit the bookmark name and choose where to save it before tapping “Save.”
How can I manage bookmarks in Chrome when using an iPad?
In Chrome on your iPad, tap the three dots in the upper-right corner to open the menu.
Select “Bookmarks” to view all your saved sites. You can organize them by tapping “Edit” in the bottom-right corner.
To add a new bookmark, navigate to the desired page, tap the three dots, and select “Bookmark this page.”
On an iPad Air, how do I access and edit my saved bookmarks?
On your iPad Air, open Safari and tap the bookmarks icon (looks like an open book) in the toolbar.
All your saved bookmarks will display. To edit a bookmark, touch and hold it, then select “Edit.”
You can change the name, URL, or folder location of any bookmark through the edit menu.
What is the process for saving a website to my iPad’s home screen for quick access?
Visit the website you want to add to your home screen in Safari.
Tap the Share button, then scroll down and select “Add to Home Screen.”
You can customize the shortcut name before tapping “Add” in the upper-right corner. The website will now appear as an icon on your home screen.
In which menu can I find the bookmarks bar on my iPad when using Safari?
To enable the bookmarks bar in Safari, go to Settings > Apps > Safari.
Turn on “Show Favorites Bar” under the General section. This displays your favorite bookmarks at the top of every Safari page.
You can customize which bookmarks appear by adding sites to your Favorites folder within the bookmarks menu.
How to synchronize bookmarks across devices with an iPad?
Make sure you’re signed in to the same Apple ID on all your devices to sync Safari bookmarks.
Go to Settings > [your name] > iCloud, then enable Safari to sync bookmarks automatically between your iPad and other Apple devices.
For Chrome users, sign in to your Google account in the browser settings to sync bookmarks across all devices where you use Chrome.