Screen recording on laptops has become an essential tool for many users. It allows people to capture tutorials, gameplay, presentations, and more with ease. Windows and Mac laptops offer built-in screen recording features that are simple to use and don’t require additional software.
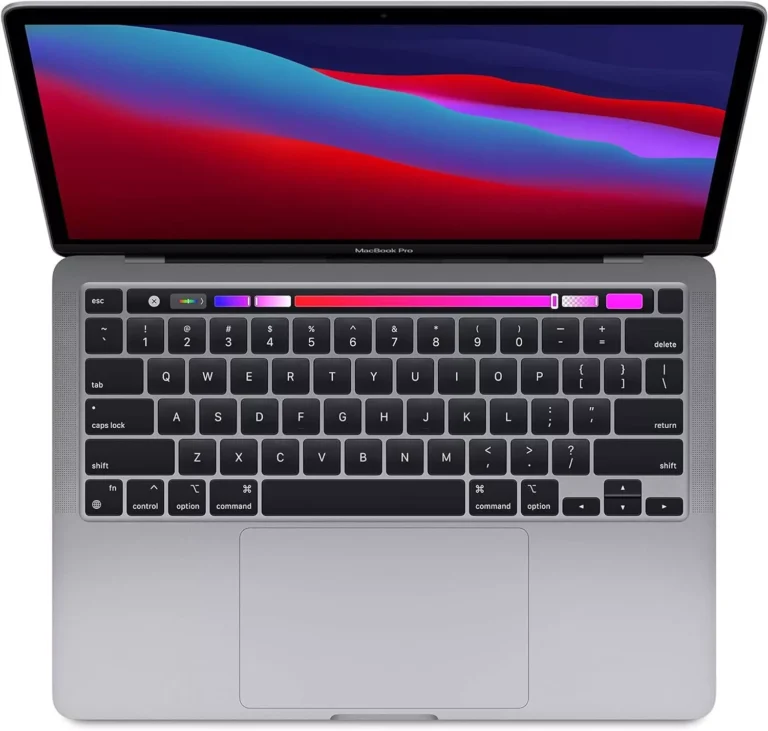
For Windows users, the Xbox Game Bar provides a quick way to record the screen. This tool works well for capturing games and other applications. Mac users can utilize the Screenshot Toolbar, which includes a screen recording option. Both systems allow users to record the entire screen or select a specific area.
Third-party applications offer more advanced features for those who need them. These apps often include editing tools, longer recording times, and additional export options. Some popular choices include OBS Studio and Camtasia, which cater to both casual and professional users.
Capturing Your Screen: A Guide to Laptop Screen Recording
Built-in Screen Recording Tools (Windows)
Windows offers a built-in screen recording tool called the Xbox Game Bar. Although designed for capturing gameplay, it can also record other applications.
- Open the Game Bar: Press the Windows key + G.
- Start Recording: Click the “Start recording” button (the circle icon) or press Windows key + Alt + R.
- Stop Recording: Click the “Stop recording” button (the square icon) or press Windows key + Alt + R again.
- Access Recordings: Your recordings are saved in the Videos\Captures folder.
The Game Bar has limitations. It can’t record the entire desktop or File Explorer. It’s best suited for recording individual application windows.
Built-in Screen Recording Tools (macOS)
macOS has a more versatile built-in screen recording tool.
- Open Screenshot Toolbar: Press Command + Shift + 5.
- Choose Recording Option: Select “Record Entire Screen” or “Record Selected Portion.”
- Start Recording: Click “Record.”
- Stop Recording: Click the stop button in the menu bar or press Command + Control + Esc.
- Access Recordings: By default, recordings are saved to your desktop.
Third-Party Screen Recording Software
Several third-party applications offer more advanced features than the built-in tools:
- OBS Studio (Free and Open Source): A powerful and versatile tool for recording and live streaming. It offers extensive customization options.
- ShareX (Free and Open Source): A lightweight tool for capturing and sharing screenshots and screen recordings.
- Bandicam (Paid): A user-friendly screen recorder with good performance and various recording modes.
- Camtasia (Paid): A robust screen recorder and video editor with advanced editing features.
Choosing the Right Tool
The best tool depends on your needs:
| Tool | Best For | Cost |
|---|---|---|
| Xbox Game Bar (Windows) | Simple game captures and recording individual application windows. | Free (Built-in) |
| macOS Built-in Recorder | General screen recording on macOS. | Free (Built-in) |
| OBS Studio | Advanced recording and live streaming, extensive customization. | Free |
| ShareX | Lightweight capturing and sharing. | Free |
| Bandicam/Camtasia | User-friendly interface, advanced features (paid). | Paid |
Tips for Better Screen Recordings
- Plan Your Recording: Outline what you want to capture before you start.
- Minimize Distractions: Close unnecessary applications and notifications.
- Use a Good Microphone: Clear audio is important for tutorials and presentations.
- Adjust Recording Settings: Choose appropriate resolution and frame rate.
- Edit Your Recording: Use video editing software to trim, add annotations, and enhance your recording.
Understanding the Impact of Storage Space on Recording Length
Screen recordings, especially those at high resolutions and frame rates, can consume significant storage space. The length of your recording will depend on factors like resolution, frame rate, and video codec used. Before starting a long recording, ensure you have sufficient free space on your hard drive. You can check your storage space in your computer’s system settings. If you are running low on space, consider using a lower resolution or frame rate for your recording, or transferring existing files to an external drive.
Key Takeaways
- Built-in tools on Windows and Mac laptops offer easy screen recording options
- Third-party applications provide advanced features for more complex recording needs
- Screen recording can be used for creating tutorials, capturing gameplay, and saving presentations
Understanding Screen Recording Basics
Screen recording on your laptop is a useful skill for creating tutorials, capturing gameplay, or sharing information. 1 This guide covers the built-in tools in Windows and macOS, as well as popular third-party software, to help you choose the best option for your needs. It also provides helpful tips for creating high-quality screen recordings.
Screen recording captures real-time activity on a computer display. This technology allows users to create visual content for various purposes.
Defining Screen Recording
Screen recording is the process of capturing everything visible on a computer monitor. It creates video files of on-screen actions, including cursor movements, clicks, and open windows. Screen recording software typically saves files in MP4 format for easy sharing and playback.
Users can choose to record the entire screen or select specific areas. Many tools offer options to include or exclude audio, webcam footage, and system sounds. Some advanced features allow for editing during recording, such as adding annotations or highlighting mouse clicks.
Applications of Screen Recording
Screen recording serves numerous practical purposes. It’s widely used for creating how-to videos, software tutorials, and product demonstrations. Educators use it to prepare online lessons, while tech support teams create visual guides for troubleshooting.
Gamers capture gameplay footage to share achievements or strategies. Businesses use screen recordings for training materials and internal communications. It’s also valuable for recording video calls, webinars, and online presentations.
Screen recording simplifies complex explanations by showing rather than telling. It helps preserve important information from temporary sources like live streams or time-sensitive web content. This versatile tool enhances communication across various fields and industries.
Using Built-in Screen Recording on Different Operating Systems
Modern operating systems offer built-in tools for screen recording. These features save time and eliminate the need for third-party software installations.
Screen Recording on Windows 10
Windows 10 includes the Xbox Game Bar for screen recording. To access it, press Windows key + G. The overlay appears with a Capture widget. Click the red record button to start. A timer shows the recording duration. To stop, click the stop button on the floating bar.
The Game Bar records the active window by default. For full-screen capture, use Windows key + Alt + R. Recordings save as MP4 files in the Videos folder.
Game Bar settings allow customization. Users can set keyboard shortcuts and adjust audio capture options. The tool also offers a feature to record the last 30 seconds of screen activity.
Screen Recording on Windows 11
Windows 11 introduces an improved Snipping Tool for screen recording. Open it by searching in the Start menu. Click the Record button in the top toolbar, then select New.
Users can choose the screen area to record by clicking and dragging. A 3-second countdown starts before recording begins. The tool captures both video and audio.
To stop recording, click the stop button. Windows 11 automatically saves recordings as MP4 files. The Snipping Tool offers easy editing and sharing options after recording.
Screen Recording on Mac
Mac users can use QuickTime Player for screen recording. Open QuickTime Player from the Applications folder. Select File > New Screen Recording from the menu bar.
A control panel appears. Click the arrow next to the record button to choose audio settings. Click the record button to start. Select the full screen or drag to choose an area.
To end the recording, click the stop button in the menu bar. QuickTime automatically opens the recording for review. Users can then edit, save, or share the video directly from QuickTime Player.
Advanced Screen Recording Techniques
Screen recording enthusiasts can elevate their captures with sophisticated tools and methods. These techniques offer enhanced control, quality, and features for creating professional-grade recordings.
Utilizing OBS Studio
OBS Studio provides powerful screen recording capabilities. Users can set up multiple scenes with various sources like webcams, game captures, and desktop windows. The software supports high-quality video encoding and live streaming to platforms like Twitch.
OBS Studio allows precise audio control. Users can mix multiple audio sources, including system sounds and microphone input. The software offers advanced features such as noise suppression and audio filters.
Custom overlays and transitions enhance video production value. Users can add text, images, and animations to their recordings. OBS plugins extend functionality, enabling features like virtual cameras and advanced scene switching.
Leveraging GeForce Experience
GeForce Experience offers screen recording for NVIDIA GPU users. The software provides easy-to-use capture options with minimal performance impact. Users can record gameplay at up to 8K resolution at 60 frames per second.
The Instant Replay feature saves recent gameplay automatically. This allows users to capture unexpected moments without constantly recording. The software supports custom overlays and webcam integration.
GeForce Experience includes broadcasting capabilities. Users can stream directly to platforms like Twitch and YouTube. The software optimizes game settings for the best balance of performance and quality.
Screen Recording with ShareX
ShareX offers versatile screen capture options. Users can record full screen, specific windows, or custom regions. The software supports various output formats and quality settings.
ShareX includes powerful annotation tools. Users can add text, shapes, and highlights to their recordings. The software offers automatic upload to cloud storage services.
Task automation streamlines the recording process. Users can set up custom workflows for capturing, editing, and sharing. ShareX supports plugins for extended functionality.
Finishing Touches: Editing and Sharing Your Screen Recordings
After recording your screen, it’s time to polish and distribute your video. Editing enhances the final product, while sharing allows others to benefit from your content.
Editing Your Screen Recordings
Video editing software offers powerful tools to refine screen recordings. Users can trim unnecessary footage, add text overlays, and insert transitions between scenes. Popular options include Adobe Premiere Pro and DaVinci Resolve for advanced editing, or simpler tools like OpenShot for basic tasks.
Many editors support cutting out mistakes or pauses. This creates a smoother viewing experience. Adding captions improves accessibility and helps viewers follow along, especially for tutorial videos.
Some software allows users to highlight mouse clicks or keystrokes. This feature is particularly useful for tech tutorials. Background music can also enhance the mood of a video, but it’s important to use royalty-free tracks to avoid copyright issues.
Sharing Screen Recordings on Platforms Like YouTube
YouTube remains a top platform for sharing screen recordings. Users can upload MP4 files directly to their channel. The platform offers basic editing tools for titles, descriptions, and thumbnails.
Before uploading, creators should optimize their video’s metadata. This includes writing descriptive titles and tags to improve searchability. YouTube’s Studio dashboard provides analytics to track video performance.
For business use, platforms like Vimeo offer more professional features. These include password protection and customizable players. Social media sites like Twitter and LinkedIn also support video uploads, ideal for shorter clips.
Cloud storage services like Google Drive or Dropbox work well for sharing private recordings. These options allow creators to control who can access their content through link sharing or permissions settings.
Frequently Asked Questions
Screen recording on laptops varies depending on the operating system and model. Different methods exist for Windows 11, Windows 10, MacBooks, and specific laptop brands.
What steps are involved in screen recording on a Windows 11 laptop?
Windows 11 includes the Snipping Tool for screen recording. Users can search for it in the Start menu. The tool offers a “Record” button in the top toolbar. Clicking “New” allows selection of the screen area to record. A 3-second countdown precedes the start of recording.
How can I screen record on a Windows 10 laptop?
Windows 10 users can utilize the Game Bar for screen recording. Pressing Windows key + G opens the Game Bar overlay. The “Record” button or Windows key + Alt + R starts the recording. A timer appears in the top-right corner to indicate active recording.
Can you guide me through screen recording on a MacBook?
MacBooks have built-in screen recording capabilities. Users can press Shift + Command + 5 to access the screen recording tools. Options include recording the entire screen or a selected portion. Clicking “Record” begins the process.
What should I do if I cannot activate the screen recording feature on my laptop?
Check if your laptop meets the minimum system requirements for screen recording. Update your operating system and graphics drivers. Restart your laptop. If issues persist, consult the manufacturer’s support website or contact customer service.
Is there a built-in tool for screen recording on HP laptops?
HP laptops running Windows use the same screen recording tools as other Windows laptops. The Game Bar on Windows 10 or the Snipping Tool on Windows 11 are available. Some HP models may include additional pre-installed screen recording software.
How can I enable and use screen recording features on a Lenovo laptop?
Lenovo laptops with Windows operating systems use standard Windows screen recording tools. Enable the Game Bar in Windows Settings if it’s not active. Some Lenovo models may offer proprietary software with screen recording functions. Check the pre-installed programs list for Lenovo-specific tools.

