The Windows 11 Start menu represents a significant shift from previous Windows versions, with Microsoft redesigning this essential interface element to be more streamlined and centered on the taskbar. You might notice immediately how the live tiles from Windows 10 have disappeared, replaced with a grid of pinned apps and a separate “All apps” section. The Windows 11 Start menu can be easily customized through Settings > Personalization > Start, allowing you to organize your most-used programs and adjust how recommendations appear.
Recent updates to Windows 11 have brought even more improvements to the Start menu experience. Microsoft has confirmed a new Start menu layout for the “All apps” page that organizes applications based on categories, making it easier to find what you’re looking for without excessive scrolling. This change has been welcomed by many users who found the initial Windows 11 Start menu too simplistic compared to previous versions.
If you’re new to Windows 11 or struggling with the Start menu changes, don’t worry—accessing it remains simple. You can open the Start menu by clicking the Windows icon on your taskbar or pressing the Windows key on your keyboard. From there, you can pin your favorite apps, access recently used files, and quickly find the programs you need.
Windows 11 Start Menu Troubleshooting Guide
The Windows 11 Start Menu is the hub for your apps, settings, and files. However, many users encounter issues ranging from the Start Menu not opening to wanting to customize its appearance. This guide covers common troubleshooting steps, customization tips, and answers to frequently asked questions about the Windows 11 Start Menu.
Windows 11 Start Menu Not Working
If your Start Menu is unresponsive or not opening, try these fixes:
- Restart Windows Explorer
- Press
Ctrl + Shift + Escto open Task Manager. - Scroll down to Windows Explorer, right-click it, and choose Restart.
- Run Start Menu Troubleshooter (via PowerShell)
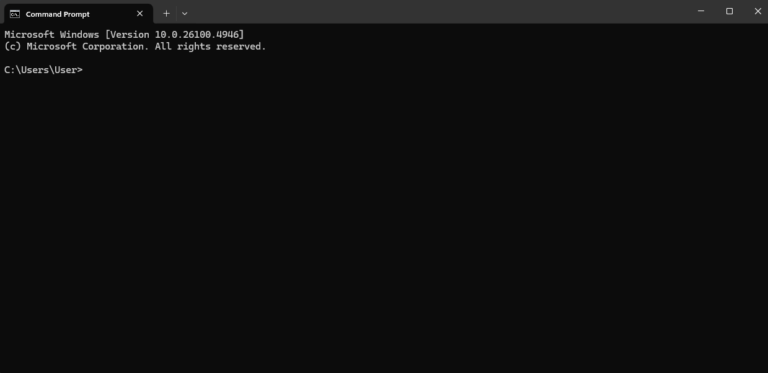
- Right-click Start and select Terminal (Admin).
- Enter:
Get-AppxPackage Microsoft.Windows.StartMenuExperienceHost | Reset-AppxPackage
- Check for Windows Updates
- Go to Settings > Windows Update and install any available updates.
- Create a New User Account
- Corrupted profiles can cause Start Menu issues. Try creating a new account via:
Settings > Accounts > Family & other users > Add account
Windows 11 Start Menu on the Left Side
By default, the Start Menu is centered. To move it to the left:
- Open Settings.
- Navigate to Personalization > Taskbar.
- Scroll to Taskbar behaviors.
- Change Taskbar alignment from Center to Left.
Windows 11 Start Menu Folder Creation
You can organize apps into folders on the Start Menu:
- Open the Start Menu.
- Drag one app icon over another. A folder will automatically be created.
- Click the folder to rename it by selecting the Edit name option.
Windows 11 Start Menu Show All Apps by Default
Currently, Windows 11 doesn’t have an option to show All apps by default. However, you can quickly access All apps by:
- Clicking Start.
- Clicking All apps in the upper-right corner.
For an always-expanded list, consider a third-party Start Menu replacement (explained later).
Windows 11 Start Menu Remove Recommended Section
You can minimize the Recommended area but not completely remove it natively:
- Go to Settings > Personalization > Start.
- Turn off:
- Show recently added apps
- Show most used apps
- Show recently opened items
This reduces clutter but doesn’t fully remove the section.
Windows 11 Start Menu Replacement Options
If you prefer more control or a classic look, consider third-party replacements:
- Start11 by Stardock
- Customizable Start Menu styles (Windows 7, 10 lookalikes)
- Open-Shell
- Free and highly customizable, mimicking Windows 7 or classic Windows XP Start Menus.
Windows 11 Start Menu Like Windows 10
You can make the Start Menu look and feel like Windows 10 by:
- Using Start11 to select a Windows 10-style menu.
- Aligning the taskbar to the left (Settings > Personalization > Taskbar > Taskbar behaviors).
- Disabling Recommended content as much as possible (Settings > Personalization > Start).
Windows 11 Start Menu Customization
You can personalize the Start Menu in several ways:
- Pin Apps
- Open Start, right-click an app, and choose Pin to Start.
- Change Folder Names
- Click a folder and select Edit name.
- Rearrange Apps
- Drag pinned apps into your preferred order.
- Change Icon Size
- Not natively supported, but possible via third-party tools like Start11.
Windows 11 Start Menu Search Not Working
Fix search issues with these steps:
- Restart Search Process
- Press
Ctrl + Shift + Escfor Task Manager. - End the SearchHost.exe process; it will restart automatically.
- Rebuild Search Index
- Go to Settings > Privacy & security > Searching Windows.
- Under Indexing options, click Advanced indexing options.
- Click Rebuild.
- Run Search Troubleshooter
- Go to Settings > System > Troubleshoot > Other troubleshooters.
- Run Search and Indexing troubleshooter.
Windows 11 Start Menu Missing
If the Start Menu button is completely missing:
- Restart Windows Explorer
Ctrl + Shift + Esc> Windows Explorer > Restart.
- Check for Corrupt Files
- Open Terminal (Admin) and run:
sfc /scannow DISM /Online /Cleanup-Image /RestoreHealth
- Reinstall Start Menu Packages
- In PowerShell (Admin):
Get-AppxPackage -AllUsers Microsoft.Windows.StartMenuExperienceHost | Foreach {Add-AppxPackage -DisableDevelopmentMode -Register "$($_.InstallLocation)\AppXManifest.xml"}
Windows 11 Start Menu Settings Location
Find Start Menu settings here:
- Open Settings > Personalization > Start.
- Adjust options like:
- Showing recently added apps
- Showing most used apps
- Recommendations visibility
Windows 11 Start Menu Layout
Control the layout by:
- Pinning and Unpinning Apps
- Right-click > Unpin from Start or Pin to Start.
- Using Folders
- Drag apps over each other to create folders.
- Choosing More Pins or Recommendations
- Go to Settings > Personalization > Start > Layout.
- Choose More pins, Default, or More recommendations.
Windows 11 Start Menu Folders
Folders help organize the Start Menu:
- Create a Folder
- Drag one pinned app onto another to form a
Key Takeaways
- The Windows 11 Start menu features a centered, streamlined design that prioritizes pinned apps and recommendations over the live tiles of previous versions.
- You can customize your Start menu through the Personalization settings to better suit your workflow and preferences.
- Microsoft continues to improve the Start menu with category-based organization in recent updates, making app navigation more intuitive.
Evolution of the Start Menu
The Windows Start Menu has undergone significant transformations since its introduction, reflecting Microsoft’s changing design philosophy and user experience priorities. These changes represent both technical improvements and responses to user feedback.
Historical Overview and Revisions
The Start Menu debuted in Windows 95, revolutionizing how users accessed programs and system functions. This iconic feature remained relatively consistent through Windows XP with its two-column layout.
Windows 7 refined the experience with improved search and a cleaner interface. The menu maintained its core functionality while adding visual polish and better organization of programs.
Windows 8 marked a controversial departure with the removal of the traditional Start Menu in favor of a full-screen Start Screen with live tiles. This radical change faced significant user pushback.
Microsoft responded in Windows 10 by bringing back a hybrid Start Menu that combined the traditional menu with live tiles. This compromise aimed to satisfy both touch and desktop users while maintaining familiar navigation.
Transition from Windows 10 to Windows 11
When Windows 11 launched, the Start Menu underwent another major redesign. The most visible change was its centered position on the taskbar rather than the left corner where it had resided for decades.
Windows 11’s Start Menu abandoned live tiles completely in favor of a simplified grid of pinned apps. The “All apps” list moved to a separate button, and the organization changed to focus on static icons rather than dynamic content.
Many users sought ways to restore the classic Start Menu from previous Windows versions. Third-party applications emerged to provide this functionality.
Recent Windows 11 updates have introduced further refinements, including AI-powered app categorization in the “All apps” section. Microsoft continues to evolve this central interface element based on user feedback and changing technology trends.
Navigating the Windows 11 Start Menu
The Windows 11 Start Menu offers a completely redesigned experience compared to previous versions, with a centered layout and simplified access to important functions. Getting familiar with its components and customization options will help you work more efficiently.
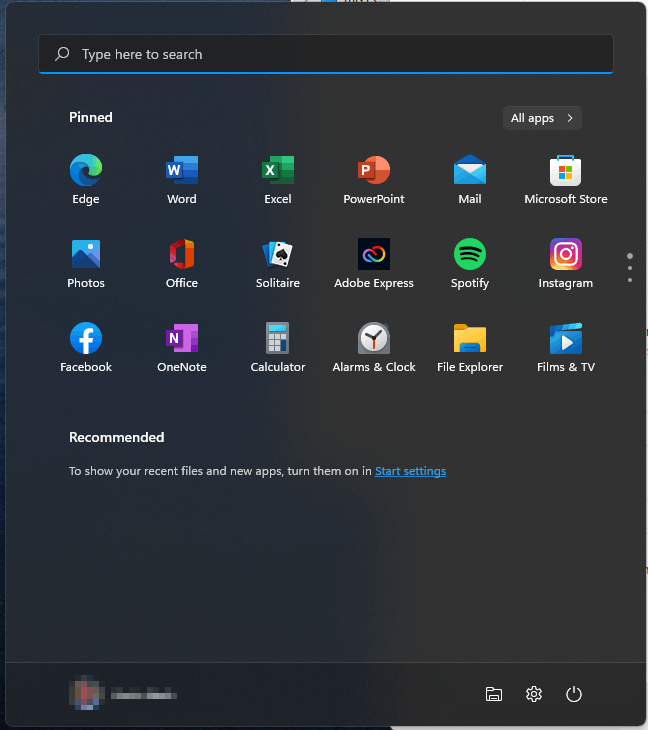
Overview of Components
The Windows 11 Start Menu appears as a floating panel when you press the Windows key on your keyboard. Unlike Windows 10, this menu is centered by default on your taskbar.
At the top of the Start Menu, you’ll find the search bar for quickly finding apps, files, and settings. This integrates Windows Search functionality directly into your workflow.
The main section displays your pinned apps as icons in a grid layout. These are programs you choose to keep readily available.
Below the pinned apps, you’ll see “Recommended” items showing recent files and newly installed applications. This section updates automatically based on your usage patterns.
The power button is located at the bottom right, giving you quick access to shutdown, restart, and sleep options.
Customization and Personalization
You can easily customize the Windows 11 Start Menu to match your preferences and workflow. Right-click on any app to pin it to Start or directly to the taskbar for even faster access.
To rearrange your pinned apps, simply drag and drop them into your preferred positions. You can organize icons into logical groups based on your workflow.
Want to change how the taskbar and Start Menu align? You can adjust the taskbar alignment through settings:
- Right-click on the taskbar
- Select “Taskbar settings”
- Find “Taskbar behaviors” and change the alignment
You can also modify which folders appear in the Start Menu through personalization settings. This lets you add quick access to important locations like File Explorer, Downloads, or Documents.
The Taskbar and Start Menu Relationship
The taskbar and Start menu in Windows 11 represent interconnected elements of the user interface that work together to provide quick access to apps and system features. Their relationship affects both functionality and user experience through customizable positioning and integrated features.
Aligning and Positioning Taskbar Icons
In Windows 11, you can customize how the taskbar and Start menu appear on your screen. By default, the taskbar icons are centered in Windows 11, which is a significant change from previous Windows versions.
To modify this setting:
- Open Settings > Personalization > Taskbar
- Find Taskbar Behaviors
- Use the drop-down menu to change alignment to “Left”
This adjustment affects both your taskbar icons and the Start button position. However, some users report an issue where even with left alignment, the Start button’s clickable area may not properly align with its visible position.
You can pin frequently used apps directly to your taskbar for quick access without opening the Start menu. Right-click any app icon and select “Pin to taskbar” to keep it permanently visible.
Taskbar Integration with Windows 11 Features
The Windows 11 taskbar integrates with several system features to enhance your workflow. The Start menu serves as the central hub, connecting to these taskbar elements for a cohesive experience.
Windows 11 version 24H2 brings new enhancements to both the taskbar and Start menu. These updates improve how these elements work together to provide faster access to your content and settings.
Key integrated features include:
- Search functionality built directly into the taskbar
- Widgets panel access
- Task View button for managing virtual desktops
- Quick Settings menu for system controls
You can quickly access the Start menu in multiple ways: clicking the Start button on the taskbar, pressing the Windows key on your keyboard, or swiping up from the bottom of your screen on touch devices.
Customization Through System Settings
Windows 11 offers several built-in options to personalize your Start menu through the Settings app. You can modify the menu’s appearance, organize pinned apps, and adjust how the taskbar interacts with your Start experience.
Taskbar and Start Menu Settings
To begin customizing your Start menu, open the Settings app by pressing Win+I or right-clicking the Start button and selecting “Settings.” Navigate to Personalization > Start to access the main customization options.
Here you’ll find several toggles that control Start menu behavior:
- Show recently added apps – Displays recently installed applications
- Show most used apps – Lists programs you frequently access
- Show recently opened items – Displays recent files in Jump Lists and Start
You can also personalize your Start menu’s appearance through related settings. The taskbar’s behavior affects how you interact with Start, so visit Personalization > Taskbar to adjust taskbar alignment and icon visibility.
Adjusting Start Menu Layout
Windows 11 introduced a new Start menu layout that you can customize to fit your needs. To pin apps, simply right-click any app and select “Pin to Start.” You can then rearrange pinned icons by dragging them to your preferred position.
For more advanced organization, you can create groups of pinned items by dragging apps together. Windows 11 allows you to name these groups, making it easier to find your applications.
If you’re setting up multiple devices, consider using PowerShell or registry modifications for consistent Start menu layouts across your organization. IT administrators can export and deploy custom Start layouts to ensure uniformity across managed devices.
For a complete transformation, third-party tools like Start11 offer additional customization options beyond Windows’ built-in settings.
Power User Tweaks and Modifications
Windows 11’s Start menu can be extensively customized beyond the basic options. Advanced users can leverage PowerShell commands, registry tweaks, and Group Policy settings to achieve deeper customization that isn’t available through the standard UI.
Using PowerShell and Registry Edits
PowerShell offers powerful ways to modify the Windows 11 Start menu. You can use commands to pin or unpin apps programmatically, which is useful for setting up multiple workstations. For example, this PowerShell command creates a backup of your current Start layout:
Export-StartLayout -Path "C:\StartMenuBackup.xml"
The Windows Registry also holds many customization options. Navigate to HKEY_CURRENT_USER\Software\Microsoft\Windows\CurrentVersion\Explorer\Advanced to find several Start menu-related settings.
For instance, you can disable the “Recommended” section by creating a DWORD value named Start_ShowClassicMode and setting it to 1. This removes the wasted space many users complain about in the Windows 11 Start menu.
You can also use Registry Editor to modify HKEY_LOCAL_MACHINE\SOFTWARE\Policies\Microsoft\Windows\Explorer for system-wide Start menu modifications that affect all users.
Group Policy Editor for Start Menu Customization
The Group Policy Editor provides a more user-friendly interface for advanced Start menu customization. This tool is only available in Windows 11 Pro, Education, and Enterprise editions.
To access relevant policies, open Group Policy Editor and navigate to:
Computer Configuration > Administrative Templates > Start Menu and TaskbarUser Configuration > Administrative Templates > Start Menu and Taskbar
Key policies you can modify include:
- Show or hide “Recommended” section – Control whether the lower section displays recently used files
- Remove “All Apps” from Start menu – Simplify the interface by removing this list
- Force Start layout – Deploy a specific Start menu configuration across multiple machines
Group Policy settings are particularly valuable in organizational environments where IT administrators need to customize the Start layout for managed Windows devices. These settings create a consistent experience across all workstations.
Third-Party Applications and Tools
Windows 11’s Start menu has limitations that frustrate many users, but several external solutions can transform your experience. These tools range from complete menu replacements to specialized add-ons that enhance specific features.
Start Menu Replacement Apps
If you’re unhappy with Windows 11’s Start menu, several replacement software options can restore a more familiar experience. Start11 is among the most popular choices, offering both v1 and v2 versions that let you customize your Start menu appearance and functionality.
Open-Shell (formerly Classic Shell) provides a free alternative that brings back the classic Windows 7 style Start menu many users prefer. It gives you extensive customization options and faster access to programs.
Explorer Patcher offers a mix-and-match approach, allowing you to choose which aspects of Windows 10/11 you want to keep or replace. You can modify the taskbar, Start menu, and context menus to create your ideal setup.
These replacements typically offer:
- Multiple style options (Windows 7, Windows 10, custom)
- Better folder organization
- Enhanced search capabilities
- More customizable layouts
Enhancing Functionality with Add-Ons
Beyond complete replacements, several tools can enhance your existing Start menu. Windhawk offers micro-modifications that tweak specific aspects of the Windows interface without replacing the entire Start menu.
You can easily add programs to your Start menu for quicker access. Right-click on applications in the All Apps list and pin them for immediate visibility.
For developers and text editors, integrating tools like Notepad++ into your Start menu can significantly improve workflow efficiency compared to the basic Notepad.
Consider these popular add-ons:
- Menu expanders: Increase the number of visible items
- Custom grouping tools: Organize apps by project or function
- Search enhancers: Improve the accuracy and speed of Start menu searches
These smaller modifications can make a big difference in daily productivity without requiring you to completely abandon the Windows 11 interface.
Frequently Asked Questions
Windows 11 introduces a completely redesigned Start menu with several changes from previous versions. Users often encounter specific issues and have questions about customization options and alternatives.
How can I fix a non-responsive Start menu in Windows 11?
If your Start menu stops working, try restarting your PC first. This simple step often resolves temporary glitches.
For persistent problems, run the Windows troubleshooter by pressing Win+I to open Settings, navigating to System > Troubleshoot > Other troubleshooters, and running the “Start Menu” troubleshooter.
You can also try creating a new user account to see if the issue is profile-specific. Sometimes corrupted user profiles can cause Start menu problems.
What are the steps to change the Start menu location on Windows 11?
You can change the Start menu alignment in Windows 11. Right-click on an empty area of the taskbar and select “Taskbar settings.”
In the Taskbar settings window, look for “Taskbar behaviors” and click to expand it. You’ll find an option for “Taskbar alignment” where you can choose between “Center” (default) or “Left.”
After selecting your preferred alignment, the change takes effect immediately without requiring a restart.
Is there an official way to download the Windows 11 Start menu?
The Windows 11 Start menu comes built into the operating system and isn’t available as a separate download. It’s an integral part of Windows 11.
If you’re using Windows 10 and want the Windows 11 Start menu, you’ll need to upgrade to Windows 11 through official channels like Windows Update or the Microsoft Installation Assistant.
Microsoft doesn’t offer the Windows 11 Start menu as a standalone feature for other Windows versions.
Can the Windows 11 Start menu be moved to the left side of the screen?
Yes! Windows 11 allows you to move the Start menu from its default center position to the left side of the screen, similar to Windows 10’s layout.
To do this, right-click on the taskbar and select “Taskbar settings.” Under “Taskbar behaviors,” change the “Taskbar alignment” setting from “Center” to “Left.”
Many users who are transitioning from Windows 10 prefer this option as it maintains the familiar Start menu location they’re accustomed to using.
Are there any third-party replacements for the Windows 11 Start menu?
Yes, several third-party alternatives can replace the Windows 11 Start menu. Popular options include Start11, StartAllBack, and Open-Shell.
These applications let you customize your Start menu experience beyond what Windows 11 natively offers. Some even allow you to restore a Windows 10 or Windows 7-style Start menu.
Before installing third-party Start menu replacements, check reviews and ensure they’re compatible with your specific Windows 11 version to avoid system issues.
What is the procedure to customize the Start menu icons in Windows 11?
To customize Start menu icons, right-click on any app in the Start menu and select “Pin to Start” to add it to your pinned apps section.
You can rearrange icons by dragging and dropping them to your preferred position. To remove an icon, right-click it and select “Unpin from Start.”
For further customization, go to Settings > Personalization > Start. Here you can toggle options to show recently added apps, most used apps, and recently opened items in the Start menu.