Backing up your iPhone to a Mac ensures your data stays safe. This process protects your photos, messages, and apps from loss. You can back up your iPhone to a Mac using Finder or iTunes, depending on your macOS version.
Mac users with macOS Catalina or later use Finder for iPhone backups. The process involves connecting your iPhone to the Mac with a USB cable and selecting backup options in Finder. For older macOS versions, iTunes handles the backup process.
Both methods allow for encrypted backups, adding an extra layer of security to your data. Regular backups keep your information current and make it easy to restore your iPhone if needed.
Backup iPhone to Mac: Quick Guide for Secure Data Transfer
Backing up your iPhone to your Mac is one of the safest ways to protect your data. Unlike iCloud, which relies on internet storage, a Mac backup gives you a local, offline copy of everything — perfect for security and quick recovery if your iPhone is lost, damaged, or replaced.
This guide walks you through the fastest and most secure methods to back up your iPhone to a Mac in 2025.
🔑 Why Backup iPhone to Mac?
- Full backup of photos, videos, contacts, messages, and apps.
- Offline security — no reliance on cloud servers.
- Faster restores compared to iCloud.
- Encrypted backups protect sensitive data like Health and Wallet info.
🔌 Method 1: Backup with Finder (macOS Catalina & Later)
Since macOS Catalina (2019), iTunes has been replaced by Finder for iPhone management.
Steps:
- Connect your iPhone to your Mac using a USB-C or Lightning cable.
- Open Finder (click the Finder icon in your Dock).
- In the sidebar, select your iPhone under Locations.
- Click General in the Finder window.
- Choose Back up all of the data on your iPhone to this Mac.
- (Optional but recommended) Check Encrypt local backup → create a password.
- Click Back Up Now.
👉 Your iPhone will now back up to your Mac. You can monitor progress in Finder.
☁️ Method 2: Backup with iTunes (macOS Mojave or Earlier)
If you’re using an older Mac:
- Open iTunes.
- Connect your iPhone via cable.
- Click the iPhone icon in the top-left corner.
- Under Backups, select This Computer.
- (Optional) Check Encrypt iPhone backup.
- Click Back Up Now.
📶 Method 3: Wireless Backup to Mac (Wi-Fi Sync)
You can set your iPhone to back up wirelessly when it’s on the same Wi-Fi network as your Mac.
- Connect your iPhone to Mac with a cable (first-time setup).
- In Finder, select your iPhone → check Show this iPhone when on Wi-Fi.
- Now, whenever your iPhone and Mac are on the same Wi-Fi network, backups can be done wirelessly.
🔒 Secure Your Backup
- Always encrypt your backup: This ensures Health, Keychain, and Apple Pay data are saved.
- Store your encryption password safely — you’ll need it to restore.
- Use Time Machine to back up your Mac, which in turn protects your iPhone backups.
🛠️ Restore from Backup
If you get a new iPhone or need to restore:
- Connect your iPhone to your Mac.
- Open Finder → select your iPhone.
- Click Restore Backup.
- Choose the most recent backup and click Restore.
📊 Backup Methods Comparison
| Method | Speed | Security | Best For |
|---|---|---|---|
| Finder (macOS Catalina+) | Fast | High (with encryption) | Most Mac users |
| iTunes (Mojave or older) | Medium | High (with encryption) | Older Macs |
| Wi-Fi Sync | Slower | Medium | Cable-free convenience |
| iCloud Backup (alternative) | Depends on internet | High (Apple encrypted) | Users without Mac access |
✅ Final Tips
- Backup regularly (weekly recommended).
- Use encrypted backups for maximum security.
- Combine Mac + iCloud backups for double protection.
- Keep your Mac updated for the latest Finder and security features.
🔐 Bottom Line: Backing up your iPhone to your Mac is fast, secure, and reliable. For 2025, the best option is Finder with encrypted local backups, giving you complete control over your data.
Key Takeaways
- Backing up iPhone to Mac protects data from loss
- Mac users can use Finder or iTunes for backups
- Encrypted backups offer enhanced data security
Requirements and Preparation
Before backing up your iPhone to a Mac, you need to ensure your devices meet certain requirements and are properly prepared. This involves checking compatibility, updating software, and making sure you have enough storage space.
Checking macOS Compatibility
To back up your iPhone to a Mac, you need a compatible macOS version. macOS Catalina (10.15) or later uses Finder for backups, while earlier versions require iTunes.
For Macs running macOS Catalina or newer:
- Open Finder to manage backups
- Connect iPhone with USB cable
- Select the device in Finder sidebar
For Macs with macOS Mojave (10.14) or earlier:
- Use iTunes for backups
- Ensure iTunes is up to date
- Connect iPhone and select it in iTunes
Updating iTunes and iOS
Keeping software updated is crucial for a smooth backup process. For Macs using iTunes:
- Open the App Store
- Click on Updates
- Install any available iTunes updates
For iPhone iOS updates:
- Go to Settings > General > Software Update
- Download and install if an update is available
It’s important to update both Mac and iPhone software to ensure compatibility and access to the latest features.
Ensuring Sufficient Storage Space
Having enough storage space on both devices is essential for a successful backup. To check available space on Mac:
- Click Apple menu > About This Mac > Storage
- Review available space
On iPhone:
- Go to Settings > General > iPhone Storage
- Check available space at the top
If storage is low, consider:
- Deleting unnecessary files or apps
- Moving data to iCloud or external drive
- Upgrading storage capacity if needed
Remember to keep your Apple ID and password handy, as you may need them during the backup process.
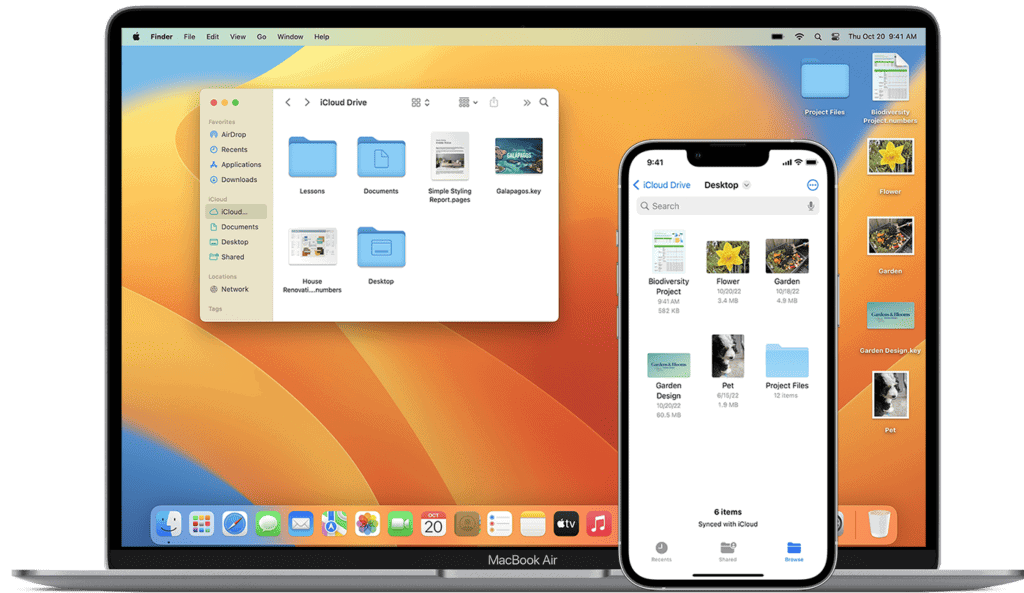
Using Finder for iPhone Backup
Backing up an iPhone to a Mac using Finder is a straightforward process. This method provides a secure way to store important data locally.
Connecting iPhone to Mac
To begin the backup process, connect your iPhone to your Mac using a USB cable. Make sure you’re using a high-quality cable to ensure a stable connection. Once connected, open a Finder window on your Mac. Look for your iPhone in the sidebar under “Locations.” If you don’t see it, check that your iPhone is unlocked and the cable is securely plugged in.
Trust This Computer Prompt
When you connect your iPhone to a Mac for the first time, a “Trust This Computer” prompt will appear on your iPhone. Tap “Trust” and enter your passcode to allow the Mac to access your iPhone’s data. This step is crucial for enabling backups and other file transfers between your devices.
Creating a Local Backup
With your iPhone connected and trusted, select it in the Finder sidebar. Click on the “General” tab in the main Finder window. You’ll see options for backing up your device. Choose “Back up all of the data on your iPhone to this Mac.” Click “Back Up Now” to start the process. The time it takes depends on how much data you have. Keep your iPhone connected until the backup finishes.
Encrypting Your Backup
For added security, encrypt your local backup. In the Finder window, check the box next to “Encrypt local backup.” You’ll be prompted to create a password. Choose a strong, unique password and store it safely. Encrypted backups protect sensitive information like passwords and health data. Once set, future backups will automatically be encrypted. This feature ensures your data remains secure even if someone gains access to your Mac.
Managing Backups and Storage
Effective backup management ensures data security and optimizes storage usage. Regular maintenance of iPhone backups on Mac helps keep important files safe while freeing up valuable space.
Viewing Previous Backups
To view existing iPhone backups on a Mac, open Finder and select the connected device. Click the “Manage Backups” button under the General tab. This displays a list of all backups for that device, including dates and sizes.
Users can also check iCloud backups by going to System Settings > Apple ID > iCloud > Manage Storage > Backups. This shows all devices backed up to iCloud associated with the Apple ID.
For local backups, navigate to ~/Library/Application Support/MobileSync/Backup/ in Finder. Each backup folder is named with a unique identifier.
Deleting Old Backups
Removing outdated backups frees up storage space on Mac or iCloud. To delete local backups, use Finder’s “Manage Backups” feature. Select the unwanted backup and click “Delete Backup.”
For iCloud backups, go to System Settings > Apple ID > iCloud > Manage Storage > Backups. Choose the device, then select “Delete Backup” to remove it from iCloud storage.
It’s advisable to keep at least one recent backup before deleting older ones. This ensures a recovery option if needed.
Allocating iCloud Storage
iCloud offers 5GB of free storage. To manage or upgrade storage:
- Go to System Settings > Apple ID > iCloud
- Click “Manage” next to iCloud Storage
- View current usage and available storage plans
Upgrading iCloud storage provides more space for backups, photos, and other data. Plans start at 50GB and go up to 2TB.
Users can optimize iCloud storage by:
- Turning off backup for non-essential apps
- Using iCloud Photos with “Optimize Mac Storage” option
- Regularly clearing old backups and unnecessary files
Proper allocation ensures sufficient space for important data while minimizing costs.
Restoration and Recovery
Restoring an iPhone from a backup is a crucial process for data recovery and device setup. This section explores methods for retrieving data, using different backup sources, and performing factory resets.
Restoring iPhone from Backup
iPhone users can restore their devices from backups using iCloud or a Mac computer. The process begins by erasing all content on the iPhone. Users then navigate to the “Transfer Your Apps & Data” screen during setup. For iCloud backups, they select “From iCloud Backup” and sign in with their Apple ID. They choose the most recent backup and wait for the restore to complete.
Mac users can restore from local backups using Finder or iTunes. They connect the iPhone to the Mac with a USB cable. In Finder, they select the device and click “Restore Backup.” For iTunes, users choose the device icon and select “Restore Backup.” The process may take some time depending on the backup size.
Recovery from Different Backup Sources
iCloud and local backups offer different recovery options. iCloud backups are convenient for users with limited computer access. They require a stable internet connection and sufficient iCloud storage. Local backups on a Mac provide faster restore times and don’t rely on internet speed.
Users can switch between backup sources. If an iCloud backup fails, they can try a local backup on their Mac. Some data, like Health and Keychain information, may require an encrypted backup for recovery.
Third-party backup solutions exist but may not offer full iOS compatibility. Apple’s built-in options generally provide the most reliable and comprehensive recovery.
Factory Reset and Restore
A factory reset erases all data and settings on an iPhone. It’s useful for fixing persistent software issues or preparing a device for sale. To perform a factory reset, users go to Settings > General > Reset > Erase All Content and Settings.
After the reset, users can set up the iPhone as new or restore from a backup. Restoring from a backup brings back personal data, settings, and apps. Setting up as new provides a clean slate but requires manual app installations and data entry.
Users should always create a recent backup before performing a factory reset. This ensures no important data is lost during the process.
Frequently Asked Questions
Backing up an iPhone to a Mac involves several methods and considerations. Users often have questions about wireless options, specific device compatibility, and time requirements.
How can I backup my iPhone to my Mac without using a cable?
Wi-Fi syncing allows wireless backups. Enable this feature in Finder or iTunes. Ensure both devices are on the same Wi-Fi network. Select “Sync with this iPhone over Wi-Fi” in the device settings. Once enabled, the iPhone will backup automatically when connected to power and Wi-Fi.
What are the steps to backup an iPhone to a MacBook Air?
Connect the iPhone to the MacBook Air using a USB cable. Open Finder on macOS Catalina or later. Select the iPhone in the sidebar. Click “Back Up Now” under the General tab. For older macOS versions, use iTunes and follow similar steps to initiate the backup process.
Is it possible to backup an iPhone without using iCloud?
Yes, local backups are possible without iCloud. Use Finder or iTunes to create backups directly on the Mac. This method stores all data locally, providing more control over backup files. It’s useful for those with limited iCloud storage or privacy concerns.
How can I use iTunes on my Mac to backup my iPhone?
For Macs running macOS Mojave or earlier, iTunes is the go-to tool. Connect the iPhone via USB. Open iTunes and select the device icon. Choose “This computer” under Backups. Click “Back Up Now” to start the process. Consider encrypting the backup for added security.
How much time is typically required to backup an iPhone to a Mac?
Backup duration varies based on data volume and connection speed. A first-time backup might take 30 minutes to several hours. Subsequent backups are faster, often completing in 5-15 minutes. Large photo libraries or app data can extend the process.
Can I transfer all data from my iPhone to a Mac, and if so, how?
Full data transfer is possible. Use Finder or iTunes for a complete backup. Select “Back up all of the data on your iPhone to this Mac” in the device settings. This includes apps, photos, messages, and settings. For selective transfers, use AirDrop or third-party apps for specific data types.