Nintendo has officially rolled out system update version 20.1.0 for the Nintendo Switch, released on May 27, 2025, and while it may appear incremental at first glance, this update plays a pivotal role in paving the way for the upcoming Nintendo Switch 2. Packed with subtle but impactful improvements, this firmware lays the groundwork for cross-generational continuity and smoother user experience as Nintendo transitions to its next console era.
What’s New in Version 20.1.0?
✅ Improved Parental Controls Interface
Nintendo has updated the Parental Controls interface, making it more visually streamlined and accessible for parents and guardians. The menus now offer clearer navigation and easier configuration of time limits, content restrictions, and online communication controls — a welcome change for families looking to manage younger players’ time and content.
✅ Nintendo Switch Online Menu Sound Refresh
A minor but noticeable change: the sound that plays when launching Nintendo Switch Online from the HOME menu has been updated. While not a functional enhancement, this refresh aligns with Nintendo’s push to give the UI a more modernized polish ahead of the Switch 2’s rumored user interface overhaul.
✅ System Stability Improvements
As with many Nintendo updates, system stability enhancements are front and center. While not specified in detail, these typically include under-the-hood fixes for background processes, UI responsiveness, and patching minor software issues. Users have reported smoother system navigation and quicker loading times in the HOME menu and eShop following the update.
✅ Required for Nintendo Switch 2 System Transfer
This is perhaps the most crucial element of version 20.1.0: compatibility with Nintendo Switch 2 system transfers. If you’re planning to move data via local wireless transfer to a Switch 2, your original Switch must be updated to 20.1.0 or later. This ensures profile continuity, game save migration, and a seamless upgrade experience when the next-gen console launches later this year.
🕹 Previous Updates Set the Stage
This latest firmware follows version 20.0.1, which resolved a critical boot error (Error Code: 2206-1015) introduced in the larger 20.0.0 update. That earlier update brought forward experimental features like Virtual Game Cards and GameShare, hinting at future functionality that may become native to the Switch 2 ecosystem.
Together, these updates suggest that Nintendo is not only stabilizing the platform but also planting the seeds for next-gen compatibility — a move that mirrors what Sony did with the PS4-to-PS5 transition in 2020.
🎮 Controller Firmware Also Updated
As part of the version 20.1.0 rollout, Nintendo has also quietly released firmware updates for the right Joy-Con and the Nintendo Switch Pro Controller. These updates are believed to improve wireless connection stability and reduce latency, though Nintendo has not released detailed patch notes for them. You can update your controllers manually through System Settings > Controllers and Sensors > Update Controllers.
🔍 Why This Update Matters More Than It Seems
While 20.1.0 doesn’t introduce flashy new features like themes or folders — both long-requested by fans — it is clearly designed with longevity and transition in mind. With the Nintendo Switch 2 expected to launch before the end of 2025, likely alongside flagship titles like Metroid Prime 4 and the next Mario Kart, Nintendo is laying a stable foundation for hybrid compatibility between consoles.
Industry analysts have also pointed out that Nintendo’s gradual but consistent updates suggest an approach similar to Apple’s iOS ecosystem — evolving its software layer by layer to support longer lifecycles, broader device interoperability, and seamless user retention during hardware transitions.
For full details or troubleshooting tips regarding update 20.1.0, you can access official information via Nintendo’s support site under the System Updates section.
Common Nintendo Switch Problems and How to Fix Them
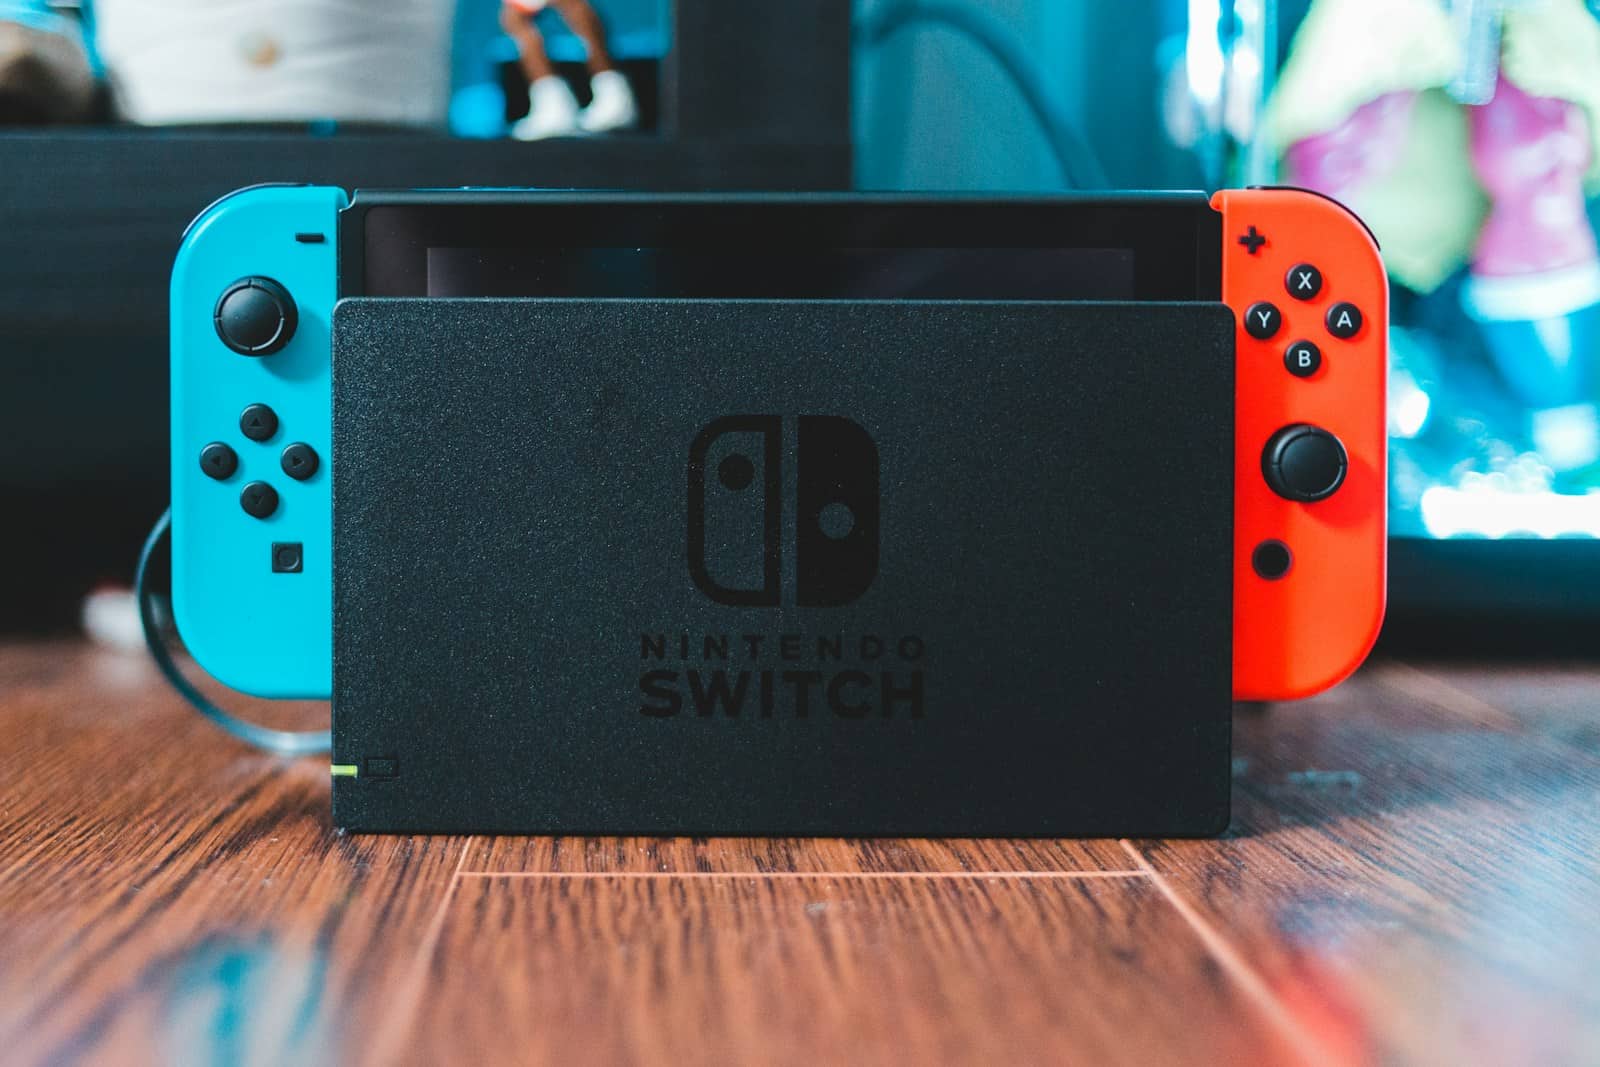
The Nintendo Switch has become a favorite gaming console for millions worldwide, but like any tech device, it can run into problems. From Joy-Con drift to battery issues, these common hiccups can interrupt your gaming experience. Most Nintendo Switch problems have simple fixes you can try at home before contacting Nintendo’s repair service.
Getting frustrated with a malfunctioning console can ruin your gaming sessions. Whether your Switch won’t turn on, the battery drains too quickly, or your Joy-Cons won’t connect properly, knowing some troubleshooting steps can save you time and money. The Nintendo Switch family – including the original model, OLED, and Lite versions – all share similar issues that often have straightforward solutions.
Key Takeaways
- Most Nintendo Switch power and display problems can be fixed with a proper restart or by checking your charging equipment.
- Joy-Con connectivity issues typically respond well to resyncing controllers or cleaning their connection points.
- Software glitches on your Nintendo Switch can usually be resolved by updating the system or performing a cache reset without losing your game data.
Understanding Your Nintendo Switch
The Nintendo Switch family includes several models with unique features and components. Knowing your specific model and its parts helps you identify and solve problems faster.
Different Models and Their Specifics
The original Nintendo Switch (Model No. HAC-007) features detachable Joy-Con controllers and can be played in three modes: handheld, tabletop, and TV mode. It has a 6.2-inch LCD screen and approximately 4.5-6.5 hours of battery life depending on usage.
The Nintendo Switch Lite is a compact, handheld-only system designed specifically for portable play. It has integrated controls, a smaller 5.5-inch screen, and slightly longer battery life than the original model. Due to its design, it cannot connect to a TV.
The OLED Model (Model No. HEG-007) features a vibrant 7-inch OLED screen, enhanced audio, a wider adjustable stand, and 64GB of internal storage. It offers the same flexibility as the original with improved features.
Each model uses the same game cartridges and offers similar performance despite their physical differences.
Key Components and Their Functions
Joy-Con Controllers: These detachable controllers (on standard and OLED models) contain motion sensors, HD rumble, and infrared cameras. They can be used attached to the console or separately for multiplayer gaming.
Dock: For standard and OLED models, the dock enables TV mode play and charges your console. The OLED model’s dock includes a wired ethernet port.
Touch Screen: All models feature touch-sensitive displays that allow for intuitive controls in compatible games and menu navigation.
Game Card Slot: Located at the top of all models, this slot reads physical game cartridges. Keeping this area clean prevents reading errors.
Micro SD Card Slot: Found under the kickstand, this allows you to expand storage beyond the internal memory. It supports cards up to 2TB.
USB-C Port: Used for charging and connecting to the dock. It’s important to use compatible chargers to avoid damaging your system.
Common Power Issues
Nintendo Switch power problems are among the most frustrating issues owners face. These can prevent you from playing your favorite games or even using the console at all.
Troubleshooting Power-on Difficulties
If your Nintendo Switch won’t turn on, the most common cause is a depleted battery. Try placing your Switch in the dock and let it charge for at least 30 minutes before attempting to power it on again.
For more stubborn cases, perform a hard reset by holding down the power button for 15 seconds, releasing it, then pressing it again to turn on. This often resolves software freezes that mimic power issues.
Check your Nintendo Switch AC Adapter for damage. Frayed cables or bent prongs can prevent proper charging. Try using a different official adapter if possible to determine if your charger is the problem.
Environmental factors like extreme temperatures can also affect your Switch’s ability to power on. Allow your device to reach room temperature before attempting to turn it on.
Evaluating Not Charging Problems
When your Switch isn’t charging, first inspect the USB-C port for debris or damage. Gently clean the port using compressed air or a soft brush.
Try different power outlets and charging cables to identify if the problem is with your outlet or adapter. Remember that non-official chargers may not provide enough power.
Check the charging indicator on your Switch screen. If it appears but doesn’t increase, your battery might be severely depleted and need extended charging time.
Signs of charging port damage:
- Loose connection feeling when plugging in
- Visible damage to the port pins
- Inconsistent charging behavior
If your charging port is damaged, professional repair is recommended as DIY fixes can cause further problems.
Addressing Issues with Power Button
A malfunctioning power button can prevent your Nintendo Switch from turning on or cause unexpected shutdowns. Test the button’s responsiveness by pressing it multiple times with varying pressure.
If the button feels stuck or unresponsive, don’t force it. Excessive pressure can cause more damage. Instead, try gently cleaning around the button using compressed air.
For Switch consoles with intermittent power button issues, you can sometimes use the hard reset method (holding power for 15 seconds) as a temporary workaround.
Sometimes the power button issues are related to internal connections rather than the physical button. In these cases, professional repair is your best option to avoid damaging other components.
If your Switch is still under warranty, contact Nintendo Support before attempting any repairs that might void your coverage.
Connectivity and Networking Problems
Nintendo Switch users commonly face network and connection issues that can prevent online gaming and downloading content. Most of these problems have simple solutions that don’t require technical expertise.
Wi-Fi and Internet Connection Troubles
If your Switch won’t connect to Wi-Fi, try moving closer to your router. Walls and electronic devices can block signals. The Switch works best when it’s within 15-25 feet of your router.
Try restarting your network equipment. Power cycling your home network can fix many connection problems:
- Turn off your modem and router
- Wait 30 seconds
- Turn on your modem first
- Wait until it fully connects
- Turn on your router
- Restart your Switch
The Switch’s Wi-Fi antenna isn’t as strong as other devices. Many players experience unstable connections when using Wi-Fi, especially for fast-paced games. Consider using a wired connection with an Ethernet adapter for more reliable online play.
Dock and HDMI Cable Concerns
If your Switch won’t display on your TV when docked, check your HDMI connection first. Unplug the HDMI cable from both ends and firmly reconnect it. The connection might seem secure but could be loose.
Try a different HDMI port on your TV. Some ports may be damaged or not fully HDCP-compliant, which the Switch requires.
Test with a different HDMI cable. HDMI cables can fail internally while looking fine externally. Use a high-speed HDMI cable for best results.
Make sure you’re using the official Nintendo dock or a licensed third-party alternative. Unlicensed docks can cause display issues and potentially damage your console. The dock’s USB-C connector must be properly aligned when inserting the Switch.
Display-Related Complications
Your Nintendo Switch screen plays a crucial role in your gaming experience. When display issues occur, they can range from minor annoyances to major problems that prevent gameplay entirely.
Identifying and Resolving Screen Issues
If you notice black spots or dead pixels on your Nintendo Switch screen, first try a soft reset by holding the power button for 12 seconds. This simple step often resolves temporary display glitches.
For persistent spots, check if your Switch is still under warranty. Nintendo may repair or replace units with screen defects within the warranty period.
The Nintendo Switch OLED Model has a different screen technology that may show occasional image retention. This usually disappears after changing what’s displayed on screen for a few minutes.
For scratches on your screen, using a microfiber cloth can help clean without causing further damage. Consider investing in a tempered glass screen protector to prevent future scratches.
If your Switch Lite has display flickering issues, try adjusting the brightness settings. Persistent flickering might indicate a hardware problem requiring professional repair.
Troubleshooting TV Mode Challenges
When your Nintendo Switch won’t display on TV, first check that the HDMI cable is securely connected to both the dock and TV. Try using the cable in a different HDMI port on your TV.
Make sure your dock has power—the green light should be on. If not, check the power adapter connections.
Sometimes the display order matters. Try this sequence:
- Connect the dock to power
- Insert your Switch into the dock
- Turn on your TV
- Select the correct HDMI input
If you’re experiencing flickering in TV mode, try changing your TV’s resolution settings through the Switch system menu. Go to System Settings > TV Settings > TV Resolution.
For random black screens when docked, the LCD connector ribbon might be loose, which may require professional repair if basic troubleshooting doesn’t work.
Controller Connectivity and Functionality
Nintendo Switch controllers can sometimes develop connectivity and responsiveness issues that disrupt gameplay. Both Joy-Cons and Pro Controllers may experience problems, but most issues can be resolved with some troubleshooting steps.
Dealing with Joy-Con Connectivity Issues
If your Joy-Con controllers aren’t responding properly, first ensure they’re fully charged. Low battery is a common cause of connectivity problems.
Update your system software and controller firmware. Nintendo regularly releases updates that fix controller issues.
Try these quick fixes:
- Remove any obstructions between the Joy-Con and the console
- Move closer to your Switch (ideal range is under 6 feet)
- Turn off other wireless devices that might cause interference
If you’re experiencing pairing problems, try this method: delete all paired controllers except for attached Joy-Cons, then re-pair the controllers you want to use.
For drift issues, calibrate your control sticks through the System Settings menu. Sometimes blowing compressed air under the joystick cover can dislodge dust causing the problem.
Repairing or Replacing Defective Joy-Cons
If troubleshooting doesn’t solve your Joy-Con problems, you may need repair or replacement options.
Nintendo offers a repair service for malfunctioning Joy-Cons. In North America, they’ve been known to repair drift issues for free even outside warranty in many cases.
Before sending your controllers for repair, back up your game data. The repair process might take 1-3 weeks depending on your location.
DIY repair is another option if you’re comfortable with electronics. Replacement joystick modules are available online for $5-15, but this will void your warranty.
You can also purchase new Joy-Cons if repairs aren’t feasible. Look for sales as they’re regularly discounted from the standard $80 pair price.
When buying used controllers, test them thoroughly before purchase to avoid inheriting someone else’s controller problems.
Software and Save Data Issues
Software problems and save data concerns are common issues that Nintendo Switch owners face. Knowing how to handle these challenges can prevent lost game progress and keep your system running smoothly.
Resolving Software Errors and Glitches
If your games are freezing or not responding properly, try restarting your Nintendo Switch by holding down the POWER button. This simple step often clears temporary software glitches.
Always keep your system up to date. Check for system updates regularly by going to System Settings > System > System Update. Similarly, make sure your games have the latest updates installed.
For persistent software issues, try these steps:
- Delete and reinstall the problematic software
- Check your microSD card for corruption
- Update each title experiencing issues
Managing and Backing Up Save Data
Nintendo Switch doesn’t automatically back up your save data, so you’ll need to take specific steps to protect your progress.
Nintendo Switch Online subscribers can use cloud saves for most games. To back up your saves, go to System Settings > Data Management > Save Data Cloud, then highlight the software and press A.
If you encounter corrupted save data, try these solutions:
- Ensure your console has the latest system update
- Restart your console completely
- Check for software updates for the affected games
Remember that not all games support cloud saves, including many popular titles like Pokémon and Splatoon.
Repair and Customer Support
When your Nintendo Switch has problems that you can’t fix yourself, you might need professional help. Nintendo offers several ways to get support and repair services for your device.
Understanding the Repair Process
To set up a repair request for your Nintendo Switch, you’ll need to follow a few important steps. First, gather your system’s serial number, which is located on the bottom of your console. This information is essential for the repair process.
Before sending your device, try to back up your save data to the cloud if you have a Nintendo Switch Online membership. Otherwise, your game progress might be lost during repairs.
Nintendo typically offers both in-warranty and out-of-warranty repair services. If your device is still under the 12-month warranty period, repairs for manufacturing defects are usually free. For out-of-warranty repairs or accidental damage, you’ll likely need to pay a fee.
The standard repair process takes about 1-2 weeks after Nintendo receives your system. You’ll get updates via email about your repair status.
How to Contact Customer Service for Support
Nintendo offers multiple ways to get help with your Switch issues. For general troubleshooting assistance, you can visit Nintendo’s support website, which has guides for common problems like audio issues, error messages, and power problems.
If you need to speak with a representative, you can:
- Call Nintendo’s customer service at 1-800-255-3700
- Use their online chat feature during business hours
- Email them through their support portal
Nintendo’s customer service is available Monday to Sunday, from 6 AM to 7 PM Pacific Time. Have your system’s serial number ready when contacting support.
For complex issues, support representatives can help determine if your Switch needs professional repair or if there are additional troubleshooting steps you can try at home.
Frequently Asked Questions
Nintendo Switch owners encounter several common issues that can be frustrating. These problems often have simple solutions you can try before seeking professional repair.
What steps can you take to resolve Joy-Con connection issues on the Nintendo Switch?
If your Joy-Cons disconnect frequently or experience drift, try updating the controller firmware through the System Settings menu. This often resolves wireless connectivity problems.
You can also try detaching and reattaching the Joy-Cons or restarting your console completely. Sometimes dust or debris causes connection problems.
For persistent Joy-Con drift, try calibrating the control sticks in System Settings. If that doesn’t work, use compressed air to clean around the joystick base.
How can one troubleshoot a Nintendo Switch that won’t turn on?
First, check if your Switch needs charging. Connect it directly to the original power adapter for at least 30 minutes before trying to turn it on again.
Try a hard reset by holding the power button for 12-15 seconds, releasing it, then pressing it normally. This often resolves issues when the system is frozen but appears off.
If these steps fail, inspect the charging port for damage or debris. Sometimes power troubleshooting requires checking different power outlets or adapters to rule out electrical issues.
What should be done to fix audio problems when the Nintendo Switch is docked?
Check your HDMI connection first, as loose cables are often the culprit. Try disconnecting and reconnecting the HDMI cable at both ends.
Verify your TV’s audio settings aren’t muted and the volume is turned up. Some TVs have separate audio settings for HDMI inputs that might need adjustment.
Restart both your Switch and TV. You can also try adjusting the audio settings on your Switch through System Settings to ensure they’re configured correctly for your setup.
How can software freezes or glitches during gameplay on the Nintendo Switch be addressed?
For game freezes, first try closing the software by pressing the home button, highlighting the game, pressing X, and selecting “Close.” Then restart the game.
If freezes persist, restart your Switch completely by holding the power button for three seconds and selecting “Restart” or “Power Options.”
Check for software updates for both your games and system. Outdated software often causes performance glitches that can be easily fixed with updates.
What methods are available for repairing a Nintendo Switch with a cracked screen or display problems?
For flickering or minor display issues, try adjusting the brightness settings or restarting your console. Sometimes these simple fixes can resolve strange screen behavior.
If your screen is physically cracked, avoid using the device as glass particles may cause injury. Physical damage typically requires professional repair service.
Nintendo offers official repair services for screen replacements. Third-party repair shops may offer more affordable options, but they could void your warranty.
How can one rectify the Nintendo Switch not recognizing game cartridges?
Clean the game card contacts gently with a soft, dry cloth. Dirt or fingerprints on the gold contacts can prevent proper reading.
Check the game card slot for dust or debris. Use compressed air to blow out any particles carefully, avoiding moisture.
Try inserting another game card to determine if the issue is with a specific cartridge or the console itself. If your Switch recognizes other cards, the original cartridge might be damaged.