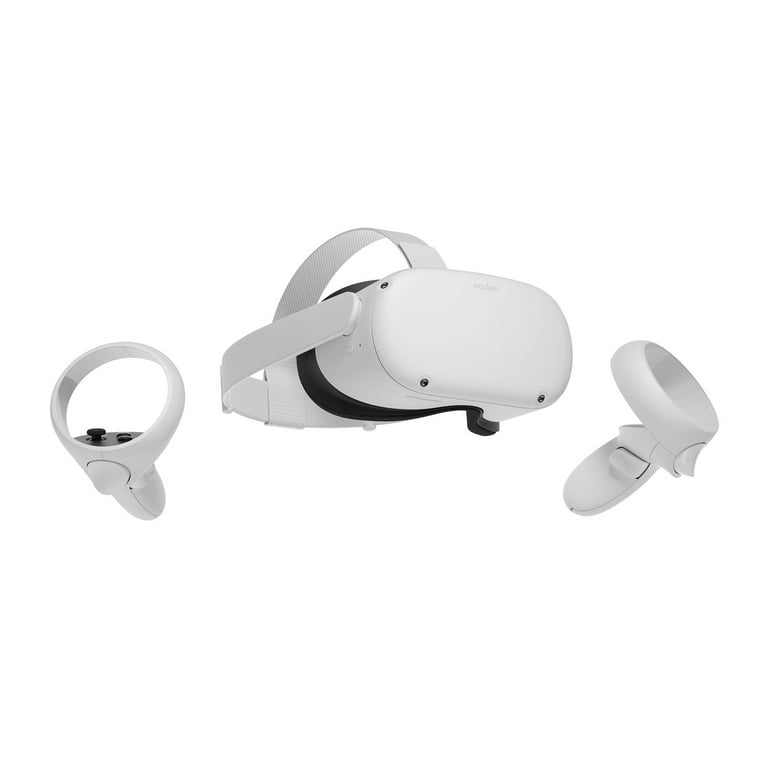
Is your Meta Quest 2 controller suddenly not working? Don’t worry, this is a common issue that can usually be fixed with a few simple steps. When your VR experience is interrupted by an unresponsive controller, it can be frustrating, but most problems have straightforward solutions that don’t require technical expertise.
The fastest way to fix your Meta Quest 2 controller is to remove its batteries for about 30-60 seconds, which performs a quick reset of the controller. If that doesn’t work, you might need to try cleaning the headset’s tracking cameras, checking for battery issues, or using the Meta app to repair the controllers. Many users find that a simple power cycle resolves most connection problems.
Sometimes the issue might be with the headset itself rather than the controller. Restarting your Meta Quest 2 can reestablish the connection to your controllers. For persistent problems, especially with the left controller, you might need to try more advanced troubleshooting steps like checking for software updates or performing a factory reset as a last resort.
How to Fix an Oculus Controller That’s Not Working
If your Oculus controller is unresponsive, not turning on, or not pairing properly, follow these steps to troubleshoot and fix the issue:
1. Check the Controller Power
- Make sure the controller is turned on.
- Replace or reinsert the AA batteries with fresh ones, as dead or weak batteries are a common cause of controller failure.
2. Restart the Headset and Controller
- Turn off your Oculus headset completely by holding the power button.
- Remove and reinsert the controller batteries.
- Turn the headset and controller back on to reset the connection.
3. Verify Controller Connection
- Open the Oculus app on your phone.
- Navigate to Menu > Devices and check if the controller appears.
- If it’s not listed, the controller is disconnected and needs to be paired again.
4. Re-Pair the Controller
- In the Oculus app, unpair the controller if it’s listed.
- Hold the pairing button on the controller (usually located near the battery compartment) until the LED flashes.
- Follow the app instructions to pair the controller again, keeping the controller close to the headset for a stable connection.
5. Update Firmware
- Ensure your Oculus headset and controllers have the latest firmware updates installed.
- Updates often fix bugs and improve controller connectivity.
6. Reset the Controller
- Remove the batteries.
- Press and hold the power button on the controller for about 10 seconds to discharge any residual power.
- Reinsert batteries and power it on.
7. Check for Physical Damage
- Inspect the controller for any visible damage or stuck buttons.
- If damaged, you may need to contact Oculus support for repair or replacement.
If the above steps don’t resolve the issue, consider contacting Oculus support or visiting their official troubleshooting page.
Sources:
- Asurion: 7 fixes to try if your Oculus controller is not working
- WikiHow: Oculus Controller Not Working? Troubleshoot with These Tips
- iTechHacks: Top 5 Ways to Fix Oculus Quest 2 Controller Not Working (2025)
- Online Tech Tips: Oculus Quest Controller Not Working? 18 Fixes to Try
Key Takeaways
- Removing batteries for 30-60 seconds often resets and fixes unresponsive Meta Quest 2 controllers.
- Check tracking cameras, battery levels, and use the Meta app to repair controllers when simple resets don’t work.
- Restarting your headset can resolve connection issues between the Quest and controllers without losing game data.
Initial Troubleshooting Steps
When your Oculus controller stops working, several quick fixes can often resolve the issue without requiring technical support. These simple solutions address the most common controller problems related to power, physical condition, and connection status.
Checking Controller Battery
Low battery power is one of the most common reasons for controller malfunctions. Start by checking the battery level in your Oculus headset’s menu. If the indicator shows low power, it’s time for a replacement.
Remove the battery cover on the side of the controller by sliding it downward. Take out the old battery and power cycle your controller by leaving it without a battery for 3-5 minutes. This resets the controller’s firmware and often fixes minor glitches.
Insert a fresh AA battery, making sure the positive and negative ends match the markings inside the compartment. Use high-quality alkaline batteries for best performance. Rechargeable batteries work too, but may not last as long per charge.
Many users report success after simply removing batteries for 15 minutes to fully reset the controller’s firmware.
Inspecting for Physical Damage
Physical damage can impact your controller’s functionality. Examine both controllers carefully for cracks, dents, or other visible damage, especially after accidental drops.
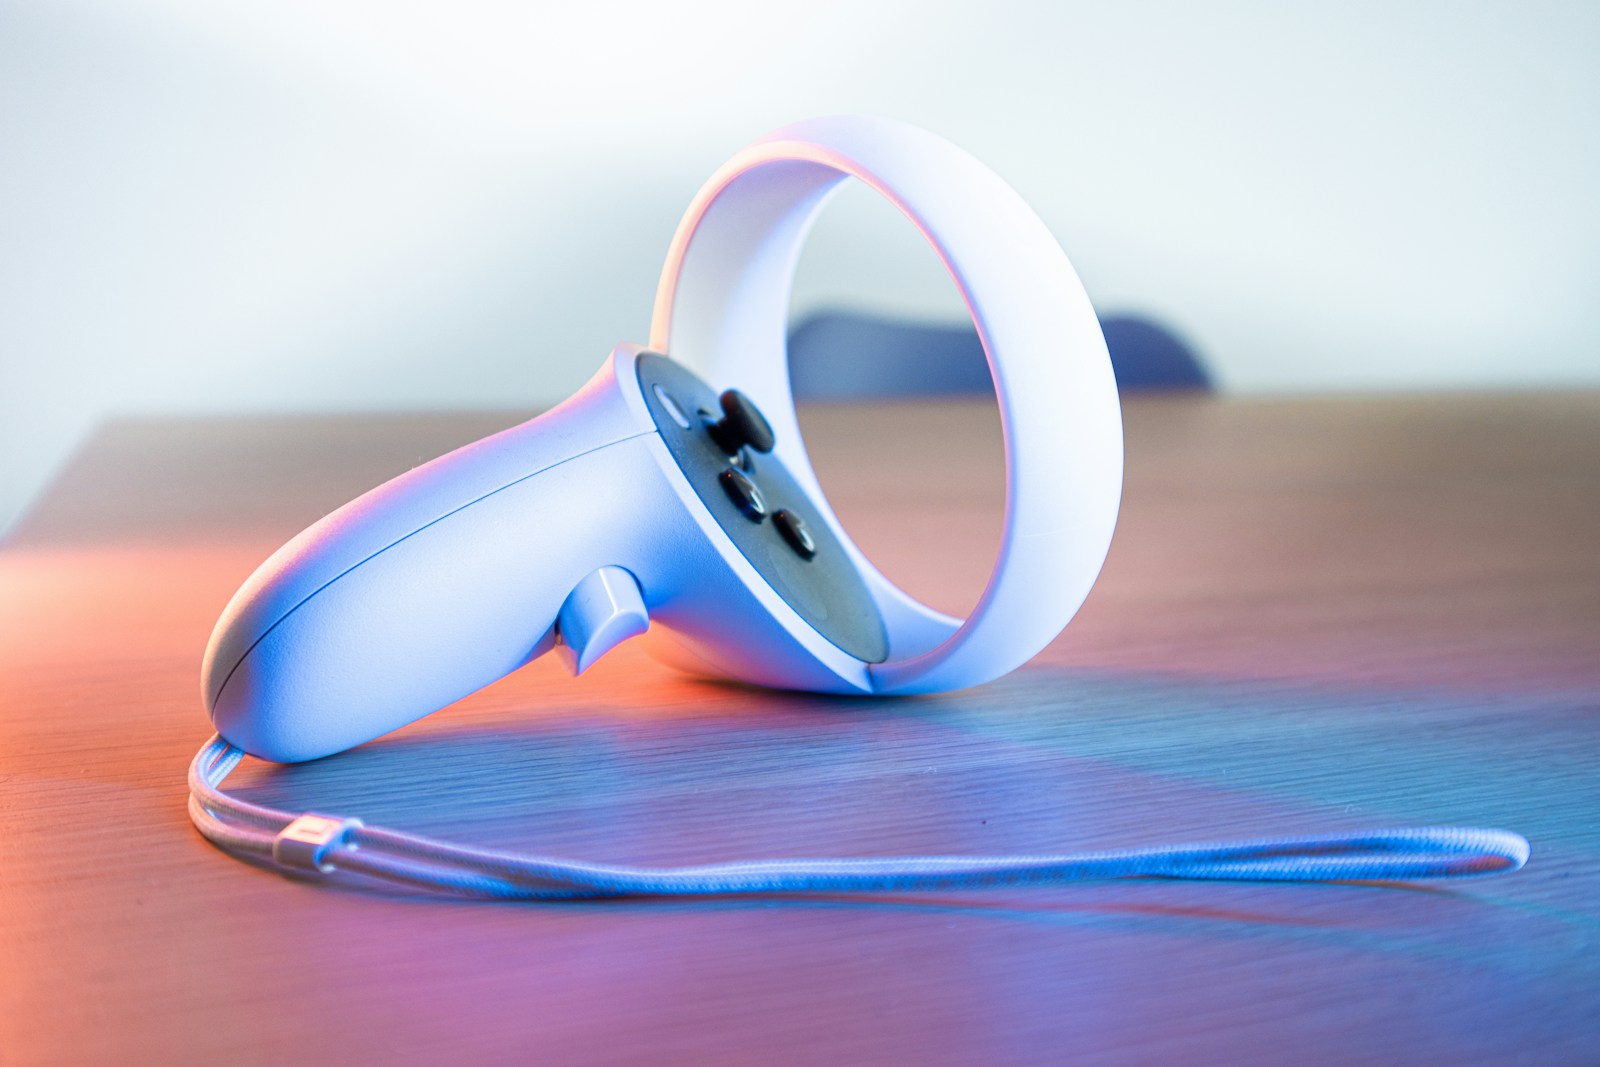
Pay special attention to the tracking ring—the circular part that contains infrared LEDs for position tracking. If these LEDs are damaged, the headset won’t be able to track the controller properly in virtual space.
Check the buttons for sticking or unusual resistance when pressed. Sometimes debris can get trapped under buttons, causing them to malfunction. Gently press each button to ensure they all spring back properly.
Inspect the battery contacts for corrosion or dirt. Clean them gently with a dry cotton swab if necessary. Bent contacts can also cause power issues.
Verifying Controller Pairing Status
Controllers sometimes lose their pairing with the headset. To check pairing status, put on your headset and look at the virtual hands. If one or both are missing, you likely have a pairing issue.
To repair a controller, go to Settings > Devices > Controllers and select “Pair New Controller.” Follow the on-screen instructions, which typically involve holding specific button combinations until the controller’s LED blinks.
You can also try unpairing and repairing the controllers through the Quest settings menu. This refreshes the connection and often resolves tracking issues.
For persistent problems, try rebooting both the headset and controllers. Power down the headset completely, remove controller batteries, wait five minutes, then power everything back up.
Advanced Connectivity Fixes
When simple solutions don’t work, these more technical approaches can resolve persistent controller connection issues. Each method addresses different aspects of the connection system between your headset and controllers.
Unpairing and Re-pairing Controllers
Sometimes the connection between your Meta Quest 2 (formerly Oculus Quest 2) headset and controllers becomes corrupted. In these cases, completely removing the pairing and starting fresh often solves the problem.
To unpair controllers:
- Open the Meta Quest app on your smartphone
- Select your headset from the Devices section
- Tap on “Controllers”
- Choose the controller that’s not working
- Select “Unpair Controller”
After unpairing, you’ll need to re-pair the controllers using the app. The app will guide you through pressing specific button combinations on the controller to initiate pairing mode.
Some users report success by removing the batteries for 3-5 minutes before re-pairing. This completely power cycles the controller, clearing any temporary glitches.
Meta Quest 2 and Oculus App Connectivity
The connection between your Meta Quest 2 headset and the mobile app plays a crucial role in controller functionality. Ensuring this connection is stable can prevent controller disconnections.
First, check that your smartphone has a strong Wi-Fi connection. Both devices should ideally be on the same network. If problems persist, try these steps:
- Force close the Meta Quest app
- Turn off Bluetooth, then turn it back on
- Restart your smartphone
- Reopen the app and reconnect to your headset
Make sure your Meta account is properly linked to your headset. Log out of the app and log back in if necessary. Software updates can also affect connectivity, so ensure both your app and headset are running the latest versions.
Resetting the VR Set Connection
When all else fails, a complete reset of the connection system may be necessary. This doesn’t erase your games or data but refreshes all connectivity settings.
To perform a connection reset:
- Power off your Meta Quest 2 headset completely
- Wait at least 30 seconds
- Press and hold the power and volume down buttons simultaneously
- When the boot menu appears, use volume buttons to navigate to “Factory Reset”
- Select “No” (we don’t want a full reset)
- Instead, choose “Headset Reset” or “Reset All Connections”
This targeted reset fixes controller disconnection issues without the drastic step of a full factory reset. After the connection reset, you’ll need to set up your controllers again and ensure the Meta Quest app recognizes your headset.
If random disconnections continue despite these steps, contact Meta support as there may be a hardware defect.
Software and Firmware Solutions
Many Oculus controller issues can be fixed through software updates and proper maintenance of your system’s firmware. Keeping both your headset and controllers updated ensures optimal performance and compatibility with the latest games and applications.
Updating Controller Firmware
Controller firmware updates are essential for fixing bugs and improving functionality. When your Oculus controllers aren’t working correctly, outdated firmware might be the culprit. To update your controller firmware:
- Put on your headset and navigate to the Settings menu
- Select Device and then About
- If updates are available, you’ll see a notification to update
If your controller is completely unresponsive during the update process, try removing the battery from your controller for 2-3 minutes before reinserting it and rebooting the headset. This often resolves update failures.
For persistent firmware issues, you may need to perform a factory reset of the headset. However, this should be your last resort as it will erase all data on the device.
Checking for Oculus Software Updates
The Oculus software needs regular updates to maintain controller compatibility. Outdated software can cause tracking issues, input lag, or complete controller failure.
To check for software updates on your PC (for Rift or Quest with Link):
- Open the Oculus app on your computer
- Click on Settings
- Select the General tab
- Look for update notifications or click Check for Updates
For standalone Quest headsets, check updates directly through the headset:
- Go to Settings in your Quest menu
- Select System
- Choose Software Updates
Oculus typically rolls out updates automatically when connected to Wi-Fi, but manual checks are recommended if you’re experiencing persistent controller issues.
Reinstalling Oculus Software
When updates don’t resolve controller problems, reinstalling the Oculus software may be necessary. This process removes potentially corrupted files and creates a fresh installation.
For PC-connected headsets:
- Uninstall the Oculus app from your computer
- Download the latest version from the official Oculus website
- Run the installer and follow the prompts
- Once installed, set up your devices again
For Quest standalone headsets, try these steps before considering a full reinstall:
- Restart your Quest headset by holding down the power button
- Select Restart instead of powering off completely
- Once restarted, check if controllers respond
If controllers remain unresponsive after restart, wake them up manually by pressing any button. Controllers automatically enter sleep mode after periods of inactivity to conserve battery life.
Controller Binding and Calibration
When your Oculus controller stops working, proper calibration and binding adjustments can solve many issues without requiring hardware replacement. These software fixes can resolve drift, unresponsive buttons, and tracking problems that affect gameplay.
Adjusting Controller Bindings in Oculus Settings
To fix controller binding issues in the Oculus system, start by accessing the device settings. Navigate to Settings > Devices > Controllers to view the available options. Here you can reset controller firmware by removing batteries for at least 15 minutes.
For thumbstick drift problems, Oculus provides built-in calibration tools. Go to Settings > Devices > Controllers and find the “Thumbstick range and deadzone” option. Select the problematic thumbstick and adjust the deadzone settings to compensate for drift.
Some games allow custom button mapping within their settings. Check individual game menus for “Controller” or “Input” options to remap functions if certain buttons aren’t responding correctly.
Calibrating Controllers with SteamVR
SteamVR offers additional calibration options when using Oculus headsets with Steam games. First, ensure your Oculus headset is properly connected to SteamVR through the Oculus desktop app.
Open SteamVR and access the Settings menu by clicking the small hamburger icon. Navigate to the “Controllers” section and select “Manage Controller Bindings” to view and modify how your Oculus controllers interact with Steam games.
For persistent tracking issues, try SteamVR’s controller calibration tool. In SteamVR settings, select “Developer” and then “Controller Calibration.” Follow the on-screen instructions to recalibrate your controllers.
Custom bindings can be created for specific games that don’t work well with default settings. SteamVR allows saving and sharing these custom profiles with the community, making it easier to find solutions for popular titles.
Factory Reset and Long-Term Solutions
When basic troubleshooting fails to resolve controller issues with your Oculus headset, more aggressive solutions may be necessary. These approaches can help resolve persistent connectivity problems that simpler fixes cannot address.
Performing a Factory Reset
A factory reset should be considered a last resort for controller issues, as it erases all data and returns the device to its original state. For the Oculus Quest 2 headset, you can perform a factory reset through the mobile app or directly on the headset.
To reset your controllers specifically, there are separate procedures. For the left controller, hold X and press the Menu button 5 times. The LED should flash white/orange during the reset process. A similar process exists for the right controller.
Before attempting a factory reset, try these less drastic measures:
- Remove batteries from controllers for several minutes
- Install fresh batteries
- Clean the battery connectors with a dry cloth
- Reboot your headset completely
Contacting Oculus Support
If factory resets and troubleshooting don’t solve the controller issues, Oculus Support can provide specialized assistance. The support team can guide users through advanced troubleshooting steps not covered in basic documentation.
To contact Oculus Support:
- Visit the official Meta/Oculus support website
- Submit a detailed support ticket describing the issue
- Include information about steps already taken
- Provide your device serial number when requested
Support may request diagnostic information from your device. They might also offer calibration procedures that aren’t accessible through standard menus. Users should be prepared to follow precise instructions and possibly upload logs from their device.
Exploring Replacement Options
When repairs aren’t possible, replacement becomes necessary. If the controller is under warranty, Meta typically provides free replacements for manufacturing defects. Warranty periods generally last one year from purchase.
For out-of-warranty devices, Meta sells individual replacement controllers. These are often more economical than purchasing an entirely new system. Third-party controllers exist but may offer reduced functionality or reliability.
Before ordering replacements, verify compatibility with your specific headset model. Quest 2 controllers won’t work with original Quest headsets and vice versa. When purchasing used controllers, ensure they haven’t been permanently paired to another headset.
Users with active accounts in good standing sometimes receive special customer service considerations for replacement requests, especially if issues arose shortly after warranty expiration.
Meta Quest 2 and VR Set-Specific Considerations
The Meta Quest 2 has unique controller issues that require specific troubleshooting methods. Understanding these device-specific problems can help you get back to your VR experience faster.
Understanding Meta Quest 2 Specific Issues
Meta Quest 2 controllers may stop working for several hardware-specific reasons. One common issue involves the battery housing connection. Make sure the tabs have been removed from both controller housings as these plastic pieces can prevent proper power connection.
Controller tracking problems often relate to the Quest 2’s camera-based tracking system. Poor lighting conditions can significantly impact tracking quality. Too bright or too dim environments confuse the sensors.
If your joystick isn’t responding correctly, it might be a calibration issue. Increasing the dead zones in the controller settings can help with minor drift problems.
Common Quest 2 Controller Issues:
- Battery connection problems
- Environmental lighting interference
- Joystick drift or calibration errors
- Bluetooth connection failures
Leveraging the Meta App for Troubleshooting
The Meta app provides powerful tools to diagnose and fix controller issues. Start by checking if your controllers need firmware updates through the app’s device settings menu.
The pairing process can be managed entirely through the app. If a controller isn’t connecting, you can unpair and re-pair your controllers to the headset directly from the mobile application. This often resolves connection issues.
Battery levels are clearly displayed in the app. Low battery can cause erratic controller behavior that might be misinterpreted as hardware failure.
Meta App Troubleshooting Steps:
- Check controller firmware status
- Monitor battery levels
- Unpair problematic controllers
- Re-pair controllers after a 30-second wait
- Adjust controller tracking settings
As a last resort, the app offers a factory reset option that can solve persistent controller issues that don’t respond to other fixes.
Frequently Asked Questions
Meta Quest (Oculus) controller issues are common but usually fixable with simple troubleshooting steps. Here are answers to the most common questions about controller problems.
What steps can be taken to address an unresponsive controller for Oculus?
If your Oculus controller is unresponsive, first check the batteries. Low battery power is often the culprit behind controller issues.
Next, try removing the batteries for about 30-60 seconds to reset the controller. This simple power cycle can resolve many connectivity problems.
Make sure the headset’s tracking cameras are clean. Dust or smudges on these cameras can prevent proper controller tracking.
How can one reset the Oculus controller if it is not functioning correctly?
To reset an Oculus controller, remove the battery for 30-60 seconds. This simple action forces the controller to power down completely.
After reinserting the battery, press and hold the Oculus button until the controller light indicates it’s powering on. This process is essentially a power cycling procedure.
For persistent issues, try unpairing and repairing the controller through the device settings menu.
What should be done when the Oculus Quest 2 controller won’t connect?
When a Quest 2 controller won’t connect, first remove the batteries for 3-5 minutes to completely power cycle the controller. Insert fresh batteries afterward.
Try unpairing and repairing the controller through the headset’s device settings. This refreshes the connection between the controller and headset.
Ensure that the protective tabs have been removed from both controller battery housings, as these can interfere with power connection.
How can joystick drift on an Oculus Quest 2 controller be fixed?
Joystick drift can often be fixed by cleaning around the joystick area. Use compressed air to blow out any dust or debris that might be causing interference.
Recalibrating the controller can help resolve drift issues. This can be done through the device settings menu.
For persistent drift, try resetting the controller by removing the battery for at least one minute before reinserting it.
In what way can a non-working Oculus Quest 2 controller trigger be repaired?
A sticky or unresponsive trigger can sometimes be fixed with compressed air. Gently blow around the trigger area to dislodge any debris.
For triggers that feel physically stuck, a small amount of isopropyl alcohol applied with a cotton swab around (not directly into) the trigger mechanism can help.
Persistent trigger issues might require opening the controller. However, this should be considered a last resort as it may void warranty.
What troubleshooting methods are available for an Oculus controller that won’t turn on?
Check that the battery is properly seated and has sufficient charge. Even new batteries can sometimes be defective.
Verify that the battery tab has been removed from the controller housing, as these insulating tabs prevent battery connection.
Try a different brand of battery. Some controllers are sensitive to certain battery types and may perform better with specific brands.