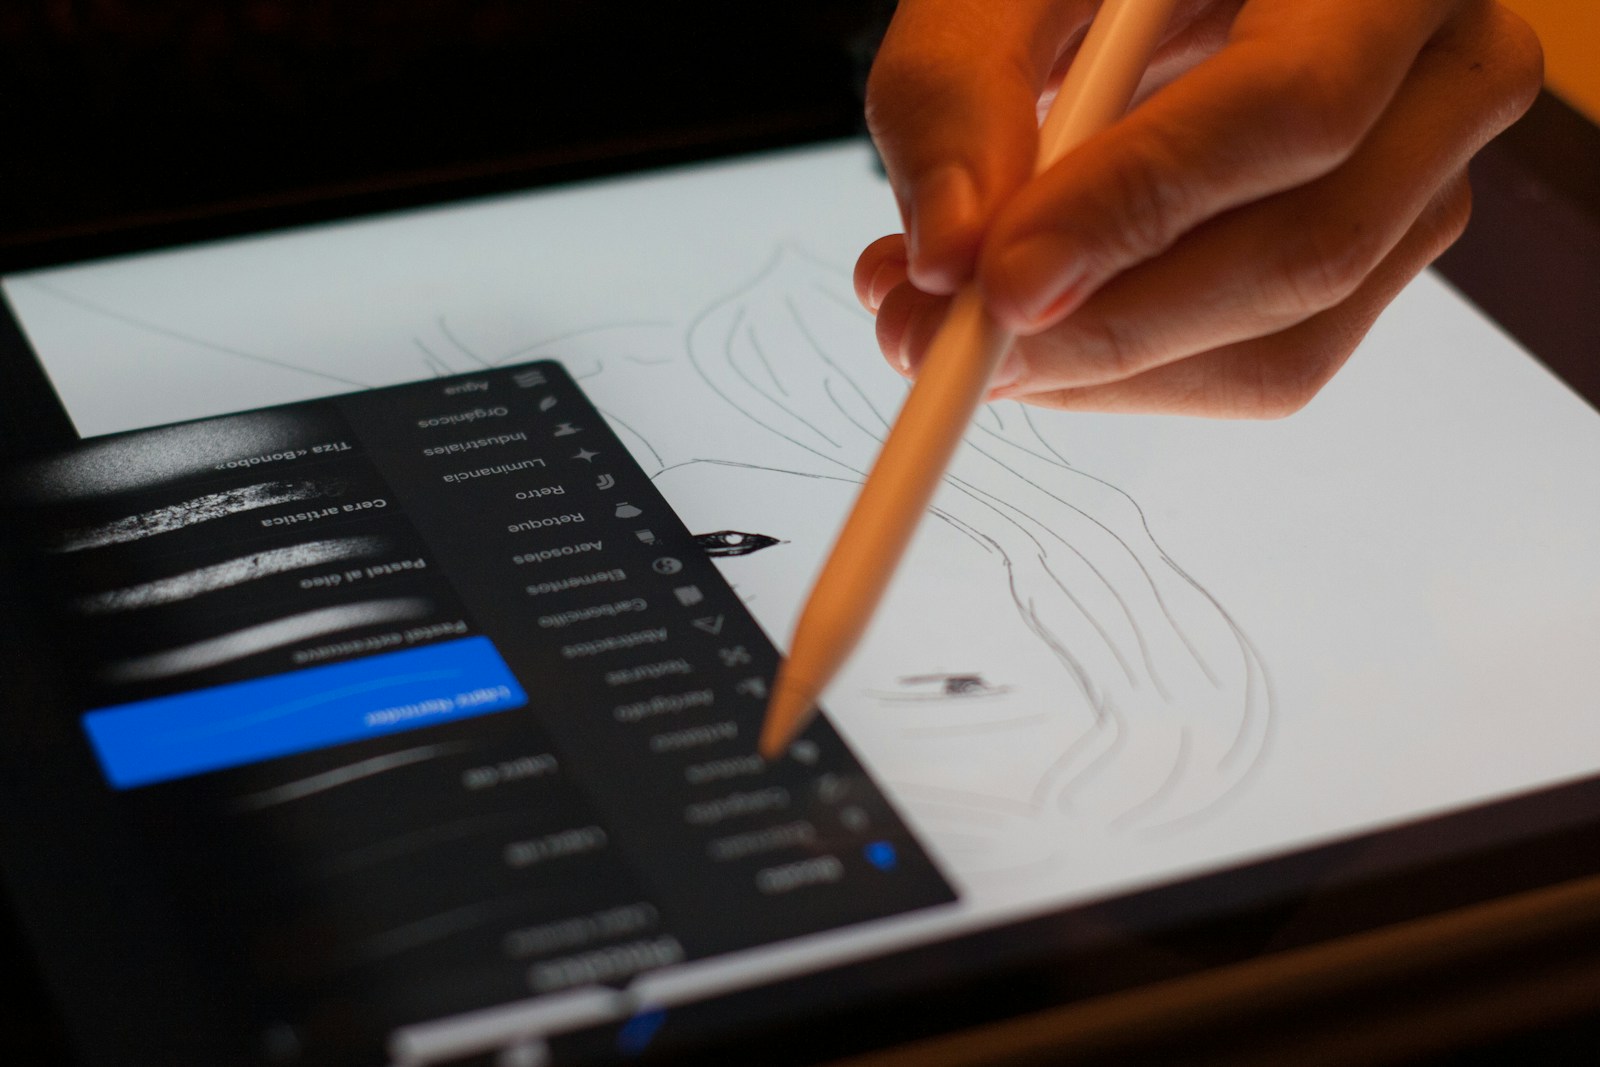
Creating magical illustrations might seem intimidating at first, but with Procreate on your iPad, you can bring enchanting worlds to life with just a few taps and swipes. The digital art app offers powerful tools that make it easier than ever to craft illustrations filled with whimsy and wonder. By mastering Procreate’s brush library, layering capabilities, and lighting effects, you can transform simple sketches into magical illustrations that captivate viewers.
The journey to creating magical digital art starts with inspiration. Many artists begin by creating thumbnails and rough sketches to map out their ideas before diving into details. You might draw inspiration from nature, like painting an enchanting forest or creating magical creatures that seem to leap off the screen. With Procreate’s intuitive interface, you can focus on creativity rather than struggling with complicated software.
How to Make Magical Illustrations Using Procreate
Procreate has revolutionized digital art creation on iPad, offering powerful tools that make creating enchanting, magical illustrations more accessible than ever. Whether you’re a beginner or experienced artist, this comprehensive guide will help you master the techniques for creating captivating magical artwork that sparkles with otherworldly charm.
Getting Started with Magical Procreate Art
Essential Setup for Magical Illustrations
Canvas Settings:
- Size: Start with 3000x3000px at 300 DPI for detailed work
- Color Profile: Display P3 for vibrant, magical colors
- Layers: Plan for 15-20+ layers for complex magical effects
Essential Brushes for Magic:
- Soft Airbrush: Perfect for glows and atmospheric effects
- Sparkle/Glitter brushes: Available in Procreate’s brush library
- Texture brushes: For organic, mystical surfaces
- Light brushes: Custom brushes for magical light effects
In this Procreate tutorial for iPad, pro artist Jana Schirmer paints a fantasy character to show how to master colour and light (source: Creative Bloq).
Step-by-Step Process for Creating Magical Illustrations
Phase 1: Concept and Sketching
Developing Your Magical Story: Develop and illustrate a magical character of your own to add to your portfolio. Follow along my step-by-step process to develop your own magical character by following this process: Storytelling & idea generation: How to come up with a good character story and concept (source: Skillshare).
Essential Elements for Magical Themes:
- Characters: Wizards, fairies, magical creatures, enchanted beings
- Objects: Crystal balls, magic wands, potions, spell books, floating elements
- Environments: Mystical forests, starry skies, magical portals, enchanted castles
- Effects: Sparkles, glows, energy streams, floating particles, ethereal mists
Initial Sketching Process:
- Create a rough composition sketch on a low-opacity layer
- Focus on overall shapes and flow rather than details
- Consider the light source and how magical elements will interact
- Plan where your most dramatic magical effects will be placed
Phase 2: Building the Foundation
Base Drawing Techniques:
- Clean Line Art: Create crisp, confident lines using the Procreate Pencil or Ink brushes
- Color Blocking: Establish base colors on separate layers below your line art
- Value Planning: Create a grayscale version to plan your light and shadow relationships
Layer Organization for Magic:
- Background elements
- Character base colors
- Character details and textures
- Magical effects (multiple layers)
- Atmospheric effects
- Final highlights and sparkles
Phase 3: Mastering Color and Light for Magical Effects
Color Psychology in Magical Art:
- Purple/Violet: Mystery, magic, spirituality
- Deep Blues: Night magic, cosmic energy
- Emerald Greens: Nature magic, healing energy
- Golden Yellows: Divine light, positive magic
- Silver/White: Pure energy, celestial magic
Lighting Techniques:
- Rim Lighting: Create magical glows around characters and objects
- Bounce Light: Show how magical light reflects off surfaces
- Atmospheric Perspective: Use cooler colors and less contrast for distant magical elements
- Color Temperature Contrast: Warm magical light against cool shadows
Advanced Color Blending:
- Use Multiply blend mode for rich shadows
- Add or Linear Burn for magical glows
- Overlay for enhancing existing colors
- Screen for bright, ethereal effects
Creating Specific Magical Effects
Sparkling and Glitter Effects
Method 1: Using Procreate’s Built-in Brushes
- Select the Flicks > Splatter brush
- Reduce brush size to 1-5% for fine sparkles
- Use white or light colors on a Screen blend mode
- Vary pressure for different sparkle sizes
- Create multiple layers with different sized sparkles
Method 2: Custom Sparkle Brush
- Create a simple star or cross shape
- Go to Brush Studio > Shape > Import your design
- Adjust Scattering settings for random placement
- Set Opacity dynamics for varied brightness
- Enable Size jitter for natural variation
Magical Glows and Auras
Creating Ethereal Glows:
- Duplicate your character or object layer
- Apply Gaussian Blur (around 20-50% depending on desired effect)
- Set blend mode to Add or Screen
- Adjust opacity to 30-70%
- Use Soft Airbrush to enhance glow areas manually
Energy Streams and Magic Trails:
- Use the Luminance brush with Streamline set to maximum
- Draw smooth, flowing lines for energy paths
- Add a slightly larger, blurred version underneath for glow
- Use contrasting colors (warm energy on cool backgrounds)
Floating Elements and Levitation Effects
Creating the Illusion of Floating Objects:
- Add subtle shadows beneath floating items (keep them soft and indirect)
- Include motion blur on edges using Motion Blur filter
- Add magical energy connecting floating objects to their source
- Use Radial Blur sparingly for mystical movement effects
Magical Particles and Dust
Fairy Dust Effect:
- Create a new layer set to Add blend mode
- Use Flicks > Splatter brush with various sizes
- Apply subtle Motion Blur to suggest movement
- Vary opacity across the particle field
- Add tiny sparkles within the dust clouds
Advanced Magical Illustration Techniques
Atmospheric Magic
Creating Mystical Fog and Mist: Watch My Full Procreate Illustration Process In this video, I take you behind the scenes as I create a magical digital illustration in Procreate—from the first sketch to the final glowing details (source: YouTube).
- Use Soft Airbrush with very low opacity (5-15%)
- Build up atmospheric effects gradually in layers
- Use Multiply blend mode for shadowy mist
- Screen blend mode for bright, magical fog
- Vary brush sizes from very large to medium for natural randomness
Portal and Dimensional Effects
Creating Magical Portals:
- Start with a dark circular or oval shape
- Add concentric rings using Selection Tools and gradients
- Apply Radial Blur to create swirling motion
- Add particle effects streaming from the portal
- Include strong Rim Lighting around the portal edges
Crystal and Gem Magic
Rendering Magical Crystals:
- Base Shape: Create angular, geometric forms
- Facet Planes: Define each face of the crystal clearly
- Internal Glow: Add bright colors inside using Screen blend mode
- Surface Reflections: Add sharp highlights on edges
- Caustic Light: Create rainbow refractions using Color Dodge
Using Procreate’s Advanced Features for Magic
Magic Canvas Feature
In this beginners guide video you’ll learn how to get the most out of using the Magic Canvas in Procreate. I’ll walk you through two methods for using the Magic Canvas in your drawings and paintings. The canvases are super easy to use and perfect for adding interesting texture and details to your work without any effort! (source: Lisa Glanz)
Method 1: Texture Overlay
- Select your Magic Canvas texture
- Apply it as an overlay on your illustration
- Adjust blend mode (typically Multiply or Overlay)
- Reduce opacity to maintain your original artwork visibility
Method 2: Selective Application
- Paint the Magic Canvas texture only where needed
- Use it to add mystical textures to specific elements
- Perfect for adding ancient, weathered looks to magical objects
- Great for creating organic, natural magical environments
Animation Features for Magical Movement
Creating Simple Magical Animations:
- Enable Animation Assist in Actions menu
- Create subtle movements: floating objects, twinkling stars, gentle glows
- Use Onion Skin to see previous frames while animating
- Keep animations simple – small movements create big magical impact
Color Schemes for Different Types of Magic
Celestial Magic
- Primary: Deep midnight blues, silver, white
- Accents: Soft purples, pale yellows
- Effects: Cool-toned glows, star-like sparkles
Nature Magic
- Primary: Forest greens, earth browns, sky blues
- Accents: Golden yellows, warm oranges
- Effects: Organic glows, leaf-like particles
Dark Magic
- Primary: Deep purples, charcoal blacks, blood reds
- Accents: Toxic greens, bone whites
- Effects: Sharp contrasts, dramatic lighting
Divine Magic
- Primary: Pure whites, golden yellows, soft blues
- Accents: Warm golds, gentle pinks
- Effects: Soft, warm glows, gentle sparkles
Professional Tips and Workflow
Building Your Magical Art Skills
New Procreate Tutorials to Learn Tips, Tricks and Tools Procreate tutorials are like your secret weapon for creating professional-looking illustrations. They offer all the guidance, community support, and creative inspiration you need to take your art to the next level (source: Graphic Design Junction).
Essential Workflow Tips
Organization:
- Name your layers clearly (“Character Base,” “Magic Glow,” “Sparkles,” etc.)
- Group related layers together
- Save multiple versions as you progress
Reference and Study:
- Study how light behaves in real life
- Analyze magical effects in movies and games
- Build a reference library of magical imagery
- Practice individual effects before combining them
Common Mistakes to Avoid
Overusing Effects:
- Less is often more with magical effects
- Focus on 2-3 main magical elements per illustration
- Ensure effects enhance rather than distract from your main subject
Poor Light Logic:
- Maintain consistent light sources
- Consider how magical light would realistically affect surrounding areas
- Don’t forget cast shadows and reflected light
Muddy Colors:
- Keep magical effects on separate layers
- Use blend modes strategically rather than randomly
- Maintain color harmony even with fantastical elements
Finishing and Polishing Your Magical Illustration
Final Enhancement Techniques
Last-Minute Magic:
- Final Sparkle Pass: Add tiny, bright sparkles throughout the composition
- Atmospheric Adjustment: Fine-tune overall mood with Hue/Saturation adjustments
- Contrast Boost: Use Curves to enhance the drama of your magical elements
- Edge Refinement: Clean up any rough edges on magical effects
Export Settings for Best Results
For Portfolio Use:
- PNG format for transparency preservation
- High resolution (300 DPI minimum)
- Full color depth
For Social Media:
- JPEG format for smaller file sizes
Key Takeaways
- Mastering Procreate’s brush library and layer system provides the foundation for creating enchanting digital illustrations.
- Starting with rough sketches and thumbnails helps you develop magical concepts before adding details and special effects.
- Learning lighting techniques and color theory transforms ordinary digital artwork into captivating magical illustrations with depth and atmosphere.
Getting Started with Procreate
Beginning your Procreate journey requires understanding the basics of the interface, setting up your canvas properly, and selecting the right tools for your magical illustrations.
Understanding the Procreate Interface
Procreate’s interface is designed to be intuitive for digital artists on iPad. When you open the app, you’ll see the Gallery view with all your artwork. Tap the “+” button to create a new canvas.
The main drawing interface has several key elements to learn:
- Top toolbar: Contains adjustment tools, brush settings, layers panel, and color selection
- Side toolbar: Includes essential tools like selection, move, and transform
- Bottom toolbar: Shows brush size and opacity sliders
Procreate’s Beginners Series offers step-by-step guidance through these essential tools and features.
Try using gesture controls to make your workflow smoother. Two-finger tap to undo, three-finger tap to redo, and pinch to zoom in and out.
Setting Up Your Canvas
Canvas selection is crucial for creating high-quality digital art. Tap the “+” in the Gallery to see preset canvas options or create a custom one.
Consider these factors when setting up your canvas:
- Dimensions: Choose based on your final output (print, social media, etc.)
- DPI: 300 for print work, 72 for digital-only projects
- Color profile: CMYK for print, RGB for digital display
The number of layers available depends on your canvas size and iPad model. Larger canvases allow fewer layers due to memory constraints.
For magical illustrations, you might want to start with a dark background. Change your canvas color before you begin sketching to set the mood for your artwork.
Choosing Your Brushes and Tools
Procreate comes with a variety of brushes organized into categories like Sketching, Inking, and Painting. Tap the brush icon to access them all.
Start with these essential tools for magical illustrations:
Sketching brushes:
- Technical Pencil for loose concepts
- 6B Pencil for more defined lines
Rendering brushes:
- Soft Brush for smooth blending
- Airbrushing tools for soft glows and ethereal effects
You can build atmosphere in your illustrations by using the right brushes for textures and lighting effects.
Adjust brush size and opacity using the sliders at the bottom left. For more precise control, create your own brushes by modifying existing ones or importing custom brushes.
Fundamentals of Magical Illustration
Creating magical illustrations requires understanding key principles that bring fantasy elements to life. These fundamentals will help you transform your imagination into visually stunning artwork that captivates viewers.
Developing Your Concept
Before touching your Apple Pencil to your iPad, take time to develop a strong concept. Think about what magical elements you want to include in your illustration. Is it a whimsical forest with glowing mushrooms or a mystical character with supernatural abilities?
Create a mood board in Procreate by importing reference images into a separate document. This helps you visualize the magical atmosphere you’re aiming for.
Consider the story behind your illustration. Even simple magical pieces tell a tale – perhaps a fairy discovering a new realm or a wizard casting a spell.
Ask yourself what emotions you want to evoke. Magic often connects with wonder, mystery, or enchantment. Your concept should target these feelings deliberately.
Sketch rough thumbnails of different composition ideas. This helps you experiment with various magical elements before committing to a final concept.
Creating the Initial Sketch
Once your concept is clear, start creating your initial sketch in Procreate. Create a new layer specifically for your sketch – this makes adjustments easier later.
Use simple lines to map out the composition. Focus on placement and proportions rather than details at this stage.
For magical illustrations, consider the flow of energy. Are there spells, light beams, or mystical connections between elements? Sketch these with loose, flowing lines.
Work with a medium-sized brush with low opacity. This allows you to build up lines gradually, creating a more natural feel.
Consider the rule of thirds when placing key magical elements. This creates visual interest and guides the viewer’s eye through your magical scene.
Use Procreate’s QuickShape tool to create perfect circles or lines for magical symbols or geometric patterns that might appear in your illustration.
Applying Base Colours
After completing your sketch, create a new layer beneath it for your base colours. This approach preserves your sketch while building your colour foundation.
Select a colour palette that reflects the magical mood of your illustration. Purples, blues, and teals often convey mystical feelings, while warm golds and pinks can suggest magical energy.
Apply flat colours using the Selection tool or Alpha Lock feature to stay within the lines of your sketch. Don’t worry about shading or highlights yet.
Consider colour harmony and contrast. Magical illustrations often benefit from complementary colours that create visual vibration or analogous palettes for harmony.
Experiment with Procreate’s colour dynamics. Try adjusting hue, saturation, and brightness to find the perfect magical tone.
Use separate layers for different elements. This organization makes it easier to adjust specific magical components later without affecting the entire illustration.
Advanced Techniques for Magical Effects
Taking your magical illustrations to the next level requires mastering several key techniques in Procreate. These methods will help you create stunning visual effects that captivate viewers and bring your magical concepts to life.
Using Layers to Your Advantage
Layers are the foundation of creating magical effects in Procreate. Start by organizing your artwork into separate layers for each element—background, character, and magical effects.
Try using the “Add” and “Color Dodge” blending modes for glowing magical elements. These modes create luminous effects perfect for spells and enchanted objects.
For complex illustrations, use layer groups to keep similar elements together. This makes it easier to adjust entire sections of your magical scene without affecting other parts.
You can adjust the opacity of effect layers to control their intensity. This works particularly well for ethereal elements like mist or magical auras.
Layer duplication combined with slight positioning shifts can create amazing motion effects for magical elements like sparkles or energy bursts.
Mastering Clipping Masks and Alpha Locks
Clipping masks are essential for creating contained magical effects. To use them, create your effect layer, then swipe right and select “Clipping Mask” to bind it to the layer below.
This technique is perfect for adding magical glows that conform exactly to character silhouettes or magical objects without spilling over their boundaries.
Alpha Lock (accessed by swiping right on a layer) restricts your painting to existing pixels. This is ideal for adding texture or color variations to magical elements while maintaining their shape.
For magical atmosphere, try using clipping masks with gradient layers. This creates dimension in your magical effects while preserving the original form.
Combine multiple clipping masks with varying opacities to build complex magical textures that have depth and character.
Creating and Applying Textures
Magical illustrations benefit greatly from texture. Create custom texture brushes by importing photos or using Procreate’s brush studio to design patterns that resemble magic—like sparkling dust or energy waves.
Apply textures subtly by using layers set to low opacity. This adds dimension without overwhelming your main illustration elements.
For marbling effects, use liquify tools and blend modes to create swirling, magical patterns that simulate magical energy or potion swirls.
Try the art reveal technique where you paint a black layer, then erase parts to reveal magical elements underneath—perfect for creating dramatic magical reveals.
Consistency in texture application helps unify your illustration. Apply similar textures across related magical elements to create visual harmony.
Lighting and Shadows with Gaussian Blur
Gaussian Blur is key for creating realistic magical lighting effects. Add a new layer for your light source, then apply Gaussian Blur to soften the edges and create a convincing glow.
For magical particle effects, paint dots on a separate layer and apply a slight Gaussian Blur to create softness and atmospheric depth.
Create dramatic shadows by duplicating your object layer, filling it with black, applying Gaussian Blur, and positioning it below your main layer. This adds weight and realism to floating magical elements.
Atmospheric lighting can be achieved by using large, soft brushes with low opacity on layers set to “Overlay” blending mode, then applying subtle Gaussian Blur to integrate the light with the scene.
Experiment with colored light sources to create magical moods—blue for cool mystical energy or warm oranges for fire magic.
Adding the Final Touches
The final touches transform good digital artwork into magical illustrations by enhancing atmosphere and visual impact. These finishing steps bring your Procreate creation to life with professional polish.
Adjusting Colour Saturation and Contrast
Start by using adjustment layers for better control over your illustration’s mood. In Procreate, access these powerful tools through the magic wand icon.
Try these essential adjustments:
- Curves: Fine-tune shadows and highlights to create depth
- Hue/Saturation/Brightness: Enhance your color palette’s vibrancy
- Color Balance: Adjust the temperature to match your desired atmosphere
For magical illustrations, consider adding a subtle color overlay layer set to “Overlay” or “Soft Light” blend mode with 10-20% opacity. This creates cohesive color harmony throughout your artwork.
Remember to occasionally flip your canvas horizontally during this process. This technique helps you spot imbalances in your composition that your eyes might have adjusted to.
Refining Details for Realistic Impressions
Zoom in to examine your illustration carefully. Focus on key focal points where adding extra detail will enhance the magic.
For mystical elements, try these rendering techniques:
- Light effects: Add small highlights using a soft airbrush with reduced opacity
- Texture overlays: Incorporate subtle texture for dimension
- Edge refinement: Sharpen important edges while softening others
Create a new layer and set it to “Overlay” to add glowing effects – perfect for magical illustrations. Use a soft brush with a bright color at low opacity to paint areas where light interacts with objects.
Consider adding atmospheric elements like dust particles or magical sparkles. These small details significantly elevate the enchanted feeling of your illustration.
Reviewing and Perfecting Your Artwork
Take time to critically review your work before finalizing. Export your illustration at a lower resolution and view it on different devices to assess how it appears in various contexts.
Create a checklist for your final review:
✓ Composition balance: Is your focal point clear?
✓ Color harmony: Do your colors work together?
✓ Consistency: Are lighting and proportions consistent?
✓ Detail balance: Do you have a mix of detailed and rested areas?
Don’t be afraid to make final adjustments based on this review. Sometimes subtle changes like slightly increasing contrast or adjusting particular colors can dramatically improve your magical illustration.
Once satisfied, save your work in multiple formats including the Procreate file with layers intact. This allows you to revisit and make changes later if needed.
Exporting and Sharing Your Work
Once you’ve created your magical illustration in Procreate, sharing it with the world requires understanding the right export options and presentation techniques. These steps ensure your artwork maintains its quality and makes the best impression.
Formats and Resolution for Digital Sharing
Procreate offers several export formats to suit different needs. To export your artwork, tap the Actions menu (wrench icon) and select Share. For online sharing, JPEG works well for photographs or painterly illustrations, while PNG preserves transparency for graphic elements.
When considering resolution, export at 300 DPI for print-quality work. For web display, 72-150 DPI is sufficient. You can also save your work in the native .procreate format to preserve all layers and editing capabilities for future adjustments.
For social media, consider these optimal dimensions:
- Instagram: 1080 x 1080px (square)
- Twitter: 1200 x 675px
- Facebook: 1200 x 630px
Remember to export as a video if you want to show your process, which can be particularly engaging for viewers.
Best Practices for Portfolio Presentation
When displaying your Procreate artwork professionally, consistency is key. Maintain similar export settings across your portfolio to create a cohesive look. Consider creating a signature style that makes your digital art instantly recognizable.
Use high-quality thumbnails that represent your work accurately. When building your portfolio, group similar illustrations together to showcase your range while demonstrating stylistic consistency.
Include a few process shots or time-lapse videos of your work to demonstrate your technical skills. This gives potential clients insight into your workflow and attention to detail.
If you’re transferring between devices, you can export all artwork as .procreate files by selecting projects in the gallery and using the share function. This preserves all your layers and editing capabilities.
Always keep original files backed up to cloud storage to protect your work and make it accessible across devices.
Frequently Asked Questions
Creating magical illustrations in Procreate involves specific tools, techniques, and approaches. Many artists have common questions about achieving ethereal effects and fantasy elements in their digital artwork.
What are the essential brushes for creating enchanting artwork in Procreate?
For magical illustrations, you’ll need a core set of brushes. The standard Round Brush and Soft Brush are perfect for basic line work and blending.
Specialty brushes like the Glimmer brush, Nebula, and Galaxy brushes help create cosmic effects. The Luminance brush is excellent for adding glows and light sources.
Custom texture brushes can add fantasy elements like sparkles, mist, and ethereal clouds. Try the Smoke brush for mystical fog effects and the Spatter brush for stars or magical particles.
Can you provide step-by-step tutorials for fantasy-themed illustrations in Procreate?
Begin with thumbnails and rough sketches to plan your composition. Work small and create multiple options before selecting your favorite.
Create a detailed rough sketch on a new layer. Focus on capturing the magical elements and overall mood rather than perfection.
Draw clean line art on a separate layer. Use the streamline feature for smooth lines, especially for delicate magical elements like fairy wings or spell effects.
Separate your elements onto different layers for easier color application. Group related elements together for better organization of complex magical scenes.
Apply base colors on a layer beneath your line art. Use the selection tool to keep colors within boundaries, especially for glowing or transparent magical elements.
Add shading and highlights to create dimension. For magical effects, use gradient mapping and overlay blending modes to achieve ethereal glows.
What are the best techniques for incorporating light and glow effects in Procreate art?
Use the Gaussian Blur tool to soften light sources and create a diffused glow effect. Apply this to separate layers dedicated to your light elements.
The Layer Blending Modes are crucial for light effects. “Add” and “Screen” modes work wonderfully for creating luminous elements that appear to emit light.
Work with low opacity brushes to build up light gradually. This technique creates more realistic and dimensional glowing effects for magical elements.
Create light rays using the selection tool and radial gradients. Add dust particles or sparkles within these rays for an enhanced magical atmosphere.
For magical auras, use soft brushes with varying opacities around characters or objects. Add subtle color variations to make the glow appear more natural and dynamic.
How do beginners approach creating otherworldly landscapes in Procreate?
Start with reference images of real landscapes, then modify elements to make them magical. Change colors, scale, or add floating elements to transform ordinary scenes.
The Magic Canvas feature can help beginners create amazing backgrounds. These special canvases add textures and effects that serve as perfect starting points for fantasy worlds.
Use perspective guides to maintain realistic spatial relationships even in fantastical scenes. Procreate’s perspective tools help create believable depth in floating islands or twisted magical architecture.
Layer atmospheric effects like fog, mist, or magical particles to add depth. These elements create distance and mystery in your otherworldly landscapes.
Work from background to foreground, building up layers of detail. This approach helps maintain the proper depth and focus in complex magical scenes.
What are some tips for animating illustrations in Procreate to add a magical dimension?
Use Procreate’s Animation Assist feature to create simple magical effects. Even subtle movements like twinkling stars or flowing magic can bring your illustration to life.
Create separate layers for elements you want to animate. This organization makes it easier to control individual movements of magical elements.
For glowing effects, animate the opacity of light layers. Pulsing lights, flickering flames, or shimmering auras create an enchanted feeling with minimal effort.
Utilize the clone tool to duplicate frames with slight variations. This technique is perfect for creating particle effects like floating dust or magical sparkles.
Keep animations subtle for more sophisticated results. Sometimes the smallest movements—like gently swaying magical plants or softly glowing runes—create the most captivating effects.
Are there special Procreate features or add-ons specifically useful for fantastical illustration work?
The Liquify tool is perfect for creating fluid, magical distortions. Use it to create water-like effects, smoky tendrils, or ethereal fabric for fantasy characters.
Procreate’s QuickShape feature helps create perfect geometric forms for magical symbols, portals, or spell circles. Hold after drawing to transform rough shapes into perfect forms.
Import custom brushes designed specifically for fantasy elements. Many artists create specialized brush sets for magical effects like enchanted forests, botanical illustrations, or cosmic phenomena.
The Symmetry tools are invaluable for creating magical mandalas, intricate spell patterns, or balanced fantasy creatures. Procreate offers rotational, vertical, and horizontal symmetry options.
Blend modes dramatically enhance magical effects. Experiment with overlay, screen, and color dodge modes to create ethereal glows, fire effects, or shimmering metals that appear truly magical.