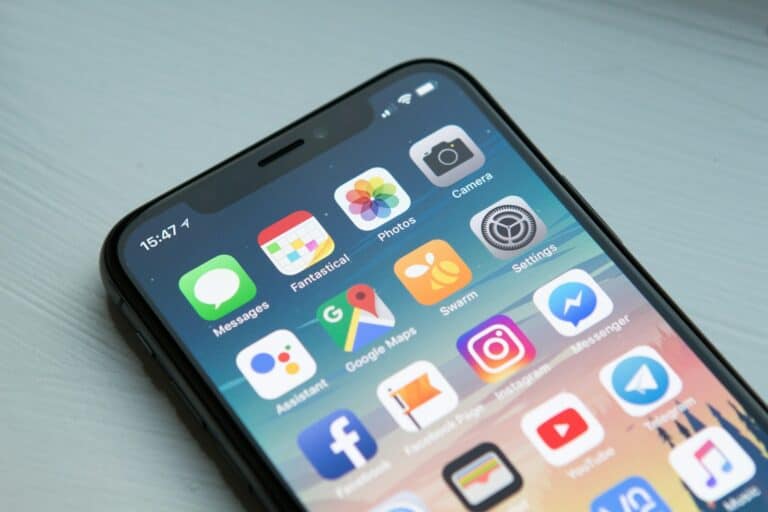
iMessage, Apple’s popular messaging service, offers a seamless communication experience for iOS users. The Messages app comes pre-installed on iPhones, iPads, and Macs, allowing users to send unlimited texts, photos, and videos. This integration across Apple devices creates a convenient ecosystem for staying connected with friends and family.
For Windows users, accessing iMessage has traditionally been challenging. However, recent developments have opened up new possibilities. The Phone Link app now allows Windows 11 users to connect their iPhones and access iMessage on their PCs. This feature is currently limited to Windows Insiders but shows promise for broader availability in the future.
While native iMessage support on non-Apple devices remains limited, alternative solutions exist. These include using remote desktop applications or third-party services to bridge the gap between Apple’s messaging platform and other operating systems. As technology evolves, more options may emerge to expand iMessage’s reach beyond the Apple ecosystem.
Why Export iMessages?
Exporting your iMessage history lets you:
- Back up meaningful conversations
- Keep records for work or legal documentation
- Transfer messages to a new device
- Save memories (photos, videos, and texts) permanently
🧰 What You’ll Need
Before you start, gather:
- Your iPhone, iPad, or Mac
- A Lightning or USB-C cable (if using a computer)
- Apple ID credentials
- Optional: third-party export software (for full message history)
📱 Method 1: Export iMessages Directly from iPhone (Manual Way)
This method works best for short conversations.
1. Open Messages
Go to the Messages app and open the conversation you want to save.
2. Select Messages
Tap and hold a message → choose More… → select multiple messages if needed.
3. Copy and Paste
Tap the Share icon or Copy, then paste the text into:
- Notes
- Pages
- Or any text editor app.
You can then export that document as a PDF or email it to yourself.
(Note: This method doesn’t include timestamps, photos, or attachments.)
💻 Method 2: Export iMessages Using a Mac
If your iMessages sync with your Mac via iCloud, you can export entire conversations easily.
1. Open Messages on Mac
Launch the Messages app and select the conversation.
2. Copy or Print
- To save text only:
Select all messages (⌘ + A), copy, and paste into a text document. - To save as a PDF:
Go to File → Print → Save as PDF.
This keeps formatting, timestamps, and message order intact.
(Source: AppleInsider)
💾 Method 3: Export iMessages via iCloud Backup
If you just want to preserve all your messages (not necessarily view them right away):
- Go to Settings → [Your Name] → iCloud → iCloud Backup.
- Turn on Messages in iCloud.
- Tap Back Up Now.
Your messages will sync to iCloud and can be restored on another Apple device using the same Apple ID.
(This doesn’t create a readable file — it’s for backup and restore only.)
🧩 Method 4: Use Third-Party Tools (Best for Full Exports)
If you want to download every iMessage, including attachments, timestamps, and reactions, use trusted third-party software such as:
- iMazing (imazing.com)
- TouchCopy (wideanglesoftware.com)
- AnyTrans (imobie.com)
- MobileTrans (Wondershare)
Steps (General):
- Connect your iPhone to your computer.
- Open the export tool and select “Messages.”
- Choose the conversation(s) you want.
- Export as PDF, CSV, HTML, or TXT.
These tools also let you include:
- Photos, videos, and audio messages
- Reactions and timestamps
- Apple Pay and edit history (source: Lifehacker)
⚠️ Tips and Warnings
- Never delete your messages before exporting — iCloud sync might remove them everywhere.
- Always back up your iPhone before using third-party tools.
- Avoid unverified software — it may compromise your privacy.
✅ Summary
| Method | Best For | Output Type |
|---|---|---|
| Manual Copy | Short chats | Text or email |
| Mac Print to PDF | Full threads | |
| iCloud Backup | Archiving | iCloud data |
| Third-Party Tools | Complete exports | PDF, CSV, HTML, TXT |
In short:
To export iMessage conversations, you can manually copy them, print them to PDF on a Mac, back them up via iCloud, or use trusted third-party tools like iMazing or MobileTrans for full message downloads
Key Takeaways
- Messages app offers seamless iMessage integration across Apple devices
- Windows 11 users can now access iMessage through the Phone Link app
- Alternative solutions exist for using iMessage on non-Apple devices
Understanding iMessage and Its Ecosystem
iMessage is Apple’s proprietary messaging service that seamlessly integrates across iOS, iPadOS, and macOS devices. It offers secure, feature-rich communication for Apple users, allowing them to send texts, photos, videos, and more without incurring SMS charges.
iMessage Fundamentals
iMessage uses Apple ID for account identification and iCloud for message storage and synchronization. Users can send text messages, photos, videos, and voice recordings through the Messages app. The service automatically switches between iMessage and SMS/MMS based on recipient availability.
iMessage encrypts communications end-to-end, enhancing privacy and security. It supports read receipts, typing indicators, and message effects like confetti or balloons. Group chats allow multiple participants to communicate simultaneously.
The service is free to use over Wi-Fi or cellular data, bypassing carrier SMS fees. This makes it particularly cost-effective for international messaging between Apple users.
iOS and MacOS Integration
iMessage is deeply integrated into Apple’s operating systems. On iOS devices, it’s built into the Messages app, allowing seamless communication between iPhones and iPads. Users can start conversations on one device and continue on another.
On macOS, the Messages app provides a desktop iMessage experience. This integration enables users to send and receive messages from their Mac computers, maintaining conversation continuity across devices.
The service syncs with the user’s Apple ID, ensuring messages appear on all linked devices. This integration extends to other Apple services, like FaceTime for video calls and Apple Pay for monetary transactions within iMessage.
Synchronizing Across Devices
iMessage uses iCloud to synchronize messages across all of a user’s Apple devices. When a user signs in with their Apple ID on a new device, it automatically syncs their message history.
This synchronization includes text messages, attachments, and conversation settings. Users can delete messages on one device, and the changes reflect across all linked devices. iCloud also backs up messages, allowing users to restore their conversation history when setting up a new device.
The sync feature ensures a consistent messaging experience across iPhone, iPad, Mac, and even Apple Watch. It allows users to start a conversation on one device and seamlessly continue it on another, enhancing productivity and convenience.
Setting Up iMessage on Different Devices
iMessage setup varies across Apple devices. Each device type requires specific steps to enable and sync messages seamlessly.
iMessage on iPhone and iPad
To set up iMessage on iPhone or iPad, go to Settings and tap your name at the top. Select iCloud, then tap “Show All” or “See All”. Find Messages and turn on the toggle switch.
For iOS 16 to 17.1, tap “Sync this device”. On iOS 17.2 or later, enable “Use on this iPhone” or “Use on this iPad”.
Make sure your Apple ID is signed in. Go to Settings > Messages. Turn on iMessage. Select which phone numbers and email addresses to use with iMessage under “Send & Receive”.
iMessage on Mac Computers
On Mac, open the Messages app. Go to Preferences > Accounts. Check if the Apple ID matches your iPhone and iPad.
Enable iMessage by selecting the checkbox next to your phone number and email addresses. This syncs messages across devices.
Ensure your Mac is signed in to the same Apple ID as other devices. If issues occur, try signing out and back in to refresh the connection.
iMessage with Apple Watch and AirPods
Apple Watch mirrors iPhone messages automatically when paired. No additional setup is needed for iMessage on Apple Watch.
AirPods integrate with iMessage for audio notifications. Connect AirPods to your iPhone in Bluetooth settings. Go to Settings > Notifications > Announce Notifications. Turn on “Announce Notifications” and select Messages.
This allows Siri to read incoming messages through AirPods. Reply hands-free by speaking your response after the message is read.
Alternative Solutions for iMessage on Non-Apple Devices
Several options exist for accessing iMessage on non-Apple devices. These solutions aim to bridge the gap between Apple’s ecosystem and other platforms, providing alternatives for users who want to use iMessage on Windows, Android, or other non-iOS devices.
Accessing iMessage via Chrome Remote Desktop
Chrome Remote Desktop allows users to access their Mac remotely from any device with a Chrome browser. This method requires a Mac computer running iMessage and a Google account. Users install the Chrome Remote Desktop extension on their Mac and set up remote access. Once configured, they can log in to their Google account on any device with Chrome and connect to their Mac.
This solution provides full access to iMessage on non-Apple devices. Users can send and receive messages, participate in group chats, and use iMessage features as if they were on their Mac. The downside is the need for a constantly running Mac and potential lag in remote connections.
Third-Party Applications like AirMessage
AirMessage is a popular third-party solution for using iMessage on Android devices. It requires a Mac computer as a server and the AirMessage app on an Android phone. Users set up the AirMessage server on their Mac and install the app on their Android device.
The app connects to the Mac server, allowing users to send and receive iMessages on their Android phone. AirMessage supports most iMessage features, including group chats and media sharing. It’s free and open-source, giving tech-savvy users the ability to examine the code.
Other similar apps exist, but they often require jailbreaking an iPhone or using potentially risky methods to access iMessage. These alternatives may not be as reliable or secure as official solutions.
Frequently Asked Questions
iMessage users often have questions about accessing and managing their messages across different devices and platforms. Here are some common inquiries and their answers.
How can one retrieve data from iMessage on iCloud?
To retrieve iMessage data from iCloud, users need to enable iCloud backup for Messages. They can then access their messages on any Apple device signed in with the same Apple ID. For specific messages, users can search within the Messages app or download their entire iCloud backup.
What are the steps for installing iMessage on a Windows 10 PC?
iMessage is not natively available on Windows 10. Users can access iMessage on a Windows PC through remote desktop solutions. They need to install Chrome on both their Mac and PC, set up Chrome Remote Desktop, and connect to their Mac from the Windows PC to use iMessage.
Is it possible to download an entire iMessage conversation for archiving?
Yes, users can download entire iMessage conversations for archiving. On a Mac, they can export conversations as PDF files. For more comprehensive backups, users can create a full iPhone backup using iTunes or Finder, which includes all iMessage data.
How does one access iMessage on a PC with Windows operating system?
Accessing iMessage on a Windows PC requires workarounds. Options include using Chrome Remote Desktop to connect to a Mac, third-party apps like Dell Mobile Connect for message mirroring, or cloud-based services that sync messages across devices.
Can iMessage be officially accessed on Android devices?
No, iMessage is not officially available on Android devices. It is an Apple-exclusive service designed for iOS and macOS. Android users cannot directly access iMessage but may use alternative messaging apps for cross-platform communication.
What should be done to log in to iMessage on a device other than an iPhone?
To log in to iMessage on a non-iPhone Apple device, users must sign in with their Apple ID. On a Mac, they can open the Messages app and enter their Apple ID credentials. For iPads, users can go to Settings, tap Messages, and sign in with their Apple ID to enable iMessage.

