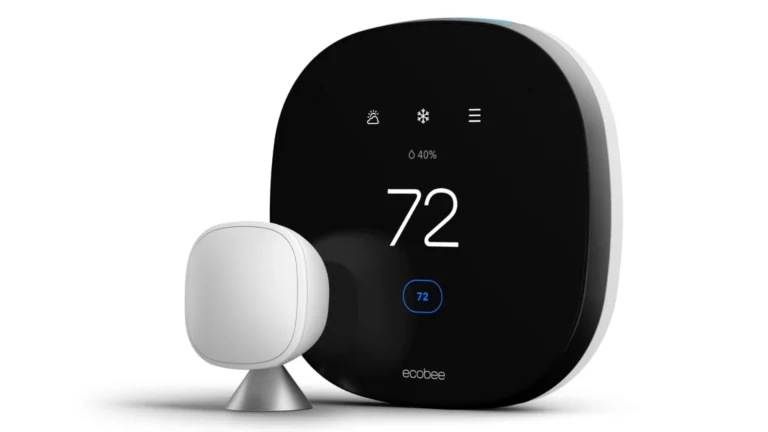
Smart thermostats bring convenience to your home, but sometimes they act up. From connectivity issues to incorrect temperature readings, troubleshooting these devices doesn’t have to be complicated. Most smart thermostat problems can be solved through simple steps like checking the wiring, replacing batteries, or ensuring your Wi-Fi connection is stable.
If your smart thermostat isn’t turning on or maintaining proper temperature control, don’t panic. It could be something as basic as a clogged air filter affecting your heating and cooling system. Other common issues include loose wiring connections or even improper thermostat placement that causes inaccurate readings.
Before calling a professional, try some DIY troubleshooting. Check if your thermostat has power, verify the wiring is correct, and ensure your heating and cooling systems are functioning properly. Many manufacturers like Honeywell and Nest offer specific troubleshooting guides for their devices.
Smart thermostats make heating and cooling more efficient — but like any connected device, they can glitch. Common issues include Wi-Fi disconnections, inaccurate temperature readings, unresponsive screens, or HVAC systems not responding.
This guide will walk you through step-by-step troubleshooting for the most frequent problems and when to call a professional.
⚙️ 1. Thermostat Not Powering On
Possible Causes:
- Dead batteries or no power from the HVAC system
- Loose wiring or tripped circuit breakers
- Blown HVAC fuse
Fixes:
- Check power supply: Make sure your HVAC system is powered on and the circuit breaker hasn’t tripped.
- Replace batteries (if applicable).
- Inspect wiring: Remove the thermostat faceplate and ensure all wires are securely connected.
- Check the C-wire: Smart thermostats often need a continuous power source (C-wire). If missing, use a power adapter kit.
💡 Tip: If your thermostat repeatedly loses power, your HVAC transformer may be undersized — contact a technician.
🌐 2. Wi-Fi Connectivity Problems
Symptoms: Thermostat goes offline, can’t connect to the app, or fails to sync schedules.
Fixes:
- Restart your router and thermostat.
- Check network frequency: Many smart thermostats only connect to 2.4GHz Wi-Fi networks.
- Move closer to the router or install a Wi-Fi extender.
- Update firmware: Check for updates in the thermostat’s app.
- Re-add the device to your home network if it continues dropping offline.
Source: Asurion – Troubleshoot Common Smart Thermostat Problems
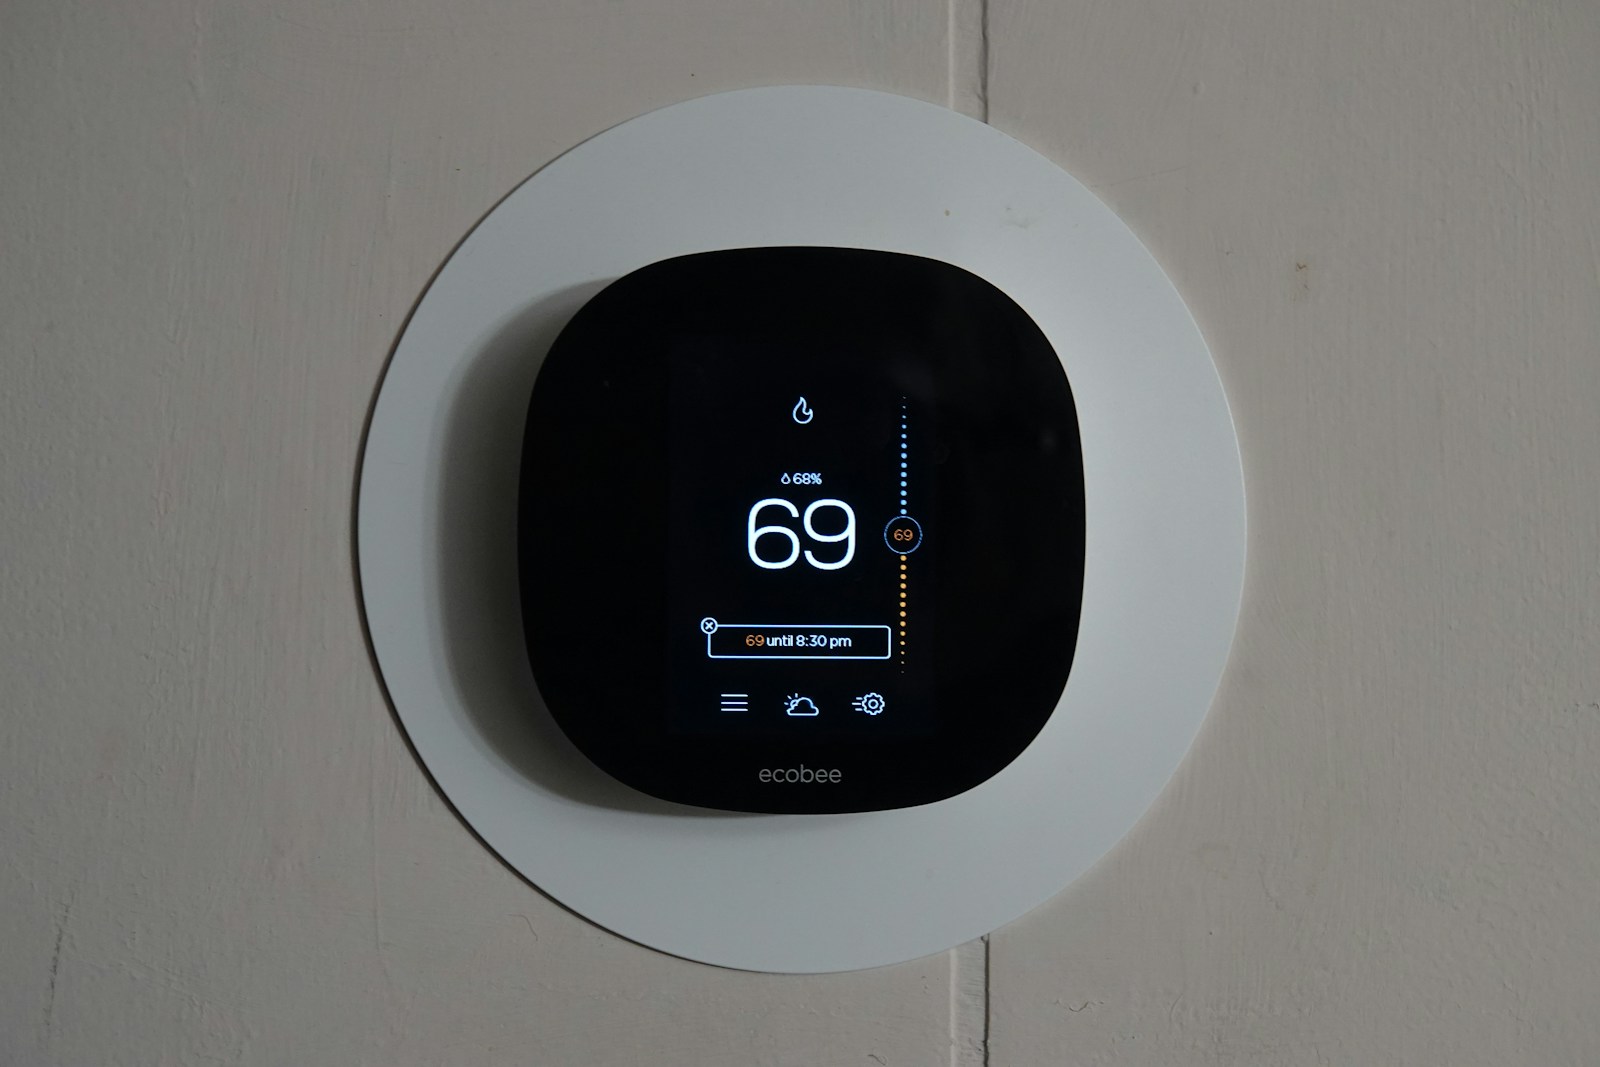
🌡️ 3. Inaccurate Temperature Readings
Possible Causes:
- Thermostat installed near heat sources or vents
- Dirty sensors
- Calibration errors
Fixes:
- Relocate the thermostat away from direct sunlight or drafts.
- Clean the thermostat sensor gently with a microfiber cloth.
- Recalibrate temperature settings through the app or settings menu.
- Check for firmware updates that address sensor accuracy issues.
Source: HeaterGuides – Smart Thermostat Not Working? Quick Fixes That Work
🧊 4. HVAC System Not Responding
Symptoms: Thermostat is on, but heating or cooling doesn’t start.
Fixes:
- Check thermostat mode: Ensure it’s set to Heat or Cool, not Off.
- Inspect wiring connections between thermostat and HVAC control board.
- Reset the thermostat to factory defaults and reconfigure.
- Test HVAC manually: Try turning on your furnace or AC directly from the unit to confirm it works.
If the system still doesn’t respond, there may be a relay or control board issue — contact a professional HVAC technician.
📱 5. App or Smart Home Integration Issues
Fixes:
- Update your thermostat app and smart home platform (Alexa, Google Home, etc.).
- Re-link the thermostat skill/integration.
- Ensure devices are on the same Wi-Fi network.
- Check permissions in your smart home app — sometimes integrations need to be reauthorized.
🔁 6. Frozen or Unresponsive Screen
Fixes:
- Restart the thermostat by removing it from the wall for 30 seconds.
- Check for firmware updates via the app.
- Factory reset if the issue persists.
- Inspect power supply — insufficient voltage can cause freezing.
Source: HomeAlliance – 7 Common Smart Thermostat Issues and Fixes
🧰 7. When to Call a Professional
If these steps don’t solve the issue, contact an HVAC technician if:
- The thermostat repeatedly loses power
- Heating or cooling cycles are erratic
- You notice burnt wiring or electrical smells
- The thermostat display is blank even with confirmed power
Source: Peak Heating & Cooling – How to Troubleshoot Your Smart Thermostat
✅ Final Thoughts
Routine maintenance — like cleaning sensors, keeping firmware updated, and checking Wi-Fi stability — can prevent most smart thermostat issues. Even the best devices sometimes need a reset or recalibration to stay efficient and responsive.
For a full maintenance checklist, see Smart Energy Home Lab’s Maintenance Guide.
Key Takeaways
- Simple fixes like checking power connections, replacing batteries, or resetting your device can solve most smart thermostat problems.
- Proper installation and placement of your thermostat plays a crucial role in accurate temperature readings and system performance.
- Regular maintenance of both your thermostat and HVAC system prevents common issues and extends the life of your equipment.
Understanding Thermostat Basics
Thermostats serve as the control center for home comfort systems, regulating temperature by communicating with heating and cooling equipment. These devices have evolved from simple mechanical models to sophisticated smart systems that offer enhanced control and energy efficiency.
Thermostat Functionality
Thermostats work on a simple principle: they measure the current room temperature and compare it to the desired setting. When the temperature falls below or rises above the set point, the thermostat signals your heating or cooling system to activate.
Most thermostats contain temperature sensors, either bimetallic strips in mechanical models or electronic sensors in digital units. These components detect temperature changes with precision.
The main function involves creating a closed or open circuit. When your home needs heat, the thermostat completes an electrical circuit to your furnace or heat pump. For cooling, it activates your AC system when temperatures rise above the set point.
Thermostats also control fan operation, switching between “auto” (running only during heating/cooling) and “on” (continuous air circulation). Some advanced models manage humidity levels alongside temperature.
Different Types of Thermostats
Mechanical Thermostats: These traditional models use physical components like mercury switches or metal coils that expand and contract with temperature changes. Though simple and inexpensive, they’re less accurate and lack programming features.
Digital Thermostats: These offer basic programming capabilities with easy-to-read displays. Users can set different temperatures for specific times, improving energy efficiency compared to mechanical models.
Programmable Thermostats: These devices allow for detailed scheduling of temperature changes throughout the day and week. Most offer 5-2 day programming (weekday/weekend) or 7-day options for maximum customization.
Smart Thermostats: The most advanced option, these connect to Wi-Fi networks and offer remote control via smartphone apps. They can face connectivity issues but provide benefits like:
- Learning your preferences automatically
- Geofencing capabilities (detecting when you’re home)
- Integration with other smart home systems
- Energy usage reports and optimization suggestions
Common Thermostat Installation Issues
Installing a smart thermostat can be tricky, and several common problems might arise during the process. Understanding the proper connection of wires and ensuring correct power supply are crucial for successful installation.
Incorrect Wiring
One of the most frequent installation issues is incorrect wiring connections. Many homeowners struggle with identifying where each colored wire should connect on their new thermostat.
The red wire (R wire) connects to the R terminal and provides power from your HVAC system’s transformer. If you have separate transformers for heating and cooling, you might have both an Rc and an Rh wire.
The green wire typically connects to the G terminal and controls the fan operation. Mixing this up with other wires can result in your fan running constantly or not at all.
The common wire (C-wire) connects to the C terminal and provides continuous power to smart thermostats. Many older homes don’t have this wire, which can cause problems with smart thermostat functionality.
If wires are connected to wrong terminals, your system might not turn on, or worse, components could be damaged.
No Power to Thermostat
When your newly installed thermostat shows no display or won’t power up, power supply issues are likely to blame.
Missing C-wire connections are a common cause. Smart thermostats need continuous power, which the C-wire provides. Without it, the thermostat may work intermittently or not at all.
Check if the R wire is properly secured to the R terminal. This wire delivers the voltage needed to power your thermostat. A loose connection here means no power reaches the device.
Some installations require a power extender kit if a C-wire isn’t available. These kits create an alternative power path for your smart thermostat.
Circuit breakers or fuses for your HVAC system should also be checked. If they’ve tripped, no power will reach the thermostat regardless of proper wiring.
Get a multimeter to test voltage between R and C terminals. You should measure approximately 24V AC if the power supply is working correctly.
Improper Heat or AC Activation
When your thermostat is powered but heating or cooling doesn’t activate properly, several wiring issues could be responsible.
The Nest thermostat may show an E5 error if it doesn’t detect wires connected to the W1 (heating) or Y1 (cooling) terminals. At least one of these connections is required for proper function.
Ensure white wires are connected to W terminals (heating control) and yellow wires to Y terminals (cooling control). Swapping these will cause your system to activate the wrong function.
Loose connections can cause intermittent operation. Press firmly on terminal buttons when inserting wires and give each a gentle tug to confirm they’re secure.
Some systems require configuration settings that match your specific HVAC equipment. Check your thermostat’s settings menu to ensure it’s configured for your system type (conventional, heat pump, etc.).
Troubleshooting Smart Thermostat Problems
Smart thermostats can experience several common issues that prevent them from functioning properly. Most problems fall into three main categories that can often be resolved without professional help.
Connectivity Issues
Wi-Fi connection problems are among the most common smart thermostat issues. When your device disconnects from the network, you’ll lose remote control capabilities and some advanced features.
To fix connectivity problems, first check if other devices can connect to your home Wi-Fi. If not, restart your router and modem by unplugging them for 30 seconds before reconnecting.
If your Wi-Fi is working but the thermostat won’t connect, try these steps:
- Verify your Wi-Fi password is correct in the thermostat settings
- Move your router closer to the thermostat if possible
- Turn on Wi-Fi and Bluetooth on your phone during setup
- Disable VPNs that might interfere with the connection
- Check if your router’s firmware needs updating
Some smart thermostats require a C-wire (common wire) for stable Wi-Fi connections. If connectivity issues persist, check your wiring configuration.
Inaccurate Temperature Readings
When your thermostat displays temperatures that don’t match how your home actually feels, several factors may be responsible.
Check the thermostat’s location first. Units placed in direct sunlight, near air vents, or by appliances that generate heat will provide inaccurate readings. The ideal location is on an interior wall away from drafts and heat sources.
Many smart thermostats have calibration settings that allow for temperature adjustments. Access these through your device’s settings menu to correct minor discrepancies.
Dust accumulation inside the thermostat can also affect sensor accuracy. Gently clean the device according to the manufacturer’s instructions, being careful not to damage internal components.
If your room temperatures don’t match thermostat settings, consider using external temperature sensors in different rooms for more balanced comfort.
Unresponsive Device
A completely unresponsive thermostat usually indicates power problems. Start troubleshooting by checking the most obvious issue: dead batteries. Even hardwired models often have battery backups that can cause issues when depleted.
If fresh batteries don’t help, check your circuit breaker to ensure power is flowing to your HVAC system. A tripped breaker can prevent your thermostat from functioning.
For hardwired systems, voltage issues may be the culprit. Using a multimeter to check voltage levels at the transformer can help identify if you’re getting the expected 24V output.
Try performing a factory reset if your device has power but remains unresponsive. The procedure varies by manufacturer, so consult your user manual for specific instructions.
If your thermostat shows a blank screen despite having power, internal component failure might require replacement of the unit.
Electrical Component Failures
Smart thermostats rely on multiple electrical components to function properly. When these components fail, your thermostat may stop working entirely or display erratic behavior that affects your home’s comfort.
Blown Fuse and Tripped Breakers
Fuses and circuit breakers protect your HVAC system from electrical surges. When a thermostat’s display is dark, checking for a blown fuse or tripped breaker should be your first step. These issues commonly occur after power outages or electrical storms.
To check for a blown fuse, locate your home’s electrical panel and look for any switches that aren’t fully in the “on” position. For fuses, look for discoloration or broken filaments inside the glass.
Many modern systems, including Nest thermostats, will display error codes when power issues occur. These codes often indicate whether the problem stems from the breaker or another electrical component.
Before replacing a fuse, ensure your HVAC system is turned off. Use the correct amperage replacement to prevent further damage to your system.
Transformer Malfunctions
The transformer converts your home’s high-voltage electricity to the low-voltage power needed by your thermostat. Power issues like a thermostat not accepting electrical signals often indicate transformer problems.
Signs of transformer failure include:
- Thermostat display flickering on and off
- Intermittent heating or cooling cycles
- Strange buzzing sounds from the air handler
- System completely non-responsive
Honeywell and other manufacturers typically use 24-volt transformers in their systems. Testing transformer output requires a multimeter to verify proper voltage. Readings significantly below 24 volts indicate a failing transformer.
Transformer replacement is not typically a DIY job due to electrical hazards. Professional HVAC technicians can safely diagnose and replace malfunctioning transformers.
Faulty Wiring and Connections
Poor wire connections are among the most common electrical issues with smart thermostats. The C-wire (common wire) supplies continuous power to smart thermostats like Nest, and when it fails, the thermostat may shut down unexpectedly.
Look for these wiring issues:
- Loose terminal connections
- Corroded or damaged wires
- Incorrectly labeled wires
- Wires touching that shouldn’t be connected
In dual transformer systems, which have separate heating and cooling power sources, wiring problems become more complex. Each system requires proper connection to the C terminal in the air handler.
To check connections, turn off power to your HVAC system, remove the thermostat from its wall plate, and inspect wire terminals for tightness and corrosion. Gently tug each wire to ensure it’s securely fastened.
Thermostat Maintenance Tips
Proper maintenance of your smart thermostat ensures accurate temperature readings, extended device lifespan, and optimal energy efficiency. Regular care can prevent common issues and save you money on energy bills.
Regular Cleaning and Inspection
Dust accumulation on thermostats can cause inaccurate readings and reduce efficiency. Turn off power to the thermostat before cleaning to prevent electrical damage.
Gently remove the thermostat cover and use a soft brush or compressed air to clear dust from internal components. Avoid using liquid cleaners directly on electronic parts as they may cause damage.
Check the thermostat’s placement regularly. Ensure it’s not exposed to direct sunlight, drafts, or heat sources that could affect its temperature readings. These environmental factors can cause your thermostat to read incorrectly.
Inspect wiring connections every few months for signs of wear or loosening. Tighten any loose connections carefully, as poor connections can cause intermittent operation issues.
Battery Replacement
Most smart thermostats display low battery warnings, but it’s wise to proactively replace batteries every 8-12 months. This prevents unexpected shutdowns during critical heating or cooling periods.
Keep spare batteries on hand, especially before extreme weather seasons. Many smart thermostat issues stem from battery problems that cause display malfunctions or connectivity failures.
When replacing batteries, note the correct polarity marking inside the battery compartment. Using incorrect battery types can damage your device, so always check manufacturer specifications.
After battery replacement, verify that all programmed settings remain intact. Some models may reset to factory defaults when power is interrupted for extended periods.
Scheduled Professional Check-Ups
Professional HVAC technicians should inspect your thermostat annually as part of your system maintenance. Technicians can calibrate your thermostat for accurate temperature readings and optimal performance.
During professional inspections, technicians can verify proper Wi-Fi connectivity and update firmware if needed. These updates often include security patches and new features that improve functionality.
Professionals can also confirm your thermostat is properly sized and positioned for your home’s specific needs. Improper placement can lead to temperature inconsistencies throughout your home.
Ask your technician to check compatibility between your thermostat and HVAC system. Some system failures occur when thermostats aren’t fully compatible with heating and cooling equipment.
Optimizing Thermostat Performance
Smart thermostats offer advanced features that can enhance your home’s comfort while reducing energy costs. Proper setup and usage are essential to get the most benefit from these devices.
Correct Usage of Programmable Features
Smart thermostats include several programmable features that many homeowners don’t fully utilize. The scheduling function allows you to set temperature changes based on your daily routine. Most models let you create different schedules for weekdays and weekends.
Key features to use:
- Temperature presets for home, away, and sleep modes
- Geofencing capabilities that adjust temperatures when you leave or approach home
- Voice control integration with systems like Alexa or Google Home
Some smart thermostats offer learning capabilities that adapt to your preferences over time. These systems analyze usage patterns and automatically adjust settings to maximize comfort and efficiency.
Connectivity issues can prevent these features from working properly. If the thermostat isn’t responding to programmed commands, check the Wi-Fi connection and ensure the app is updated.
Energy Saving Strategies
Smart thermostats can significantly reduce energy bills when properly configured. Programming temperature setbacks of 7-10°F for 8 hours daily (while sleeping or away) can save up to 10% annually on heating and cooling costs.
Effective energy-saving techniques:
- Use the “eco” or “away” mode when the house is empty
- Take advantage of utility company programs that offer rebates for reduced usage during peak hours
- Enable adaptive recovery features that efficiently reach target temperatures
Many smart thermostats provide energy usage reports that highlight consumption patterns. These insights help identify opportunities for additional savings.
Temperature differentials between heating and cooling modes should typically be at least 4°F to prevent system short-cycling, which wastes energy and increases wear on HVAC equipment.
Thermostat Placement and Calibration
The physical location of a smart thermostat significantly impacts its performance. Incorrect placement can lead to false temperature readings and unnecessary system cycling.
Optimal placement guidelines:
- Install on interior walls, away from direct sunlight
- Position at least 5 feet above the floor
- Keep away from air vents, doors, windows, and appliances that generate heat
- Avoid hallways or rarely used rooms
Calibration is essential for accurate temperature control. If there’s a consistent difference between the displayed temperature and how the room feels, the thermostat may need adjustment.
Most smart thermostats have offset settings that allow for temperature corrections of 1-3 degrees. Regular troubleshooting of temperature inconsistencies helps maintain optimal HVAC system operation and prevents unnecessary heating or cooling cycles.
Advanced Smart Thermostat Features
Modern smart thermostats offer sophisticated capabilities that go beyond basic temperature control. These features help improve comfort, increase energy savings, and enhance the overall user experience.
Learning Functions
Smart thermostats use advanced algorithms to learn your temperature preferences and daily routines. The Nest Thermostat, for example, monitors when you adjust the temperature and creates a personalized schedule based on these patterns.
After about a week of use, most smart thermostats begin to anticipate your needs. They can automatically adjust temperatures when you wake up, leave home, return, and go to bed.
These learning functions also adapt to seasonal changes. During summer, they might learn you prefer cooler temperatures, while in winter, they recognize your preference for warmth.
Some models even provide energy usage reports. These reports show how your habits affect consumption and suggest ways to improve efficiency.
The learning capabilities can help reduce your HVAC system workload by maintaining optimal temperatures only when needed, potentially extending equipment life.
Geofencing Capabilities
Geofencing uses your smartphone’s location to trigger automated actions on your smart thermostat. When you cross a virtual boundary around your home, the system responds accordingly.
How it works:
- Set a perimeter around your home (usually 1-3 miles)
- When you leave this area, the thermostat switches to “Away” mode
- When you return, it resumes “Home” mode before you arrive
This feature eliminates the need to program schedules. It’s especially useful for households with unpredictable routines.
Multiple family members can connect their phones to the system. The thermostat will remain in “Home” mode until everyone has left the geofenced area.
Some systems like Nest and other smart thermostats combine geofencing with other sensors to confirm occupancy, preventing false triggers when phones are left at home.
Integration with Home Automation
Smart thermostats serve as central components in modern home automation systems. They can communicate with other smart devices to create a more responsive living environment.
Popular integrations include:
- Voice assistants (Amazon Alexa, Google Assistant, Apple HomeKit)
- Smart lighting systems that work with temperature changes
- Window coverings that adjust based on heating/cooling needs
- Smart vents that direct airflow to specific rooms
These connections allow for sophisticated automation scenarios. For example, when your thermostat detects you’re returning home, it can trigger your lights to turn on while adjusting the temperature.
Many smart thermostats offer open APIs for developers. This enables connectivity with various home automation platforms, expanding their functionality beyond temperature control.
The best systems allow for conditional programming like “If indoor temperature exceeds 78°F and humidity is above 60%, turn on dehumidifier.”
Frequently Asked Questions
Smart thermostats can sometimes present challenges for homeowners. The following questions address the most common issues users face with their devices and provide practical solutions.
Why isn’t my smart thermostat turning on at the programmed temperature?
When your smart thermostat doesn’t activate at the set temperature, it might need calibration. Temperature sensors may drift over time, causing discrepancies between actual and displayed readings.
Check to ensure the schedule is correctly programmed with appropriate time and temperature settings. Many users accidentally set AM instead of PM or enter conflicting schedules.
Verify that your HVAC system is receiving power and that circuit breakers haven’t tripped. Sometimes the issue isn’t with the thermostat but with the heating or cooling system itself.
How can I determine if my smart thermostat is defective or malfunctioning?
A malfunctioning thermostat often displays inconsistent temperature readings or fails to respond to adjustments. Compare the thermostat’s reading with a separate thermometer placed nearby to check for accuracy.
Screen issues such as blank displays, freezing interfaces, or erratic behavior indicate potential hardware problems. If the screen doesn’t power on at all, check the wiring connections and power supply.
If the thermostat doesn’t communicate with your HVAC system despite having power, try performing a factory reset. Persistent issues after a reset typically indicate a defective unit that may need replacement.
What steps should I follow to reset my Honeywell smart thermostat?
For most Honeywell smart thermostats, begin by locating the reset button or combination of buttons on the device. Different models use different reset methods, so consult your specific model’s manual if available.
Standard reset procedures typically involve pressing and holding a combination of buttons for 5-10 seconds. Many models use the “Menu” button plus another control button simultaneously.
After resetting, you’ll need to reconfigure your preferences, schedules, and reconnect to your home’s Wi-Fi network. Note that a reset erases all personalized settings, so consider taking photos of your settings beforehand.
Can you provide guidance on troubleshooting connectivity issues with smart thermostats?
When a smart thermostat loses connectivity, first check your home’s Wi-Fi signal strength near the device. Weak signals often cause intermittent connection problems.
Verify that your Wi-Fi network is operational by testing other devices. Sometimes the issue lies with your internet service rather than the thermostat itself.
Try restarting your router and the thermostat. Power cycling both devices simultaneously resolves many connectivity problems by refreshing network configurations and connections.
What are some common issues that may arise with Nest smart thermostats?
Nest thermostats occasionally experience power-related issues when the internal battery fails to charge properly. This typically happens when the C-wire (common wire) is missing or improperly connected.
The Nest’s learning features sometimes create unwanted temperature changes when the device misinterprets household patterns. Users can disable learning features and set manual schedules if this occurs.
Screen freezes or unresponsiveness can affect Nest thermostats. In such cases, pressing the display and holding it for 10 seconds usually triggers a restart that resolves the problem.
How do I troubleshoot inconsistent temperature readings in my smart thermostat?
Inconsistent readings often result from poor thermostat placement. Devices installed near drafts, direct sunlight, or heat sources will display inaccurate temperatures. Consider relocating the thermostat to a more central, neutral location.
Dust accumulation inside the thermostat can interfere with sensors. Gently remove the cover and clean the interior with compressed air or a soft brush, being careful not to damage delicate components.
Some smart thermostats offer calibration options in their settings menu. This feature allows users to adjust the displayed temperature to match the actual room temperature for more accurate operation.