Are you tired of your computer running slow? Upgrading your hard drive is one of the most effective ways to breathe new life into your aging PC or laptop. Whether you’re running out of storage space or want faster performance, swapping out your old drive for a new one can make a huge difference in daily use.
Upgrading to an SSD from a traditional hard drive can dramatically improve your computer’s performance, with boot times and application loading becoming up to 10 times faster. The process might seem intimidating at first, but with some preparation and the right tools, you can replace a hard drive without losing your data. Many people don’t realize they can do this upgrade themselves, potentially saving hundreds of dollars compared to buying a new computer.
Before starting, it’s important to purchase a new drive that’s equal to or larger than your current one. Popular options like the Western Digital Blue or Crucial MX500 offer excellent value for most users. The installation process differs slightly between desktop PCs and laptops, but both are manageable for anyone willing to follow instructions carefully.
🛠️ What You’ll Need
- A new hard drive or SSD (make sure it’s compatible with your system)
- A screwdriver (for desktops and many laptops)
- Cloning software (if you want to transfer your OS and files)
- An external enclosure or SATA‑to‑USB adapter (optional, for cloning)
- Your PC or laptop manual (for model‑specific instructions)
🔍 Step 1: Choose the Right Drive
- HDD (Hard Disk Drive): Cheaper, larger storage, slower performance.
- SSD (Solid State Drive): Faster boot times, better performance, more expensive per GB.
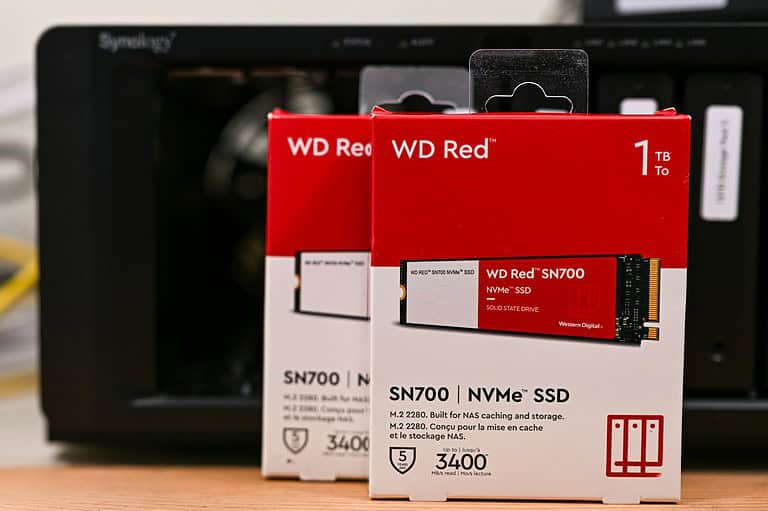
- NVMe SSD: The fastest option, but requires an M.2 slot.
👉 If speed is your priority, go SSD. If storage space is more important, go HDD.
📂 Step 2: Back Up Your Data
- Use cloud storage or an external drive to back up important files.
- If cloning your old drive, install cloning software like Macrium Reflect, Clonezilla, or the tool provided by your SSD manufacturer.
🔄 Step 3: Clone or Reinstall
- Cloning: Copies your entire OS, apps, and files to the new drive.
- Fresh Install: Clean installation of Windows/macOS plus manual file transfer.
👉 Cloning saves time, but a fresh install can improve performance.
🔧 Step 4: Physically Install the New Drive
For Desktops:
- Power off your PC and unplug it.
- Open the case with a screwdriver.
- Locate the old drive and disconnect the SATA and power cables.
- Unscrew and remove the old drive.
- Mount the new drive in the same bay.
- Reconnect the SATA and power cables.
For Laptops:
- Power off and unplug the laptop.
- Remove the back panel (check your model’s manual).
- Unscrew and remove the old drive.
- Insert the new drive into the slot.
- Screw it into place and close the panel.
⚙️ Step 5: Set Up the New Drive
- If you cloned your old drive, the system should boot normally.
- If you installed a fresh drive:
- Insert your OS installation media (USB/DVD).
- Boot from it and install the operating system.
- Restore your files from backup.
🧹 Step 6: Optimize & Configure
- Format the old drive (if you’re keeping it as secondary storage).
- Enable TRIM for SSDs (Windows usually does this automatically).
- Update your system BIOS/firmware if needed.
✅ Final Tips
- Always ground yourself to avoid static damage when handling components.
- Check your system’s warranty before opening laptops.
- If you’re not comfortable opening your PC, consider professional help.
🔗 Helpful resources:
Key Takeaways
- Upgrading to an SSD can significantly boost performance and extend your computer’s useful life.
- Cloning your existing drive ensures you keep all your programs and files without needing to reinstall everything.
- Different installation procedures apply for laptops versus desktop PCs, but both are achievable with basic technical skills.
Understanding Hard Drive Types
When upgrading your computer storage, knowing the different hard drive technologies helps you make the best choice for your needs. The right drive type can significantly impact your computer’s performance and reliability.
Comparing SSD and HDD
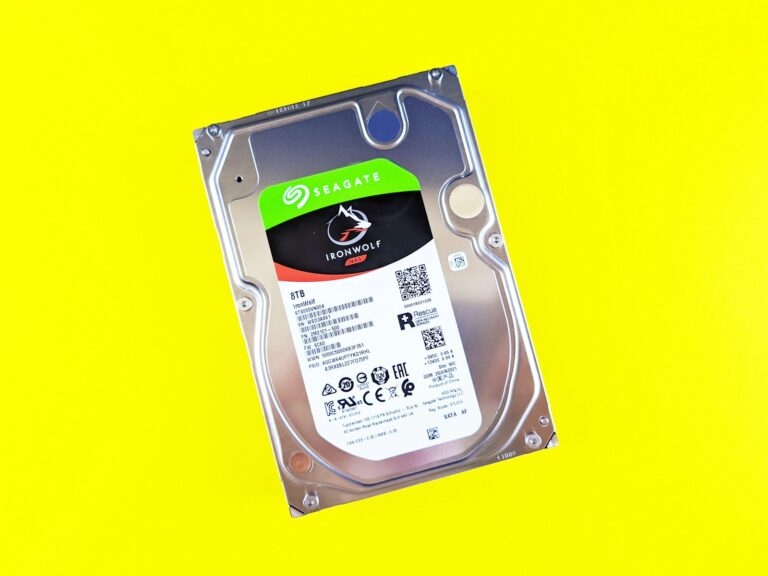
Hard Disk Drives (HDD) use mechanical parts with spinning magnetic platters to store data. They’re generally more affordable and offer larger capacities at lower prices.
HDDs are ideal for:
- Bulk storage needs
- Budget-conscious users
- Situations where raw capacity matters more than speed
Solid State Drives (SSD) contain no moving parts and store data on flash memory chips. This design makes them significantly faster than traditional hard drives.
Key SSD advantages include:
- Much faster read/write speeds (5-20x faster than HDDs)
- More reliable with no moving parts
- Less power consumption
- Silent operation
Many computers now use hybrid drives (SSHD) that combine both technologies, offering a balance of performance and capacity.
MBR vs GPT Partitions
When setting up a new hard drive, choosing the right partition style is crucial. The two main options are MBR and GPT.
MBR (Master Boot Record) is the older standard with several limitations:
- Maximum 2TB partition size
- Only supports 4 primary partitions
- Less robust recovery capabilities
GPT (GUID Partition Table) is the newer, more advanced standard:
- Supports drives larger than 2TB
- Allows up to 128 partitions
- Stores backup partition data for better recovery
- Required for UEFI boot systems
When upgrading to a modern SSD, GPT is typically the better choice for compatibility with newer systems. Most current operating systems support GPT, though some legacy systems may require MBR.
Pre-Upgrade Preparations
Before replacing your old hard drive with a new one, careful planning and preparation are essential to ensure a smooth transition. Taking the right precautions will protect your data and make the upgrade process straightforward.
Backup Strategies to Prevent Data Loss
Data loss during hard drive upgrades is a common but avoidable problem. Creating a complete backup is the most important step before attempting any hardware change.
The safest approach is to implement multiple backup methods. Unplugging your old drive and testing the new one first can prevent complications. For full protection, consider:
- Full system image: Creates an exact copy of your entire system
- Cloud backup: Stores your files securely online
- External drive backup: Physical copy of important files
Specialized cloning software can also transfer your operating system directly to the new drive. For Windows users, built-in backup tools work well, but third-party options like Macrium Reflect or Acronis offer more features.
Verify your backups before proceeding with any hardware changes to ensure they’re complete and accessible.
Identifying Compatible Drives for Your PC or Laptop
Choosing the right replacement drive is crucial for a successful upgrade. Compatibility involves several key factors that vary between desktop PCs and laptops.
First, determine the physical interface. Most modern computers use SATA connections, but newer systems might support the faster NVMe M.2 format. Check your motherboard specifications or laptop service manual.
Size considerations include:
| Device Type | Common Form Factors | Connection Types |
|---|---|---|
| Desktop PC | 3.5″ (HDD), 2.5″ (SSD) | SATA, M.2 |
| Laptop | 2.5″ (HDD/SSD), M.2 | SATA, M.2 |
For optimal performance, replacing an old HDD with an SSD provides the most noticeable speed improvement. When upgrading, ensure the new drive has equal or greater capacity than your current one to accommodate all your data.
Check power requirements too, as some high-performance drives need additional connections.
Tools and Materials Required for Upgrade
The right tools make a hard drive upgrade much easier and help prevent damage to sensitive components. Most upgrades can be completed with basic equipment.
Essential tools include:
- Screwdrivers: Phillips and Torx sets (laptops often use specialized screws)
- Anti-static wrist strap: Prevents damaging components with static electricity
- External drive enclosure/adapter: For connecting your old drive externally
- Cable organizers: Keep your workspace tidy during the process
For software preparation, gather:
- Operating system installation media (USB or disc)
- Product keys for Windows and essential software
- Driver installation files for your specific computer model
If cloning your drive, you’ll need cloning software and possibly a USB-to-SATA adapter to connect both drives simultaneously.
For laptop upgrades, consult your manufacturer’s service manual to identify any specialized tools needed for your specific model.
Cloning vs Clean Install
When upgrading a hard drive, you have two main options: cloning your existing drive or performing a clean installation. Each approach offers different advantages depending on your specific needs and technical comfort level.
Disk Cloning Software Options
Several reliable disk cloning tools make the migration process straightforward. Macrium Reflect offers both free and paid versions with an intuitive interface, making it popular among home users. The software creates an exact replica of your drive, including the operating system, applications, and personal files.
AOMEI Backupper provides comprehensive cloning features with support for different partition styles and disk types. It’s particularly useful when transferring to SSDs as it automatically aligns partitions for optimal performance.
DiskGenius offers advanced options beyond basic cloning, including partition management and data recovery tools. This makes it valuable for users who need additional disk management capabilities.
EaseUS Todo Backup also deserves mention for its user-friendly interface and reliable clone functionality. Most of these programs offer scheduling options and incremental backups for ongoing protection.
Benefits of a Clean Install
A clean installation provides a fresh start without accumulated digital clutter. Systems often experience performance improvements after a clean install since it removes unused registry entries and background processes that accumulate over time.
Security benefits are significant as well. A clean installation eliminates potential malware or adware that might have been lurking undetected on the original system. Users also receive the latest security patches when installing an up-to-date operating system version.
Windows activation is handled differently with clean installs. While cloning can avoid some activation issues, a proper clean installation ties the license to your Microsoft account or hardware, ensuring legitimate licensing.
Clean installs also allow users to rethink their partition structure and optimize disk space allocation for their current needs rather than carrying forward old configurations.
When to Choose Each Method
Cloning works best when minimal downtime is required. Businesses and professionals who need identical system configurations without reinstalling applications typically prefer this approach. It’s also ideal when users lack installation media for certain software or don’t want to reconfigure complex settings.
For systems experiencing performance issues or those that haven’t had a fresh installation in years, a clean install often provides better long-term results. This approach is recommended when upgrading to significantly newer Windows versions where compatibility issues might arise.
Available time is another consideration. Cloning is typically faster overall, requiring minimal user intervention, while clean installations demand more time for software reinstallation and system configuration. However, clean installs offer the opportunity to be selective about which applications return to the system.
Technical comfort level matters too. Cloning requires less technical knowledge while clean installations demand more familiarity with the installation process and system configuration.
How to Upgrade a Laptop Hard Drive
Upgrading your laptop’s hard drive to a newer SSD can significantly improve performance and provide more storage space. The process requires careful handling of components and proper data migration to ensure all your files and operating system transfer correctly.
Step-by-Step Guide for Replacing the Drive
First, back up all your important data before beginning any hardware changes. This critical step ensures you won’t lose valuable information during the upgrade process.
Next, gather the necessary tools: a small screwdriver set, an external drive enclosure or USB-to-SATA adapter, and your new SSD. These tools will make the physical replacement much easier.
Power down your laptop completely and unplug it from any power source. For safety, remove the battery if possible.
Locate the hard drive compartment on your laptop. This is typically accessible via a panel on the bottom of most laptops. Remove the screws and carefully open the panel.
Gently disconnect and remove the old drive. Pay attention to how it’s mounted, as you’ll need to install the new SSD in the same way. Many laptops use a special cradle or mounting brackets that need to be transferred to the new drive.
Insert the new SSD into the same position and secure it properly. Reattach any brackets or screws that held the old drive in place.
Migrating OS to the New SSD
There are two main approaches to moving your operating system. You can either clone your existing drive or perform a fresh installation.
For cloning, connect your new SSD to your laptop using an external enclosure or adapter. Use cloning software like Macrium Reflect, Acronis True Image, or Samsung Data Migration (if using a Samsung SSD). These programs will copy everything exactly as it is.
Launch the cloning software and select your current drive as the source and your new SSD as the destination. Start the cloning process, which may take several hours depending on the amount of data.
For a fresh installation, create a bootable USB drive with your operating system. After physically installing the new SSD, boot from this USB and follow the installation prompts. You’ll need your Windows license key if reinstalling Windows.
Ensuring Proper SSD Alignment and Configuration
After installation, verify that your SSD is properly recognized by your system. Check in Disk Management (Windows) or Disk Utility (Mac) to confirm the drive appears with the correct capacity.
Enable TRIM support, which helps maintain SSD performance over time. In Windows, this can be checked by running the command “fsutil behavior query DisableDeleteNotify” in Command Prompt. A return value of 0 means TRIM is enabled.
Consider adjusting your power settings to optimize for SSD usage. Disable functions like hibernation if you don’t need them, as they can take up valuable SSD space.
For Windows systems, verify that defragmentation is disabled for SSDs. Windows 10 and 11 automatically detect SSDs and disable this feature, but it’s worth checking in the Defragment and Optimize Drives utility.
Finally, update your firmware if available from the SSD manufacturer’s website. This ensures you have the latest performance improvements and bug fixes.
How to Upgrade PC Hard Drive
Upgrading your PC’s hard drive can significantly improve system performance and storage capacity. The process involves selecting appropriate hardware, proper installation, and configuring your system to recognize the new drive.
Selecting the Right SSD for Desktop PCs
When choosing a new SSD for your desktop PC, consider both capacity and interface type. Purchase a drive equal to or larger than your current one to ensure adequate storage space.
Modern SSDs come in two main form factors:
- 2.5-inch SATA SSDs: Compatible with most desktops, offering good performance at reasonable prices
- M.2 NVMe SSDs: Faster performance but require a compatible motherboard
Check your motherboard specifications to confirm which interfaces are supported. For systems with heavy workloads or gaming, NVMe drives provide superior speed but cost more than SATA options.
Consider reputable brands with good warranty terms. Many manufacturers offer software tools to help monitor drive health and prevent data loss from bad sectors.
Disk Management for Diverse Storage Setups
Installing a new drive requires both physical installation and proper configuration in Windows Disk Management. First, physically connect the drive by attaching SATA and power cables or inserting the M.2 drive into its slot.
Once installed, press Windows+X and select “Disk Management” to initialize the new drive. Right-click the unallocated space and select “New Simple Volume” to format it for use.
For users keeping their old drive alongside the new one, decide whether to:
- Use the new drive as additional storage
- Clone the old drive to transfer Windows to the new SSD
Cloning software like Macrium Reflect or Samsung Migration Tool can transfer your entire system to the new drive without reinstalling Windows.
Troubleshooting Common Upgrade Issues
If Windows doesn’t recognize the new drive, check both physical connections and BIOS settings. Ensure SATA cables are firmly connected and the drive appears in BIOS/UEFI settings.
For drives with bad sectors, run diagnostic tools like CrystalDiskInfo or manufacturer utilities to assess drive health. Replace drives showing signs of failure immediately to prevent data loss.
Common issues include:
- Drive not appearing: Check connections and BIOS settings
- Slow performance: Verify the drive is connected to the correct interface (NVMe drives in PCIe slots)
- Boot failure: Confirm boot order in BIOS if you’ve cloned your system drive
Users with laptops may need specific adapters or specialized installation procedures as laptop storage configurations vary by manufacturer.
Finalizing the Upgrade
After successfully installing a new hard drive, several critical steps ensure optimal performance and data integrity. Proper system configuration and testing will help maximize the benefits of your hardware investment.
Optimizing the Operating System for New Drives
When working with a newly installed drive, it’s important to properly configure the operating system. For SSDs, enable TRIM functionality to maintain performance over time. This can be done by opening Command Prompt as administrator and typing “fsutil behavior query DisableDeleteNotify” to check if TRIM is enabled (0 means enabled).
Windows users should check that drive indexing settings are appropriate. For SSDs, consider disabling indexing to reduce write operations and extend drive life.
Adjust virtual memory settings based on your new storage configuration. With faster drives, you may benefit from relocating the page file.
Update all storage drivers to the latest versions. Manufacturer websites typically offer the most current drivers that can improve compatibility and performance with new hardware.
Consider running disk optimization tools appropriate for your drive type. For HDDs, use defragmentation; for SSDs, use the TRIM command instead.
Recovering from Potential Data Migration Issues
Data migration problems can occur even with careful planning. If files are missing after migration, check the old drive if it’s still accessible or look in Windows.old folder if you performed an upgrade installation.
When facing boot issues after migration, use Windows Recovery Environment (WinRE) to repair startup problems. Access this by pressing F8 during startup or using installation media.
For corrupted files, try using the System File Checker by opening Command Prompt and typing “sfc /scannow” to identify and repair system file corruption.
Data loss situations might require specialized recovery software. Programs like Recuva or TestDisk can help recover accidentally deleted or corrupted files following a migration.
If performing a clean install, reinstall essential applications and restore personal files from your backup. Always verify data integrity after restoration.
Testing and Verifying Drive Performance
After finalizing the upgrade, it’s essential to verify that the new drive performs as expected. Run built-in diagnostics through Windows’ Device Manager to check for any reported issues with the new hardware.
Use benchmark software like CrystalDiskMark or AS SSD Benchmark to measure read/write speeds and compare them to the manufacturer’s specifications. Significant discrepancies may indicate configuration problems.
Monitor temperature and health metrics using tools like HWiNFO or CrystalDiskInfo. Modern drives have S.M.A.R.T. technology that reports potential issues before failure occurs.
Test drive stability by performing intensive operations such as large file transfers or running disk-intensive applications. Some experts recommend a “burn-in” period of several days before trusting the drive with critical data.
Run a full system backup after verification to establish a recovery point with your new configuration. This provides protection against future issues.
Additional Tools and Resources
Beyond basic hardware installation, specialized software tools can make hard drive upgrades significantly easier and more reliable. These applications offer advanced features for managing partitions and creating exact duplicates of your existing drive.
Partition Management with Minitool Partition Wizard
MiniTool Partition Wizard is a powerful utility for managing disk partitions during hard drive upgrades. This software allows users to resize, move, merge, and split partitions without data loss.
The free version offers essential functionality like:
- Partition resizing and moving
- Format conversion (NTFS to FAT32)
- Surface testing to check drive health
- Basic cloning features
Premium versions include additional capabilities such as OS migration and dynamic disk conversion. The interface is intuitive with a preview function that shows changes before applying them.
MiniTool excels at handling complex partition structures and resolving issues that might arise during the upgrade process. It’s particularly useful when transitioning to a larger drive and need to expand partitions accordingly.
Advanced Cloning Features of AOMEI Backupper
AOMEI Backupper provides comprehensive disk cloning capabilities that go beyond basic copying. It specializes in creating exact duplicates of drives, including the operating system, applications, and personal files.
Key features include:
- Sector-by-sector cloning for perfect replication
- Intelligent cloning that optimizes for SSDs
- Flexible options for partition sizing during cloning
- Bootable media creation for cloning without Windows running
AOMEI supports cloning to smaller destination drives (as long as used space fits) and can automatically align partitions for SSDs to enhance performance. The software can also perform incremental and differential backups.
Users appreciate its straightforward wizard-based approach that walks through the clone disk process step by step, making it suitable for both beginners and advanced users.
Frequently Asked Questions
Upgrading your hard drive involves several technical steps that many computer users find challenging. These common questions address the most important aspects of hard drive upgrades, from data migration to performance improvements.
How do I migrate my operating system to a new SSD without losing data?
To migrate your OS without data loss, you’ll need a cloning software like Macrium Reflect or Acronis True Image. Connect both your old drive and new SSD to your computer.
Run the cloning software and select your source drive (current hard drive) and destination drive (new SSD). Make sure to mark the system partition as active during the cloning process.
Once cloning is complete, shut down your computer and replace the old drive with the new SSD. Your computer should boot from the new drive with all your data intact.
What steps should be followed to replace a laptop’s hard drive with an SSD?
First, purchase a new SSD that’s equal to or larger than your current drive. Back up all your important files to an external drive or cloud storage.
Power down your laptop completely and disconnect the power adapter and battery if possible. Locate the hard drive compartment (often accessible via a panel on the bottom of the laptop).
Remove the old drive carefully and insert the new SSD in the same orientation. Reassemble the laptop, then either restore from backup or install a fresh operating system.
Can you upgrade a PC’s hard drive to an SSD without reinstalling Windows?
Yes, you can upgrade without reinstalling Windows by using drive cloning software. Connect your new SSD to your computer using an adapter or docking station.
Use a reliable cloning tool to create an exact copy of your existing Windows installation on the new SSD. This transfers all your programs, settings, and files.
After cloning, replace the old drive with the SSD and boot your computer. Windows should start normally from the SSD with all your programs and files intact.
How does upgrading from HDD to SSD improve computer performance?
Upgrading from an HDD to an SSD dramatically reduces boot and load times. SSDs have no moving parts, allowing for data access speeds up to 10 times faster than traditional hard drives.
Applications launch almost instantly, and file transfers happen in seconds rather than minutes. The overall system becomes more responsive because an SSD can handle multiple read/write requests simultaneously.
Users typically notice improved performance in everyday tasks like browsing, multitasking, and gaming. Battery life often improves on laptops since SSDs consume less power than mechanical drives.
What are the compatibility considerations when upgrading a hard drive on a laptop?
Check your laptop’s form factor requirements—most laptops use 2.5-inch drives, but some newer models require M.2 SSDs. Verify the interface type (SATA or NVMe) your laptop supports.
Consider the height restrictions, as some laptops only accommodate 7mm-thick drives while others can fit 9.5mm drives. Confirm your BIOS/UEFI supports the capacity of your new drive.
Also check power requirements, as some high-performance SSDs may consume more power than your laptop was designed to provide. This is particularly important for older systems.
What is the process for cloning a hard drive to a larger capacity on Windows 10?
Start by connecting your new larger drive to your computer using an appropriate adapter or enclosure. Install a reliable cloning software compatible with Windows 10.
Run the cloning software and select your original drive as the source and the new drive as the destination. Most software will allow you to adjust partition sizes to utilize the extra space on the larger drive.
After cloning completes, shut down the computer and replace the old drive with the new one. When you restart, Windows 10 will boot from the new drive with all your data and settings intact.