Creating stunning product visualizations often requires more than static images. KeyShot’s Physics Simulation tool lets you add realistic movement to your designs, making them come alive in ways static renderings simply can’t match. By using KeyShot’s Physics Simulation feature, you can create dynamic scenes where objects interact naturally following real-world physics, resulting in authentic animations that showcase your products in action.
Setting up these simulations is surprisingly straightforward. You can launch the Physics Simulation tool from the Tools Section in the Ribbon or by right-clicking on a model in the scene tree. Once activated, KeyShot automatically handles the complex calculations while you control key parameters like gravity, collision behavior, and material properties. The system generates keyframes during the simulation process, which you can fine-tune for perfect results.
Whether you’re demonstrating how components fit together, showing products in realistic environments, or creating dynamic marketing materials, physics simulations add a powerful dimension to your visualization toolkit. The best part is you don’t need extensive animation experience to achieve professional results – KeyShot handles the complex physics while you focus on creating compelling visuals.

How to Run a Realistic Physics Simulation in KeyShot
Since KeyShot 11 (2022), Luxion added a built-in Physics Simulation tool, allowing you to simulate realistic object movement and then record it as keyframe animation.
🔑 1. Launch the Physics Simulation Tool
- Open your project in KeyShot.
- Go to the Ribbon → Tools → Physics Simulation.
- Or right-click on an object in the Scene Tree or Real-time View → select Physics Simulation.
⚙️ 2. Set Up Your Simulation Environment
- Ground Plane: Enable it in the Scene tab if you want objects to collide with the floor.
- Collision Objects: Define which models are static (like a table) and which are dynamic (like a ball).
- Gravity: Adjust based on your scene (default is Earth gravity, but you can change direction/strength).
🧩 3. Assign Physics Properties
For each object you want to simulate:
- Select the object.
- In the Physics Simulation panel, set:
- Type: Dynamic (moves), Kinematic (controlled by animation), or Static (doesn’t move).
- Mass & Density: Affects how heavy/light the object behaves.
- Friction & Bounciness: Controls sliding and rebound effects.
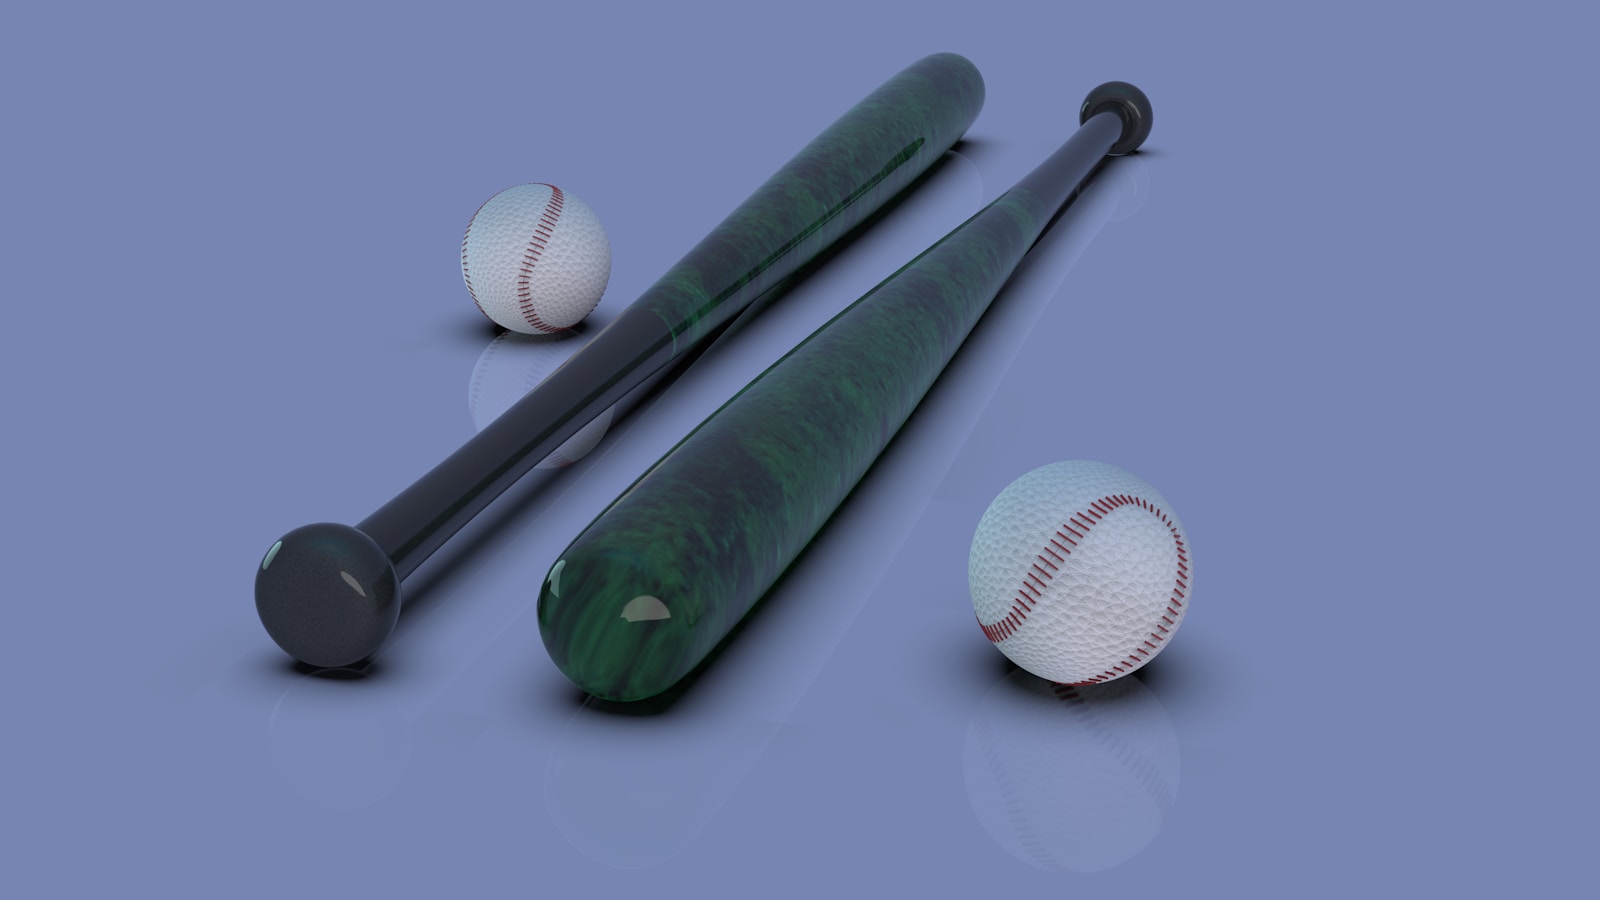
👉 Example: A metal ball = high mass, low friction, medium bounce.
▶️ 4. Run the Simulation
- Click Play in the Physics Simulation panel.
- Watch how objects interact in real time.
- If needed, tweak gravity, mass, or collision settings and rerun.
🎬 5. Record the Simulation
- When satisfied, click Record.
- KeyShot will convert the simulation into keyframe animation.
- You can then refine it in the Animation Timeline (slow down, speed up, edit frames).
🎨 6. Render Your Animation
- Once the physics looks right:
- Go to Render.
- Choose Animation mode.
- Export as MP4, AVI, or image sequence.
💡 Tips for Realism
- Use realistic scale: A ball that’s “1 mm” in KeyShot won’t fall like a real soccer ball.
- Adjust time scale: Slow motion can make collisions more dramatic.
- Combine with camera animations for cinematic effects.
- Use multiple simulations: Run smaller simulations for complex scenes, then merge them.
✅ Summary
- Open Physics Simulation tool.
- Define objects as Static, Dynamic, or Kinematic.
- Adjust mass, friction, bounce, and gravity.
- Run and tweak until realistic.
- Record to turn into an animation.
- Render your final scene.
Key Takeaways
- KeyShot’s Physics Simulation creates realistic object interactions by automatically calculating natural movement based on gravity and material properties.
- You can easily configure simulations through the dedicated tool in the Ribbon or by right-clicking models in your scene.
- The resulting keyframe animations can be refined and rendered into high-quality visuals that showcase your product designs in dynamic, true-to-life scenarios.
Understanding Physics Simulation in KeyShot
KeyShot’s physics simulation offers a powerful way to create realistic animations without tedious manual keyframing. This feature allows objects to interact naturally through gravity and collision, saving time while creating visually impressive results.
Principles of Physics Simulation
Physics simulation in KeyShot works on basic real-world physics principles. The software calculates how objects would behave under the influence of gravity and when they collide with each other. When you run a physics simulation, KeyShot handles the complex calculations that determine object movement, rotation, and interaction.
You can access this feature by going to Tools > Physics Simulation in the main menu. The system applies properties like:
- Mass
- Gravity
- Friction
- Bounce (restitution)
These properties determine how objects fall, roll, and interact with each other. For instance, a rubber ball will bounce differently than a metal one when dropped on the same surface.
KeyShot Physics Simulation Capabilities
KeyShot’s physics engine can handle various simulation scenarios effectively. You can simulate objects falling, colliding, or being arranged through natural settling. This is particularly useful for product arrangements that look natural rather than manually placed.
The simulation works with KeyShot’s extensive material library, ensuring that objects behave according to their assigned materials. Metal objects slide differently than rubber ones, for example.
For your simulated animations, you can:
- Select which objects are affected by gravity
- Define collision properties
- Set animation length and frame rate
- Adjust physics parameters for realistic results
KeyShot 11 enhanced these capabilities, making it possible to create dynamic product visualizations that would be extremely difficult to keyframe manually.
Getting Started with KeyShot for Physics Simulation
KeyShot’s physics simulation tool allows you to create realistic object movements and interactions with just a few simple steps. Understanding the basics of model preparation, interface navigation, and scene organization will help you achieve impressive results quickly.
Setting Up Your 3D Model
Before running a physics simulation in KeyShot, you need to prepare your 3D model properly. Make sure your model is correctly scaled and positioned in 3D space. Models should be imported at real-world scale for accurate physics behavior.
Break complex models into separate parts that need to interact with each other. Each object that will participate in the simulation should be a distinct part in your scene.
For best results, simplify collision geometry where possible. Complex models with many polygons can slow down the simulation process.
You can import models from most major 3D software packages. KeyShot supports formats like OBJ, FBX, STEP, and many others, making it flexible for various workflows.
Navigating the KeyShot Interface
To access the physics simulation tool, go to Tools > Physics Simulation in the main ribbon or right-click on a model in the scene tree. This opens the simulation panel where you’ll find all necessary controls.
The interface is divided into several key sections:
- Simulation Controls: Start, pause, and reset buttons
- Physics Settings: Gravity direction, collision detection, and friction settings
- Object Properties: Mass, elasticity, and other physical characteristics
Use the timeline at the bottom of the screen to scrub through your simulation after it has run. This allows you to see the object movement at different points in time.
The real-time view window shows a preview of your simulation as it runs, giving immediate feedback on object interactions.
Utilizing the Scene Tree
The Scene Tree is essential for managing your physics simulation. It displays a hierarchical view of all objects in your scene and allows you to select which ones will participate in the simulation.
To include an object in your simulation:
- Locate it in the Scene Tree
- Check the box next to it in the Physics Simulation panel
- Adjust its physical properties as needed
Group related objects together in the Scene Tree to manage complex scenes more efficiently. This organization helps when you need to apply similar physics properties to multiple objects.
The Scene Tree also lets you define parent-child relationships between objects, which can be useful for creating hinged or jointed items that move together during simulation.
Use labels and colors in the Scene Tree to keep track of different object groups, especially in complex scenes with many interacting parts.
Creating and Managing Materials
Proper material setup is crucial for realistic physics simulations in KeyShot. The way materials interact with each other directly affects how objects behave when they collide or slide against one another.
Material Library Overview
KeyShot’s Material Library offers a wide range of pre-configured materials that work well with physics simulations. You can access this library from the Materials tab in the Project panel. The library contains hundreds of physically accurate materials organized into categories like metals, plastics, and fabrics.
These materials aren’t just for looks—they contain physics properties that determine how objects behave during simulation. For example, a rubber material will bounce differently than glass when dropped.
When browsing the Material Library, pay attention to the material preview thumbnails that show how light interacts with each material. This gives you a quick visual reference of reflectivity and texture before applying it to your model.
Tip: Use the search function to quickly find specific materials like "steel" or "rubber"
when setting up physics simulations.
Customizing Materials for Realism
To create truly realistic physics simulations, you’ll need to adjust material properties beyond their visual appearance. Select your material and access the Material Properties panel where you can modify:
- Friction: Controls how much objects slide against each other
- Restitution: Determines bounciness (0 = no bounce, 1 = perfect bounce)
- Density: Affects weight and falling speed
You can use the 3D Paint tool to apply different materials to specific areas of your model. This is useful when creating objects with multiple material properties, like a rubber-handled metal tool.
For dynamic simulations, consider adjusting the roughness value of surfaces that will interact. Rough surfaces typically have higher friction and will slow down moving objects more quickly than smooth ones.
Material Management Techniques
Organizing materials efficiently saves time and ensures consistent results across your physics simulations. Create custom material sets for different simulation scenarios by right-clicking in the Material tab and selecting “New Set.”
Use the Real-Time Rendering view while adjusting material properties to immediately see how changes affect your simulation. This workflow helps you fine-tune physics behaviors without waiting for final renders.
Material instances are powerful for managing multiple similar materials. Create a parent material with base physics properties, then make instances with slight variations. When you update the parent, all instances update too.
The Denoise feature helps clean up material previews for better visual feedback during setup. Enable it when working with complex materials to reduce noise in the viewport while maintaining accurate physics representations.
Key Material Properties for Physics:
- Friction: 0.1-0.3 (slippery), 0.4-0.7 (moderate), 0.8+ (high grip)
- Restitution: 0.1-0.2 (wood), 0.5-0.7 (rubber), 0.8+ (super bouncy)
- Density: 0.3-0.9 (light materials), 1.0-8.0 (heavy materials)
Configuring Realistic Animations
Creating lifelike animations in KeyShot requires understanding both keyframe techniques and the physics simulation tool. These powerful features work together to produce natural-looking movement and interactions between objects.
Keyframe Animation Basics
KeyShot’s animation system is built around keyframes, which are specific points in time where you set the properties of objects. Between these points, KeyShot automatically creates smooth transitions.
To start a keyframe animation, click the Animation Timeline button in the bottom toolbar. You can add a new keyframe by moving the timeline slider to your desired position and clicking the “+” button.
For precise control, right-click on a keyframe and select “Edit Keyframe” to adjust its timing and easing functions. This helps create more natural movement patterns rather than linear transitions.
Try animating simple properties first, like position or rotation. This builds your confidence before attempting more complex animations with multiple moving parts.
Use the Animation Wizard for common scenarios like product rotations. It saves time and ensures professional results for standard presentation techniques.
Enhancing Animations with Physics
The Physics Simulation tool elevates your animations with realistic object interactions. Launch it from the Tools section in the Ribbon or by right-clicking on a model in the scene tree.
Within the Physics Simulation panel, you can set key parameters:
- Mass: Affects how objects respond to forces
- Friction: Controls sliding behavior
- Restitution: Determines bounce intensity
For realistic results, adjust the gravity settings to match real-world conditions. The default setting mirrors Earth’s gravity, but you can modify it for special effects.
During simulation, KeyShot generates keyframes automatically to represent object movement. After running the simulation, you can fine-tune these keyframes in the Animation Timeline.
Try combining manual keyframes with physics simulations for complex scenes. For example, manually animate a hand dropping an object, then use physics to realistically simulate the fall.
Optimizing Keyframes Per Second
The keyframes per second (KPS) setting directly impacts your animation’s smoothness and file size. Finding the right balance is crucial for both quality and efficiency.
Start with the default 24 KPS for most product animations. This provides smooth motion while keeping project files manageable. For slow-motion effects or complex physics interactions, consider increasing to 48 or 60 KPS.
You can adjust this setting in the Animation Timeline settings menu. Look for the small gear icon to access these controls.
Be strategic about where you need detail. Use more keyframes during complex movements and fewer during simple transitions or static periods.
Watch for the warning indicator that appears when too many keyframes might affect performance. If you see this, consider reducing your KPS or simplifying your animation.
For final renders, remember that frame rate (FPS) differs from keyframes per second. While keyframes control animation definition, FPS determines playback smoothness.
Rendering and Output
After setting up your physics simulation in KeyShot, the quality of your final output depends on your rendering settings and workflow choices. Proper rendering transforms a simple simulation into a photorealistic visualization.
Real-Time Rendering Features
KeyShot’s real-time rendering capability gives you immediate visual feedback as you adjust your physics simulation. You can see how objects interact and settle in your scene without waiting for final renders.
The Real-time view in KeyShot provides a preview of lighting, materials, and physics effects. This helps you make quick decisions about camera angles and timing for your final output.
To get the most from real-time rendering during physics simulations:
- Use the Production render mode for better quality previews
- Adjust Sample count based on your hardware capabilities
- Enable GPU acceleration if available on your system
Real-time rendering is particularly valuable when timing physics events like falling objects or collisions. You can scrub through the timeline to find the exact moment you want to capture.
Using Denoise for Clearer Images
Denoise technology significantly improves render quality while reducing render times. This is especially important for physics simulations where complex interactions can create noise in your renders.
When working with physics simulations in KeyShot, enable the Denoise feature to:
- Remove graininess from shadows and reflections
- Preserve fine details in textures and materials
- Achieve cleaner renders with fewer samples
You can adjust the Denoise strength based on your scene complexity. For physics simulations with many small moving parts, a moderate setting often works best.
Remember that Denoise works best when you’ve already set a reasonable sample count. Start with at least 256 samples before applying Denoise for optimal results.
Automating Render Output
Once your physics simulation looks perfect, you’ll want to automate the rendering process for efficiency. KeyShot offers several automation features to streamline your workflow.
The Physics Simulation tool can be combined with KeyShot’s render queue to batch process outputs. Set up your render queue by:
- Selecting the frame range that shows your physics simulation
- Choosing output resolution and format (PNG recommended for quality)
- Setting your desired render quality and effects
For professional results, consider these automation settings:
| Setting | Recommendation |
|---|---|
| Format | PNG or EXR for post-processing |
| Resolution | At least 2K for detailed simulations |
| Network Rendering | Enable for complex scenes |
You can also create animation outputs directly from your physics simulation. This is perfect for showing how objects interact over time rather than just the final resting position.
Advanced KeyShot Functionalities
KeyShot offers powerful advanced features that can significantly improve your rendering workflow and efficiency. These tools help you automate repetitive tasks, customize your experience through scripting, and leverage modern GPU technology for faster results.
Headless Scripting Mode for Workflow Automation
Headless Scripting Mode allows you to run KeyShot without the graphical user interface, perfect for automating batch rendering tasks. This powerful feature lets you execute scripts that control KeyShot entirely through code commands.
You can set up automated workflows that run overnight or on dedicated render machines. For example, you might create a script that:
- Loads multiple models sequentially
- Applies different material combinations
- Renders each variation with custom settings
- Saves outputs to specified folders with organized naming conventions
This functionality is particularly valuable for Windows environments where you need to produce numerous product variations. Many Luxion customers use this for e-commerce applications where hundreds of product configurations must be rendered efficiently.
Leveraging KeyShot Scripting Console
The KeyShot Scripting Console gives you direct access to KeyShot’s programming interface. Unlike headless mode, you can use this while working within the full interface.
The console supports Python scripting, allowing you to:
- Create custom tools and utilities
- Automate repetitive tasks
- Extend KeyShot’s capabilities beyond built-in features
- Generate procedural materials or animations
For instance, you might write a script that automatically positions multiple cameras around your model at precise intervals. Another common use is batch-modifying material properties across dozens of parts simultaneously—tasks that would be tedious manually.
Many users find the scripting console invaluable when working with physics simulations, as it allows for precise control over parameters and automation of complex simulation setups.
GPU Rendering with NVIDIA RTX
KeyShot now supports GPU rendering with NVIDIA RTX technology, dramatically accelerating your rendering workflow. This feature leverages specialized hardware in modern NVIDIA graphics cards to process ray-tracing calculations much faster than traditional CPU methods.
The benefits include:
- Significantly faster rendering times (often 2-5x speedup)
- Real-time interactive ray tracing for complex scenes
- More iterations and experiments in less time
- Better handling of physics simulations
To get the best performance, you’ll need a compatible NVIDIA RTX graphics card with adequate VRAM. The more complex your physics simulations, the more VRAM you’ll want—16GB or higher is recommended for professional work.
GPU rendering is particularly effective when working with dynamic physics simulations, as it can calculate complex interactions between objects much faster than CPU-only rendering.
Integrating KeyShot into Your Pipeline
Successful integration of KeyShot into your existing workflow requires understanding compatible software, sharing options, and export capabilities. These elements work together to create a seamless experience from concept to final render.
3D Modeling Software Compatibility
KeyShot works exceptionally well with various 3D modeling platforms. The software offers direct plugins for popular programs like SolidWorks, Rhino, and SOLIDWORKS. These plugins allow for one-click transfers of your models directly to KeyShot.
For programs without direct plugins, KeyShot supports numerous file formats including:
- OBJ
- STL
- STEP
- IGES
- FBX
When preparing your 3D models, maintain organized layer structures and naming conventions. This practice helps KeyShot recognize separate components for material application and physics simulations.
You can also set up live-linking between some modeling software and KeyShot. This creates an automatic update whenever you modify your original model, saving significant time during iterative design phases.
Utilizing the KeyShot Web Viewer
The KeyShot Web Viewer transforms how you share your physics simulations with clients and team members. This tool allows you to upload your rendered animations to the cloud and share them via a simple URL.
Recipients don’t need KeyShot installed to view and interact with your simulations. The Web Viewer works on most browsers and is compatible with mobile devices, making it ideal for presentations on the go.
To use the Web Viewer:
- Render your physics simulation in KeyShot
- Export using the Web Viewer option
- Upload to KeyShot Cloud
- Share the generated link with stakeholders
The viewer includes basic controls for rotating, zooming, and playing animations. Your clients can see how objects interact physically without requiring specialized software knowledge.
Export Formats and Cross-Platform Use
KeyShot offers diverse export formats to ensure your physics simulations work across platforms. For animations, you can export as MP4, MOV, or animated GIF files that play on virtually any device.
For interactive 3D experiences, consider exporting in GLB or USD formats. These formats support:
- Embedded materials
- Lighting information
- Animation data from physics simulations
When preparing files for team collaboration, FBX exports preserve material assignments and can be imported into other visualization software. For web integration, WebGL exports create interactive 3D experiences that run directly in browsers.
You can also batch export multiple views or animation frames to streamline your workflow. Setting up export presets saves time when you need to create deliverables in various formats for different stakeholders.
Use Cases and Application Examples
KeyShot’s physics simulation tool offers practical applications across various industries. The realistic motion and interaction capabilities enhance visualization projects by adding dynamic elements that static images simply cannot capture.
Product Design and Engineering
In product design, physics simulations can demonstrate how components interact mechanically. You can visualize product assemblies coming together or separating, clearly showing how parts fit and function.
For engineering validation, you can test how products respond to gravity and collisions. This helps you identify potential design flaws before physical prototyping begins.
When designing consumer electronics, you might simulate a phone dropping onto different surfaces to showcase durability features. The simulation can capture realistic bounce, slide, and impact reactions.
For mechanical products, you can demonstrate moving parts like hinges, sliders, and buttons. This gives stakeholders a clear understanding of the product’s functionality without needing to build physical models.
Key benefits for engineers:
- Validate mechanical interactions before prototyping
- Demonstrate complex assemblies clearly
- Test product behavior under different physical conditions
- Create more convincing design presentations
Architectural Design and Visualization
Architects can use physics simulations to demonstrate dynamic elements within their designs. You can show how natural light interacts with movable elements like blinds or sliding doors throughout the day.
For material demonstrations, simulations help visualize how different finishes react to light and movement. This creates more engaging presentations that highlight material properties realistically.
In landscape architecture, you can simulate water flow through designed spaces. This helps clients visualize how water features will look and function in the final project.
For interior designs, physics simulations allow you to show how furniture arrangements work in spaces. You can demonstrate how doors open, how drawers slide, and how movable partitions function.
Practical applications:
- Simulating opening/closing of architectural elements
- Demonstrating furniture placement and movement
- Showing how light interacts with moving elements
- Visualizing material behavior under different conditions
Marketing and Presentation Strategies
Product animations created with physics simulation add authenticity to marketing materials. You can produce realistic product demonstrations that show exactly how your designs function in real-world scenarios.
For product launches, you can create eye-catching animations showing products assembling themselves. This technique is particularly effective for products with multiple components or unique mechanical features.
When creating demonstration videos, physics simulations help you show product functionality without expensive video production. The realistic movements generated by proper physics settings make your animations more credible and engaging.
Social media marketing benefits from short, dynamic clips that showcase product features. You can create these efficiently by setting up simple physics simulations that highlight key selling points.
Marketing advantages:
- Create more engaging product demonstrations
- Reduce video production costs
- Generate multiple animation variations easily
- Produce more convincing marketing materials
- Highlight mechanical features effectively
Frequently Asked Questions
KeyShot’s physics simulation tools provide powerful capabilities for creating realistic animations. Many users have common questions about implementation, optimization, and technical details that can help improve their workflow.
What are the steps to setting up a physics simulation in KeyShot?
To set up a physics simulation in KeyShot, you’ll need to follow several key steps. First, open the Physics Simulation tool from the Tools section in the Ribbon or by right-clicking on a model in the scene tree.
Next, you’ll need to designate which objects will be dynamic (affected by physics) and which will be static (immovable). This is done by selecting objects and setting their properties in the physics panel.
Set material properties that affect physical behavior like mass, friction, and bounciness. These settings determine how objects interact with each other.
Finally, adjust the simulation parameters including gravity, duration, and frames per second before running your simulation. You can preview the physics simulation before applying it to your animation.
Can you recommend best practices for achieving realistic material behavior in KeyShot simulations?
Always start with accurate mass settings for your objects. Real-world references will help create believable motion—a bowling ball should move differently than a balloon.
Consider friction carefully. Different materials have varying friction coefficients, which dramatically affects how they slide, roll, or stop on surfaces.
Use appropriate elasticity (bounciness) settings based on material types. A rubber ball will behave differently than a glass marble when dropped.
Test small adjustments in controlled scenarios before creating complex simulations. Single-object tests help isolate behavior issues before combining multiple interacting objects.
Keep in mind that realistic physics simulation often requires iterative fine-tuning of these parameters.
What are the capabilities and limitations of KeyShot’s physics engine?
KeyShot’s physics engine can simulate gravity, collisions, and object interactions effectively for visualization purposes. It works well for product drops, parts assembly, and basic mechanical movements.
The engine handles rigid body dynamics efficiently, allowing for realistic interactions between hard-surfaced objects. This makes it ideal for product visualization and industrial design applications.
However, KeyShot does have limitations. It doesn’t simulate soft body deformations, fluid dynamics, or cloth behavior with physical accuracy. These complex simulations require specialized software.
There are also computational limits to consider. Very complex scenes with many interacting objects may slow down performance or produce less accurate results.
How does KeyShot handle collision detection and response in simulations?
KeyShot uses an algorithmic approach to detect when objects intersect or collide during simulations. The software automatically calculates contact points between geometries.
When collisions occur, the physics engine applies appropriate forces based on object properties like mass, velocity, and material characteristics. This creates realistic bouncing, sliding, and stopping behaviors.
The quality of collision detection depends on mesh complexity. More detailed meshes provide more accurate collisions but require more processing power. KeyShot 10.1 and newer versions include improved collision detection features for more realistic interactions.
You can adjust collision properties for specific objects to fine-tune how they interact, allowing for customized behavior when needed.
What resources are available for learning advanced physics simulation techniques in KeyShot?
KeyShot offers comprehensive official documentation on their website with detailed explanations of physics simulation tools. The KeyShot manual provides step-by-step guidance for various techniques.
Video tutorials on the official KeyShot YouTube channel demonstrate practical applications. These include overview tutorials for beginners and more specific technique demonstrations.
Community forums like the KeyShot forum and social media groups contain valuable discussions and solutions to common problems. These can be excellent resources for troubleshooting.
Third-party educators and designers like Will Gibbons offer specialized tutorials that cover advanced techniques and real-world applications of KeyShot physics.
How can one ensure accurate results when using KeyShot for physics-based animations?
Start with simplified test scenes to validate physics behavior before creating complex simulations. This allows you to identify and fix issues early.
Use real-world reference footage whenever possible to compare your simulation results. This helps ensure movements appear natural and believable.
Pay attention to timing and pacing. Real objects rarely move at constant speeds—they accelerate, decelerate, and have momentum. Study how realistic objects fall and interact.
Document your successful physics settings for future reference. Creating a library of proven material physics properties saves time on future projects.
Check your simulation at different playback speeds to catch subtle issues. Sometimes problems are only visible when viewing the animation frame by frame.