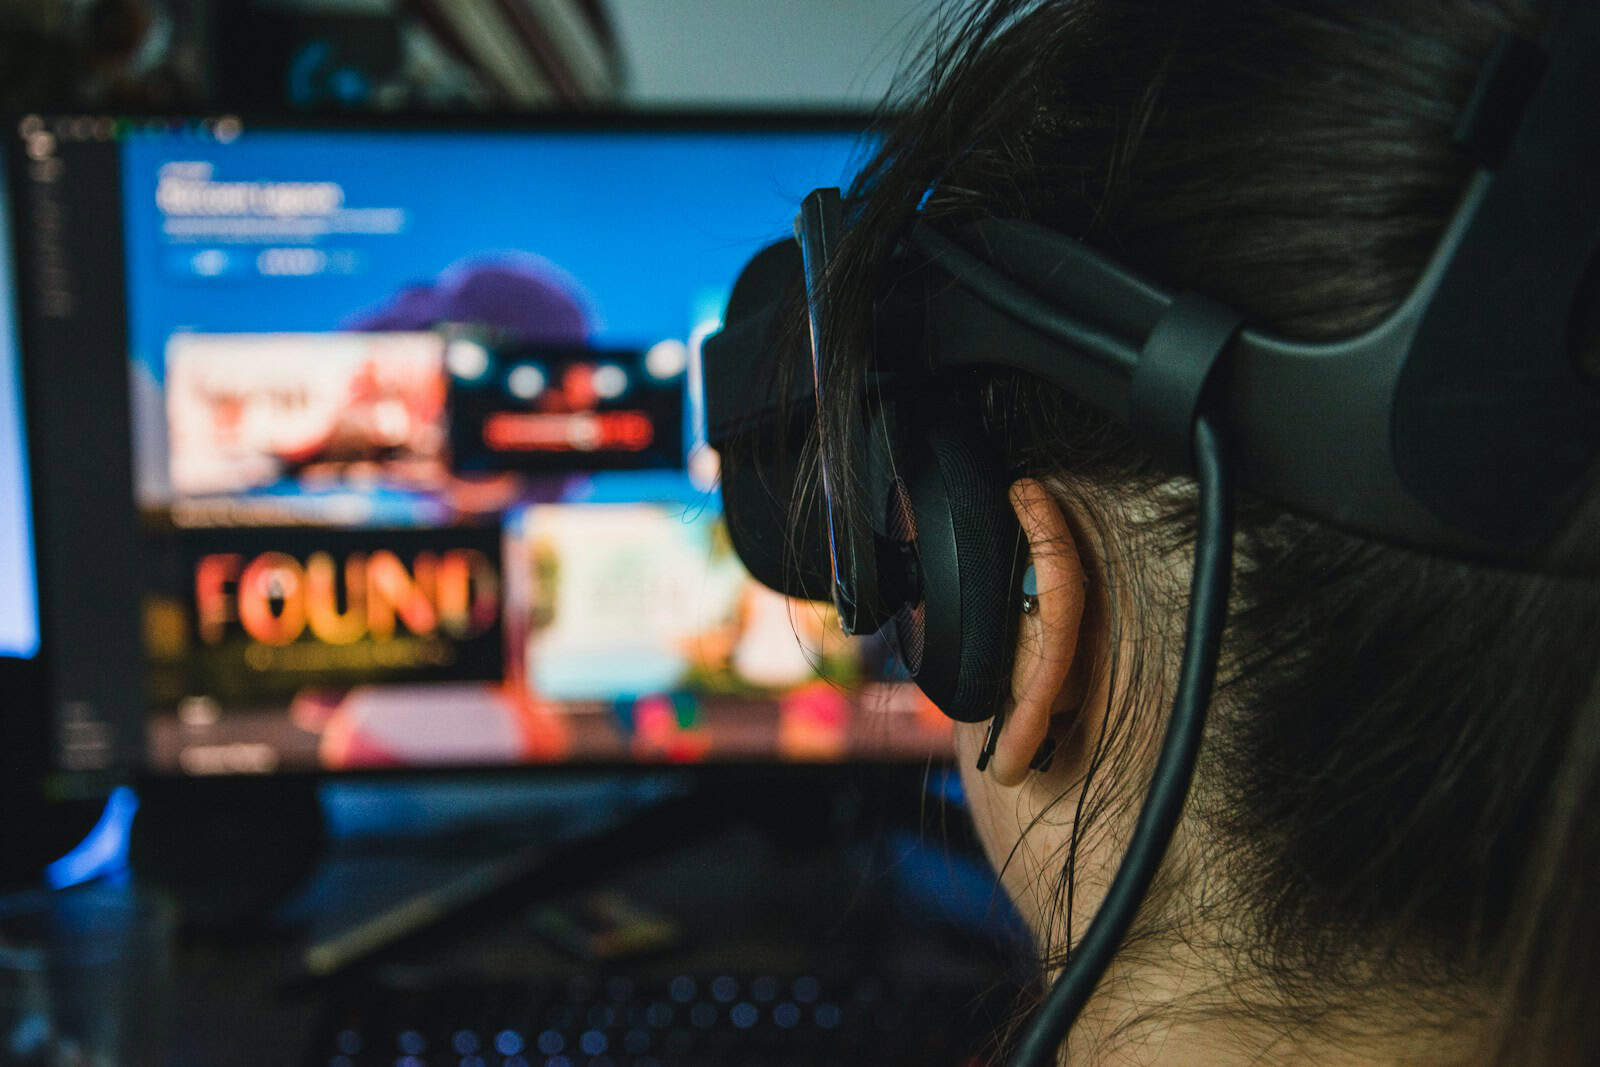
Virtual reality gaming is more accessible than ever with the Oculus Rift headset. Setting up your new VR system might seem complex at first, but the process is straightforward when you follow the right steps. You can have your Oculus Rift up and running in under an hour by downloading the setup software from the official website and following the guided installation process.
Before diving in, make sure your computer meets the minimum requirements to run VR applications. The Oculus Rift needs a powerful graphics card, adequate RAM, and the right ports to connect properly. Once confirmed, you’ll need to position your sensors correctly for optimal tracking and adjust your headset for comfort before calibrating the software.
Many new users skip important steps like updating port drivers or checking compatibility, which can lead to frustration later. Taking your time with the initial setup ensures you’ll have the best possible VR experience from day one, whether you’re gaming, exploring virtual worlds, or using educational simulations.
What You Need Before Getting Started
Before diving into setup, make sure your PC and environment are ready for the Oculus Rift. Here’s what you’ll need:
Minimum System Requirements
| Component | Minimum Requirement |
|---|---|
| CPU | Intel i5-4590 / AMD Ryzen 5 1500X or better |
| GPU | NVIDIA GTX 970 / AMD R9 290 equivalent or better |
| RAM | 8GB+ RAM |
| Video Output | HDMI 1.3 |
| USB Ports | 3x USB 3.0 ports + 1x USB 2.0 port |
| OS | Windows 10 or 11 |
Make sure you also have at least 2m x 1.5m of clear floor space for standing or room-scale experiences.
Step-by-Step Oculus Rift Setup
1. Download the Oculus Setup Software
Start by downloading the Oculus Rift software from Meta’s official website (formerly Oculus.com). This software will guide you through the full setup process.
- Go to the Oculus Rift setup page
- Download the installer (OculusSetup.exe)
- Run the installer and follow on-screen instructions
2. Connect Your Rift Headset and Sensors
You’ll need to plug in multiple USB and HDMI cables. Follow these steps:
- Connect the HDMI cable from the headset to your graphics card
- Plug the headset’s USB cable into a USB 3.0 port
- Plug the two included sensors into USB 3.0 ports (use USB 2.0 if you’re low on 3.0 ports)
- If you have Oculus Touch controllers, insert batteries and pair them during this step
Make sure sensors are spaced at least 3 feet apart and pointed toward your play area for accurate tracking.
3. Sensor and Guardian Setup
The software will prompt you to place your sensors and configure Guardian—a virtual boundary system to prevent you from bumping into walls or furniture.
Tips for optimal Guardian setup:
- Stand in the center of your play space
- Use the Touch controller to trace the available area
- Make sure no objects are inside the boundary
Guardian setup helps the system warn you before you leave your safe zone.
4. Pairing and Calibrating Oculus Touch Controllers
Oculus Touch controllers are essential for most VR experiences. Here’s how to get them ready:
- During setup, the software will walk you through pairing each controller
- You’ll be asked to hold down specific buttons to complete the process
- Once paired, you’ll perform a quick calibration, including adjusting the floor height
5. Adjusting the Headset for Comfort and Visual Clarity
Comfort is key. Poor headset fit can cause blurred visuals or discomfort during long sessions.
- Use the velcro straps to tighten or loosen the fit
- Adjust the distance between lenses using the slider underneath
- Make sure the image is sharp—if it isn’t, try moving the headset up/down slightly or adjusting your IPD (interpupillary distance)
If you wear glasses, consider using the included spacer to make extra room inside the headset.
Installing and Managing VR Games and Apps
You’ll manage your Oculus library through the Oculus desktop app. Here’s how to install your first few experiences:
- Open the Oculus app
- Navigate to the Store tab
- Browse or search for titles (free and paid)
- Click Install to add games to your library
- Once installed, go to the Library tab and click Launch
Some essential free apps to try first:
| App Name | Description |
|---|---|
| First Contact | A tutorial/demo that introduces VR basics |
| Oculus DreamDeck | A showcase of immersive environments |
| Echo VR (if available) | Zero-gravity multiplayer sport experience |
You can also access VR content from other platforms like Steam by enabling Unknown Sources in the Oculus settings.
Tips for a Better VR Experience
- Keep your headset lenses clean – use a microfiber cloth, never a paper towel
- Recenter your view often – press and hold the Oculus button on the right Touch controller
- Update your graphics drivers – especially after installing new games
- Use earbuds or a headset – spatial audio greatly enhances immersion
- Take breaks – avoid eye strain by taking a 10-minute break every hour
Common Issues and Fixes
Here’s a quick troubleshooting chart for frequent setup problems:
| Issue | Solution |
|---|---|
| Headset not detected | Re-plug USB and HDMI, use different ports, restart the PC |
| Tracking issues | Reposition sensors, avoid reflective surfaces, update firmware |
| No audio | Check Windows sound output, select Rift headset as default |
| Blurry visuals | Adjust headset position, clean lenses, check app rendering resolution |
| Controller won’t pair | Remove and reinsert batteries, hold pairing button near headset |
Setting up the Oculus Rift is mostly plug-and-play, but attention to detail during these steps makes a big difference in your overall experience.
Key Takeaways
- Download the Oculus setup software from the official website and follow the step-by-step instructions for a smooth installation process.
- Position sensors correctly and ensure your computer meets minimum requirements before attempting to use your headset.
- Adjust the headset properly for comfort and run the software calibration to optimize your virtual reality experience.
System Requirements
Before setting up your Oculus Rift, you need to ensure your PC meets the necessary requirements. Having the right hardware and software will give you the best VR experience without frustrating performance issues.
Compatible Operating Systems
For Oculus Rift, your computer must run on Windows 10 or newer. The older Windows 7 and 8.1 operating systems are no longer supported by the Oculus platform.
Meta strongly encourages all users to upgrade to Windows 10 or above if you haven’t already done so. This ensures compatibility and access to the latest features and security updates.
The operating system must be the 64-bit version as 32-bit Windows versions don’t have the memory addressing capabilities needed for VR applications.
Windows 11 is also compatible with the Oculus Rift, though some users report needing to update drivers after upgrading to this newer OS.
Minimum Hardware Specifications
Your PC needs to meet these basic requirements to run Oculus Rift:
- CPU: Intel Core i3-6100 / AMD Ryzen 3 1200 / AMD FX4350 or better
- RAM: 8GB or more
- GPU: NVIDIA GeForce GTX 1050Ti / AMD Radeon RX 470 or better
- Ports: At least one USB 3.0 port (for Rift S)
- Video Output: Compatible HDMI 1.3 output
For the original Rift, you’ll need additional USB ports as you must connect the headset and two sensors to USB 3.0 ports. The Rift S simplifies this setup requirement.
These specifications will allow you to run most basic VR applications, but more demanding games may struggle.
Recommended Hardware for Optimal Performance
For the best VR experience, aim for these recommended specifications:
- CPU: Intel Core i5 (3GHz or higher) / AMD Ryzen 5 or better
- RAM: 16GB to 32GB
- GPU: NVIDIA GeForce GTX 1070 / RTX 2060 / AMD Radeon RX 5700 or better
- Storage: SSD instead of HDD for faster loading times
- Ports: Multiple USB 3.0 ports
Higher-end games and applications will benefit significantly from better hardware. Flight simulators and graphically intensive VR games often require even more powerful components.
Your graphics card is particularly important for VR performance. Consider it the most critical component to upgrade if you’re experiencing lag or stuttering.
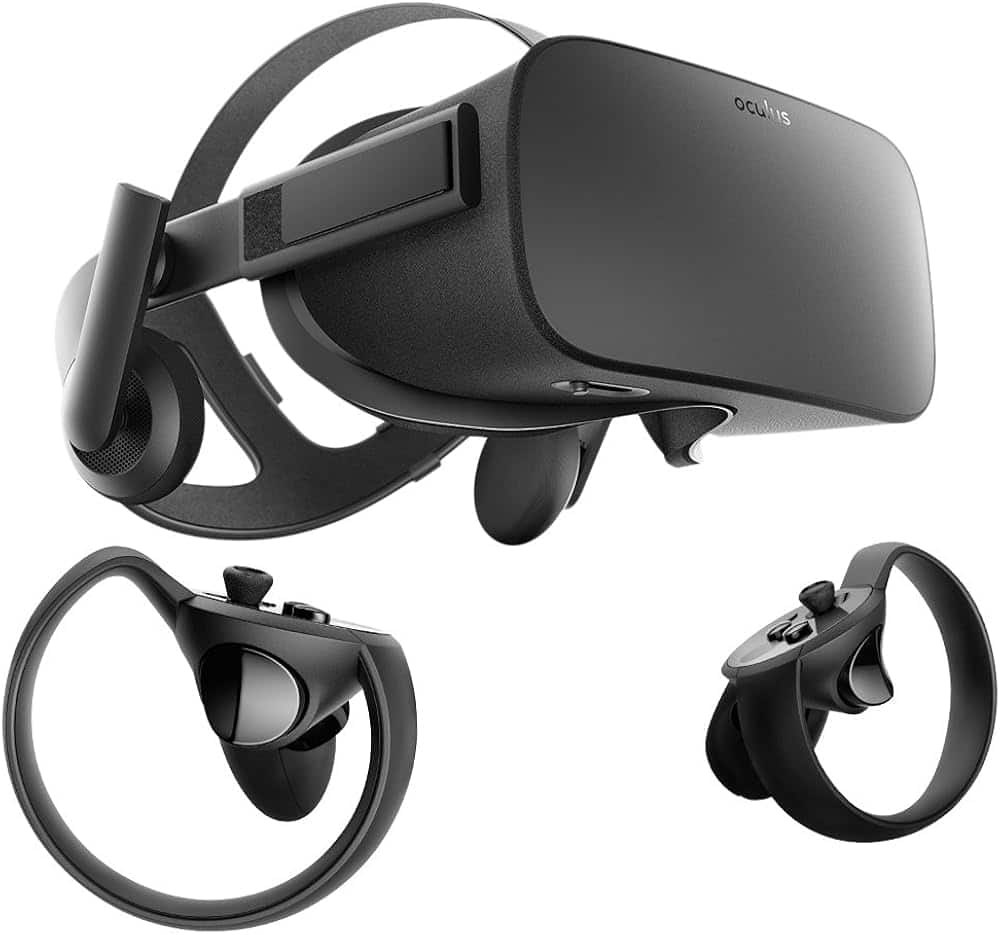
Unboxing Your Oculus Rift
When you first receive your Oculus Rift, taking the time to properly unbox and inspect all components ensures you’ll have everything needed for a successful setup. Careful handling during this initial stage prevents damage to sensitive VR equipment.
Inventory of Contents
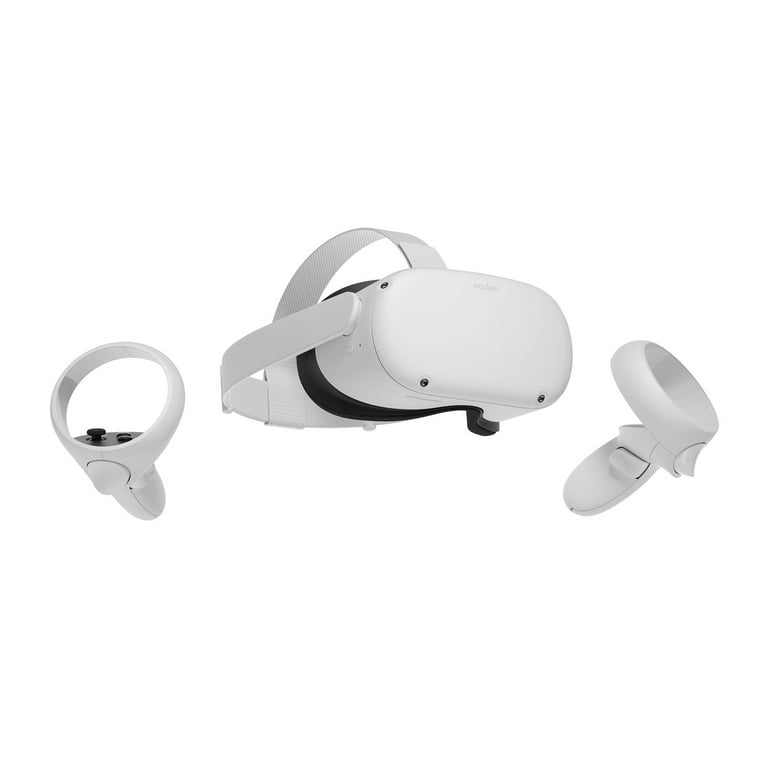
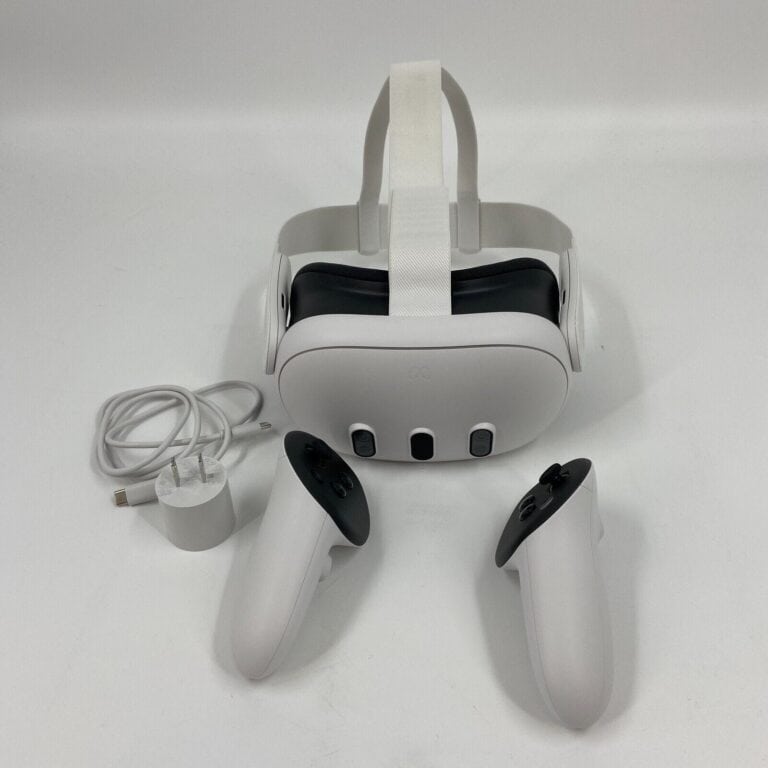
Your Oculus Rift package should contain several essential components:
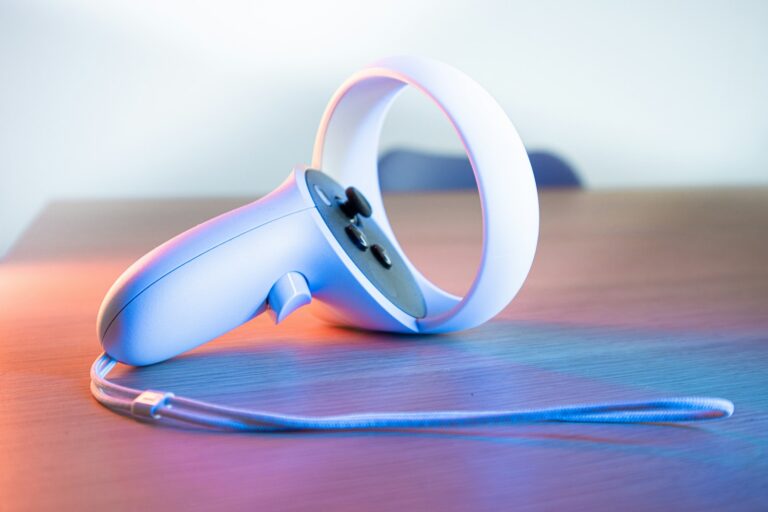
- VR headset with attached cable
- Two external sensors with stands
- Oculus Touch controllers (one for each hand)
- Oculus remote for basic navigation
- Xbox One wireless controller with adapter
- Two AA batteries for Touch controllers
- Sensor extension cable
- Removable headphones that attach to the headset
- Cleaning cloth for the lenses
Check that all items are present before proceeding with setup. The unboxing experience is designed to introduce components in a logical order.
Be sure to keep all packaging materials until you’ve confirmed everything works properly. Your warranty information is typically included on a small card in the box.
Handling and Safety
Handle your VR headset with clean, dry hands to prevent smudges on the lenses. Never expose the lenses to direct sunlight as this can damage the displays.
When removing the headset from the box, hold it by the rigid frame rather than by the straps or lenses. The Oculus Rift’s dual 1200×1080 AMOLED displays are sensitive to scratches and pressure.
For the external sensors, avoid touching the front surface. Place them on stable surfaces where they won’t be knocked over.
Store all protective covers included with your devices. They’ll help protect your equipment when not in use.
Remove any protective films on the lenses before first use, but be extremely gentle. Consider reviewing the setup guide before handling components to ensure proper technique.
Initial Setup Process
Setting up your Oculus Rift requires installing software, creating an account, and connecting your hardware properly. Following these steps in order will ensure you get the best experience with minimal troubleshooting.
Installing the Oculus Software
Before connecting your Oculus Rift headset, you’ll need to download and install the Oculus software on your computer. Visit the official Oculus website and click the “Download” button for the Oculus PC app. The installer is approximately 5GB, so ensure you have sufficient storage space and a stable internet connection.
Once downloaded, run the installer and follow the on-screen instructions. The software will automatically check if your computer meets the minimum requirements for VR. These include:
- Windows 10 or newer
- Intel i3-6100 / AMD Ryzen 3 1200 or greater
- NVIDIA GTX 1050 Ti / AMD Radeon RX 470 or greater
- 8GB+ RAM
- 1x USB 3.0 port plus 2x USB 2.0 ports
The installation process takes about 10-15 minutes depending on your internet speed and computer performance.
Creating an Oculus Account
After installing the software, you’ll need to create an Oculus account. The setup wizard will guide you through this process. You can create an account using your Facebook credentials or create a separate Oculus account with your email address.
Fill in your personal details and create a strong password. You’ll also need to:
- Verify your email address
- Set up payment information (optional but recommended)
- Configure privacy settings
- Accept the terms of service
Adding payment information now will make it easier to purchase games and experiences later. You can also set up a PIN for purchases as an added security measure.
Pairing the VR Headset with Your Computer
Now it’s time to connect your Oculus Rift headset to your computer. Start by connecting the USB cable from your headset to a USB 3.0 port on your computer (usually colored blue). Then connect the HDMI cable to your graphics card.
The Oculus software should automatically detect your headset. If not, check that:
- All cables are firmly connected
- You’re using the recommended ports
- Your graphics drivers are up to date
Place the sensors on your desk, facing where you’ll be using the headset. For optimal tracking, position them at least 3 feet apart and 4 feet off the ground.
The software will guide you through sensor setup and boundary configuration. Follow the on-screen instructions to define your play area and set up your Guardian System to prevent collisions with real-world objects.
Connecting the Hardware
Setting up your Oculus Rift requires proper connection to your computer through specific ports. The headset uses both HDMI and USB connections to function correctly.
Connecting to HDMI or DVI Ports
The Oculus Rift headset needs to connect to your computer’s video output. Plug the HDMI connector from your Rift headset directly into your computer’s HDMI port for best results. This connection sends visual data to the headset displays.
If your computer doesn’t have an HDMI port, you can use a DVI port with an adapter. Many Oculus Rift packages include an HDMI-to-DVI adapter for this purpose. Make sure the adapter is firmly connected to both the DVI port and the Rift’s HDMI cable.
For computers with dedicated graphics cards, always connect the headset to the graphics card’s HDMI port rather than any HDMI ports on the motherboard. This ensures your VR experience uses the full power of your graphics card.
USB Connections for the VR Headset and Sensors
The Oculus Rift relies on USB 3.0 ports for both the headset and sensors. These connections require sufficient bandwidth to transfer tracking data.
Connect the Rift headset to a USB 3.0 port on your computer. These ports are typically blue and provide faster data transfer than standard USB ports. The Oculus Rift S uses USB 3.0 specifically for optimal performance.
For sensor setup, connect the webcam-like sensors to separate USB 3.0 ports. Using USB 2.0 ports may result in tracking issues or error messages. If you receive a “Hardware Error” stating “Oculus Rift Not Attached,” double-check all your connections as this is a common troubleshooting step.
Avoid using USB hubs if possible, as they may not provide enough power or bandwidth. Direct connections to your computer’s built-in USB ports yield the best results.
Positioning the Sensors
Proper sensor placement is crucial for tracking accuracy and an immersive VR experience with your Oculus Rift. The external sensors need specific positioning to create a reliable tracking area and minimize dead zones.
Determining Optimal Sensor Placement
For a standard two-sensor setup, place them 3-6 feet apart on a desk or shelf facing your play area. Position them at least 3 feet high and angled slightly downward toward the center of your play space. This creates a tracking cone that covers your movement range.
For roomscale VR with three sensors, arrange them in a triangle pattern. Place two sensors in front corners of your play area and the third in a rear corner for 360-degree coverage.
Make sure your sensors are:
- Stable and won’t move during gameplay
- Angled correctly toward the center of your play area
- Spaced properly (not too close together)
- Free from obstructions between sensors and your headset/controllers
Mounting and Calibration
Wall or ceiling mounting provides better tracking coverage than desk placement. You can use simple sensor mounts that don’t require drilling or complex installation.
After mounting, run the sensor setup in the Oculus app by going to Settings > Devices > Configure Rift > Sensor Setup. During calibration, hold your Touch controller equidistant from each sensor when prompted.
For best results:
- Keep sensors away from bright light sources
- Ensure USB cables reach your computer without stretching
- Use USB 3.0 ports for all sensors when possible
If tracking seems off after setup, try the sensor boundary visualization tool to see your actual coverage area and adjust accordingly.
Headset Adjustment and Comfort
Getting your Oculus Rift properly adjusted is crucial for both comfort during extended VR sessions and optimal visual clarity. Proper fit prevents headaches and ensures you can fully enjoy your virtual experiences.
Fitting the Headset
Start by holding the headset with both hands and placing it on your face from front to back. The display should sit centered over your eyes with the bottom edge resting lightly on your cheekbones. Don’t place it too high or too low – proper alignment ensures clear visuals.
Make sure the back portion cradles the base of your skull for stability. The weight should feel balanced between the front and back of your head.
If you wear glasses, put the headset on carefully to avoid scratching your lenses. The Rift S has a convenient button on the underside that lets you adjust the forward/backward position to accommodate glasses.
A good fit means minimal light leakage around the nose area and even pressure around your face.
Adjusting Straps and Lenses
The Rift features three main straps: top and two side straps. Begin by loosening all straps before putting on the headset.
Top strap adjustment:
- Adjust this first to position the headset height
- Should remove pressure from your cheeks
- Supports weight distribution
Side straps:
Tighten these gradually and evenly on both sides until the headset feels secure but not tight. Over-tightening causes discomfort and “VR face” marks.
For optimal visual clarity, you can slightly tilt the front of the headset a few degrees up after achieving comfort. This small adjustment often dramatically improves focus and reduces blur.
Use the IPD (interpupillary distance) adjustment if your model has one, aligning the lenses with your eyes’ spacing. When properly adjusted, text in VR should appear sharp without straining your eyes.
Software Configuration
After connecting your Oculus Rift hardware, you’ll need to configure the software properly to ensure a smooth VR experience. The software setup involves making sure your headset has the latest firmware and creating a safe play area.
Updating Firmware
To update your Oculus Rift firmware, first download and install the Oculus software from the official website. Launch the application and sign in with your Meta account or create a new one if needed.
The software will automatically check for updates when you connect your headset. If an update is available, you’ll see a notification in the app.
Always keep your firmware updated to:
- Fix bugs and improve stability
- Enable new features
- Enhance performance
- Improve compatibility with games
Updates typically take 5-15 minutes to complete. Don’t disconnect your Rift during updates as this could damage the device.
Setting Up the Guardian System
The Guardian System creates a virtual boundary to keep you safe while using your Oculus Rift. This system helps prevent collisions with real-world objects during gameplay.
To set up Guardian:
- In the Oculus app, select Devices > Configure Rift
- Follow the on-screen instructions to define your play area
- Hold the Touch controller at arm’s length to trace the boundary of your space
For seated experiences, choose the “Stationary Guardian” option. For room-scale VR, select “Room-Scale Guardian” and ensure you have at least 6.5 x 6.5 feet of clear space.
The system will display a glowing grid when you approach boundaries during use. This helpful visual warning prevents accidents and keeps your VR sessions safe and enjoyable.
Enhancing Your VR Experience
After setting up your Oculus Rift, there are several ways to make your virtual reality sessions more immersive and comfortable. The right adjustments and accessories can transform an ordinary VR session into an extraordinary one.
Integrating with Oculus Rift S and Quest Platforms
The Oculus Rift S offers excellent integration with various platforms through the Oculus app. You can customize your VR experience by adjusting the game resolution settings to match your computer’s capabilities.
For optimal performance, try setting your in-game resolution to lower settings like 1024×768. This can significantly improve performance without drastically affecting visual quality in the headset.
If you’re switching between Oculus Rift S and Quest platforms, remember that your library can be shared across devices through your Oculus account. This gives you flexibility when choosing which device to use.
The Guardian system should be properly configured on both Rift S and Quest to prevent accidents. Spend time setting up this boundary system carefully for each play area you use.
Exploring Additional Accessories
Enhance your Oculus experience with carefully selected accessories. A VR mat helps you maintain position awareness and provides comfort during longer sessions.
For Oculus Rift S, consider these popular additions:
- Cable management systems: Keep cables organized and prevent tripping
- Lens protectors: Shield your lenses from scratches and sunlight damage
- Replacement facial interfaces: Improve comfort and hygiene for extended play
Third-party controller grips can improve your grip and prevent controller drops during intense gameplay. Many users find these essential for games requiring quick movements.
Battery packs are particularly useful for Quest users but can also power accessories for your Rift S setup. Look for ones that offer at least 10,000mAh capacity for extended sessions.
Custom head straps improve weight distribution and comfort. This becomes especially important during longer VR sessions when standard straps might cause discomfort.
Troubleshooting and Support
Setting up your Oculus Rift can sometimes come with unexpected challenges. The following information will help you solve common problems and find assistance when needed.
Common Issues and Resolutions
If your Rift isn’t connecting properly, first check all the cables to ensure they’re securely plugged in. This includes examining the connection on the headset side, particularly on the top left of your Rift S.
Try unplugging any secondary monitors you have connected to your computer. These can sometimes interfere with the Rift’s display connections.
For Rift S users experiencing connection problems, try using a DisplayPort dongle if you’re having issues with your current connection method.
If your antivirus is blocking Oculus software installation, you’ll need to add Oculus as a trusted program in your antivirus settings. Also ensure your antivirus software is up to date.
Make sure you aren’t running any screen streaming software or remote desktop applications while setting up your Rift.
Accessing Oculus Tech Support
When you can’t resolve issues on your own, Oculus provides several support options. Their official support website offers troubleshooting guides, FAQs, and direct contact methods.
For immediate assistance, you can open a support ticket through the Oculus app or website. Their team of verified experts typically responds within 1-2 business days.
The Oculus Community Forums are another valuable resource where you can find solutions from other users and official Oculus representatives who regularly monitor discussions.
For complex technical issues, you might consider using services like JustAnswer, which connects you with verified tech experts who specialize in VR equipment.
Before contacting support, have your Rift’s serial number and your computer specifications ready. This information helps support teams provide more targeted assistance through their expert quality process.
Integrating with Development Tools
After setting up your Oculus Rift hardware, you’ll need to connect it with development tools to create VR applications. Unity offers robust VR development capabilities that work seamlessly with Oculus devices.
Using Oculus Rift with Unity
To integrate your Oculus Rift with Unity, you’ll need to download and import the Oculus Integration package. Start by opening the Unity Asset Store tab within Unity and searching for “Oculus Integration.” Download and import this package, accepting any pop-ups about updating plugins.
Unity 2018.2 and newer versions work well with Oculus Rift. When setting up your project, select the 3D template and enable VR support in your project settings.
The Oculus Integration package provides essential components:
- OVRCameraRig prefab for head tracking
- Hand controllers and interaction systems
- Pre-built UI elements designed for VR
You can test your setup by pressing and holding the Oculus and A buttons on the left controller simultaneously. For the right controller, use the Oculus and B buttons.
Optimizing Applications for VR
VR applications demand higher performance than traditional software. Your Oculus Rift apps should maintain at least 90 frames per second to prevent motion sickness and provide a smooth experience.
To optimize your VR applications:
- Reduce polygon count in 3D models without sacrificing visual quality
- Use occlusion culling to avoid rendering objects not in view
- Implement level-of-detail (LOD) systems for distant objects
Consider the user’s field of view when designing interactions. Place important elements within the central 30° of vision for comfortable viewing.
Lighting affects both atmosphere and performance. Use baked lighting instead of real-time calculations when possible. This significantly improves frame rates while maintaining visual quality.
Test your application frequently with actual users. VR interactions that seem intuitive to you may not be obvious to others.
Care and Maintenance
Proper maintenance of your Oculus Rift ensures optimal performance and extends its lifespan. Regular cleaning and knowing when to seek professional repairs are essential aspects of VR headset ownership.
Cleaning Best Practices
To keep your Oculus Rift in top condition, clean it regularly using appropriate methods. For the lenses, use a dry microfiber cloth with gentle circular motions to remove smudges and fingerprints. Never use liquid cleaners on lenses as they can damage the special coating.
For the facial interface, gently wipe it with non-alcohol antibacterial wipes. Allow it to dry completely before using again. This helps prevent skin irritation and maintains hygiene when sharing your headset.
The Oculus Rift S maintenance guide recommends cleaning the headset body with a slightly damp cloth. Make sure no moisture enters any openings or ports.
Controllers should be wiped with a dry cloth to remove hand oils and dirt. Pay special attention to tracking rings and buttons where residue can build up.
Servicing and Repairs
When you encounter technical issues, first check the Oculus Rift setup guide to troubleshoot common problems. Many issues can be resolved by checking connections or updating software.
Your Oculus Rift comes with a limited warranty covering manufacturing defects. Contact Meta customer support if you believe your device has a defect covered under warranty.
For home repairs, only attempt simple fixes like reconnecting cables or reseating batteries. Never open the headset casing as this voids your warranty and may cause further damage.
Meta offers in-person appointments at select locations for hardware issues beyond basic troubleshooting. These appointments can be scheduled through their support website.
If you wear glasses, follow the proper technique for wearing Rift S with glasses to prevent scratching the lenses or damaging your frames.
Frequently Asked Questions
Setting up your Oculus Rift properly requires knowledge of several key elements. Here are answers to the most common questions about getting started with your VR system.
What are the system requirements for Oculus Rift S setup?
The Oculus Rift S requires a Windows 10 PC with at least an Intel i3-6100 or AMD Ryzen 3 1200 processor. You’ll need 8GB+ RAM and a compatible graphics card – at minimum an NVIDIA GTX 1050Ti/AMD Radeon RX 470.
Your PC must also have a DisplayPort 1.2 connection and one USB 3.0 port. These hardware requirements ensure smooth performance and prevent motion sickness from frame rate issues.
What are the steps involved in installing the Oculus software on a PC?
First, visit the Oculus website and download the Oculus app installer. Run the installer and follow the on-screen instructions to complete installation.
Create or log into your Meta/Oculus account when prompted. The software will guide you through setting up your headset once installed.
The app will also check if your PC meets the minimum requirements and help you optimize settings for the best experience.
How do I pair the Oculus Rift controllers with my headset?
Insert fresh AA batteries into each Touch controller. The battery compartment is located under the magnetic cover on the handle.
During the setup process in the Oculus app, you’ll be prompted to pair your controllers. Hold the buttons as instructed to initiate pairing.
If your controllers aren’t detected, try holding the Oculus button and Y button on the left controller or Oculus button and B button on the right controller until the LED flashes and then turns solid.
Is a high-performance PC necessary to use Oculus Rift?
While a high-performance PC isn’t strictly necessary, it significantly improves your VR experience. Meeting only minimum requirements may result in laggy performance in more demanding games.
For the best experience, a PC with a dedicated GPU like an NVIDIA GTX 1070/AMD Radeon RX 590 or better is recommended. This ensures smoother frame rates and better VR performance across all applications.
16GB of RAM and a modern CPU will also help maintain consistent performance during longer VR sessions.
How can I ensure my play area is properly set up for Oculus Rift?
Clear a space of at least 6.5 x 6.5 feet for room-scale VR. Remove any objects that could cause you to trip or that you might hit while playing.
Ensure your sensors are placed in optimal positions—typically in corners of your play space at different heights for maximum coverage. The setup wizard will guide you through this process.
Good lighting is essential—not too dark or bright, and avoid direct sunlight on the headset or sensors. Set up your Guardian boundary carefully to prevent collisions with real-world objects.
What troubleshooting steps should I follow if my Oculus Rift is not detected by the Oculus app?
Check all cables are securely connected. For Rift S, ensure the DisplayPort and USB cables are properly plugged in. For the original Rift, verify all sensor and headset connections.
Try different USB ports, particularly USB 3.0 ports directly on your motherboard rather than front panel ports or hubs. Some USB controllers don’t work well with VR headsets.
Restart the Oculus software and your computer. If problems persist, update your graphics drivers and check for Windows updates. You can also try resetting the Oculus software through the app settings.