Creating a robot in Procreate lets you blend futuristic technology with traditional artistic elements. The process combines mechanical precision with organic flow, giving you a unique character that stands out in digital art portfolios. With Procreate’s powerful brushes and layering capabilities, you can design intricate robotic components alongside human features to achieve that perfect cyborg aesthetic that’s popular in Japanese sci-fi and anime.
Whether you’re inspired by classic mecha designs or modern cyberpunk styles, Procreate offers the versatility needed to bring your vision to life. You can start with a simple sketch and gradually build complexity by adding detailed mechanical parts, glowing elements, and textures that create contrast between the human and machine aspects of your character.
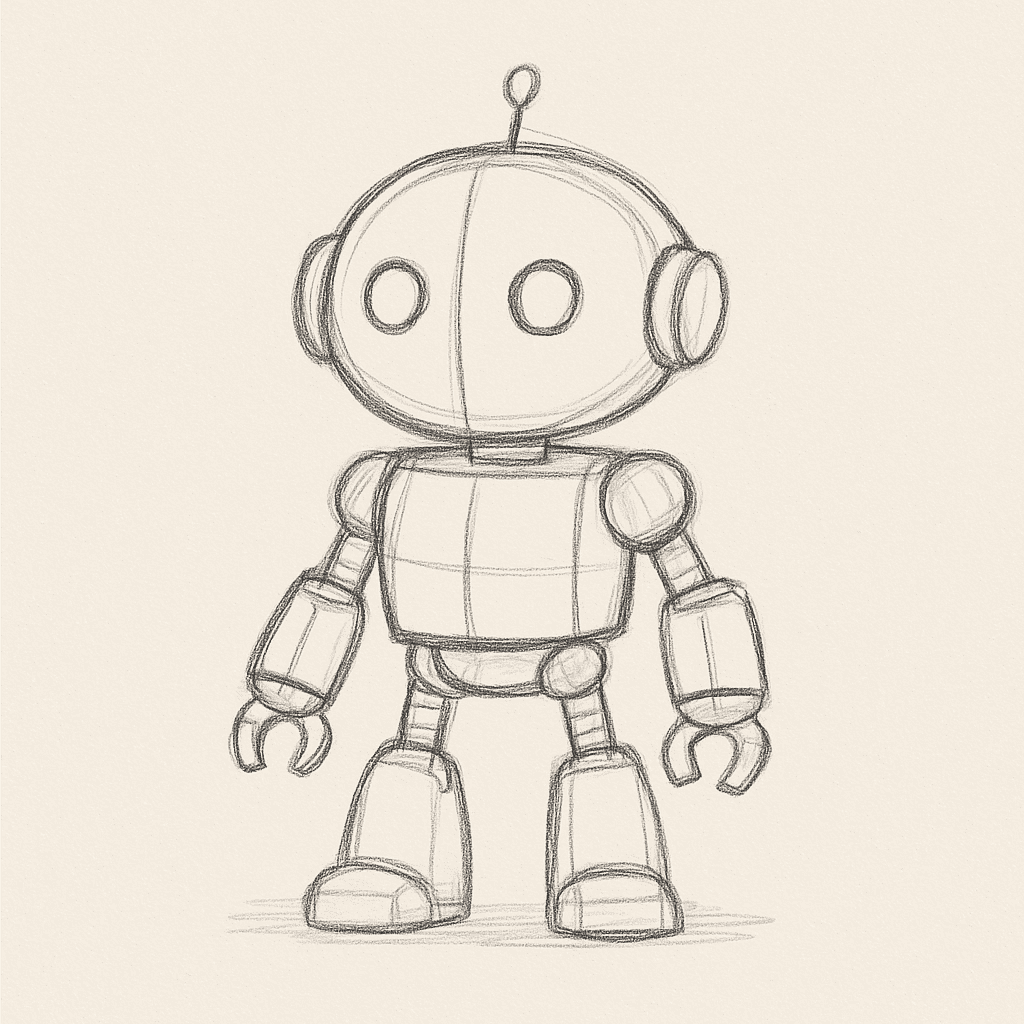
Want to start ahead? Save this robot sketch template above to your computer and you’re ready for you to ink, color, and customize!
Here’s a simple, step-by-step guide on how to create a robot in Procreate, whether you’re aiming for something cute, futuristic, or hardcore mechanical:
Step 1: Set Up Your Canvas
- Open Procreate and tap the “+” to create a new canvas.
- Choose a size like 2048 x 2048 px for high-quality work (or any size you’re comfortable sketching in).
Step 2: Start With Basic Shapes
- Select the 6B Pencil from the Sketching brush set.
- Lightly sketch out simple shapes like:
- Circle (head or body)
- Rectangle (torso)
- Cylinders (arms and legs)
- Squares or hexagons (joints, elbows, knees)
👉 Robots look best when built from recognizable, mechanical parts. Think like a builder — blocks, tubes, and panels.
Step 3: Refine the Design
- Lower the opacity of your rough sketch layer.
- Create a new layer and start refining:
- Add details like antennae, gears, vents, LED eyes, buttons, or armor plating.
- Make joints visible — show where parts connect.
- Think about how your robot moves — add hinges or ball joints at elbows, knees, and necks.
Step 4: Ink the Final Lines
- Choose a technical pen (like Studio Pen under “Inking” brushes).
- On a new layer, carefully trace your final lines.
- Keep your lines clean and mechanical — use lots of straight lines and clean curves.
- Pro Tip: Use the QuickShape tool (hold after drawing a line) to instantly create perfect circles, squares, and straight lines for an extra robotic feel.
Step 5: Add Color and Texture
- Create a new layer below your linework for coloring.
- Pick metallic colors (gray, silver, chrome, copper) or get creative with neon accents (bright blues, greens, reds).
- Use soft airbrush tools for light shading or Industrial brushes for gritty textures.
Color ideas:
| Area | Suggested Color |
|---|---|
| Main body | Steel gray or gunmetal |
| Joints | Dark gray or black |
| Lights | Bright blue, green, or red |
| Accessories | Rusty orange, neon purple |
Step 6: Add Highlights and Shadows
- To make it pop:
- Create a new layer set to “Overlay” or “Add” mode for highlights.
- Use a small soft brush and add bright spots where light would naturally hit (edges, tips of parts).
- For shadows, use a Multiply layer with soft dark tones underneath parts that overlap.
Key Tip: Sharp highlights and defined shadows make the robot look more metallic and three-dimensional.
Step 7: Background and Effects
- If you want to go further:
- Add a simple gradient background.
- Draw a techno-glow effect around the robot using light brush strokes.
- Or sketch in a sci-fi environment — a lab, battlefield, or scrapyard.
Bonus Tips
- Reference real machines: Look at cars, engines, old computers — anything with mechanical complexity.
- Mix styles: Blend cute elements (like big eyes) with detailed mechanical parts for a Pixar or anime-like vibe.
- Experiment: Try different head shapes, limbs (tracks, spider legs, jets), or weird attachments (like a vacuum or laser cannon).
Key Takeaways
- Procreate’s layering system helps separate mechanical and organic elements for easier editing and more defined cyborg creations.
- Combining traditional artistic motifs with futuristic mechanical details creates authentic robots.
- Proper color selection and lighting effects enhance the contrast between human flesh and metallic components for a realistic cyborg appearance.
Understanding the Concept of a Japanese Cyborg
Japanese cyborgs blend traditional cultural elements with futuristic technology to create unique character designs. These creations often explore the relationship between humanity and machinery in ways that reflect Japan’s distinct technological and artistic heritage.
History and Significance in Japanese Culture
The concept of cyborgs in Japanese culture emerged prominently in the post-World War II era, reflecting Japan’s rapid industrialization and technological advancement. Works like “Astro Boy” by Osamu Tezuka in the 1950s introduced early human-machine hybrids to popular culture.
By the 1980s, iconic works such as “Ghost in the Shell” and “Akira” deepened the exploration of cyborg themes. These stories often questioned what it means to be human when the body becomes increasingly mechanical.
Japanese cyborgs typically address themes of:
- Identity and consciousness
- The blurring line between human and machine
- Social commentary on technological progress
- Spiritual questions about the soul within mechanical bodies
This cultural significance makes Japanese cyborg designs particularly rich with symbolism and meaning.
Defining the Cyborg Aesthetic
The Japanese cyborg aesthetic combines mechanical elements with human anatomy in a distinctive visual style. You’ll notice these designs often feature exposed mechanical parts alongside organic elements, creating a compelling visual contrast.
Key visual elements include:
- Mechanical joints – often exposed at elbows, knees, and neck
- Panel lines – suggesting removable sections of synthetic skin
- Energy sources – glowing elements that suggest power sources
- Asymmetry – partially mechanical bodies with human elements intact
The anatomy of Japanese cyborgs frequently emphasizes the eyes, which remain distinctly human to convey emotion amid mechanical features. Hidetaka Tenjin, a renowned mecha designer, exemplifies this approach in his work on series like Macross and Gundam.
Traditional Japanese symbols like kanji characters are often incorporated into the design, either as decorative elements or to suggest programming/functionality of the mechanical components.
Setting Up Procreate for Cyborg Creation
Before diving into your Japanese cyborg design, properly configuring your Procreate workspace will ensure a smooth creative process. The right setup creates the foundation for detailed mechanical elements and organic components that make cyborgs visually compelling.
Canvas Size and Resolution
Start with a canvas that gives you plenty of room to work with fine details. For a professional cyborg illustration, create a new document at 4096 x 3072 pixels with a resolution of 300 DPI. This size provides enough space for intricate mechanical parts while maintaining print quality if needed.
If you’re planning to include detailed kanji characters in your design, higher resolution becomes even more important. You can check your iPad’s performance capabilities by tapping the wrench icon and selecting Canvas Information.
Consider your final output when choosing dimensions. For social media posts, 2048 x 2048 pixels works well, while concept art might require larger dimensions to showcase mechanical intricacies.
Remember that larger canvases use more processing power and layer limits. Balance quality with performance based on your device capabilities.
Selecting Brushes and Tools
The right brushes make a significant difference when creating cybernetic elements. For initial sketching, use the 6B Pencil or Studio Pen to rough out your character’s form and proportions.
For inking mechanical parts, the Technical Pen or Syrup brush provides clean, precise lines that work perfectly for circuit patterns and metal components. When creating your cyborg in Procreate, brush consistency helps maintain a cohesive style.
Essential tools for cyborg creation include:
- Selection tool: For clean mechanical edges
- Liquify: To adjust organic body parts
- Symmetry tools: Perfect for balanced mechanical components
- QuickShape: Ideal for geometric elements in cybernetic designs
Adjust brush size and opacity using the sliders on the left side of your screen for varying line weights that add depth to your cyborg’s mechanical features.
Layer Management Techniques
Effective layer organization is crucial when creating complex cyborg illustrations. Start with a clear hierarchy:
- Background layer
- Character base anatomy
- Cybernetic components
- Details and highlights
- Effects and atmosphere
Group related elements by selecting multiple layers and swiping right with three fingers to create a folder. This keeps mechanical parts separate from organic elements for easier editing.
Use layer masks rather than erasing to maintain flexibility. This allows you to adjust the boundary between human and machine elements without destroying your original work.
When adding circuit patterns or glowing components to your cyborg, place them on separate layers with appropriate blending modes. Overlay or Add work well for neon elements, while Multiply helps create shadows in mechanical crevices.
Regularly duplicate important layers before making major changes to preserve your progress as you develop your unique Japanese cyborg style.
Drawing the Foundation
Creating a solid foundation for your Japanese cyborg is crucial before diving into details. A strong base ensures that your character looks both believable and visually striking.
Sketching the Basic Anatomy
Start by creating a simple human figure as your base. Draw a stick figure with proper proportions to establish the pose and movement. Remember that even cyborgs need realistic anatomy.
Use Procreate’s streamline feature to get smooth lines. Set it to about 15-20% to maintain control while reducing shakiness.
Next, block in the major muscle groups and body parts. Focus on the torso, limbs, and head. For a Japanese-styled cyborg, consider more stylized proportions with a slightly larger head and eyes.
Add guidelines for facial features. The eyes, nose, and mouth placement will help define your character’s expression. Keep these lines light and in a different color from your final lines.
Incorporating Mechanical Elements
Now it’s time to blend robotic parts with the human anatomy. Identify which body parts will be mechanical. Popular choices include:
- Arms or partial limbs
- Eye enhancements or visors
- Chest plating or exposed core
- Spine modifications
- Lower limbs or feet
Draw geometric shapes over your anatomy to represent mechanical parts. Use straight lines and precise angles for contrast against organic forms.
Consider how these parts connect to the organic elements. Add connector pieces, wires, or tubes where human meets machine. These transition areas create visual interest and realism.
Japanese cyborg designs often feature distinctive mecha elements like sleek armor panels or exposed internal mechanisms. Add these elements while maintaining the flow of your design.
Detailing the Cyborg
The detailing stage brings your Japanese cyborg to life through careful composition refinement and strategic texture application. This is where your character gains personality and visual impact.
Refining the Composition
Begin by focusing on the silhouette of your cyborg. Make sure the outline is clean and the proportions are balanced. Use Procreate’s selection tool to isolate different parts and adjust them as needed.
Create a new layer for highlights and shadows. Use a lighter color for areas where light would naturally hit your cyborg, such as the tops of metallic components. Apply shadows under overlapping parts using a darker shade of your base colors.
Pay special attention to the facial features if your cyborg has human elements. The eyes often serve as the focal point of your character, so make them detailed and expressive.
Consider adding Japanese kanji characters to emphasize the cultural aspect. Place them strategically on armor plates or as holographic elements floating around your character.
Adding Texture and Depth
Texture transforms a flat drawing into a three-dimensional character. For metallic parts, use Procreate’s brushes like “Scratches” or “Noise” on a low opacity layer to simulate worn metal.
For cables and wires, apply a subtle gradient to suggest cylindrical forms. Add small highlights along one edge and shadows on the opposite side.
Try these techniques for specific cyborg elements:
- Metal plates: Add subtle scratches and edge highlights
- Screens/displays: Create a faint glow effect using the airbrush
- Joints: Draw small mechanical details and shadow lines
- Energy sources: Use vibrant colors with outer glow effects
When drawing robotic components, vary the texture between different materials. Smooth, reflective surfaces can contrast nicely with rough, weathered areas.
Remember to use Procreate’s layering system to your advantage. Keep different elements on separate layers so you can adjust textures individually without affecting other parts of your cyborg design.
Coloring Techniques
Creating a Japanese cyborg in Procreate requires thoughtful color application to achieve that distinctive blend of traditional Japanese aesthetics with futuristic cybernetic elements. The right coloring approach can make your artwork stand out with depth and visual impact.
Choosing a Color Palette
Start by selecting colors that reflect both Japanese artistic traditions and cyberpunk themes. Create a custom palette with 8-12 colors including:
- 2-3 primary colors (often red, blue, or purple for cybernetic elements)
- 1-2 metallic tones (silver, chrome, or gunmetal)
- 2-3 accent colors (neon green, pink, or orange for glowing parts)
- Traditional Japanese colors like indigo, vermilion, or sakura pink
You can find inspiration by studying Japanese art in Procreate tutorials or traditional ukiyo-e prints.
When designing your cyborg, use color to distinguish between human and mechanical parts. Consider using warmer tones for organic elements and cooler tones for mechanical components.
Use Alpha Lock to paint within specific layers without affecting outlines. This technique proves especially useful when coloring intricate cybernetic details.
Applying Blending Modes
Blending modes transform your coloring process by creating realistic light effects essential for cybernetic elements. For metallic surfaces, try Overlay or Soft Light blending modes with a silver base color.
When coloring in Procreate, create a new layer for shadows and set it to Multiply. Use a dark blue or purple rather than black for more dimensional shadows. For highlights on mechanical parts, add a layer set to Add or Screen blending mode.
Experiment with the Gaussian Blur tool on highlight layers to create a convincing glow effect for digital elements. Keep blur radius below 5% for subtle results.
For translucent cybernetic parts, try layering colors with Color Burn or Linear Burn at 30-40% opacity. This creates depth while maintaining transparency.
Always use separate layers for different elements to adjust blending modes individually. This approach provides maximum flexibility as you refine your Japanese cyborg artwork.
Adding Final Touches
The final touches bring your Japanese cyborg to life with depth and visual interest. These elements transform a flat illustration into a dynamic piece that catches the viewer’s eye.
Highlights and Shadows
Adding proper lighting to your cyborg creates dimension and realism. In Procreate, create a new layer above your colored artwork and set it to “Overlay” blending mode. Use a soft brush with white to add highlights where light would naturally hit metallic surfaces—typically along edges and raised areas.
For shadows, create another layer set to “Multiply” mode. Use dark blues or purples rather than black for more natural-looking shadows. Focus on areas beneath overhangs and where the cyborg’s body parts overlap.
Use the inking techniques you learned earlier to refine these lighting effects. Try Procreate’s Gaussian Blur to soften some highlights and shadows for a more realistic look.
Remember to consider your light source direction and maintain consistency throughout your painting.
Special Effects to Emulate a ‘Living’ Cyborg
To make your cyborg appear alive rather than static, add dynamic elements that suggest movement and energy. Create a new layer for glowing effects around power sources or eyes using Procreate’s luminance brushes.
Add small details that imply functionality:
- Circuit patterns that pulse with light
- Steam or vapor releasing from joints
- Energy fields using gradient meshes
- Small LED indicators on control panels
For mechanical parts, add subtle texture overlays to simulate wear and tear. This creates visual interest and suggests your cyborg has a history.
You can also incorporate Japanese kanji characters as interface elements or warnings on the cyborg’s body. These details add authenticity and reinforce the Japanese aesthetic of your design.
Incorporating Japanese Elements
Adding distinctive Japanese elements to your cyborg design creates authenticity and cultural depth. These elements can transform a standard robot concept into a unique creation that blends traditional Japanese aesthetics with futuristic technology.
Integrating Traditional Motifs
When creating your Japanese cyborg in Procreate, incorporate traditional motifs like cherry blossoms, waves, or dragons into the mechanical parts. Start by arranging these elements strategically within your composition. You can add kanji characters as decorative elements or as meaningful text on armor plates.
For the background, consider traditional Japanese landscapes or architectural elements. Mount Fuji, torii gates, or temple structures work well to establish setting.
Try these specific motifs:
- Ukiyo-e wave patterns for energy flows or circuit designs
- Sakura (cherry blossoms) as decorative elements or power indicators
- Bamboo-inspired structural components for limbs
- Oni masks integrated into helmet or face designs
Use brushes that mimic traditional Japanese ink techniques for line work to create authentic Japanese styling.
Symbolism and Character Features
Your cyborg’s character will gain depth through meaningful symbolism. Consider incorporating oni (demons) or yokai elements to suggest supernatural power sources for your cyborg.
Color choices should reflect traditional Japanese color symbolism:
- Red: power, vitality, and protection
- Black: mystery and the unknown
- Gold: divinity and imperial connections
- White: purity and technology
When designing the face, blend human features with robotic elements while maintaining Japanese aesthetic sensibilities. Exaggerated eyes with technological enhancements work well in this style.
Weapons and tools should combine traditional Japanese weapons (katana, kunai) with futuristic technology. Try creating a cyborg with a sword for a classic yet powerful design.
Add small details like circuit patterns that resemble traditional textile designs or armor plates inspired by samurai armor to further enhance the Japanese cyborg aesthetic.
Saving and Exporting Your Artwork
Once you’ve completed your Japanese cyborg design, you’ll need to save and export your work properly. Procreate offers several options to ensure your artwork maintains its quality across different platforms.
Optimizing for Different Platforms
When preparing your Japanese cyborg artwork for different platforms, consider the file format requirements of each destination. For social media, JPEG works well for most purposes, while PNG preserves transparency if your design has it.
To export your artwork, tap the Actions button (wrench icon) in the top menu, then select Share. From there, you can choose your preferred file format based on your needs:
- JPEG: Best for web sharing and smaller file sizes
- PNG: Maintains transparency and quality
- PSD: For further editing in Photoshop
- PROCREATE: Preserves all layers and export to the native format
Adjust the quality setting for JPEGs to balance file size and image clarity. For print work, export at 300 DPI to ensure crisp details in your cyborg design.
Using Procreate’s Sharing Features
Procreate offers robust sharing options to help you distribute your Japanese cyborg artwork efficiently. You can save images directly to your device or share them to other apps.
To back up your work, you can select multiple artworks and drag them to your desired folder in the Files app. This creates a safety net for your designs.
For specific platform sharing, use these features:
- Social Media: Share directly to Instagram, Twitter, or Facebook
- Cloud Storage: Export to Dropbox, Google Drive, or iCloud
- AirDrop: Send to nearby devices instantly
You can also create a timelapse video of your cyborg creation process by tapping Actions > Share > Timelapse Video. This shows others how you designed your stylized Japanese cyborg from start to finish.
Frequently Asked Questions
Digital artists commonly encounter specific challenges when creating Japanese-inspired cyborg illustrations. These questions address the essential techniques and resources for bringing mechanical characters to life with cultural elements.
What are the steps for illustrating a cybernetic character in Procreate?
Start with a clear concept sketch of your cyborg character. Focus on the balance between human and mechanical elements before moving to detailed work.
Next, create a new layer for inking your sketch. Begin the inking stage with bold, clean lines to define the character’s silhouette and main features.
Add separate layers for different components like metal parts, organic elements, and lighting effects. This organization makes adjustments easier later in your process.
Finish with color, shading, and highlights. Use the gradient tool for smooth metal transitions and add texture brushes for mechanical details.
How can I add Japanese-themed elements to my Procreate artwork?
Incorporate traditional Japanese motifs like cherry blossoms, dragons, or geometric patterns into your cyborg design. These can appear as decorative elements on armor or as background elements.
Create kanji characters using specialized brushes or by referencing proper Japanese symbols. Add these to your character’s armor, as digital displays, or as tattoos on organic parts.
Consider a color palette inspired by traditional Japanese art or modern Tokyo aesthetics. Combinations of red, black, and gold offer a classic look, while neon blues and pinks evoke a futuristic Tokyo vibe.
What techniques are used for shading metallic surfaces in Procreate?
Use the airbrush tool with low opacity to build up gradual highlights and shadows on metallic surfaces. This creates the smooth reflective quality characteristic of polished metal.
Create sharp highlights with a small, hard brush at 100% opacity. Place these strategically where light would directly hit the metal surfaces of your cyborg.
Add color reflections to suggest the environment around your character. Even gray metals reflect surrounding colors, adding depth and realism to your illustration.
Can you suggest layers and blending modes for creating a futuristic look in Procreate?
Set up a base layer with your main colors, then add an overlay layer with neon accents using the “Add” or “Color Dodge” blending modes. This creates a glowing effect perfect for energy sources or tech elements.
Create a separate layer for digital displays or holographic elements using the “Screen” blending mode. This helps achieve that semi-transparent, glowing appearance.
Add atmospheric effects like smoke or energy fields on a layer using the “Multiply” blending mode for shadows or “Overlay” for colored atmospheric effects.
Where can I find Procreate brushes suitable for crafting a cyborg aesthetic?
Procreate’s standard technical pen brushes work well for precise mechanical lines and details. The Studio Pen and Technical Pencil are particularly useful for initial sketches.
Look for specialized brush packs designed for mechanical or sci-fi art on the Procreate Brush Market or creative marketplaces like Gumroad. Many artists create custom brushes specifically for metallic textures and robotic details.
Follow digital artists who create robot illustrations for recommendations. Many share their brush preferences or even create their own brush sets for purchase or download.
How do you animate a cybernetic character using Procreate’s animation tools?
Start by creating a static character with parts on separate layers to facilitate movement. Organize these in logical groups like “arm mechanics,” “eye components,” or “chest panels.”
Use Procreate’s Animation Assist to create frame-by-frame animations. Simple movements like glowing eyes, rotating gears, or opening mechanical parts can bring your cyborg to life.
Add subtle animation effects like pulsing energy sources or flickering displays. Even minor movements can significantly enhance the futuristic feel of your Japanese cyborg illustration.