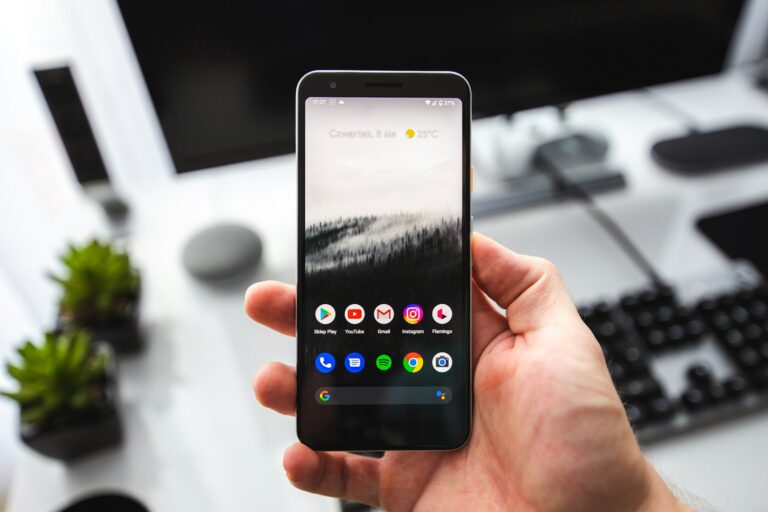
black android smartphone turned on displaying icons

Is your phone constantly buzzing with notifications? Endless alerts can be distracting and drain your battery. You can disable app notifications on Android devices by going to Settings > Apps > select the app > Notifications, then toggle off “All notifications” or customize which specific types you want to receive. This simple process puts you back in control of when and how apps get your attention.

Many Android users don’t realize they have granular control over their notification settings. You can silence some apps completely while allowing important ones to alert you. For particularly busy periods, Android’s Do Not Disturb mode can block all interruptions except from your most important contacts.

How To Turn Off App Notifications On Android

Tired of constant pings and alerts from certain apps? You can easily disable notifications for any app on your Android device. Whether you’re trying to focus, save battery, or just reduce distractions, here’s how to turn off app notifications in just a few steps.


Method 1: Turn Off Notifications from Settings

  1. Open the Settings app on your Android phone.
  2. Tap Notifications or Apps & notifications, depending on your device.
  3. Select See all apps or App settings.
  4. Find and tap the app you want to silence.
  5. Tap Notifications.
  6. Toggle All Notifications off or selectively disable specific notification categories.

This method lets you control all types of alerts the app may send—like chats, promotional messages, or background activity alerts.


Method 2: Disable Notifications via Notification Panel

  1. Wait for a notification from the app.
  2. Swipe down to expand the notification shade.
  3. Press and hold the notification.
  4. Tap Turn off notifications or Settings.
  5. Choose whether to turn off all notifications or specific types.

This is a quick way to silence an app right when it starts bothering you.


Method 3: Use Do Not Disturb (Temporarily Silence All Notifications)

  1. Open Settings.
  2. Tap Sound & vibration or Notifications > Do Not Disturb.
  3. Toggle it on, or schedule it for specific times.
  4. You can allow exceptions for important contacts or alarms.

Use this if you want complete silence without changing individual app settings.


Optional: Battery Optimization to Limit Background Activity

If you want to prevent an app from running and sending notifications in the background:

  1. Go to Settings > Battery > Battery Usage.
  2. Tap the app in question.
  3. Choose Restricted or Optimize.

This doesn’t always stop notifications entirely, but it reduces their frequency by limiting the app’s activity.


Disabling notifications on Android is highly customizable, so you can control exactly how and when apps get your attention.

Key Takeaways

  • Android’s notification settings allow users to disable alerts for individual apps or customize which notification types appear.
  • Do Not Disturb mode offers temporary relief from notifications during meetings, sleep, or focused work periods.
  • Managing notification settings not only reduces distractions but can significantly improve battery life and overall phone performance.

Understanding App Notifications on Android

Android phones use notifications to keep users informed about important updates, messages, and events. These alerts appear as banners at the top of the screen or in the notification shade when you swipe down.

Notifications can include text messages, emails, social media updates, weather alerts, and app-specific information. They help users stay connected without having to open each app individually.

Android organizes notifications into categories and prioritizes them based on importance. Important notifications appear at the top, while less urgent ones move down the list.

Many notifications appear briefly as banners at the top of the screen before moving to the notification shade. This allows users to see updates without interrupting their current task.

Each notification typically includes:

  • App icon
  • Brief message content
  • Time received
  • Quick action buttons

Users can interact with notifications in several ways:

  1. Tap to open the associated app
  2. Swipe to dismiss
  3. Long-press to access additional options

Android’s notification system works even when the phone is using mobile data instead of Wi-Fi. This ensures important alerts are delivered regardless of connection type.

The system can become overwhelming when too many apps send frequent notifications. Understanding how to manage these alerts helps users maintain focus and reduce distractions on their Android devices.

Configuring Global Notification Settings

Android provides central controls to manage notifications across your entire device. These settings let you quickly silence all apps or customize how notifications appear.

Accessing the Notifications Menu

To access notification settings on your Android phone, start by opening the Settings app. Look for the “Notifications” section, which may appear directly in the main menu or under “Apps & notifications” depending on your device model.

You can also access notification settings quickly by swiping down from the top of your screen to open the notification shade. Press and hold the notification icon in the quick settings panel to jump directly to notification settings.

On Samsung devices, users should navigate to Settings, then tap “Notifications” followed by “Advanced settings” to access additional notification controls.

Most Android phones also offer notification access through the following path:

  • Settings
  • Sound & vibration
  • Notifications

Turning Off Notifications for All Apps

Android provides several methods to disable notifications across multiple apps simultaneously.

The quickest option is enabling Do Not Disturb mode, accessible from the quick settings panel. This immediately silences all incoming alerts while allowing exceptions for priority contacts.

For more permanent solutions, go to Settings > Notifications, where you can turn off all “Default notifications” from specified apps. Some devices offer a master toggle that disables all app notifications with one switch.

Android 12 users can control notification pop-up styles by visiting Settings > Notifications > Advanced settings. From there, they can select “included apps” and choose “none” to disable all pop-up notifications.

Remember that critical system notifications may still appear even with global settings turned off.

Disabling Notifications for Individual Apps

Android phones offer granular control over which apps can send notifications. Users can customize their notification experience by selectively enabling or disabling alerts for specific applications.

Navigating to App Notifications

On most Android devices, notification settings are accessed through the main Settings menu. Users can tap on “Settings” and look for “Apps” or “Apps & Notifications” depending on their phone model. Some newer Android versions provide a shortcut by long-pressing an app icon on the home screen and selecting “App info.”

Another method involves pulling down the notification shade and swiping right on an existing notification. This reveals a gear icon that leads directly to that app’s notification settings.

For Samsung Galaxy devices, users might find these settings under “Settings → Notifications” or through the Quick Settings panel. The exact path may vary slightly based on the Android version and manufacturer’s interface.

Selectively Turning Off Notifications for Specific Apps

Once in the app notification settings, users will see a list of all installed applications. From here, they can select individual apps to modify their notification behavior.

After selecting an app, several options typically appear:

  • Allow notifications: The master toggle to enable/disable all notifications
  • Show silently: Delivers notifications without sound or vibration
  • Alert types: Options for sounds, vibration patterns, and pop-up alerts
  • Importance: Priority levels that determine how notifications appear

Many apps offer category-specific notifications. For example, messaging apps might separate notifications for group chats, direct messages, and system alerts. Users can toggle each category independently.

For time-sensitive control, Android provides Focus Mode or Do Not Disturb with customizable schedules. These features allow users to create “Automatic rules” that silence specific apps during designated timeframes like work hours or bedtime.

Utilizing Do Not Disturb Mode

The Do Not Disturb mode offers a powerful way to temporarily block notifications when you need to focus or sleep. This feature can be customized to allow important alerts through while silencing less urgent ones.

Setting Up Do Not Disturb

To activate Do Not Disturb on an Android phone, swipe down from the top of the screen with two fingers to open Quick Settings. Look for the Do Not Disturb icon (usually a circle with a horizontal line) and tap it to enable the feature.

Users can also access Do Not Disturb settings through the Settings app. Navigate to Sound & Vibration or Notifications, then select Do Not Disturb.

Android offers schedule options for automating Do Not Disturb. Set specific times for the feature to activate automatically, such as during meetings or sleeping hours.

Most phones allow duration settings as well. Users can choose to enable Do Not Disturb for a set period like 1 hour, until the next alarm, or until manually turned off.

Customizing Do Not Disturb Exceptions

Do Not Disturb mode doesn’t have to block everything. Users can configure certain apps to bypass this setting for important notifications.

To set exceptions, go to Settings > Sound & Vibration > Do Not Disturb > Exceptions (or Allow). Here, choose which notifications can come through when the mode is active:

People exceptions:

  • Calls from starred contacts
  • Repeated calls (when someone calls twice within 15 minutes)
  • Messages from specific contacts

App exceptions:

  • Select specific apps that can still notify you
  • Allow alarms, reminders, or event notifications

Some Android users may notice a persistent “Do Not Disturb is on” notification. Unfortunately, this system notification often can’t be disabled as it serves as a reminder that notifications are being filtered.

Managing Notifications on the Lock Screen

Your Android phone’s lock screen shows notifications by default, which can be convenient but may also reveal private information to others. You can customize how these notifications appear or disable them completely for better privacy.

Hiding Sensitive Content

Android offers options to hide sensitive content in notifications that appear on your lock screen. To protect your privacy, you can change the Ambient Display settings to control how notifications display.

To hide sensitive content:

  1. Open the Settings app
  2. Tap Notifications
  3. Select Notifications on lock screen
  4. Choose Hide sensitive content

This setting allows notifications to appear on the lock screen but hides the actual message content. For example, instead of showing “Payment of $500 received,” it might only display “New message.”

You can also adjust privacy settings for individual apps. Long-press on a notification, tap the gear icon, and look for privacy options specific to that app.

Disabling Lock Screen Notifications

For maximum privacy, users can completely turn off notifications from appearing on the lock screen.

To disable all lock screen notifications:

  1. Open Settings
  2. Tap Notifications
  3. Select Notifications on lock screen
  4. Choose Don’t show notifications

This prevents any notifications from appearing when the phone is locked. Notifications will still be available once the device is unlocked.

For specific apps, Android provides granular control:

  1. Go to Settings > Apps & notifications
  2. Select the app you want to manage
  3. Tap Notifications
  4. Toggle off Show on lock screen

Users can also silence specific notification categories by long-pressing a notification, tapping the gear icon, and selecting “Silence” for that notification type.

Linking Android Phone Notifications with Windows 10/11

Microsoft’s Phone Link feature creates a bridge between your Android device and Windows PC. This integration allows you to receive and manage Android notifications directly on your computer, saving time and preventing you from constantly switching between devices.

Setting Up Your Phone Companion App

To begin linking your Android phone with Windows, you’ll need to download the Phone Link app (formerly known as Your Phone) on your PC. This app comes pre-installed on most Windows 10 and 11 computers.

On your Android device, you’ll need to install the Phone Link Companion app from the Google Play Store. After installation, open the app and follow the setup instructions.

The pairing process typically involves:

  • Scanning a QR code displayed on your PC
  • Signing in with your Microsoft account on both devices
  • Granting necessary permissions for notifications and other features

Make sure both devices are connected to the same Wi-Fi network for optimal performance. The initial setup usually takes less than five minutes to complete.

Linking Android Phone to Windows 10/11 PC

Once the apps are installed, open the Phone Link app on your Windows PC. Sign in with your Microsoft account and follow the on-screen instructions to connect your devices.

You’ll be prompted to scan a QR code with your Android phone. After scanning, your phone will ask for permission to connect to your PC.

Grant the necessary permissions on your Android device, including:

  • Access to notifications
  • Access to contacts
  • Permission to make and manage phone calls
  • Permission to send and receive messages

After granting permissions, your devices will establish a connection. This connection allows you to view and interact with your phone’s content directly from your Windows 10/11 PC.

Managing Notifications Through Your Phone App

After successful connection, you can customize which app notifications appear on your PC. Open the Phone Link app on your Windows computer and click on the Settings (gear) icon.

Select “Features” and then “Notifications” to manage which apps can send alerts to your PC. Toggle notifications on or off for specific apps to avoid notification overload.

To clear individual notifications, simply hover over the notification and click the X in the top-right corner. If you’re experiencing duplicate notifications, adjust settings on both your phone and PC.

To completely disable Phone Link notifications, you can:

  1. Open the Phone Link app on your PC
  2. Go to Settings > Notifications
  3. Toggle off “Show notifications from my phone on this PC”

This integration works best when both devices remain within close proximity and connected to the same network.

Optimizing Notifications for Minimal Distraction

Android phones offer several ways to manage notifications for better focus. Taking control of your notification settings can reduce distractions and help you stay productive throughout the day.

Scheduling Notification Delivery

Android’s notification system has become more sophisticated, letting users control when alerts appear. The notification history feature makes it easy to review past alerts and adjust settings for specific apps.

To reduce distractions, users can set up Do Not Disturb schedules that silence notifications during important meetings or sleep hours. This feature allows exceptions for priority contacts or repeat callers in emergencies.

Many Android phones also offer notification throttling, which paces alerts to avoid overwhelming the user. This is especially helpful for messaging apps that might send multiple notifications in quick succession.

For persistent alerts like the app optimization notification, users can turn them off completely or set apps to “Always optimizing” to prevent repeated alerts.

Custom notification channels allow even more control, letting users set different sound levels, vibration patterns, or silent alerts for different types of notifications from the same app.

Troubleshooting Common Notification Issues

Even with the right settings, Android notifications can sometimes act up. These common problems often stem from incorrect permissions or sync issues that prevent apps from properly communicating with their servers.

Verifying App Permissions

When notifications aren’t appearing, the first step is to check if the app has proper notification permissions. On most Android devices, users can go to Settings > Apps > (select the app) > Notifications to verify these settings are enabled.

Some apps have notification channels that allow for more granular control. These channels let users choose which types of notifications to receive from a single app. If only certain notifications are missing, check these channel settings.

Android 10 and newer versions have special categories like “Alerting” and “Silent” notifications. Make sure the app is set to “Alerting” if audible alerts are needed. Do Not Disturb mode can also block notifications, so verify it’s turned off or configured to allow important apps.

Ensuring Proper Sync Settings

Sync settings play a crucial role in timely notification delivery. Many apps rely on background data refresh to receive and display notifications. If notifications are delayed or missing, check that Background Data is enabled for the app.

To do this, go to Settings > Apps > (select the app) > Mobile data & Wi-Fi and ensure “Background data” is turned on. Some devices have additional battery optimization features that can restrict background activities.

For persistent issues, check if Battery Optimization is affecting the app. Navigate to Settings > Battery > Battery Optimization and set important apps to “Don’t optimize.” This prevents the system from restricting their background activities.

Network connectivity problems can also interrupt notifications. If using Mobile data, ensure the app has permission to use data in the background. Switching between Wi-Fi and mobile networks can sometimes trigger notification refreshes if they’ve been stuck.

Frequently Asked Questions

Android offers many ways to manage notifications that can sometimes feel overwhelming. These questions address the most common concerns about controlling app notifications on your device.

What steps are required to disable app notifications for a specific app on an Android device?

To disable notifications for a specific app on Android, open Settings and tap “Notifications” or “Apps & notifications.” Find and select the app you want to modify from the app list.

Toggle off the main notification switch to block all notifications from that app. You can also customize notification categories within each app if you only want to disable certain types of alerts.

Some newer Android versions also let you long-press on a notification and tap “Turn off notifications” for quick access to these settings.

Can you customize notification settings for individual apps on an Android phone?

Yes, Android provides detailed customization for individual app notifications. Users can adjust the notification sound, vibration pattern, and importance level for each app.

Within most apps, you can also manage specific categories of notifications. For example, in a messaging app, you might choose to receive alerts for direct messages but disable group chat notifications.

Android 12 and newer versions offer even more granular control with options for notification priority levels and the ability to show or hide sensitive content.

How do you turn off notifications on an Android device from the lock screen?

To disable notifications on the lock screen, go to Settings and tap “Notifications.” Look for “Lock screen” or “Notifications on lock screen” options.

Users can choose between three common settings: show all notification content, hide sensitive content, or don’t show notifications at all. The exact wording varies by device manufacturer.

On many Android devices, you can also disable lock screen notifications through the Settings app under “Sound & notification” or “Security” sections.

Is there a way to manage app notification settings quickly on a Samsung Android phone?

Samsung devices offer several quick methods to manage notifications. Users can access the notification panel by swiping down and tap “Notification settings” or the gear icon.

Quick settings toggles allow for enabling or disabling notifications temporarily. Samsung also includes a “Notification assistant” feature on newer models that helps prioritize important alerts.

For even faster access, users can long-press any notification to see quick options or use the Galaxy Wearable app to manage notifications from a connected watch.

What are the methods to stop unwanted pop-up notifications on Android?

The most direct way to stop pop-up notifications is through Settings. Navigate to “Notifications” and look for “Pop-up style” or “Floating notifications” options.

Users can turn off pop-up notifications system-wide or customize which apps can display them. Many Android devices allow selecting between no pop-ups, brief pop-ups, or persistent pop-ups.

Do Not Disturb mode also effectively blocks pop-up notifications during specified times or activities. This can be enabled quickly from the quick settings panel.

How can persistent notifications be removed from the Android notification bar?

Persistent notifications can be managed in several ways. For temporary dismissal, swipe the notification partially to the side and tap the settings icon that appears, then select “Minimize” or “Silent.”

For permanent removal, go to Settings > Apps & notifications > See all apps, select the app showing persistent notifications, tap “Notifications,” and disable the relevant notification channels.

Some system notifications cannot be completely disabled as they’re essential for operation, but they can often be minimized to take less space in the notification panel.

Similar Posts