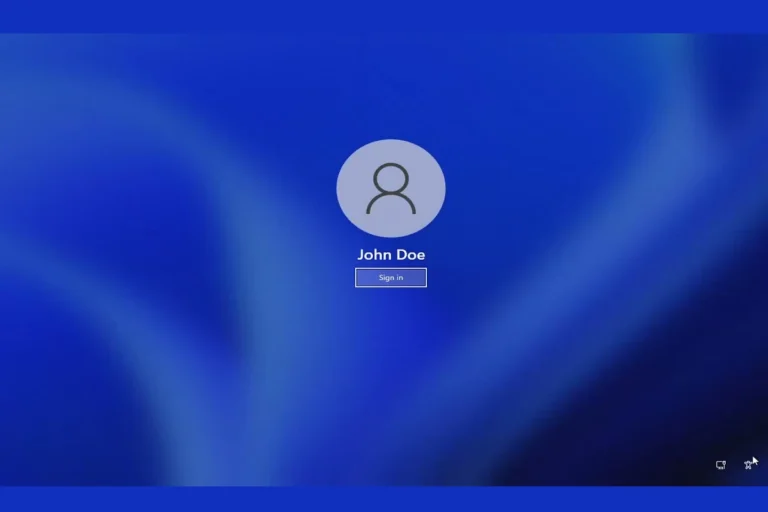
The Lock Screen in Windows 10 and 11 is more than just a security feature — it’s also a place to display useful information, notifications, and beautiful backgrounds. Whether you want to personalize it or improve your privacy, Windows gives you plenty of customization options.
This guide walks you through everything you can do with your Lock Screen settings on both Windows 10 and Windows 11.
🧭 What Is the Lock Screen?
The Lock Screen appears when:
- You start or wake your PC.
- You switch users.
- You lock your computer manually (press Windows + L).
It can show:
- Background images
- Notifications and app statuses
- Date and time
- Network and battery icons
⚙️ Accessing Lock Screen Settings
🪟 On Windows 11:
- Click Start → Settings → Personalization → Lock screen.
- You’ll see options to change your background, app status, and screen timeout.
💻 On Windows 10:
- Click Start → Settings → Personalization → Lock screen.
- The options are similar but with a slightly different layout.
🖼️ 1. Change the Lock Screen Background
You can choose what image or slideshow appears behind the time and date.
Options:
- Windows Spotlight – daily curated images from Microsoft.
- Picture – choose your own photo.
- Slideshow – cycle through a folder of images.
How to Change It:
- Go to Settings → Personalization → Lock screen.
- Under Background, select Windows Spotlight, Picture, or Slideshow.
- If you choose Picture, click Browse to pick an image.
- If you choose Slideshow, select a folder containing your photos.
(source: Microsoft Support)
📱 2. Add App Status and Notifications
You can display quick status updates from apps like Mail, Calendar, or Weather right on your Lock Screen.
How to Set It:
- In Lock screen settings, scroll to Lock screen status.
- Choose one app to show detailed status (e.g., Calendar).
- Choose up to seven apps to show quick status (e.g., Mail, Weather, or Alarms).
💡 Tip: If privacy is a concern, choose apps that don’t reveal sensitive information.
🌦️ 3. Enable Weather and Dynamic Info (Windows 11)
Windows 11’s “Weather and more” widget can show real-time updates like:
- Current weather
- Traffic
- Sports scores
- Finance updates
To enable:
- Open Settings → Personalization → Lock screen.
- Under Lock screen status, select Weather and more.
(source: Microsoft Support)
⏲️ 4. Adjust Screen Timeout and Sleep Settings
You can control how long your screen stays on before turning off when locked.
Steps:
- Go to Settings → System → Power & battery (Windows 11) or Power & sleep (Windows 10).
- Adjust the Screen and Sleep timers.
This helps conserve battery life on laptops or tablets.
🔐 5. Manage Security and Sign-In Options
The Lock Screen is tied to your sign-in methods. You can choose how you unlock your PC.
Options Include:
- PIN (recommended for speed and security)
- Password
- Fingerprint (Windows Hello)
- Face recognition (Windows Hello Face)
- Security key
To set these up:
- Go to Settings → Accounts → Sign-in options.
- Choose your preferred sign-in method and follow the setup prompts.
(source: TheITBros)
🧩 6. Disable the Lock Screen (Optional)
If you prefer to go straight to your login screen, you can disable the Lock Screen — though this is only recommended for personal PCs.
Method (Windows 11 Pro / Enterprise):
- Press Windows + R, type
gpedit.msc, and hit Enter. - Navigate to:
Computer Configuration → Administrative Templates → Control Panel → Personalization - Double-click Do not display the lock screen → Set to Enabled.
- Click Apply → OK.
For Windows 10 Home:
You can achieve the same via a Registry edit (advanced users only).
(source: TheITBros)
🎨 7. Customize Lock Screen Clock and Notifications (Windows 11)
Windows 11 lets you personalize how the clock and notifications appear on the Lock Screen.
- Open Settings → Time & language → Date & time to adjust format.
- Notifications can be managed under System → Notifications → Lock screen notifications.
You can choose whether notifications appear when your device is locked.
🧠 Bonus Tips
- Use Dynamic Lock: Automatically lock your PC when you walk away using your phone’s Bluetooth connection (Settings → Accounts → Sign-in options → Dynamic Lock).
- Use Themes: Lock Screen background can sync with your desktop theme for a unified look.
- Privacy Tip: Disable “Show notifications on the lock screen” if you share your PC with others.
🏁 Final Thoughts
The Lock Screen in Windows 10 and 11 is both functional and customizable. You can make it a productivity hub with weather and calendar updates — or keep it minimal for privacy and speed.
Whether you’re personalizing your background, adjusting app notifications, or fine-tuning security, these settings help make your PC experience truly yours.
In short:
Go to Settings → Personalization → Lock screen to change your background, app status, and lock behavior — and make your Windows experience both secure and personal.
Overview of the Windows 10 Lock Screen
The Windows 10 lock screen is more than just a barrier between you and your desktop – it’s a customizable feature that balances security with personalization. You can transform this screen with beautiful backgrounds, app notifications, and status updates that make your PC uniquely yours. Customizing your Windows 10 lock screen takes just a few clicks through the Settings app, where you can change backgrounds, add status information, and set up security features to protect your data.
Many users don’t realize how functional the lock screen can be beyond just looking pretty. You can display calendar appointments, weather updates, and notifications from your favorite apps without even logging in. This makes your computer more useful even when you’re not actively using it.
Key Takeaways
- You can personalize your lock screen with custom backgrounds and app notifications through Windows Settings under Personalization.
- The lock screen provides important security by requiring a password, PIN, or biometric authentication before accessing your computer.
- Setting your screen to lock automatically after inactivity helps protect your information when you step away from your computer.
The Windows 10 Lock Screen serves as your first point of contact with your computer, offering both security and personalization options. It displays useful information while keeping your system protected from unauthorized access.
Purpose and Functionality
The Lock Screen in Windows acts as a security layer that appears when you start your device or wake it from sleep. It prevents immediate access to your personal data and system functions.
Beyond security, the Lock Screen displays helpful information at a glance, including:
- Time and date
- Calendar appointments
- Weather updates
- Email notifications
- App notifications
You can customize your Lock Screen with various background options. Choose from personal photos, slideshows, or Windows Spotlight which provides rotating images and occasional tips.
The Lock Screen also supports quick-access functions. Depending on your settings, you can access the camera, Cortana voice assistant, and certain notification details without fully unlocking your device.
Lock Screen Vs. Login Screen
Many users confuse the Lock Screen with the Login Screen, but they serve different purposes in Windows 10.
The Lock Screen comes first, displaying your chosen background image and basic information. You must dismiss this screen by pressing any key or swiping up to proceed.
The Login Screen appears after dismissing the Lock Screen. This is where you enter your password, PIN, or use Windows Hello biometric authentication to access your account.
You can disable the Lock Screen if you prefer to go directly to the Login Screen, though this removes the visual customization and information display benefits.
While the Lock Screen is primarily visual, the Login Screen is functional—it’s where authentication happens and where you can switch users or access accessibility options.
Accessing Lock Screen Settings
Windows 10 offers multiple ways to access and modify your lock screen settings. You can personalize your experience by changing background images, adding apps, or adjusting timeout settings.
Using Windows Settings
The quickest way to access lock screen settings is through the Windows Settings app. Press Windows key + I to open Settings, then click on Personalization. From there, select Lock screen in the left sidebar.
In this section, you’ll see options to customize your lock screen background – choose between Picture, Slideshow, or Windows spotlight. You can also select which apps show detailed status on the lock screen.
To adjust when your screen locks automatically:
- Go to Settings > Personalization > Lock screen
- Scroll down and click Screen timeout settings
- Choose how long your PC stays awake before the screen turns off
You can also set Windows to lock automatically after a specific time period for better security.
Via Control Panel
While Microsoft now emphasizes the Settings app, you can still access some lock screen options through Control Panel. Open Control Panel by searching for it in the Start menu.
Navigate to Control Panel > Appearance and Personalization > Personalization. Here you’ll find basic options for changing your desktop background, which indirectly affects some lock screen settings.
For more advanced lock screen security settings, go to Control Panel > System and Security > Security and Maintenance. From here, you can adjust account settings and screen lock timeouts.
Some system administrators may need to enable or disable the lock screen entirely through Group Policy Editor or Registry Editor – though this is typically only necessary in specialized workplace environments.
Customization of the Lock Screen
Windows 10 offers several ways to personalize your lock screen experience. You can change backgrounds, set up slideshows of your favorite photos, and choose which apps display notifications before you even log in.
Changing the Background Image
To customize your lock screen background, go to Settings > Personalization > Lock screen. You’ll see several options for the background type, including:
- Picture
- Slideshow
- Windows spotlight
When selecting “Picture,” you can choose from preset images or click “Browse” to use your own photo. Windows 10 stores these images in a specific folder, which you can access by typing %USERPROFILE%\AppData\Local\Packages\Microsoft.Windows.ContentDeliveryManager_cw5n1h2txyewy\LocalState\Assets in File Explorer.
You can also change your lock screen through Group Policy if you’re using Windows 10 Pro. This is helpful for IT administrators who need to standardize lock screens across multiple computers.
Setting Up Slide Show
The slideshow option lets you display multiple photos on your lock screen. To enable this feature, select “Slideshow” from the background dropdown menu in lock screen settings.
You can add an existing folder or create a new album specifically for your lock screen. Click the “+” button to add folders containing images you want to include.
For best results, configure these additional slideshow settings:
- Include camera roll folders from this PC and OneDrive: Toggle on/off
- Only use pictures that fit my screen: Recommended for cleaner appearance
- Play a slideshow when using battery power: Toggle off to save battery
If you find the slideshow option is grayed out, try updating Windows or checking if your organization has disabled this feature.
Adding App Notifications
Windows 10 allows you to display quick status updates from apps on your lock screen. You can select one app for detailed status and several apps for quick status icons.
To configure app notifications:
- Scroll down in Lock screen settings to “Choose apps that show quick status”
- Click on a “+” tile to add an app
- Select from available apps like Weather, Mail, or Calendar
For detailed status, select one app that will show extended information. This works well with apps like Calendar that can display your next appointment.
You can also customize Windows lock screen privacy settings by going to Settings > Accounts > Sign-in options. This lets you control whether Cortana is available on the lock screen and if your email address is shown.
Security Features
Windows 10 offers several robust security options to protect your device when you’re away from it. These features include PIN authentication, picture passwords, and automatic locking capabilities that work with your smartphone.
Configuring a PIN
Setting up a PIN provides a quick, secure way to access your Windows 10 device. Unlike your Microsoft account password, a PIN is only stored locally on your device.
To set up a PIN, go to Settings > Accounts > Sign-in options and select PIN under the Sign-in options. Click “Add” to create a new PIN.
For better security, you can include letters and symbols in your PIN. Windows 10 also offers the option to require a PIN after sleep or when leaving the lock screen.
Remember to choose a PIN that’s easy for you to remember but difficult for others to guess. Avoid common combinations like “1234” or your birth year.
Using Picture Password
Picture Password offers a unique, touch-friendly way to secure your device using gestures on an image.
To set up Picture Password, navigate to Settings > Accounts > Sign-in options and select Picture Password. You’ll need to:
- Choose a personal photo
- Create three gestures (circles, straight lines, or taps)
- Repeat the gestures to confirm
This feature works especially well on touchscreens but can also be used with a mouse. The specific combination of gestures and their placement on your chosen image creates a secure password that’s difficult for others to replicate.
Picture Password can be used alongside other authentication methods like your PIN or traditional password for added security.
Understanding Dynamic Lock
Dynamic lock automatically secures your PC when you walk away by pairing with your smartphone via Bluetooth.
To enable this feature:
- Pair your phone with your Windows 10 PC
- Go to Settings > Accounts > Sign-in options
- Under Dynamic lock, check “Allow Windows to automatically lock your device when you’re away”
Once configured, Windows will detect when your phone moves out of Bluetooth range (approximately 30 feet) and lock your PC after 30 seconds. This provides protection without you needing to manually lock your screen each time.
You can customize when your screen locks by adjusting screen timeout settings in the Power & Sleep section of System Settings.
Troubleshooting Common Issues
When your Windows 10 lock screen isn’t working properly, it can prevent you from accessing your computer. Several issues can affect this important security feature, from unresponsive interfaces to conflicting settings.
Lock Screen Not Working
If your lock screen becomes unresponsive or gets stuck, there are several troubleshooting steps you can try. First, try pressing Ctrl+Alt+Delete to see if you can access the sign-in options or restart your computer. If that doesn’t work, hold down the power button for about 10 seconds to force a shutdown.
For recurring issues, you might need to check your registry settings. You can:
- Press Windows key + R and type “regedit”
- Navigate to the proper registry path
- Check the DisableLogonBackgroundImage setting
Sometimes Windows updates can also cause lock screen problems. Try booting into Safe Mode to see if the issue persists, which helps determine if a third-party program is causing the conflict.
Problem With Sign-In Options
Some users report that the PIN entry field doesn’t appear on the lock screen, making it impossible to log in. This frustrating issue often requires specific fixes.
Try these solutions:
- Restart the Windows login services by pressing Ctrl+Alt+Delete and selecting Task Manager
- Check if your PIN has been corrupted in Windows settings
- Remove and re-add your PIN through Settings > Accounts > Sign-in options
If your password field isn’t appearing, it might be related to a known issue in Windows 10 when resuming from Away Mode. Microsoft has recognized this problem in certain builds.
You can also try clicking in different areas of the screen, as sometimes the input field is present but not visible due to display or graphic driver issues.
Screen Saver Interference
Your screen saver settings can sometimes conflict with the lock screen, causing unexpected behavior. When your screen saver activates, it should properly transition to the lock screen afterward, but this doesn’t always happen smoothly.
To fix screen saver and lock screen conflicts:
- Right-click on your desktop and select Personalize
- Go to Lock screen settings
- Check the Screen timeout settings link at the bottom
- Ensure your screen saver settings are compatible with your lock screen preferences
If your screen saver is causing your system to get stuck on the welcome screen, try disabling it temporarily to see if that resolves the issue.
Power settings can also affect how your screen saver and lock screen interact. Check your power plan settings to ensure they aren’t causing your computer to enter sleep mode improperly after the screen saver activates.
Advanced Configuration
Windows 10 offers several advanced methods to customize your lock screen beyond the basic Settings app. These techniques give you more control over timeout settings, behaviors, and visual elements.
Using Group Policy Editor
The Group Policy Editor is a powerful tool for making system-wide changes to your lock screen configuration. This feature is only available in Windows 10 Pro, Education, and Enterprise editions.
To access it, press Win+R and type gpedit.msc. Navigate to Computer Configuration > Administrative Templates > Control Panel > Personalization. Here you can configure Windows spotlight and other lock screen features.
You can disable the lock screen completely by enabling the “Do not display the lock screen” policy. This makes your computer go directly to the sign-in screen when waking from sleep.
Another useful setting is “Force a specific default lock screen image” which lets you standardize lock screens across multiple devices in an organization.
Editing Registry Settings
For more granular control, you can modify the Windows Registry to change how your lock screen behaves. Always backup your registry before making changes.
To adjust the lock screen timeout (how long before the screen turns off), you’ll need to modify a registry key. Run Registry Editor by pressing Win+R and typing regedit.
Navigate to: HKEY_CURRENT_USER\Control Panel\Personalization\Desktop Slideshow
Create a new DWORD value named “ScreenSaverTimeout” and set it to your desired timeout in seconds.
You can also prevent your PC from sleeping while locked by adjusting power settings. This is useful for presentations or when monitoring processes. Access these settings through Control Panel > Power Options or by right-clicking the battery icon.
User Account Management
Windows 10 allows you to create and manage multiple user accounts on your device, which is essential for households or workplaces where different people use the same computer. The lock screen serves as the gateway to these accounts.
Creating and Managing User Accounts
To add a new user account in Windows 10, open the Settings app and select Accounts. From there, click on Family & other users. In the “Other users” section, select “Add someone else to this PC” to create a new account.
You can also manage existing accounts from this same screen. Each account can have different permissions – standard users or administrators. Administrator accounts have full control over the computer, while standard users have limited access.
To modify account settings, go to Settings > Accounts. Here you can change the account picture, password, and other details. You can also convert a Microsoft account to a local account or vice versa.
Switching Between Users From the Lock Screen
The Windows 10 lock screen displays all user accounts set up on your computer. To switch between accounts, simply click on the user icon you want to access and enter the password.
If you don’t see all user accounts, you might need to click the back arrow or select “Other user” on the sign-in screen. Windows remembers recently used accounts and displays them prominently.
For power users, there’s a hidden trick: you can access user management tools from the lock screen by clicking the accessibility icon and typing “lusrmgr.msc” in the command prompt that appears.
To customize how users appear on the lock screen, go to Settings > Accounts > Sign-in options and click on Change screen lock settings.
Frequently Asked Questions
Windows 10 lock screen has several customization options and security features that users often have questions about. Here are answers to some common questions to help you make the most of your lock screen.
How can I change the Wallpaper on my Windows 10 lock screen?
To change your Windows 10 lock screen wallpaper, start by clicking the Start menu and selecting Settings. Next, click on Personalization and then select Lock Screen from the left panel.
Under the Background dropdown menu, you can choose between Picture, Slideshow, or Windows Spotlight. If you select Picture, you can browse your files to pick an image or choose from the provided options.
For Slideshow, you can select an album or folder of images to rotate through on your lock screen.
What is the default location of Windows 10 lock screen images?
The default Windows 10 lock screen images are stored in the Windows system files. You can find them in C:\Windows\Web\Screen.
Additional lock screen images may be stored in C:\Windows\Web\Wallpaper\Windows. Microsoft also downloads some temporary images if you use Windows Spotlight.
These system images are protected, so if you want to use them elsewhere, it’s best to copy rather than move them.
What are the steps to protect my Windows 10 PC with a password lock screen?
To set up password protection on your Windows 10 lock screen, open Settings from the Start menu. Select Accounts, then Sign-in options from the left panel.
Under the Password section, click on “Add” if you haven’t set a password before, or “Change” if you want to update your existing password. Follow the on-screen instructions to create your password.
For additional security, you can also set up PIN, fingerprint recognition, or facial recognition if your device supports these features. If you forget your password, you can recover your account through Microsoft.
How can I set my Windows 10 lock screen with a 4k resolution background?
To set a 4k resolution background for your Windows 10 lock screen, first make sure you have a 4k image (3840×2160 pixels) saved on your computer. Go to Settings > Personalization > Lock screen.
Select “Picture” from the Background dropdown menu. Click the Browse button to find your 4k image file and select it.
For best results, make sure your display supports 4k resolution. Windows will automatically resize the image to fit your screen, but starting with a high-resolution image ensures the best quality.
What is the process for resetting the Windows 10 lock screen settings to default?
To reset your Windows 10 lock screen settings to default, open Settings from the Start menu. Go to Personalization > Lock screen.
In the Background dropdown menu, select Windows Spotlight to return to the default rotating images from Microsoft. This will remove any custom pictures or slideshows you’ve set up.
If you’ve made other customizations, such as changing quick status apps, you’ll need to manually remove those selections to fully return to default settings.
How do I configure Windows 10 to automatically lock after a period of inactivity?
To set up automatic locking in Windows 10, you’ll need to configure your screen saver settings. Open Control Panel and go to Appearance and Personalization.
Click on “Change screen saver” and set a time in the “Wait” box for how long your computer should be inactive before locking. Make sure to check the box that says “On resume, display logon screen.”
You can also set up automatic locking through Power Options. Go to Control Panel > System and Security > Power Options > Change plan settings > Change advanced power settings. Find “Power buttons and lid” and set “Require a password on wakeup” to On.