Connecting your laptop to a monitor can transform your work experience by giving you more screen space and better visual clarity. Whether you need a bigger display for work, gaming, or just watching videos, the process is simple and can be done in minutes. Connecting your laptop to a monitor typically requires just the right cable (HDMI, DisplayPort, or USB-C) that matches the ports on both your laptop and monitor.
Most laptops today automatically detect when an external monitor is connected and adjust settings accordingly. You can easily extend your desktop across both screens or mirror your laptop display to the monitor. Windows and Mac systems both have built-in tools to help you configure your display settings exactly the way you want them.
How to Connect a Laptop to a Monitor: Step-by-Step Guide
Connecting your laptop to an external monitor can expand your screen space, improve productivity, and create a better viewing experience. Here’s how to do it:
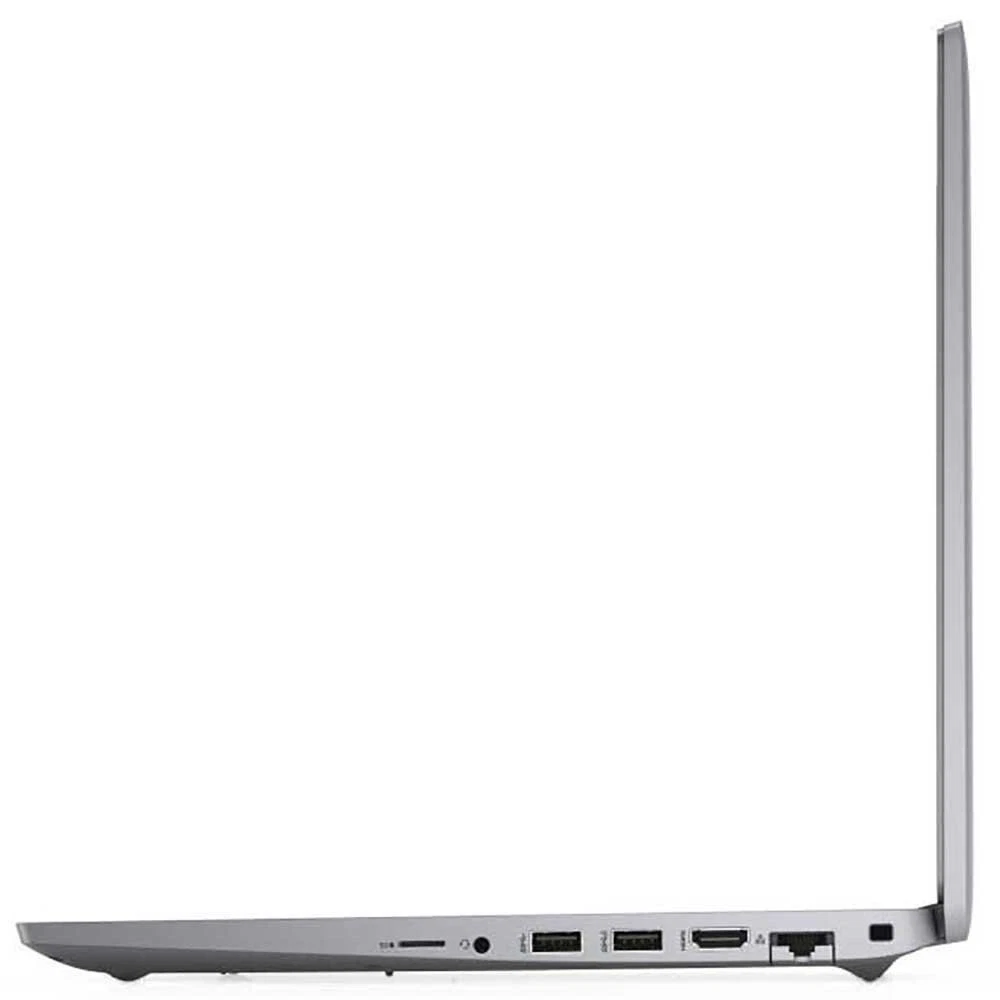
1. Check Your Laptop’s Video Output Ports
Look at the sides or back of your laptop for available video ports. Common ones include:
- HDMI – Most common for modern laptops and monitors
- USB-C / Thunderbolt – Found on newer laptops like MacBooks or Dell XPS
- DisplayPort (DP) – Used in high-end or gaming laptops
- Mini DisplayPort – Older MacBooks or Microsoft Surface devices
- VGA – Older, analog-only connection
Tip: If your laptop and monitor have different ports, you’ll need an adapter (e.g., USB-C to HDMI).
2. Identify the Input Port on the Monitor
Most monitors support:
- HDMI
- DisplayPort
- VGA
- DVI (older monitors)
Ensure the monitor has a compatible port or use the appropriate adapter.
3. Get the Right Cable
Depending on the ports, grab one of these:
- HDMI to HDMI
- USB-C to HDMI/DisplayPort
- DisplayPort to DisplayPort
- VGA to VGA (for older equipment)
4. Turn Off or Sleep Your Laptop (Optional but Recommended)
This can help avoid glitches or detection issues during the initial connection.
5. Connect the Cable
- Plug one end of the cable into your laptop.
- Plug the other end into the monitor.
If you’re using an adapter, connect it securely before plugging in the cable.
6. Turn On the Monitor
Make sure the monitor is powered on and set to the correct input source (HDMI, DP, etc.).
7. Wake or Power On Your Laptop
Your laptop should detect the monitor automatically. If not:
- Windows: Press
Windows + Pto bring up display options - Mac: Go to System Settings > Displays
8. Choose a Display Mode
On Windows, after pressing Windows + P, select:
- Duplicate – Mirror your laptop screen
- Extend – Use the monitor as an additional screen
- Second screen only – Use only the monitor
On Mac, under System Settings > Displays, you can:
- Mirror Displays
- Arrange them for extended desktop mode
9. Adjust Resolution and Layout
Fine-tune your settings:
- On Windows: Right-click the desktop > Display Settings
- On Mac: Go to System Settings > Displays
You can adjust resolution, scale, orientation, and screen arrangement.
10. Optional: Configure Audio Output
If your monitor has built-in speakers and supports audio:
- On Windows: Go to Sound Settings and choose the monitor as output
- On Mac: Go to System Settings > Sound > Output
You’re all set! Enjoy your new dual-screen (or external screen) setup.
Key Takeaways
- You only need to match the correct cable type to your laptop and monitor ports (typically HDMI, DisplayPort, or USB-C) for a quick connection.
- Most modern laptops automatically detect external monitors, but you can manually adjust display settings through your operating system.
- You can choose to extend your desktop across multiple displays or mirror your laptop screen depending on your specific needs.
Understanding the Connection Basics
Before connecting your laptop to a monitor, it’s important to identify what ports you have available and select the appropriate cable for your setup.
Types of Connection Ports
Most modern laptops come equipped with several types of video output ports. The most common is HDMI (High-Definition Multimedia Interface), which transmits both high-quality video and audio through a single cable.
Many newer laptops also feature USB-C ports, which can handle video output along with data transfer and power. Some USB-C ports support Thunderbolt 3 technology, offering even faster data transfer speeds and reliable video output to high-resolution monitors.
Older laptops might have VGA or DVI ports instead. These are being phased out but are still found on some business laptops and older monitors.
You can identify these ports by looking at the sides or back of your laptop. HDMI ports are narrow and typically labeled, while USB-C ports are small, oval-shaped connectors.
Choosing the Right Cable
The cable you need depends on the ports available on both your laptop and monitor. An HDMI cable is the most straightforward option if both devices have HDMI ports. This single cable will carry both video and audio signals.
If your laptop has a USB-C or Thunderbolt 3 port, you have several options:
- A USB-C cable connected to a USB-C monitor
- A USB-C to HDMI adapter plus an HDMI cable
- A USB-C to DisplayPort cable if your monitor uses DisplayPort
For the best performance, match the cable to your monitor’s capabilities. A 4K monitor will need a cable that supports 4K resolution. Thunderbolt 3 cables can support higher resolutions and refresh rates than standard HDMI in many cases.
When buying cables, check both length and quality. A 6-foot cable is sufficient for most setups, but longer cables might be needed depending on your workspace arrangement.
Setting Up the Monitor
Properly setting up your monitor is essential for a comfortable and productive work experience. The right position, connection method, and ergonomic adjustments can significantly impact your daily computer use.
Positioning Your Monitor
Place your monitor at eye level to maintain good posture. The top of the screen should be at or slightly below eye level when you’re sitting straight. This helps prevent neck strain during long work sessions.
Position the monitor about an arm’s length away (20-30 inches) from where you sit. This distance allows your eyes to focus comfortably without straining.
Consider the lighting in your workspace. Avoid placing the monitor directly in front of windows or bright lights that can cause glare. Use curtains or blinds if needed to control natural light.
For dual monitor setups, arrange them side by side with a slight inward angle, creating a gentle arc around your viewing position. Place your primary monitor directly in front of you and the secondary one to the side.
Connecting to the Laptop
Check what ports your laptop and monitor have before connecting them. Most modern laptops offer HDMI or USB-C connections for external monitors.
For HDMI connections:
- Locate the HDMI port on both devices
- Connect one end of the HDMI cable to your laptop
- Connect the other end to your external monitor
- Turn on the monitor and it should detect your laptop automatically
If your laptop has USB-C but no HDMI port, you can use a USB-C to HDMI adapter. Simply plug the adapter into your laptop’s USB-C port, then connect the HDMI cable to the adapter and monitor.
Older laptops and monitors might use VGA or DisplayPort connections. Make sure you have the right cable or adapter for your specific devices.
Adjusting the Stand and Ergonomics
Most desktop monitors come with adjustable stands. Take advantage of these features to create an ergonomic setup that works for you.
Height adjustment is crucial—position the monitor so you’re looking slightly downward at the screen. This helps reduce neck strain during long work sessions.
Tilt adjustment allows you to angle the screen to reduce glare. Usually, a slight tilt upward (5-15 degrees) provides the best viewing angle while minimizing reflection from overhead lights.
If your monitor has swivel capability, use it to easily share your screen with others or adjust for changing light conditions throughout the day.
For monitors with limited adjustment options, consider using a monitor stand or riser to achieve the proper height. Even a stack of books can work as a temporary solution to bring your screen to eye level.
Configuring Display Settings
Once you’ve connected your laptop to a monitor, you’ll need to configure your display settings to get the optimal viewing experience. Windows offers several options to customize how your screens work together.
Accessing Display Settings
To configure your monitor setup, you need to access the display settings in Windows. The quickest way is to right-click on your desktop and select “Display settings” from the context menu.
You can also access display settings through the Windows Settings app. Go to Start > Settings > System > Display. This opens the main display configuration panel where you’ll see a visual representation of your monitors.
If Windows doesn’t detect your external monitor, check that all cables are properly connected. You might need to press the Windows key + P to open the projection menu and select an option like “Extend” or “Duplicate.”
Adjusting Resolution and Refresh Rate
Setting the correct resolution and refresh rate ensures the best image quality on your external monitor. Here’s how to optimize these settings:
- Go to Display Settings
- Select the monitor you want to adjust
- Scroll down to find “Display resolution” and select the recommended option
For most modern monitors, 1080p (1920×1080) is the standard resolution, while many newer models support 4K (3840×2160). Always choose the native resolution of your monitor for the sharpest image.
To adjust the refresh rate:
- Scroll down to “Advanced display settings”
- Select “Display adapter properties”
- Go to the “Monitor” tab
- Choose your desired refresh rate from the dropdown menu
Higher refresh rates (60Hz, 120Hz, 144Hz) provide smoother motion, especially for gaming or video editing.
Setting Primary and Secondary Displays
Designating which monitor serves as your primary display affects where your main taskbar and startup apps appear.
To set your primary display:
- In Display Settings, identify your monitors in the diagram
- Select the monitor you want as primary
- Scroll down and check the box that says “Make this my main display”
Your primary screen will be labeled as “1” in the display diagram. The taskbar will appear on this screen by default, though you can configure it to show on all displays through taskbar settings.
If you’re giving a presentation, you might want to make the external monitor your primary display. For everyday work, many users prefer their laptop screen as primary and use the external monitor for additional workspace.
Arranging Multiple Displays
When using multiple displays with your laptop, you can arrange how they relate to each other in virtual space.
In the Display Settings window, you’ll see a diagram showing numbered boxes representing your screens. You can drag these boxes to match the physical arrangement of your monitors. This ensures your mouse moves naturally between screens.
You can also choose how Windows uses your displays:
- Extend: Spreads your desktop across all screens (most common)
- Duplicate: Shows the same content on all screens
- Show only on 1/2: Uses just one display
The “Identify” button helps you match the numbers in the diagram to your physical monitors by briefly displaying numbers on each screen.
You can also adjust scaling for each monitor separately if text appears too small or large on your external display.
Troubleshooting Common Issues
When your laptop won’t connect properly to your monitor, several common problems might be occurring. These issues typically involve connection failures, display quality problems, or incorrect screen arrangements.
Problems with Connection
If your monitor isn’t being detected by your laptop, start by checking the physical connections. Make sure all cables are securely plugged in at both ends.
Try pressing the Windows key + P to open display settings and select the Extend option. This common fix often resolves detection problems immediately.
If you’re using a docking station, try resetting the dock by unplugging it from power for 30 seconds.
Check for outdated drivers on your laptop. In some cases, a driver issue might prevent proper detection. Update your video card drivers through Device Manager or the manufacturer’s website.
Try different ports on your laptop if available. Sometimes a specific HDMI port or DisplayPort might malfunction while others work fine.
Issues with Display Clarity
Poor display quality often stems from incorrect resolution settings. Right-click on your desktop and select Display Settings to adjust the resolution.
Match the resolution to your monitor’s native specifications for the clearest image. Using a non-native resolution can cause blurriness or distortion.
Color calibration problems can make images look washed out or too dark. Access color calibration through Windows Display Settings to adjust brightness, contrast, and gamma levels.
If text appears fuzzy, check your scaling settings. Windows sometimes applies incorrect scaling percentages that can blur text. Try adjusting to 100% scaling as a test.
Flickering screens often indicate refresh rate problems. Ensure your refresh rate matches what your monitor supports in the Advanced Display Settings.
Incorrect Display Arrangement
When using multiple displays, Windows might arrange them incorrectly. Access Display Settings to drag and rearrange the monitor positions to match your physical setup.
Check which display is set as your main display. Your taskbar and desktop icons appear on the main display by default. Right-click on the desired monitor in Display Settings and select “Make this my main display.”
Adjust extended desktop settings to match your workspace. If your external monitor is to the left of your laptop in real life, arrange it that way in display settings.
Try different display modes using Windows key + P:
- Duplicate: Shows the same content on both screens
- Extend: Spreads your desktop across all screens
- Second screen only: Turns off laptop display
Mismatched display orientations can be fixed in Display Settings. If your monitor is mounted vertically, change the orientation from Landscape to Portrait.
Advanced Setup Options
Connecting your laptop to external displays offers significant productivity benefits beyond basic setups. Advanced configurations can transform your workspace into a professional command center.
Utilizing a Docking Station
Docking stations provide a convenient solution for connecting multiple peripherals to your laptop with a single cable. Most modern docking stations connect via USB-C or Thunderbolt 3 ports, offering fast data transfer speeds and video output capabilities.
When choosing a docking station, look for:
- Port variety (HDMI, DisplayPort, USB-A, Ethernet)
- Power delivery capabilities to charge your laptop
- Compatibility with your specific laptop model
To set up your docking station, simply connect it to power, attach your monitor cables to the appropriate ports, and connect to your laptop using the primary cable. Many docking stations allow you to keep your laptop lid closed while working on external displays.
This single-cable solution eliminates cable clutter and creates a clean, efficient workspace.
Managing Multiple Monitors
You can dramatically increase your productivity by connecting two or more monitors to your laptop. Windows 10/11 makes setting up multiple displays relatively straightforward.
After physically connecting your monitors, you’ll need to configure how they work together:
- Right-click on your desktop and select Display Settings
- Under the Multiple Displays section, choose your preferred arrangement:
- Extend (different content on each screen)
- Duplicate (same content on all screens)
- Show only on specific displays
You can also customize the arrangement by dragging the monitor icons to match their physical positions. This helps with cursor movement between screens.
For optimal productivity, consider assigning different programs to specific monitors. You might keep communication tools on one screen while working on your main project on another.
Selecting the Right Monitor for Your Needs
Choosing the right external monitor involves understanding display technologies, resolution options, and connection types that work with your laptop. These factors directly impact your viewing experience and productivity.
Differences in Monitor Technologies
Modern monitors come in several panel types, each with distinct advantages. IPS panels offer excellent color accuracy and wide viewing angles, making them ideal for design work and media consumption.
VA panels provide better contrast ratios and deeper blacks, perfect for watching movies or gaming in darker environments. They typically cost less than IPS monitors but may have slower response times.
TN panels deliver the fastest response times, which gamers appreciate, but they sacrifice color accuracy and viewing angles. These are usually the most affordable option.
OLED monitors display perfect blacks and vibrant colors but come at a premium price point and may be susceptible to burn-in over time.
When shopping for an external monitor, consider how you’ll primarily use it to determine which technology best suits your needs.
Resolution and Size Considerations
Resolution directly affects image clarity and workspace. Here’s a quick comparison:
| Resolution | Common Name | Best For |
|---|---|---|
| 1920 x 1080 | Full HD (1080p) | General use, basic work |
| 2560 x 1440 | QHD | Productivity, gaming |
| 3840 x 2160 | 4K UHD | Design, video editing |
For productivity, a 24-27 inch monitor with 1080p resolution works well. If you work with detailed graphics or multiple windows, consider a larger monitor with higher resolution.
The sweet spot for many users is a 27-inch display with 1440p resolution, balancing screen space and clarity. If you need maximum detail, a 4K monitor provides crisp images but requires a more powerful laptop to drive it properly.
Consider your desk space and viewing distance when selecting monitor size. Larger isn’t always better if you sit close to your screen.
Input Source Selection
Your laptop’s available ports will influence which monitor you can connect. Check your laptop for these common ports:
- HDMI: Most common connection, supports audio and video
- DisplayPort: Higher bandwidth than HDMI, good for high refresh rates
- USB-C/Thunderbolt: Modern connection that can also charge your laptop
- VGA/DVI: Older connections found on some laptops and monitors
If your laptop lacks the right port for your preferred monitor, you’ll need an adapter. For example, many ultrabooks only have USB-C ports, requiring an adapter for HDMI monitors.
Many modern monitors include multiple input sources, allowing you to connect different devices simultaneously. This is helpful if you want to switch between your laptop and a desktop computer without changing cables.
Frequently Asked Questions
Connecting a laptop to a monitor involves several options depending on your available ports and preferences. Here are answers to common questions about setting up external displays with your laptop.
What steps are required to set up a dual-screen workspace using a laptop and an external monitor?
To set up a dual-screen workspace, first connect your monitor to your laptop using an appropriate cable (HDMI, DisplayPort, USB-C, etc).
Once physically connected, go to your display settings. On Windows, right-click on your desktop and select “Display settings.” On Mac, go to System Preferences and select “Displays.”
Choose how you want the screens to work together. You can select “Extend” to use the monitor as additional screen space or “Duplicate” to show the same content on both screens.
Adjust the resolution and orientation of each display to your preference. You can also arrange the position of the screens to match their physical setup.
How can one connect a laptop to a monitor using a USB connection?
You can connect a laptop to a monitor via USB using a USB-to-HDMI or USB-to-DisplayPort adapter. This is useful for laptops with limited ports.
For newer laptops with USB-C ports that support video output, you can use a USB-C to HDMI or DisplayPort cable directly.
USB display adapters are another option. These devices let you connect multiple monitors through USB ports, though they might not support high resolutions or refresh rates for gaming.
What is the process for connecting a laptop to a monitor via HDMI?
Identify the HDMI port on your laptop and monitor. Most modern laptops and monitors include HDMI ports for easy connection.
Connect an HDMI cable between your laptop and monitor. Make sure both devices are powered off before connecting for safety.
Turn on both devices. Your laptop should automatically detect the external monitor. If it doesn’t, press Windows key + P (on Windows) to access display options.
Select your preferred display mode: extend, duplicate, or use only the external monitor. You can also adjust resolution and other display settings as needed.
Can a laptop be linked to an external display wirelessly, and if so, how?
Yes, you can connect your laptop to a monitor wirelessly using several technologies. Miracast is built into many Windows 10 and 11 devices for wireless display connections.
To use Miracast, press Windows key + K to open the Connect panel, then select your compatible wireless display. Your monitor must support Miracast or have a Miracast adapter.
Apple users can use AirPlay to connect to Apple TV or AirPlay-compatible smart TVs. Select the AirPlay icon in the menu bar and choose your display.
Third-party options like Chromecast or wireless HDMI kits also work well. These solutions might introduce slight latency, making them better for presentations than gaming.
How can a user configure an external monitor when using a laptop with Windows 11?
In Windows 11, right-click on the desktop and select “Display settings” or use the Windows key + I shortcut and navigate to System > Display.
Under the Multiple displays section, choose how you want your screens to function. Options include extend, duplicate, or show on one display only.
Arrange your displays by dragging the numbered boxes to match their physical arrangement. You can also set one display as your main screen by checking “Make this my main display.”
Adjust the scale, resolution, and orientation settings for each monitor individually to optimize your viewing experience and workspace.
What alternatives exist for connecting a laptop to a monitor when there is no HDMI port available?
If your laptop lacks an HDMI port, you can use adapters based on your available ports. For laptops with DisplayPort, DVI, or VGA ports, use the appropriate adapter cables to connect to your monitor.
USB-C is increasingly common on newer laptops. Many USB-C ports support video output, allowing you to use USB-C to HDMI or DisplayPort adapters.
Docking stations are excellent for laptops with limited ports. Connect your laptop to the dock, which then offers multiple video output options and additional USB ports.
For older laptops with only VGA outputs, VGA-to-HDMI converters are available, though image quality may not match direct digital connections like HDMI or DisplayPort.