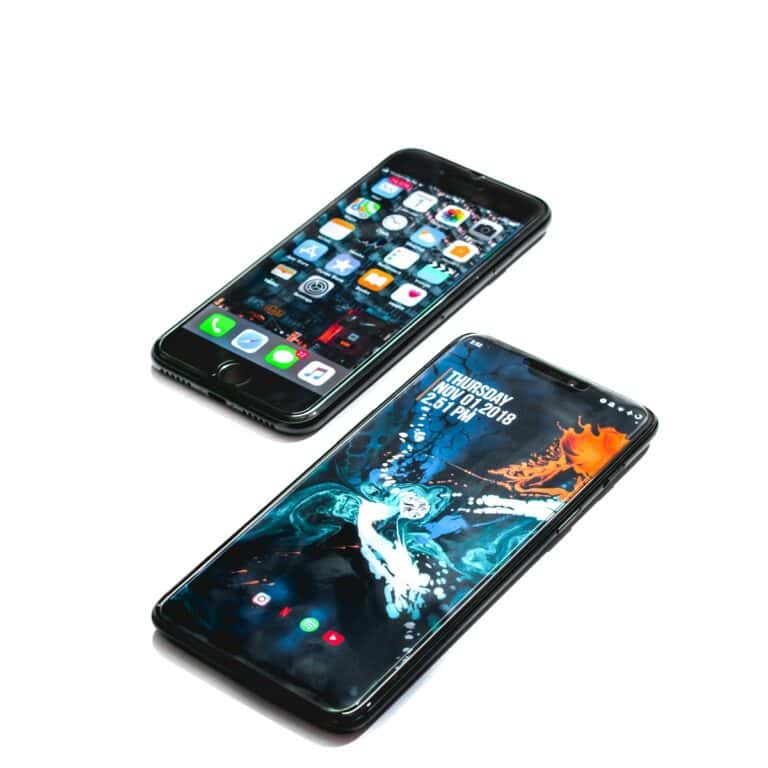
Setting up iCloud email on your iPhone gives you access to Apple’s reliable email service that syncs across all your devices. The setup process is simple and only takes a few minutes to complete. To create a new iCloud email address, go to Settings > [your name] > iCloud, then tap on Mail or iCloud Mail and follow the on-screen instructions.
Having an iCloud email address offers several benefits beyond just sending and receiving messages. It integrates seamlessly with your Apple ID, allowing you to manage contacts, calendars, and other personal information in one place. Plus, with iCloud+, you can even customize your email with a personal domain name for a more professional look.
How To Set Up iCloud Email on iPhone
Setting up your iCloud email on an iPhone is quick and seamless, especially if you’re already signed in with your Apple ID. iCloud Mail lets you send, receive, and organize email across Apple devices. Here’s how to get it running:
Method 1: Use Your Apple ID to Enable iCloud Mail
If you’re already signed into your Apple ID on your iPhone:
- Open Settings
- Tap your Apple ID banner at the top (your name)
- Go to iCloud
- Tap iCloud Mail
- If prompted, turn on Use on this iPhone
- If you don’t have an iCloud email yet, you’ll be asked to create one (e.g., [email protected])
✅ Once enabled, your Mail app will automatically be linked to your iCloud inbox.
Method 2: Manually Add an iCloud Email Account
If you’re using a different Apple ID or want to manually add another iCloud email:
- Open Settings
- Scroll down and tap Mail
- Tap Accounts
- Tap Add Account
- Select iCloud
- Enter your iCloud email and password
- Follow the prompts to enable Mail and any other iCloud services (Contacts, Calendars, Notes, etc.)
How To Access iCloud Mail
- Open the Mail app on your iPhone
- Tap Mailboxes in the top-left corner
- You’ll see your iCloud inbox listed—tap it to view and manage email
Troubleshooting iCloud Mail Setup
| Problem | Fix |
|---|---|
| Can’t create iCloud email | Must be signed into Apple ID and have iCloud Mail enabled |
| Email not syncing | Check Settings > Mail > Accounts > iCloud and re-enable Mail |
| Forgot iCloud password | Go to Settings > Your Name > Password & Security > Change Password |
| Mail app not showing inbox | Try restarting the iPhone or toggling Mail off and on again |
Once you’ve completed the steps above, you’re all set—your iCloud email will sync with your iPhone’s Mail app and stay updated across any other Apple devices using the same account.
Key Takeaways
- Setting up iCloud Mail requires going to iPhone Settings, tapping your Apple ID, selecting iCloud, and enabling the Mail option.
- Your iCloud email automatically syncs across all Apple devices connected to the same Apple ID.
- iCloud Mail integrates with iPhone’s native Mail app and provides 5GB of free storage for emails and attachments.
Requirements for iCloud Email Setup
Before setting up an iCloud email on an iPhone, users need to ensure they meet several important prerequisites. These include having proper account credentials, compatible devices, and a stable internet connection.
Verifying iCloud Account and Apple ID
Users must have an active Apple ID to create or access an iCloud email address. This Apple ID serves as the foundation for all Apple services, including iCloud Mail.
If a user already has an Apple ID but hasn’t set up an iCloud email yet, they can add one through their device settings. For users without an Apple ID, they’ll need to create a new Apple account first.
Two-factor authentication should be enabled on the Apple ID for security purposes. This provides an extra layer of protection when accessing iCloud Mail from new devices.
Users should also ensure they remember their Apple ID password. Without it, setting up iCloud Mail will not be possible.
Ensuring Device Compatibility
iCloud Mail works seamlessly on modern iOS devices, but compatibility is essential. iPhones must run iOS 10.3 or later to support the latest iCloud Mail features.
For optimal performance, an iPhone 6s or newer model is recommended. Older models may experience slower performance when using iCloud Mail.
iPad users can also set up iCloud Mail through similar steps, requiring iPadOS 10.3 or later.
Mac users have the option of accessing their iCloud Mail through the Mail app or directly through the iCloud website.
Storage space on the device doesn’t significantly impact iCloud Mail setup, as emails are primarily stored in the cloud.
Checking Internet Connectivity
A stable internet connection is crucial for setting up and using iCloud Mail. WiFi is recommended for the initial setup process to ensure uninterrupted configuration.
Users should verify their connection by opening Safari or another app that requires internet access before beginning the setup process.
For those setting up on cellular data, at least 3G connectivity is required, though 4G/LTE or 5G is preferable for faster synchronization.
If connectivity issues arise during setup, users should toggle Airplane Mode on and off or restart their device to refresh the connection.
iCloud Mail synchronizes across devices when connected to the internet, allowing users to access their emails from any Apple device using the same Apple ID.
Creating an iCloud Email Address
Setting up an iCloud email address gives Apple users a personalized way to communicate while integrating seamlessly with other Apple services. This process involves choosing a unique email name, completing a simple sign-up procedure, and understanding the policies that govern iCloud mail usage.
Choosing an iCloud Email Name
When selecting an iCloud email name, users should aim for something memorable yet professional. The email will end with “@icloud.com” and becomes part of the user’s Apple ID credentials.
To begin choosing an email name, users need to:
- Consider using a combination of their name or initials
- Avoid using special characters (only periods are allowed)
- Check availability of their preferred name
- Think about privacy implications of using full names
Apple will indicate if the chosen name is already taken. If so, it may suggest alternatives or users can try adding numbers or slight variations to their preferred name.
Many people use their iCloud email for both personal and professional purposes, so selecting something appropriate for both contexts is important.
Completing the Sign Up Process
To set up iCloud Mail on an iPhone, users should:
- Go to Settings
- Tap their name at the top
- Select iCloud
- Toggle on Mail
- Follow the on-screen instructions
If users don’t yet have an iCloud email, they’ll be prompted to create one during this process. After selecting an available email name, Apple will confirm the choice.
Users should create a strong password if setting up a new Apple ID. For those who already have an Apple ID but are adding an iCloud email, their existing password will apply.
Once completed, the new email address becomes active immediately and appears in the Mail app on the iPhone.
Understanding iCloud Email Policies
Apple maintains specific policies for iCloud email that users should know. Each Apple ID can have one primary iCloud email address and up to three aliases.
iCloud email includes:
- 5GB of free storage (shared with other iCloud services)
- Spam and junk mail filtering
- End-to-end encryption for enhanced privacy
- Integration with all Apple devices
Users should check their new email regularly, as Apple sends important account notifications to this address. Inactive accounts may be disabled after extended periods without usage.
For those wanting more personalization, iCloud+ subscribers can use custom domain names with their iCloud email. This feature allows users to maintain professional branding while enjoying iCloud’s security benefits.
Adding iCloud Email to Your iPhone
Setting up iCloud Mail on your iPhone provides seamless access to your emails across all Apple devices. The process is straightforward and offers several benefits for iPhone users who want to keep their communications organized.
Syncing Your iCloud Email
To begin syncing your iCloud email with your iPhone, users need to ensure their Apple ID is properly configured. When iCloud Mail is enabled, emails automatically synchronize between all devices signed in with the same Apple ID.
The synchronization happens in real-time, allowing users to start composing an email on their iPhone and finish it later on their Mac or iPad. This seamless integration is one of the key advantages of using iCloud Mail.
To verify sync settings:
- Go to Settings
- Tap on the user’s name at the top
- Select iCloud
- Ensure the Mail toggle is switched on
Users can also customize sync options such as how far back emails should be downloaded and whether to include attachments when syncing.
Using the Mail App for Setup
The iPhone’s built-in Mail app offers a simple way to set up an iCloud email account. Users who haven’t yet created an iCloud email address can do so directly from their device.
To set up iCloud Mail through the Mail app:
- Open Settings on the iPhone
- Scroll down and tap Mail
- Select Accounts
- Tap Add Account
- Choose iCloud from the list of options
After selecting iCloud, users will need to enter their Apple ID credentials. The system will then verify the information and enable Mail services.
If users already have an Apple ID but haven’t set up an iCloud email address, they’ll be prompted to create one during this process. The newly created email will end with “@icloud.com”.
Configuring Settings on iPhone
Once iCloud Mail is activated, users can customize various settings to enhance their email experience. The Mail app offers several configuration options specifically for iCloud accounts.
Important settings to consider adjusting:
- Push notifications for new emails
- Signature text that appears at the bottom of outgoing messages
- Mail fetch schedule for battery optimization
- Default email account settings if multiple accounts are used
To access these settings, navigate to Settings > Mail and scroll through the available options. Users can also set up advanced features like VIP senders, email threading, and custom notification sounds.
For security purposes, it’s recommended to enable two-factor authentication for the Apple ID associated with the iCloud email. This provides an additional layer of protection for sensitive communications and personal information.
Setting Up iCloud Email on Other Devices
iCloud email works seamlessly across multiple devices and platforms. You can access your messages anywhere by configuring your account on various devices using the correct settings.
Adding to iPad and Mac
Setting up iCloud email on an iPad follows a similar process to iPhone. Go to Settings > [your name] > iCloud and ensure Mail is toggled on. If you haven’t added your Apple ID to the iPad yet, you’ll need to do that first through Settings.
On a Mac, the process is straightforward. Open System Preferences (or System Settings on newer macOS), click Apple ID, then select iCloud from the sidebar. Make sure Mail is checked.
The Mail app on Mac will automatically configure itself to work with iCloud email. Users can check their settings by opening Mail > Settings > Accounts and selecting their iCloud account.
Integrating with Outlook and Windows PC
Windows users can access iCloud email through Outlook or other email clients. They’ll need the following server settings:
Incoming Mail Server (IMAP):
- Server name: imap.mail.me.com
- Port: 993
- Requires SSL: Yes
Outgoing Mail Server (SMTP):
- Server name: smtp.mail.me.com
- Port: 587
- Requires TLS: Yes
To set up in Outlook, go to File > Add Account. Choose Manual setup, then select POP or IMAP. Enter your iCloud email address, password, and the server settings above.
Apple’s iCloud for Windows app simplifies this process by automatically configuring Outlook when installed.
Connecting to Third-Party Apps
Many third-party email apps support iCloud email through IMAP settings. Users will need their full iCloud email address and app-specific password if they have two-factor authentication enabled.
To generate an app-specific password:
- Visit iCloud.com/settings
- Sign in with Apple ID
- Go to Security > Generate Password
Popular email apps like Gmail, Spark, and Edison Mail all support iCloud email accounts. Users should enter the same IMAP and SMTP server information listed above.
Some apps may require additional verification steps. If users encounter problems, checking that IMAP access is enabled in their iCloud settings may resolve connection issues.
Managing Contacts, Calendars, and More
iCloud integration allows your iPhone to keep important personal information synchronized across all your devices. Setting up these features properly ensures you’ll always have access to your contacts, schedule, and important files.
Syncing Contacts Across Devices
To enable contact syncing, go to Settings > [your name] > iCloud. Toggle on the Contacts option to sync all your contacts with iCloud. When turned on, any changes made to contacts on your iPhone will automatically appear on other Apple devices signed into the same iCloud account.
For users with multiple accounts, iPhone allows managing contacts from various sources. To check which accounts are syncing contacts:
- Open Settings > Apps > Contacts
- Tap Accounts to view all connected services
- Select any account to adjust sync settings
If contacts aren’t syncing properly, ensure that iCloud contact sync is enabled on each device. Users can also merge duplicate contacts by selecting them and choosing the Link Contacts option.
Integrating Calendars and Reminders
Calendar and Reminder integration works similarly to contacts. Enable these services in Settings > [your name] > iCloud by toggling on Calendars and Reminders.
iPhone users can view events from multiple accounts in a single calendar view. To customize which calendars appear:
- Open the Calendar app
- Tap Calendars at the bottom
- Select which calendars to display
Calendar colors can be customized to easily distinguish between work, personal, and other event types. For reminders, users can create different lists for various purposes like groceries, work tasks, or personal goals.
Time-sensitive reminders can be set with location alerts that notify users when arriving at or leaving specific places. This feature makes the reminders system particularly useful for location-based tasks.
Accessing Notes and iCloud Drive
The Notes app syncs through iCloud when enabled in Settings > [your name] > iCloud. This allows for creating, editing, and accessing notes across all devices. Notes can include text, images, scanned documents, and even handwritten content.
iCloud Drive provides file storage that’s accessible from any device. To enable:
- Go to Settings > [your name] > iCloud
- Turn on iCloud Drive
- Choose which apps can store documents in iCloud
Files stored in iCloud Drive can be accessed through the Files app on iPhone. Users can download files for offline access by tapping the download icon. This ensures important documents are available even without an internet connection.
For efficient storage management, iPhone users can optimize storage settings to automatically remove downloaded files when space is needed while keeping them accessible in iCloud.
Security and Privacy Configuration
Protecting your iCloud email requires specific security measures and privacy settings. These features help safeguard your personal information while maintaining convenient access to your email across devices.
Understanding App-Specific Passwords
App-specific passwords provide an extra layer of security for your iCloud account. These are special passwords that allow specific apps to access your iCloud information without using your main password.
When you connect third-party email apps to your iCloud account, Apple requires you to use app-specific passwords instead of your primary iCloud password. This prevents unauthorized apps from gaining complete access to your account.
To create an app-specific password:
- Visit Apple ID account page
- Sign in with your Apple ID
- Go to the “Security” section
- Click “Generate Password” under App-Specific Passwords
- Name the password (identify which app it’s for)
- Use the generated password in the third-party app
These passwords can be revoked individually if a device is lost or compromised without changing your main password.
Setting Up Two-Factor Authentication
Two-factor authentication (2FA) is crucial for protecting iCloud accounts. It requires both your password and a verification code to access your account.
When someone tries to sign in to your iCloud from a new device, they’ll need:
- Your password
- A six-digit verification code sent to your trusted devices
To enable 2FA on iPhone:
- Open Settings
- Tap your name at the top
- Select “Password & Security”
- Tap “Turn On Two-Factor Authentication”
- Follow the on-screen prompts
This protection ensures that even if someone discovers your password, they still can’t access your account without physical access to your trusted devices or phone number.
Privacy Settings and Access Controls
iCloud offers several privacy features that help control who can see your email activity and personal information.
Mail Privacy Protection prevents senders from knowing when you open their emails. It also hides your IP address so senders can’t link it to your other online activity or determine your location.
To enable Mail Privacy Protection:
- Go to icloud.com/mail and sign in
- Click the Settings button at the top of the Mailboxes list
- Choose “Settings” from the dropdown menu
- Turn on Mail Privacy Protection
Users can also control which apps have access to iCloud data. This granular control helps prevent unwanted data sharing between services and limits potential privacy breaches.
In the iCloud settings, reviewers can see exactly which apps are using storage and revoke access as needed.
Email Server Information
Setting up iCloud email on your iPhone requires accurate server information for proper communication between your device and Apple’s mail servers. These settings ensure emails are sent and received correctly.
Incoming and Outgoing Mail Server Details
When manually configuring iCloud Mail on an iPhone, users need specific server information. The iCloud Mail incoming server (IMAP) is imap.mail.me.com with port 993 requiring SSL encryption. This server handles all incoming messages to your iCloud email account.
For sending emails, the outgoing mail server (SMTP) is smtp.mail.me.com with port 587 and TLS encryption required. Both servers require authentication using your Apple ID credentials.
These servers work together to provide seamless email functionality. The incoming server stores and retrieves your messages, while the outgoing server ensures your emails reach their intended recipients.
Adjusting IMAP and SMTP Settings
IMAP settings control how emails are synchronized between your device and the server. When configuring IMAP settings for iCloud, make sure SSL is enabled for secure communication.
Users can adjust the mailbox behaviors, including:
- Check frequency: How often your device checks for new mail
- Mail days to sync: How many days of emails to keep on your device
- Message size limits: Maximum download size for attachments
For SMTP configuration, authentication must be enabled using your Apple ID and password. Some email clients might require specific authentication methods like OAuth or password authentication.
Advanced users can modify timeout settings and connection parameters for troubleshooting connectivity issues with iCloud mail servers.
Troubleshooting Common Issues
Setting up iCloud email on your iPhone may sometimes involve unexpected challenges that can prevent proper functionality. These issues typically fall into three main categories that users should know how to address.
Recovering Lost Email Accounts
If you’re unable to access your iCloud email account, first check if your iCloud Mail service is enabled. Go to your iPhone’s Settings, tap your name, then select iCloud. Look for Mail under “Apps Using iCloud” and make sure it’s turned on.
Sometimes users find they can’t create a new iCloud email address. This often happens due to account setup issues. If you don’t see the option to create an @iCloud.com address, try signing out of iCloud completely from your device and signing back in.
For those who recently changed their Apple ID password, remember to update this information in your Mail settings as well. Otherwise, authentication failures will prevent access to your iCloud email.
Resolving Sync Problems
When iCloud Mail isn’t syncing properly, try these proven solutions:
- Check your internet connection – Poor connectivity often causes sync failures
- Update iOS – Outdated software can conflict with iCloud services
- Restart Mail app – Close the app completely and reopen it
Another effective troubleshooting step is to disable and re-enable iCloud Mail. This refreshes your mail settings and fixes many common bugs. Go to Settings > your name > iCloud, turn Mail off, wait 30 seconds, then turn it back on.
If emails aren’t updating across your devices, check that “Push” is enabled in Settings > Mail > Accounts > Fetch New Data.
Seeking Help from Tech Support
When self-troubleshooting doesn’t resolve iCloud Mail issues, Apple’s support channels offer specialized assistance. Start with the Apple Support website where you’ll find comprehensive guides addressing specific iCloud Mail problems.
For direct assistance, contact Apple Support through:
- The Support app on your iPhone
- Phone support at 1-800-APL-CARE
- Apple Store Genius Bar appointments
Before contacting support, gather relevant information including:
- Your Apple ID
- iOS version
- When the problem started
- Error messages you’ve encountered
Taking screenshots of error messages can help support staff diagnose the issue more efficiently. Remember that Apple will never ask for your password, so be cautious about sharing sensitive information.
Alternatives to iCloud Email
While Apple’s iCloud email provides seamless integration with Apple devices, several alternatives offer different features that might better suit your needs. These options can be used instead of or alongside your iCloud account depending on your preferences.
Comparing iCloud With Gmail and Yahoo
Gmail stands out as one of the most popular alternatives to iCloud email. It offers 15GB of free storage compared to iCloud’s basic 5GB. Gmail also provides powerful search capabilities and excellent spam filtering.
One important distinction is privacy. Apple emphasizes user privacy with iCloud, while Gmail scans emails to deliver personalized ads. This makes iCloud a better choice for privacy-conscious users.
Yahoo Mail remains another viable option with 1TB of storage. It features a clean interface similar to iCloud but offers more robust organization tools.
For users seeking complete privacy, Fastmail provides an alternative that doesn’t track user behavior and gives more control over personal data.
Using iCloud Email Alongside Other Email Accounts
The iPhone Mail app supports multiple email accounts simultaneously. Users can add various email services including Gmail, Yahoo, and Microsoft Exchange alongside iCloud by going to Settings > Mail > Accounts > Add Account.
This multi-account approach offers several benefits:
- Separate personal and professional communications
- Maintain access to existing email history
- Use specialized features from different providers
Users can even set up their Mail app without iCloud by adjusting iCloud settings in System Preferences. This gives flexibility to those who prefer other email services.
For Apple ID purposes, many users create a dedicated iCloud email, while others use third-party email addresses. With iCloud+, subscribers can generate random forwarding addresses for enhanced privacy.
Frequently Asked Questions
Setting up iCloud email on an iPhone can sometimes raise questions about the process. These common inquiries address everything from account creation to troubleshooting connection issues.
How can I create an iCloud email account on my iPhone without an existing Apple ID?
Users cannot create a standalone iCloud email without first having an Apple ID. The process requires setting up an Apple ID which then enables iCloud email creation.
To create both an Apple ID and iCloud email, go to Settings, tap “Sign in to your iPhone,” and select “Don’t have an Apple ID or forgot it?” Then follow the prompts to create an account.
After setting up the Apple ID, return to Settings > Apple ID > iCloud and toggle on Mail to activate the iCloud email service.
What steps are required to integrate iCloud email with the Mail app on an iPhone?
Integrating iCloud email with the Mail app requires just a few simple steps. First, users should go to Settings, tap their name, and select iCloud.
Next, they should tap Mail (or iCloud Mail) and toggle the switch to the ON position. This activates iCloud Mail on the device.
The Mail app will automatically configure to display iCloud email alongside any other email accounts already set up on the device.
Why am I unable to configure iCloud email on my iPhone, and how can I troubleshoot this issue?
Configuration problems often stem from Apple ID sign-in issues or network connectivity problems. First, users should verify they’re signed in correctly to their Apple ID through Settings.
Network issues can be resolved by checking the internet connection, toggling Airplane mode on and off, or restarting the device. Sometimes there’s an error during the setup process that requires these steps.
If problems persist, checking for iOS updates or signing out of the Apple ID and signing back in can resolve persistent configuration issues.
How do you activate iCloud Mail after creating a new iCloud email address on an iPhone?
After creating a new iCloud email address, activation requires toggling on the Mail service. Users should navigate to Settings > [their name] > iCloud.
From there, they should tap on iCloud Mail or simply Mail and ensure the toggle switch is turned ON. This enables the Mail service for that iCloud account.
The activation process may take a few minutes to complete, after which the iCloud email will appear in the iPhone’s Mail app.
Is there a way to access my iCloud email account directly through the iPhone’s Mail app?
Yes, once properly configured, iCloud email integrates seamlessly with the built-in Mail app. There’s no need to download separate applications to access iCloud email.
After setup, the Mail app automatically displays iCloud emails alongside messages from other configured accounts. Users can distinguish between accounts using the account badges or by checking the “From” field when composing messages.
The Mail app provides full functionality for iCloud email, including sending, receiving, organizing, and searching through iCloud messages.
Where can I find the settings to input my iCloud email credentials on my iPhone?
The iCloud email credentials are managed through the Apple ID settings. Users should go to Settings and tap on their name at the top of the screen.
From there, selecting iCloud and then Mail provides access to all iCloud email settings. Unlike third-party email services, users don’t need to manually enter server information or ports.
If users have multiple email accounts, they can manage all email settings, including iCloud, through Settings > Mail > Accounts.