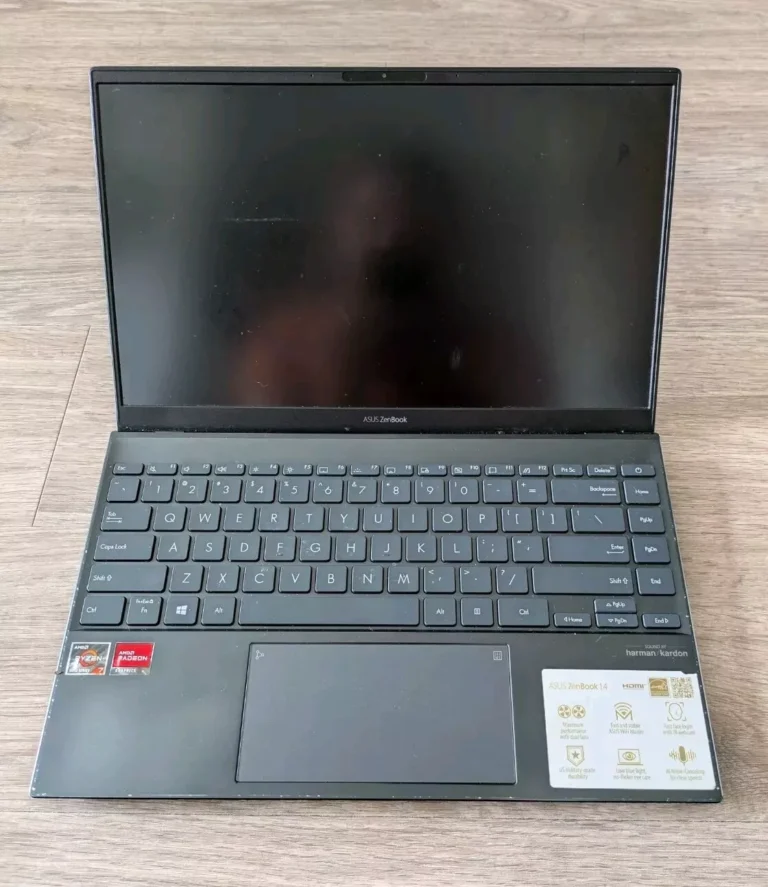
Taking screenshots on your laptop is a simple skill that can make your digital life much easier. Whether you need to save information for later, show someone what you’re seeing on your screen, or document an error message, knowing how to capture your screen is essential. On Windows laptops, you can quickly take a screenshot by pressing the Windows logo key + Shift + S to open the Snipping Tool, or by using the Print Screen (PrtSc) key to capture the entire screen.
Different laptop brands and operating systems offer various methods for taking screenshots. Apple Mac users can press Command + Shift + 3 to capture the entire screen, or Command + Shift + 4 to select a specific area. Windows users have options ranging from the dedicated Snipping Tool to simple keyboard shortcuts that make the process quick and painless.
Screenshot on a Laptop: The Ultimate Guide
Taking a screenshot is one of the most useful skills for anyone working on a laptop—whether you want to save a memorable moment from a video call, capture an error message, or share a part of your screen with colleagues. But did you know there are multiple ways to take screenshots, each suited for different needs and devices?
In this guide, we’ll walk you through the most effective methods to capture your laptop screen, including keyboard shortcuts, built-in tools, and third-party apps. Plus, we’ll explore tips to edit and organize your screenshots efficiently.
Why Take Screenshots?
Screenshots are essential for:
- Troubleshooting technical issues: Quickly capture error messages to send to support teams.
- Creating tutorials or presentations: Visual aids help clarify instructions.
- Saving important information: Snap a receipt, confirmation page, or a social media post.
- Collaborating remotely: Share your screen content without live screen sharing.
How to Take a Screenshot on a Windows Laptop
1. Using the Print Screen (PrtScn) Key
- Full screen capture: Press the
PrtScnkey. This copies the entire screen to the clipboard. Open an image editor (like Paint) and pressCtrl + Vto paste and save. - Active window only: Press
Alt + PrtScnto capture the currently active window. - Direct save: Press
Windows key + PrtScnto capture the entire screen and save it automatically to thePictures > Screenshotsfolder.
2. Using Snipping Tool or Snip & Sketch
Windows offers two built-in screenshot utilities:
- Snipping Tool: Available in older Windows versions. Allows free-form, rectangular, window, or full-screen snips.
- Snip & Sketch: Available in Windows 10 and later. Press
Windows key + Shift + Sto open the snipping toolbar, select the area, and the screenshot is copied to clipboard and a notification appears for editing.
3. Using Game Bar (For Gamers)
Press Windows key + G to open the Xbox Game Bar, then click the camera icon or press Windows key + Alt + PrtScn to capture screenshots during gameplay.
How to Take a Screenshot on a MacBook
1. Capture Entire Screen
Press Command (⌘) + Shift + 3. The screenshot is saved to your desktop by default.
2. Capture a Selected Portion
Press Command (⌘) + Shift + 4. Click and drag to select the area. Release to capture.
3. Capture a Specific Window
Press Command (⌘) + Shift + 4, then press the Spacebar. Click the window to capture.
4. Screenshot Utility (macOS Mojave and later)
Press Command (⌘) + Shift + 5 to open the screenshot toolbar, which allows screen recording and choosing where to save screenshots.
Third-Party Screenshot Tools
If you want more advanced features like annotation, scrolling screenshots, or cloud storage, consider these popular apps:
| Tool | Platform | Key Features | Cost |
|---|---|---|---|
| Snagit | Windows, Mac | Advanced editing, video capture, templates | Paid (Free trial available) |
| Lightshot | Windows, Mac | Simple interface, instant upload & sharing | Free |
| Greenshot | Windows | Lightweight, annotation tools | Free |
| ShareX | Windows | Highly customizable, supports GIFs, workflows | Free |
Tips for Better Screenshot Management
- Organize your screenshots: Create dedicated folders by date or project to avoid clutter.
- Use cloud storage: Sync screenshots with services like OneDrive, Google Drive, or iCloud for easy access across devices.
- Edit immediately: Crop, annotate, or highlight important parts to make your screenshots more informative.
- Keyboard shortcuts: Memorize shortcuts to save time, especially if you take screenshots frequently.
Summary Table: Quick Screenshot Methods on Laptops
| Operating System | Shortcut / Tool | Captures | Saves To | Notes |
|---|---|---|---|---|
| Windows | PrtScn | Full screen (to clipboard) | Paste manually | Requires pasting into an editor |
| Windows | Alt + PrtScn | Active window (to clipboard) | Paste manually | |
| Windows | Win + PrtScn | Full screen (auto-save) | Pictures > Screenshots folder | Automatically saved |
| Windows | Win + Shift + S | Partial screen (Snip & Sketch) | Clipboard + notification | Allows quick editing |
| MacOS | Cmd + Shift + 3 | Full screen | Desktop | |
| MacOS | Cmd + Shift + 4 | Selected area | Desktop | |
| MacOS | Cmd + Shift + 4 + Spacebar | Specific window | Desktop | |
| MacOS | Cmd + Shift + 5 | Screenshot toolbar | User-defined | Includes screen recording options |
Final Thoughts
Mastering screenshot techniques on your laptop can significantly improve your productivity and communication. Whether you’re a student, professional, gamer, or casual user, knowing how to capture and manage screenshots empowers you to share information clearly and efficiently.
Try out the different methods, find what works best for your workflow, and don’t forget to explore third-party tools if you need more advanced features. Happy screenshotting!
Key Takeaways
- Screenshots can be captured using keyboard shortcuts specific to your operating system.
- Windows users can use the Snipping Tool or Print Screen key while Mac users have Command + Shift combinations.
- Your captured images can be edited, saved in different formats, and shared directly from your laptop.
Understanding Screenshots
Screenshots are digital images that capture exactly what appears on your laptop screen. They allow you to save and share visual information quickly without needing to describe everything in words.
The Basics of a Screenshot
A screenshot (also called a screen capture) is simply a digital photo of whatever is displayed on your screen. When you take a screenshot, your computer saves an exact image of what you see – including all open windows, applications, error messages, and other visual elements.
Most laptops offer multiple ways to capture screenshots, depending on what you need:
- Full screen capture: Grabs everything visible on your display
- Window capture: Takes a photo of just the active window
- Selected area capture: Lets you choose a specific portion of the screen
Screenshots are saved as image files (usually PNG or JPG format) that you can edit, share, or store like any other picture.
Benefits of Taking Screenshots
Screenshots serve many practical purposes in your daily computer use. They’re invaluable for providing tech support to others since you can show exactly what’s happening on your screen.
They’re also perfect for:
- Saving important information that might disappear (like confirmation numbers)
- Creating visual instructions for others to follow
- Documenting error messages when troubleshooting problems
- Capturing memorable moments from videos or online conversations
For work and education, screenshots help you gather research, create tutorials, or save information for later reference.
You don’t need special skills or equipment – the tools are already built into your laptop’s operating system.
Preparing to Take a Screenshot
Before capturing your screen, you need to ensure your laptop meets basic requirements and you understand which keys to use. Taking just a minute to prepare will save you frustration and help you get the perfect screenshot every time.
Checking System Requirements
Most laptops come with built-in screenshot capabilities, regardless of whether you’re using Windows 10, Windows 11, or older versions like Windows 7. You don’t need special hardware or additional software to take basic screenshots.
Your laptop’s operating system determines which screenshot methods are available to you:
- Windows 10/11: Offers the most options, including Snipping Tool, Snip & Sketch, and various keyboard shortcuts
- Windows 7: Includes basic screenshot functions with the Print Screen key and Snipping Tool
- All Windows versions: Support the traditional Print Screen (PrtSc) method
Make sure your keyboard shortcuts are enabled in your system settings. If you have trouble with screenshots, try updating your laptop’s drivers or operating system.
Understanding Your Laptop’s Keyboard Layout
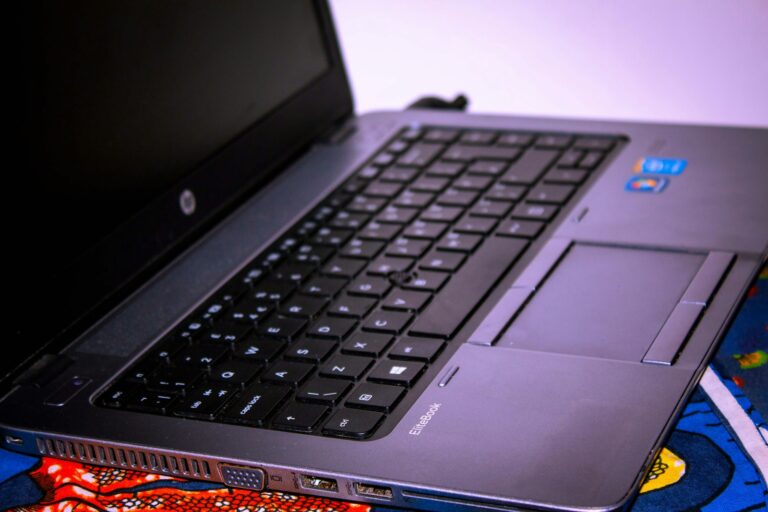
Locating the Print Screen key is essential for taking screenshots. On most laptops, you’ll find this key in the upper right section of your keyboard, often labeled as “PrtSc,” “PrtScn,” or “Print Screen.”
Some laptop models, especially compact ones, combine the Print Screen function with another key. In these cases, you’ll need to press the Function (Fn) key together with the Print Screen key.
Common keyboard shortcuts for screenshots include:
- PrtSc: Captures the entire screen
- Alt + PrtSc: Captures only the active window
- Windows + PrtSc: Captures the screen and automatically saves it as a file
Take a moment to examine your keyboard layout and identify these keys before attempting to take a screenshot. This small preparation step will make the process much smoother.
Methods for Capturing Screenshots
Taking screenshots on your laptop doesn’t have to be complicated. Windows offers several built-in tools that make capturing your screen easy, whether you need the entire screen or just a portion of it.
Using Keyboard Shortcuts
The fastest way to capture your screen is with keyboard shortcuts. To capture your entire screen at once, simply press the Print Screen (sometimes labeled as PrtScn) key. This copies the full screen to your clipboard, allowing you to paste it into any program like Paint or Word.
For capturing just the active window, press Alt + Print Screen. This handy combination saves you from having to crop out unwanted areas later.
If you want to save your screenshot directly as a file, press Windows key + Print Screen. Your screen will briefly dim, indicating the screenshot was taken. These images automatically save to the Pictures > Screenshots folder.
Windows 10 and 11 introduced an even more versatile shortcut: Windows key + Shift + S. This activates a screenshot toolbar at the top of your screen, letting you choose between:
- Rectangular snip
- Free-form snip
- Window snip
- Full-screen snip
After selecting your preferred option, simply drag to select the area you want to capture.
Utilizing the Snipping Tool and Snip & Sketch
The Snipping Tool has been a reliable screenshot option in Windows for years. To access it, type “snipping tool” in the Start menu and select it from the results.
Once open, click “New” to start your screenshot. You can choose between different capture modes:
- Rectangular snip: Drag to select a rectangular area
- Free-form snip: Draw any shape to capture
- Window snip: Select a specific window
- Full-screen snip: Capture everything visible
After taking your screenshot, you can annotate it with the pen or highlighter tools before saving. This makes it perfect for creating instructional materials or marking important information.
In newer Windows versions, Snip & Sketch has been introduced as the modern replacement. It offers similar functionality with a cleaner interface and better annotation tools.
Capturing Screenshots on HP Laptops
HP laptops typically follow the standard Windows screenshot methods, but some models offer additional options. Most HP laptops include the basic Print Screen key, usually found in the function key row or near the number pad.
Some HP models require you to press the Fn + Print Screen combination if the Print Screen function is shared with another command on the same key. Look for the Print Screen icon (usually showing a screen with a dotted line around it) on your function keys.
HP’s Command Center or Support Assistant software might offer additional screenshot capabilities. Check your installed HP programs for these options.
For HP tablets or 2-in-1 devices, you might also be able to use the Power button + Volume down combination, similar to mobile devices.
Using the Windows Game Bar
Originally designed for gamers, the Windows Game Bar has evolved into a useful tool for all kinds of screenshots and screen recordings. To access it, press Windows key + G.
Once the Game Bar appears, click the camera icon to take a screenshot of your active window. These screenshots are automatically saved to the Videos > Captures folder.
The Game Bar also excels at screen recording. Click the record button (circle icon) to start capturing video of your screen—perfect for tutorials or demonstrations. You can also record audio narration while capturing your screen.
To ensure the Game Bar is enabled, go to Settings > Gaming > Xbox Game Bar and toggle it on. You can also customize the keyboard shortcuts here to suit your workflow.
Leveraging the Camera App for Screenshots
Windows 10 and 11’s Camera app isn’t just for webcam photos—you can also use it to capture screenshots. To begin, open the Camera app from your Start menu.
Once the Camera app is open, click on the “Change camera” button to switch from your webcam to screen capture mode (if available on your device).
The Camera app offers some unique advantages:
- Countdown timer for timed screenshots
- Easy access to your photo library
- Simple editing tools right after capture
For devices with touch screens, the Camera app provides a more touch-friendly interface than some other screenshot tools. Simply tap the camera button to capture what’s on your screen.
Remember that the Camera app functionality varies between Windows versions and device types, so explore the options available on your specific laptop.
Editing and Managing Your Screenshots
Once you’ve captured your screenshot, knowing how to edit, save, and share it properly will help you communicate more effectively. The right tools can transform a basic screen capture into a professional image.
Initial Steps After Taking a Screenshot
After taking a screenshot on your laptop, the image is typically stored in the clipboard. This means you need to act quickly before it’s replaced by something else.
On Windows, you can immediately paste the screenshot into an application like Word, PowerPoint, or an email by pressing Ctrl+V. If you used Windows+Shift+S or the Snipping Tool, a notification will appear that allows you to open and edit the image right away.
For permanent storage, paste your full screenshot into Paint or Photos before saving it. This prevents losing your work when the clipboard is cleared.
Remember to check your Screenshots folder (usually in Pictures) if you used Windows+PrtScn, as Windows automatically saves these images there.
Using Editing Tools for Enhancement
Most screenshots benefit from simple edits before sharing. Windows offers several built-in options for enhancing your images.
The Snipping Tool includes basic editing features:
- Highlighting important areas
- Drawing arrows or circling elements
- Adding text annotations
- Using a pen tool to write notes
For more advanced editing, try the Photos app which allows you to:
- Crop unwanted portions
- Adjust brightness and contrast
- Add filters for better visibility
- Draw a rectangle around important content
Paint remains a reliable option for quick edits. You can resize your screenshot, add text, or use various drawing tools to emphasize key information.
Third-party applications offer even more features if you regularly work with screenshots.
Saving and Sharing Your Screenshots
Properly saving your screenshot ensures you can find and use it later. Always choose an appropriate file name that describes the content for easy searching.
When saving, select the right format:
- PNG: Best for screenshots with text (maintains clarity)
- JPG: Good for photos or when file size matters
- GIF: Useful for simple animations
You can save directly to your desktop for quick access or create a dedicated folder for better organization.
Sharing options are plentiful. You can attach screenshots to emails, upload them to cloud storage, or paste them directly into messaging apps.
For work purposes, consider using the built-in sharing features in Windows or upload your edited screenshots to collaborative platforms like Teams or Slack.
Troubleshooting Common Issues
When screenshots don’t work properly, it’s usually due to keyboard issues or software glitches that can be fixed with a few simple steps.
Resolving Keyboard Shortcut Failures
If your Print Screen key isn’t working, first check if your function (Fn) key needs to be pressed simultaneously. Many laptops require this combination to activate the Print Screen feature.
Try alternative shortcuts like Windows + Print Screen to save directly to your Pictures folder. This often works when the standard PrtSc button fails.
Restart your computer to clear temporary system issues that might be blocking keyboard functions. Simple restarts solve many screenshot problems without additional troubleshooting.
Check for keyboard drivers that need updating. Outdated drivers can cause specific keys to stop responding properly. Visit your laptop manufacturer’s website for the latest keyboard driver.
You can also try using the on-screen keyboard to take screenshots if your physical keyboard is malfunctioning.
Fixing Snipping Tool Errors
If the Snipping Tool or Snip & Sketch won’t open or crashes, try running the Windows troubleshooter. Search for “troubleshoot” in your Start menu and select the app troubleshooting option.
The Windows + Shift + S shortcut is a reliable alternative that bypasses potential Snipping Tool issues. This brings up the screen snipping interface regardless of whether the main app works.
Clear your temporary files which might be causing conflicts. Type %temp% in the search bar, press Enter, and delete unnecessary files.
For persistent issues, try creating a new user profile on your computer. Screenshot tools sometimes encounter permission problems that are fixed with a fresh profile.
Consider using the Snipping Tool through its direct file path rather than shortcuts: C:\Windows\System32\SnippingTool.exe.
Professional Tips and Tricks
Taking screenshots efficiently can boost your productivity, especially for work-from-home jobs where sharing information quickly is essential.
When capturing important content, use Windows + Shift + S for more precise selection options. This shortcut activates the Snipping Tool without having to search for the app.
Create a dedicated folder for your screenshots to stay organized. You can set up automatic saving by adjusting your Snipping Tool settings.
Pro tip: Use keyboard shortcuts to save time:
- Windows + Print Screen: Captures full screen and saves automatically
- Alt + Print Screen: Captures active window only
If you need to take screenshots of your smartphone screen for work, connect it to your laptop using USB and use the Android Debug Bridge or iOS screen mirroring.
For frequent screenshots, consider using the delayed capture feature. This gives you 3-10 seconds to set up your screen exactly how you want it.
Remember to respect privacy when taking screenshots. Never capture sensitive information like passwords or personal data without proper authorization.
One of the best free expert tips is to use annotation tools after capturing. Adding arrows, text, or highlighting specific areas makes your point clearer when sharing with colleagues.
Additional Support and Resources
Sometimes taking screenshots becomes challenging, requiring help from experts or addressing legal concerns about what you capture. Finding the right resources can save you time and prevent frustration.
Seeking Expert Assistance
If you’re experiencing persistent issues with screenshot functionality, consider reaching out to technical experts. Many laptop manufacturers offer dedicated support teams that understand the specific quirks of your device’s hardware and software.
You can contact customer support directly through your manufacturer’s website. Companies like HP, Dell, and Apple maintain comprehensive knowledge bases addressing common screenshot problems.
For personalized help, JustAnswer membership connects you with verified experts who can guide you through a multi-step quality process tailored to your individual situation. These professionals can troubleshoot:
- Hardware key malfunctions
- Software conflicts preventing screenshots
- Driver issues affecting screen capture
- Alternative methods when standard approaches fail
Response times vary from minutes to hours depending on the complexity of your issue.
Asking Legal and Emergency Questions
Screenshot activities sometimes raise legal concerns, particularly in workplace or educational settings. Before capturing sensitive information, understand what you’re legally permitted to document.
Many organizations have specific policies about screen captures of confidential information. Check your employee handbook or student guidelines before capturing workplace or classroom content.
For urgent legal questions about screenshot use, consult with verified legal experts who can address your individual situation promptly. This becomes especially important when dealing with:
- Copyright-protected content
- Confidential business information
- Personal data subject to privacy laws
- Evidence for potential legal proceedings
In emergency situations where you need to document time-sensitive information, take the screenshot first and seek legal guidance afterward to ensure you’ve acted appropriately.
Frequently Asked Questions
Screenshots are essential for sharing what’s on your screen. Different laptop brands offer various methods to capture your screen, from keyboard shortcuts to built-in tools.
What are the steps to capture a screen image on a Windows 10 laptop?
You can use the Snipping Tool to capture screenshots on your Windows 10 laptop. Simply press Windows logo key + Shift + S to activate the snipping menu.
This shortcut brings up a small toolbar at the top of your screen with different capture options. You can choose rectangular snip, freeform snip, window snip, or full-screen snip.
After selecting an area, the screenshot is copied to your clipboard. You can then paste it into any application or find it in the Snipping Tool app for editing.
How can one take a screenshot on a Dell laptop using built-in tools?
On Dell laptops, you can take screenshots using the same methods available on most Windows computers. The quickest way is to press the Print Screen (PrtScn) key.
Some Dell models have a Function (Fn) key that you need to press along with the Print Screen key. This combination captures your entire screen and copies it to the clipboard.
Dell laptops may also include additional manufacturer software that offers enhanced screenshot capabilities. Check your pre-installed programs for Dell-specific screen capture tools.
What is the process for taking a screenshot on a Lenovo laptop?
Lenovo laptops running Windows use standard Windows screenshot methods. Press the PrtSc key to capture the entire screen or Alt + PrtSc to capture only the active window.
Some Lenovo models may require you to press the Fn key together with PrtSc. The screenshot is copied to your clipboard, ready to be pasted into an application.
Newer Lenovo laptops also support the Windows key + Shift + S shortcut to open the Snipping Tool for more flexible screenshot options.
Can you explain how to take a screenshot on a PC using the Print Screen key?
The Print Screen key (often labeled as PrtScn or Prt SC) captures your entire screen when pressed. This copies the image to your clipboard.
To capture just the active window, press Alt + Print Screen. These shortcuts don’t provide any visual confirmation that the screenshot was taken.
After capturing your screenshot, open an image editing program or document and paste the image using Ctrl + V. You can then save it in your preferred format.
What methods are available for taking a screenshot on a Mac computer?
On a Mac, you can press Shift + Command + 3 to capture the entire screen. The screenshot will automatically save to your desktop.
To capture a selected portion of your screen, press Shift + Command + 4, then drag to select the area you want. Mac laptops also offer a dedicated screenshot tool accessible by pressing Shift + Command + 5.
This tool provides options for capturing the entire screen, a window, or a portion. It also lets you record videos and choose where to save your screenshots.
How does one take a screenshot on a laptop using the Shift key along with other key combinations?
The Windows key + Shift + S combination activates the Snipping Tool in Windows 10 and 11. This lets you select an area to capture rather than capturing the entire screen.
After pressing this combination, your screen dims and you can select what you want to capture. The screenshot is copied to your clipboard and a notification appears.
On Mac laptops, Shift is part of several screenshot combinations: Shift + Command + 3 captures the entire screen, while Shift + Command + 4 lets you select an area to capture.

