Have you ever wondered if someone has read your text message? Read receipts on iPhones let others know when you’ve seen their messages. While this feature can be helpful, it might feel intrusive at times. Maybe you need some privacy or don’t want to feel pressured to respond immediately.
You can turn off read receipts on your iPhone by going to Settings > Messages and toggling off the “Send Read Receipts” option. This simple change gives you more control over your messaging experience. If you prefer a more selective approach, you can also disable read receipts for specific contacts rather than turning them off completely.
Privacy experts often recommend disabling read receipts as a security measure. When enabled, they can potentially provide information to scammers or create unnecessary social pressure. Taking control of this setting allows you to message on your own terms.
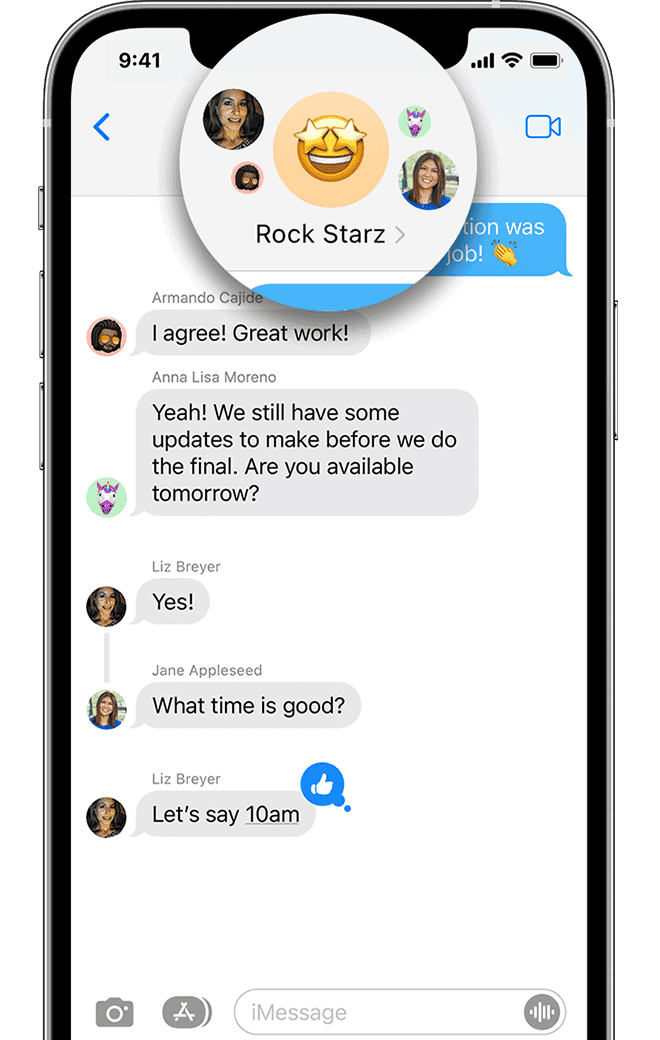
How To Turn Off Read Receipts for All Contacts
If you want complete privacy and don’t want anyone seeing when you’ve read their iMessages, you can disable read receipts globally.
Steps:
- Open the Settings app on your iPhone.
- Scroll down and tap Messages.
- Toggle Send Read Receipts to the off position (gray).
Once turned off, none of your contacts will see the “Read” timestamp under their messages — they’ll only see “Delivered,” even if you’ve read the message.
How To Turn Off Read Receipts for Individual Contacts
If you prefer to keep read receipts on for most people but want to disable them for specific conversations, you can do that too.
Steps:
- Open the Messages app.
- Tap the conversation with the person you want to change the setting for.
- Tap the contact’s name at the top of the screen.
- Toggle Send Read Receipts to off just for that person.
This gives you more control over your privacy without affecting all your message threads.
iMessage vs. SMS: Why Read Receipts Only Work with iMessages
It’s important to understand that read receipts only apply to iMessages, not regular text messages (SMS/MMS). Here’s how to tell the difference:
| Message Type | Bubble Color | Read Receipts? | Works Over Wi-Fi? |
|---|---|---|---|
| iMessage | Blue | Yes | Yes |
| SMS/MMS | Green | No | No (cellular only) |
So if you’re messaging an Android user or someone without iMessage enabled, your read receipt setting won’t matter.
When Should You Keep Read Receipts On?
While most people disable read receipts for privacy, there are scenarios where leaving them on is helpful:
- Professional communication: Helps confirm receipt of urgent info.
- Family members: Can offer peace of mind, especially for parents.
- Time-sensitive situations: Shows others you’ve seen important updates.
Consider using the per-conversation method so you can maintain transparency with people you trust and privacy with others.
What Happens When You Turn Read Receipts Off?
When you disable read receipts:
- Other people won’t see “Read” under your messages — only “Delivered.”
- You can still see read receipts from others (unless they’ve turned theirs off).
- It doesn’t affect message delivery — your messages will still send and receive normally.
There’s no notification to the other person that you’ve turned this off. It just quietly stops telling them when you’ve opened their message.
Key Takeaways
- Disabling read receipts protects privacy and reduces the pressure to respond immediately to messages.
- Users can turn off read receipts for all conversations or manage them individually for specific contacts.
- Regular checks of message privacy settings help maintain control over personal communication preferences.
Understanding Read Receipts on iPhone
Read receipts on iPhone let people know when you’ve seen their messages. This feature exists within iMessage, Apple’s messaging service, and gives users control over their messaging privacy.
What Are Read Receipts?
Read receipts are small notifications that tell the sender when you’ve opened and read their message. On iPhone, this appears as “Read” with a timestamp underneath the message bubble in an iMessage conversation.
This feature works only with iMessage (blue bubbles), not with regular SMS text messages (green bubbles). When enabled, your contacts will see exactly when you’ve viewed their messages.
Some users find read receipts helpful for confirming message delivery and viewing. Others consider them an invasion of privacy or a source of social pressure to respond immediately.
Read receipts are enabled by default on many iPhones, but users can turn them off completely or customize them for specific contacts.
How Do Read Receipts Work?
When read receipts are enabled, your iPhone automatically sends a notification to the sender once you open their message. This happens in the background without requiring any action from you.
The notification appears as “Read” followed by the exact time you viewed the message. If read receipts are disabled, the sender will only see “Delivered” when their message reaches your device.
Apple allows users to manage read receipts in two ways. You can turn them on or off globally for all contacts through Settings, or you can enable them selectively for specific conversations.
To control read receipts for individual contacts, you need to open each conversation and adjust the settings separately. This gives you precise control over who can see when you’ve read their messages.
iOS updates sometimes change how read receipts function, so settings may look different depending on your iPhone model and iOS version.
Accessing Message Settings on iPhone
Finding the right settings to turn off read receipts requires navigating through your iPhone’s settings menu. The process is straightforward and only takes a few taps once you know where to look.
Navigating to the Settings App
To access Message settings on your iPhone, first locate the Settings app on your home screen. It appears as a gray icon with gears. If you can’t find it immediately, you can swipe down on your home screen and use the search function by typing “Settings” in the search bar.
Once you’ve found the Settings app, tap on it to open. The Settings menu displays various system options for your iPhone. The layout is organized with your Apple ID information at the top, followed by commonly used settings categories below.
If you have many apps installed, scrolling through Settings might take a moment. The Settings app organizes options in a logical order, with system settings appearing before third-party app settings.
Locating Message Settings
After opening Settings, scroll down until you find the “Messages” option. This option typically appears in the middle section of the Settings menu, grouped with other built-in apps like Phone, FaceTime, and Mail.
Tap on “Messages” to access all settings related to your iPhone’s messaging capabilities. The Messages settings screen contains numerous options for customizing how your Message app functions.
Within this menu, you’ll find settings for iMessage activation, SMS/MMS messaging, message filtering, and other text messaging features. The read receipts option is located by scrolling down slightly within this menu.
The Messages settings page also contains other important privacy settings that you might want to review while adjusting your read receipts preferences. These include settings for message filtering, blocked contacts, and keeping messages.
Disabling Read Receipts for All Contacts
Turning off read receipts globally on your iPhone prevents others from knowing when you’ve read their messages. This setting affects all your iMessage conversations at once.
Turning Off Send Read Receipts Option
To disable read receipts for all contacts on your iPhone, you’ll need to access the Messages settings. Start by opening the Settings app on your home screen. This is the gray icon with gears.
Scroll down the settings menu until you find Messages and tap on it. This will open all messaging-related options.
In the Messages settings, look for the Send Read Receipts toggle switch. It’s usually located in the upper portion of the screen among other iMessage settings.
Turn off the switch by tapping it. When disabled, the toggle will appear gray instead of green. Once you’ve turned it off, your iPhone will immediately stop sending read receipts to all your contacts.
This global setting overrides any individual contact settings you might have previously configured. Your contacts will no longer see when you’ve read their messages.
Managing Read Receipts for Specific Contacts
iPhone users can control read receipts for individual contacts rather than using a single setting for everyone. This feature gives users more privacy control while maintaining transparency with specific people.
Adjusting Read Receipts for Individual Conversations
To turn off read receipts for a specific person, users need to open an existing conversation with that contact in the Messages app. After opening the conversation, they should tap on the contact’s name or icon at the top of the screen to access conversation details.
In the details screen, users will find the Send Read Receipts toggle option. Simply switch this off to disable read receipts for only this contact while keeping them on for others.
If the toggle doesn’t appear, users might need to check each contact individually as some iOS versions require managing this setting one conversation at a time.
For users who want to disable read receipts without opening a message, unfortunately, iOS requires accessing the conversation details first, which means opening the conversation.
This selective approach gives users the flexibility to be transparent with family and close friends while maintaining privacy with others.
Handling Read Receipts on Other Apple Devices
When using multiple Apple devices, read receipt settings can work differently across each device. Understanding how to manage these settings on iPad and Mac helps maintain consistent privacy across the Apple ecosystem.
Read Receipts on iPad and Mac
Apple’s read receipt feature works separately on each device. This means that turning off read receipts on your iPhone won’t automatically disable them on other devices.
For iPad, users need to:
- Open Settings
- Tap on Messages
- Toggle off Send Read Receipts
For Mac computers, the process differs slightly:
- Open the Messages app
- Click on Messages in the menu bar
- Select Settings or Preferences
- Click the iMessage tab
- Uncheck the box for Send Read Receipts
If someone uses multiple Apple devices with different read receipt settings, confusion might occur. For example, reading a message on an iPad with read receipts enabled will send a “Read” notification, even if the iPhone has them disabled.
For consistent privacy across all devices, users should check and update read receipt settings on each Apple device individually.
Troubleshooting Common Issues
Even with the right settings, iPhone users sometimes encounter problems with read receipts continuing to appear after being disabled. These persistent issues can be fixed with specific steps targeting both system-wide and conversation-specific settings.
Dealing with Read Receipts Bugs
Some iPhone users report that despite turning off read receipts in Settings, the feature continues to work. This common bug can be frustrating but has several potential solutions.
First, try force closing the Messages app and restarting your iPhone. Hold the power button until “slide to power off” appears, then slide to shut down. After restarting, check if read receipts are properly disabled.
If problems persist, you might need to turn off read receipts for each individual contact rather than relying on the global setting. Open a conversation, tap the contact name at the top, and disable read receipts there.
For persistent issues, updating iOS can help, as Apple frequently fixes read receipt bugs in newer versions. Go to Settings > General > Software Update to check for available updates.
Tips for Ensuring Read Receipts Are Off
To completely disable read receipts, users should check both global and conversation-specific settings. Start by verifying the main setting is off: go to Settings > Messages and ensure “Send Read Receipts” is toggled off.
For group conversations and individual chats, additional steps may be needed. Open each conversation in Messages, tap the contact name or group name at the top, and make sure read receipts are disabled there too. This extra step is often missed but crucial.
Quick verification tips:
- Ask a trusted friend to send you a message and confirm they don’t see “Read” notifications
- Check both iMessage and SMS conversations separately
- Verify settings after each iOS update, as updates can sometimes reset preferences
Remember that turning off read receipts is a two-way street—you won’t be able to see when others have read your messages either.
Privacy Considerations and Best Practices
Controlling read receipts on iPhone involves important privacy implications and requires thoughtful management. These settings can significantly impact personal communications and relationships while revealing behavioral patterns to message recipients.
The Impact of Read Receipts on Privacy
Read receipts in iMessage can create privacy concerns by revealing when users view messages. This feature essentially tracks and shares reading behavior with contacts, which might feel invasive to some users.
When enabled, read receipts tell others exactly when someone has seen their message. This could lead to unwanted pressure to respond immediately or create anxiety when recipients see their message was read but not answered.
Some users prefer to turn off read receipts for all contacts to maintain privacy. Others might want more granular control.
iOS allows users to manage privacy by enabling selective read receipts for specific people while keeping them disabled for others. This balanced approach helps maintain boundaries with certain contacts while staying transparent with close friends or family.
Best Practices for Read Receipts Management
For optimal privacy management, iPhone users should consider a selective approach to read receipts. Instead of using a one-size-fits-all setting, iOS makes it possible to customize these settings for different relationships.
To manage individual contact settings:
- Open a conversation with the specific contact
- Tap their name/icon at the top
- Select “Info”
- Toggle “Send Read Receipts” on or off for just that person
For global settings, users can disable read receipts entirely through Settings > Messages > Send Read Receipts. This provides complete reading privacy across all conversations.
Consider regularly reviewing these settings, especially after iOS updates, as system changes might reset preferences. Some users prefer enabling read receipts only for close family and work contacts where immediate communication is expected.
Remember that read receipt settings only apply to iMessage (blue bubbles) and not to standard SMS messages (green bubbles), which don’t support this feature.
Cross-Platform Implications
When using iMessage between Apple devices, read receipts work seamlessly, but things change when texting between iPhone and Android. The introduction of RCS messaging has created new considerations for privacy and notification settings.
Interaction with Android Users
Until recently, messages between iPhone and Android users relied on SMS/MMS protocols which don’t support read receipts. However, Apple has now implemented RCS (Rich Communication Services), which has changed how cross-platform messaging works.
RCS is now confirmed working on iPhone with features like read receipts and voice messages. An important privacy consideration is that at present, users cannot disable read receipts when messaging between iPhone and Android through RCS. Apple has indicated this limitation will be addressed in future updates.
For those concerned about privacy, it’s worth noting that without RCS, iPhone users cannot see read receipts from Android users and vice versa when using standard SMS.
If privacy is a priority, users may prefer third-party messaging apps like WhatsApp or Telegram. These apps offer consistent read receipt controls regardless of the recipient’s device type.
Future Updates and Considerations
Apple continues to evolve its messaging features, including read receipts. The company regularly updates iOS to improve user experience and privacy options for iMessage users.
Potential Changes in Future iOS Versions
Apple may introduce more granular control over read receipts in upcoming iOS updates. Currently, users can either enable read receipts for everyone or manage them individually by conversation, but future versions might offer time-based controls or automatic settings.
For RCS messaging (recently added to iPhone), Apple is working on improvements. As noted in recent discussions, read receipts cannot currently be disabled between iPhone and Android when using RCS, but Apple has indicated this feature will be updated in the future.
The Settings app interface might also see refinements. Apple typically streamlines navigation in iOS updates, potentially making the read receipt toggle more accessible rather than buried in the Messages settings.
iPadOS will likely maintain feature parity with iOS for read receipts, ensuring consistent messaging experiences across Apple devices. This synchronization helps users manage their privacy preferences seamlessly regardless of which device they’re using.
Frequently Asked Questions
iPhones offer several options for managing read receipts in messages. Users can control these settings globally or for individual contacts depending on their privacy preferences.
Can I disable read receipts for a specific contact on my iPhone?
Yes, iPhone users can turn off read receipts for specific contacts. To do this, open a conversation with the contact, tap on their name at the top of the screen, and scroll down to find the “Send Read Receipts” option.
This toggle allows users to disable read receipts for individual threads while keeping them active for other conversations. This feature gives more control over who can see when messages have been read.
What is the process to turn off read receipts globally on an iPhone?
Turning off read receipts globally on an iPhone takes just a few steps. First, open the Settings app on the iPhone. Next, scroll down and tap on “Messages” in the list of options.
Within the Messages settings, locate the “Send Read Receipts” toggle and switch it to the off position. This disables read receipts for all conversations at once.
Is there a way to turn off read receipts without opening the messages app?
Yes, users can disable read receipts without opening the Messages app. The process is done entirely through the iPhone Settings app, which means users don’t need to access any individual conversations.
Simply navigate to Settings, tap on Messages, and toggle off the “Send Read Receipts” option. This method is quick and doesn’t require opening any message threads.
How can read receipts be turned off after a major iOS update?
After a major iOS update, the process to turn off read receipts typically remains the same. Users should open Settings, navigate to Messages, and locate the “Send Read Receipts” toggle.
If the setting location has changed in the update, searching within the Settings app using the search bar at the top can help locate the read receipts option quickly. Apple generally maintains consistent locations for common settings across updates.
With the release of a new iPhone model, do the steps to disable read receipts change?
The steps to disable read receipts generally remain consistent across new iPhone models. The Settings app maintains a similar layout regardless of whether using an iPhone 15 Pro or earlier models.
Apple designs its user interface to be familiar across device generations. This means the process of going to Settings, then Messages, and toggling off Send Read Receipts works on all current iPhones.
Are read receipts able to be turned off on messages for all app messaging functions?
The built-in read receipts toggle primarily affects iMessage conversations, not third-party messaging apps. Each messaging application typically has its own separate settings for read receipts.
Apps like WhatsApp, Facebook Messenger, and Telegram have their own in-app settings to control read receipts. Users need to adjust these settings individually within each app’s preferences or privacy settings.


