iPhone security lockouts can be frustrating for users. These occur when too many incorrect passcode attempts are made. Apple implements this feature to protect user data from unauthorized access. The lockout duration increases with each failed attempt, potentially leading to a permanent lockout.
Users facing a security lockout have options. For short lockouts, waiting is the simplest solution. Longer lockouts may require connecting to a computer and using recovery mode. In extreme cases, erasing the device might be necessary. This process removes all data but allows the iPhone to be used again.
Prevention is key to avoiding security lockouts. Using Face ID or Touch ID reduces the need for manual passcode entry. Choosing a memorable but secure passcode is also important. Regular iCloud backups ensure data is safe if a reset becomes necessary.

iPhone Security Lockouts
If you’ve ever entered the wrong passcode too many times on your iPhone, you’ve probably seen the dreaded “iPhone Unavailable” or “Security Lockout” message. This feature is designed to protect your data, but it can be confusing and stressful if you’re locked out. Let’s break down what it means, why it happens, and how to fix it.
📱 What Is a Security Lockout?
A Security Lockout occurs when you repeatedly enter the wrong passcode on your iPhone. Instead of allowing unlimited attempts, iOS temporarily locks the device to prevent unauthorized access.
This is part of Apple’s built-in security system to protect your personal data (photos, messages, financial info, etc.) from brute-force attacks.
⏱️ How Security Lockouts Work
The lockout time increases with each failed attempt:
- 6 wrong attempts → 1-minute lockout
- 7 wrong attempts → 5-minute lockout
- 8 wrong attempts → 15-minute lockout
- 9 wrong attempts → 1-hour lockout
- 10 wrong attempts → Permanent Security Lockout message
At this point, you’ll see options like “Erase iPhone” (if enabled) or you’ll need to connect to a computer to reset.
(source: Apple Support)
🛠️ How to Fix a Security Lockout
Unfortunately, there’s no way to bypass a lockout without erasing the device. Apple does this intentionally to keep your data safe. Here are your options:
1. Use “Erase iPhone” on the Lock Screen
- If your device is running iOS 15.2 or later, you’ll see an Erase iPhone option after repeated failed attempts.
- Tap it, enter your Apple ID password, and the phone will erase itself so you can set it up again.
2. Recovery Mode via Computer
- Connect your iPhone to a Mac or PC.
- Put it into Recovery Mode (button sequence depends on model).
- Open Finder (Mac) or iTunes (Windows) → choose Restore.
- This erases the device and reinstalls iOS.
3. iCloud (Find My iPhone)
- Go to iCloud.com → Find My iPhone.
- Select your device → Erase iPhone.
- Once erased, you can restore from a backup.
💡 Pro Tips to Avoid Lockouts
- Use Face ID or Touch ID for quicker, safer access.
- Write down or securely store your passcode in a password manager.
- Keep regular iCloud or computer backups so you don’t lose data if you’re forced to erase.
- Enable “Erase Data” after 10 failed attempts (Settings → Face ID & Passcode) if you want maximum security.
✅ Final Thoughts
The iPhone Security Lockout system is frustrating when you’re locked out, but it’s a critical safeguard for your privacy. If you forget your passcode, the only solution is to erase and restore your iPhone — which is why keeping backups is so important.
Key Takeaways
- Security lockouts protect iPhones from unauthorized access after multiple incorrect passcode attempts
- Options for resolving lockouts range from waiting to device restoration
- Using biometric authentication and creating strong, memorable passcodes help prevent lockouts
Understanding iPhone Security Lockout
iPhone Security Lockout is a protective feature that restricts device access after multiple incorrect passcode attempts. This mechanism safeguards personal data from unauthorized access and potential security breaches.
Essentials of Security Lockout
Security Lockout activates when an incorrect passcode is entered multiple times. After 5 failed attempts, the iPhone enforces a 1-minute delay. The lockout duration increases with subsequent failures:
- 6 attempts: 5-minute delay
- 7-8 attempts: 15-minute delay
- 9 attempts: 1-hour delay
After 10 incorrect tries, the iPhone enters Security Lockout mode. At this point, users see an “iPhone Unavailable” or “Security Lockout” message. The device requires a reset to regain access.
Common Causes of iPhone Lockout
Forgotten passcodes are the primary reason for Security Lockouts. Users may mix up their current code with an old one or simply blank on the correct combination. Children playing with the device can also trigger lockouts by entering random numbers.
Unintended pocket dialing sometimes leads to accidental passcode attempts. This occurs when the iPhone’s screen activates in a pocket or bag, registering touch inputs as passcode tries.
Malicious attempts to access the device by unauthorized individuals can result in lockouts. The Security Lockout feature effectively thwarts these brute-force attacks, protecting sensitive information stored on the iPhone.
Navigating the Lockout Screen
The iPhone security lockout screen presents crucial information and options when a device becomes unavailable due to multiple incorrect passcode attempts. Users face two key elements: the “iPhone Unavailable” message and the “Erase iPhone” option.
Interpreting the ‘iPhone Unavailable’ Message
The “iPhone Unavailable” message appears after several incorrect passcode entries. This screen displays a countdown timer, indicating how long users must wait before trying again. The lockout duration increases with each failed attempt:
- 5 minutes after 6 wrong tries
- 15 minutes after 7 wrong tries
- 1 hour after 8 wrong tries
After 10 failed attempts, the iPhone may lock permanently, depending on settings. Users should wait for the timer to expire before retrying their passcode.
Actions on ‘Erase iPhone’ Option
The “Erase iPhone” option becomes available during extended lockouts. This feature allows users to reset their device if they’ve forgotten the passcode. To use this option:
- Tap “Erase iPhone” in the bottom corner
- Confirm the action
- Enter Apple ID password to sign out
This process erases all data and settings. Users should only choose this option if they have a recent backup or are willing to lose their data. After erasing, the iPhone can be set up as new or restored from a backup.
Recovery and Reset Options
When facing a security lockout on an iPhone, several methods exist to regain access. These options range from using computer software to leveraging iCloud services.
Using iTunes or Finder for Recovery
iTunes or Finder can help recover a locked iPhone. Connect the device to a computer with iTunes (Windows) or Finder (Mac). Put the iPhone in recovery mode by pressing and holding specific buttons, depending on the model. For newer iPhones without a home button, press and quickly release the volume up button, then the volume down button, and finally hold the side button until the recovery mode screen appears.
Once in recovery mode, iTunes or Finder will detect the iPhone and offer to restore or update it. Choose “Restore” to erase all data and install the latest iOS version. This process removes the passcode and security lockout.
Restoring iPhone to Factory Settings
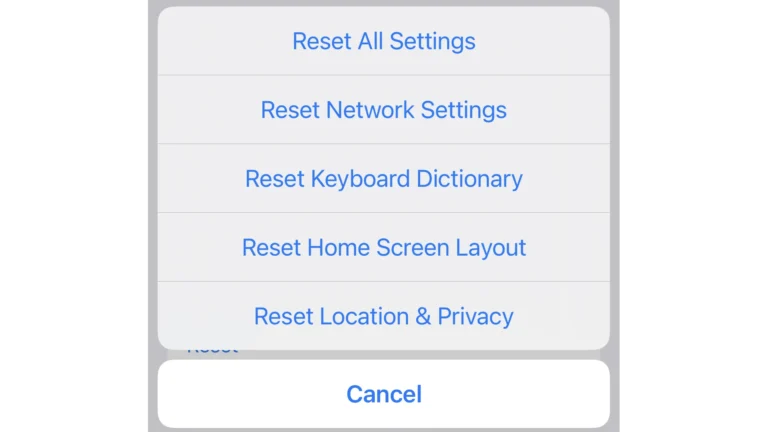
Restoring an iPhone to factory settings erases all content and removes the security lockout. This can be done directly on the device if it’s not completely locked out. Go to Settings > General > Reset > Erase All Content and Settings. Enter the Apple ID password when prompted.
If the iPhone is locked, use the “Erase iPhone” option on the security lockout screen. This appears after multiple incorrect passcode attempts. Tap “Erase iPhone” and confirm to reset the device. The process erases all data and settings, including the passcode.
Passcode Recovery with iCloud Services
iCloud offers a way to recover access without a computer. Use the Find My iPhone feature on iCloud.com or the Find My app on another Apple device. Sign in with the Apple ID associated with the locked iPhone.
Select the locked device and choose “Erase iPhone.” This remotely erases all content and settings, including the passcode. After erasure, set up the iPhone as new or restore from an iCloud backup.
Remember, all these methods erase data. Regular backups are crucial to avoid data loss during recovery.
Preventive Measures and Best Practices
Implementing proactive security measures safeguards iPhones against unauthorized access and potential data loss. Regular backups and strong authentication methods form the foundation of a robust security strategy.
Setting up a Backup Strategy
Regular backups protect important data on iPhones. Users can enable automatic iCloud backups or perform manual backups to a computer using iTunes or Finder. iCloud offers 5GB of free storage, with paid options for more space.
To set up iCloud backups:
- Go to Settings > [Your Name] > iCloud
- Tap “iCloud Backup”
- Toggle on “iCloud Backup”
For local backups:
- Connect iPhone to computer
- Open iTunes (Windows) or Finder (Mac)
- Select the device and click “Back Up Now”
Backing up ensures data recovery if the iPhone is lost, stolen, or experiences a security lockout.
Understanding the Importance of Apple ID and Passcode
Apple ID and passcode are crucial for iPhone security. The Apple ID links devices to iCloud services and enables features like Find My iPhone. A strong passcode prevents unauthorized access to the device.
Tips for a secure Apple ID:
- Use a unique, complex password
- Enable two-factor authentication
- Avoid sharing the password
For a strong iPhone passcode:
- Use at least 6 digits (longer is better)
- Avoid common numbers like birthdates
- Consider using an alphanumeric code
iOS 17 introduces additional security features. Users can now set up an emergency reset code to regain access if locked out of their device.
Frequently Asked Questions
Security lockouts on iPhones can be frustrating, but there are several ways to address this issue. Users can often recover their devices without data loss or a trip to the service center.
How can I unlock my iPhone after a security lockout without losing data?
Connect the iPhone to a trusted computer with iTunes or Finder. Select the device and choose the “Update” option instead of “Restore.” This method often unlocks the iPhone while preserving data.
If updating doesn’t work, try using iCloud to erase the device remotely. This will remove the passcode but also delete data. Restore from a recent backup to recover your information.
What steps should be taken to fix an iPhone that is displaying ‘iPhone Unavailable’ due to a security lockout?
Wait for the lockout timer to expire if it’s displayed. Enter the correct passcode when prompted. For longer lockouts, use Recovery Mode to reset the device.
To enter Recovery Mode, connect the iPhone to a computer and force restart it. Follow the on-screen instructions to restore or update the device.
Is there a way to reset an iPhone when it is in a security lockout state?
Use iTunes or Finder on a computer to restore the iPhone. This process erases all data and settings, removing the lockout.
Alternatively, use the “Erase iPhone” option if available on the lockout screen. This requires the Apple ID password associated with the device.
What is the duration of a security lockout on an iPhone?
Lockout durations vary based on the number of incorrect passcode attempts. They range from 1 minute to several hours.
After six failed attempts, the iPhone may display “iPhone Unavailable” or a countdown timer. The lockout can extend up to several days in extreme cases.
Can an iPhone be recovered from a security lockout without going to the service center?
Most security lockouts can be resolved at home. Use iTunes, Finder, or iCloud to reset the device. These methods don’t require visiting a service center.
For persistent issues, contact Apple Support for remote assistance before considering a service center visit.
What methods are recommended for addressing a security lockout on an iPad?
The methods for unlocking an iPad are similar to those for an iPhone. Use iTunes or Finder to update or restore the device. Enter Recovery Mode if necessary.
For iPads with cellular connectivity, removing the SIM card before attempting to unlock can sometimes resolve issues.