Is your Google Nest thermostat refusing to connect to WiFi? This common but frustrating problem can prevent your smart thermostat from working properly. The most common causes include router settings, weak WiFi signals, power issues with your thermostat, or outdated firmware that needs to be updated.
Many homeowners experience connection problems when their Google Nest thermostat suddenly goes offline or won’t connect during setup. When this happens, you might notice the thermostat showing offline status in your app or displaying error messages during WiFi setup. Your thermostat might also fail to detect your network altogether, preventing a successful connection.
The good news is that most WiFi connection issues with your Nest thermostat can be resolved with some simple troubleshooting steps. From checking your thermostat’s battery level to adjusting router settings or repositioning your router, the solution is often straightforward and doesn’t require professional help.
Guide: What to Do When Your Google Nest Thermostat Won’t Connect to Wi-Fi
A Google Nest Thermostat that won’t connect to Wi-Fi can disrupt your smart home experience, preventing remote control, updates, and integration with other devices. Fortunately, most connectivity issues are fixable with some straightforward troubleshooting steps. This guide will help you identify and resolve common reasons why your Nest Thermostat won’t connect to Wi-Fi.
Common Reasons Why Nest Thermostat Won’t Connect to Wi-Fi
- Incorrect Wi-Fi password entered
- Wi-Fi network not broadcasting or hidden
- Router or modem issues
- Network compatibility problems (e.g., 5 GHz vs 2.4 GHz)
- Signal interference or weak Wi-Fi signal at thermostat location
- Firmware or software glitches on the thermostat
- Network settings like MAC filtering or firewall blocking the device
Step-by-Step Troubleshooting
1. Confirm Wi-Fi Network and Password
- Double-check that you’re selecting the correct Wi-Fi network.
- Re-enter your Wi-Fi password carefully; passwords are case-sensitive.
- If your network is hidden (SSID not broadcasting), temporarily enable SSID broadcast on your router.
2. Restart Your Nest Thermostat
- Press the thermostat ring and hold it down for about 10 seconds until the screen turns off.
- Release the ring and let the thermostat reboot.
- Try reconnecting to Wi-Fi after it restarts.
3. Restart Your Router and Modem
- Power off your router and modem.
- Wait 30 seconds, then power them back on.
- Once your network is back online, try connecting your Nest Thermostat again.
4. Check Wi-Fi Frequency Band
- Nest Thermostats typically work best on a 2.4 GHz Wi-Fi band.
- If your router broadcasts both 2.4 GHz and 5 GHz, try connecting your thermostat to the 2.4 GHz network.
- Some routers use the same SSID for both bands; consider separating them with different names (e.g., HomeWiFi_2.4G and HomeWiFi_5G) for troubleshooting.
5. Move Thermostat or Router to Improve Signal
- Wi-Fi signals can be blocked or weakened by walls, appliances, or metal objects.
- If possible, move your router closer to the thermostat or install a Wi-Fi extender.
- Alternatively, relocate the thermostat slightly if it’s in a Wi-Fi dead zone.
6. Check Router Settings for Restrictions
- Ensure MAC address filtering is disabled or your thermostat’s MAC address is allowed.
- Disable any firewall or parental controls temporarily to test connectivity.
- Verify that your router supports standard Wi-Fi security protocols (WPA2 or WPA3).
7. Reset Network Settings on Nest Thermostat
- On your thermostat, go to Settings > Reset > Network.
- This will erase saved Wi-Fi networks and allow you to set up the connection fresh.
8. Factory Reset the Nest Thermostat (Last Resort)
- Go to Settings > Reset > All Settings to perform a full factory reset.
- Note this will erase all your preferences and settings.
- After reset, set up the thermostat from scratch and try connecting to Wi-Fi.
Additional Tips
- Make sure your Nest Thermostat firmware is up to date once connected.
- Use the Google Home app to help with setup and troubleshooting.
- Check Google’s official troubleshooting page for the latest advice: Google Nest Thermostat Wi-Fi Troubleshooting.
When to Contact Support
If you’ve tried all the above steps and your Nest Thermostat still won’t connect to Wi-Fi:
- Contact your internet service provider to check for network issues.
- Reach out to Google Nest Support for device-specific help.
- Consider router replacement if it’s outdated or incompatible.
Summary
Most Google Nest Thermostat Wi-Fi connection issues can be resolved by verifying your network details, restarting devices, adjusting router settings, and resetting the thermostat’s network configuration. With patience and these steps, you should restore your thermostat’s connectivity and enjoy seamless smart home control again.
Key Takeaways
- Check your thermostat’s power supply and battery level before attempting other WiFi troubleshooting steps.
- Router settings like enabling 802.11 b/g/n modes and adjusting DHCP lease times can resolve persistent connection problems.
- Restarting both your router and thermostat often fixes temporary connection issues without requiring advanced technical knowledge.
Understanding Your Google Nest Thermostat
Google Nest thermostats combine sleek design with smart functionality to help users manage their home climate more efficiently while potentially reducing energy consumption. These devices are engineered with both user-friendly interfaces and advanced capabilities.
Components and Design
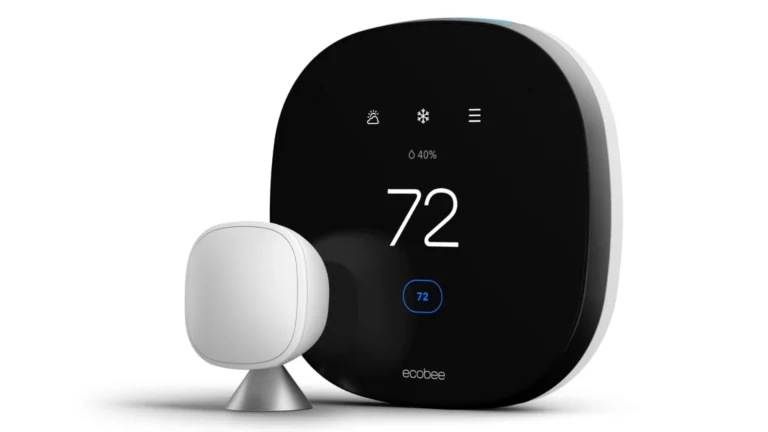
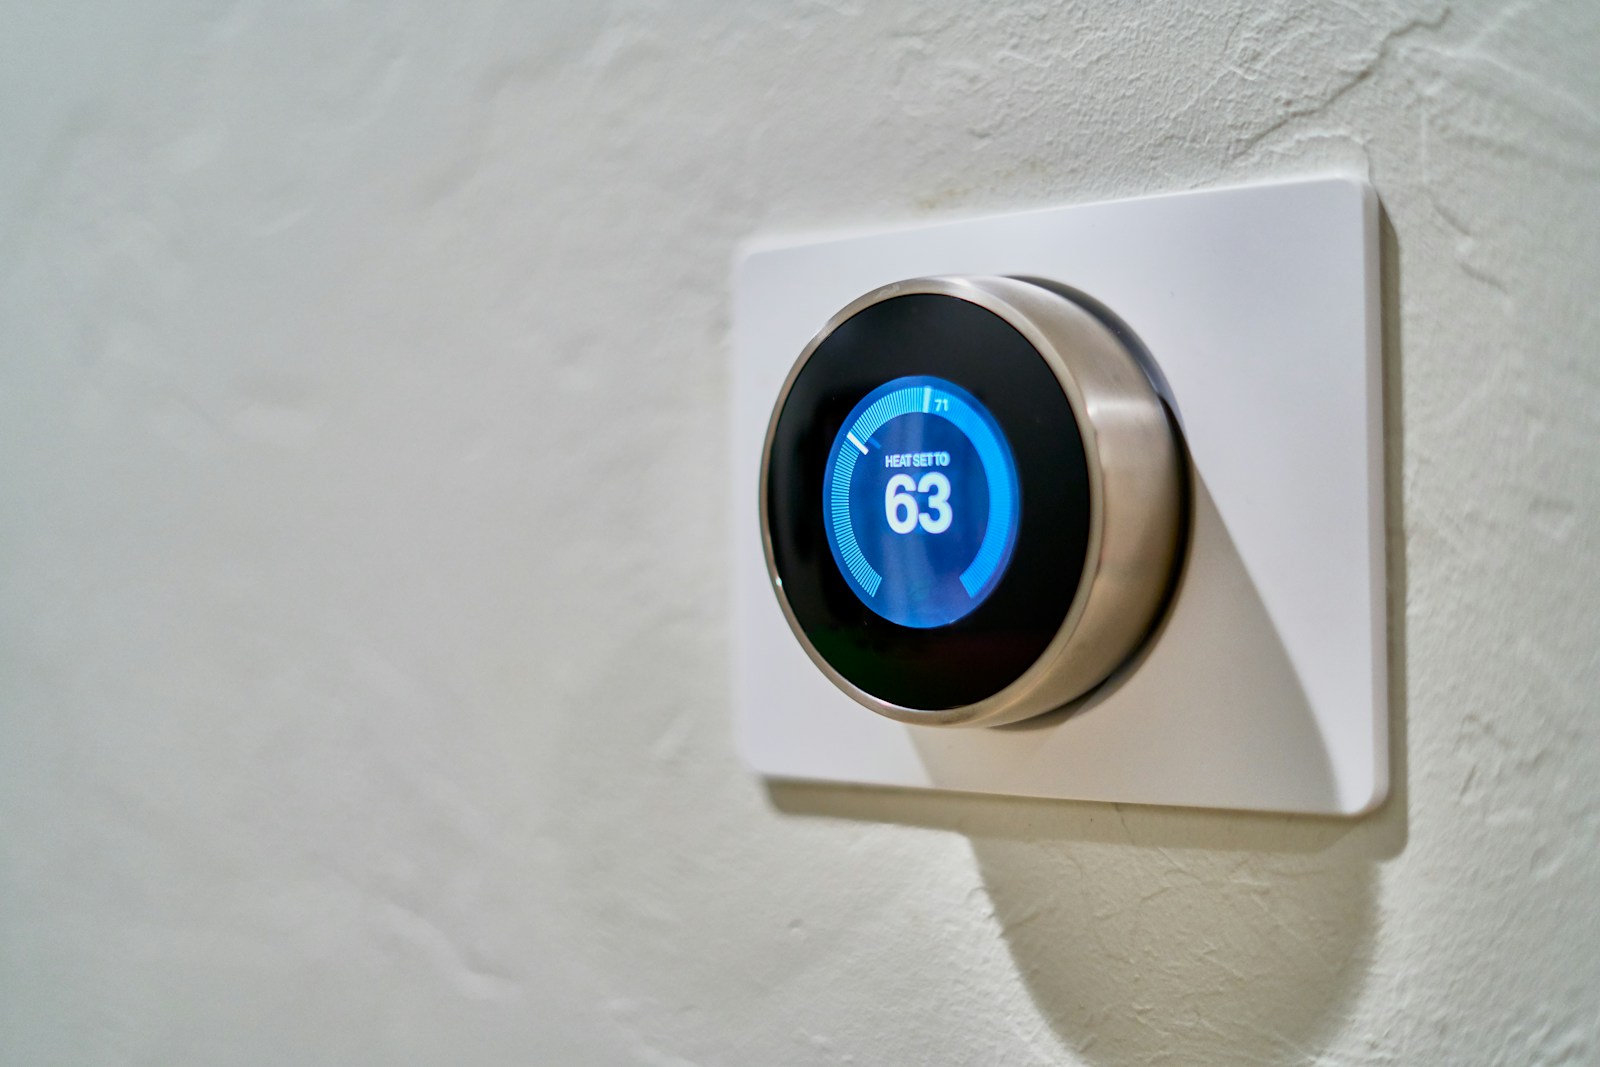
The Google Nest thermostat features a circular design with a high-resolution display that shows temperature, humidity, and system status. Most models include a metal outer ring that serves as the main control dial, allowing users to adjust settings with simple turns.
The thermostat contains several sensors that monitor temperature, humidity, occupancy, and ambient light to make intelligent decisions about heating and cooling. These components are housed in a compact unit made partly from recycled materials to reduce environmental impact.
Installation typically requires connection to your HVAC system’s wiring. Some homes may need a C wire or Nest Power Connector to provide consistent power to the device, which is crucial for maintaining Wi-Fi connectivity and proper function.
The built-in rechargeable battery powers the thermostat when the HVAC system isn’t running. Low battery levels can cause Wi-Fi connectivity issues as the device conserves power.
Features and Capabilities
Google Nest thermostats are ENERGY STAR certified, offering sophisticated energy management capabilities. The device learns user preferences over time and creates personalized schedules to optimize comfort while reducing energy consumption.
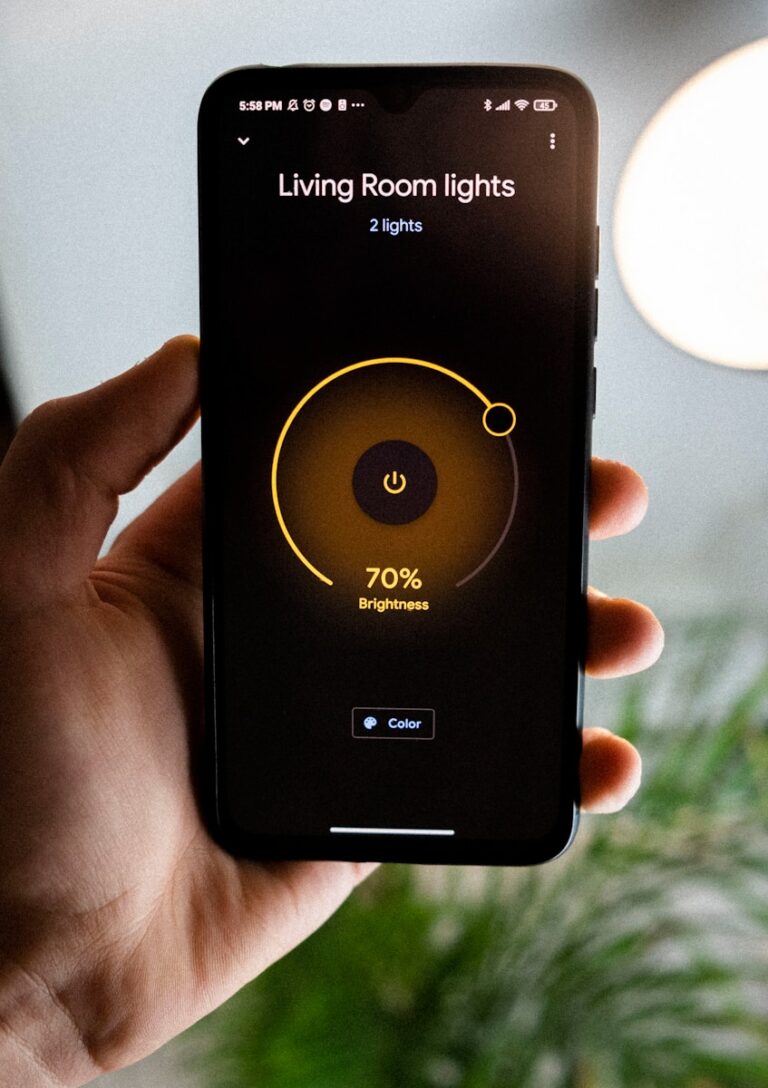
The thermostat connects to home Wi-Fi networks to enable remote control through the Google Home app. This connection allows users to adjust temperature settings from anywhere and receive important notifications about system performance.
Advanced models include HVAC monitoring features that can detect potential issues with heating and cooling systems before they become serious problems. They’re also compatible with most heat pumps and conventional HVAC systems.
Users can create a Quick Schedule directly on the device or use voice control through Google Assistant or Amazon Alexa integration. The Nest Renew service (where available) helps users maximize clean energy usage by optimizing run times based on grid conditions.
Pre-Installation Checklist
Before attempting to connect your Nest thermostat to Wi-Fi, ensure you have all the necessary components and compatibility requirements met. Proper preparation will save time and prevent frustration during the installation process.
Compatibility with Your HVAC System
The Nest thermostat works with most heating and cooling systems, but not all. Check if your system is compatible by examining your current wiring setup. Most Nest thermostats require a C wire or power connector for proper functioning, especially for systems like heat pumps.
Systems with 24V power are generally compatible. If your system lacks a C wire, the Nest Power Connector may be necessary to provide consistent power to the thermostat.
Compatibility checklist:
- Proper voltage (20-30V AC)
- Compatible system type (conventional, heat pump, etc.)
- Available C wire or alternative power solution
- Router that supports 2.4GHz Wi-Fi network
Required Tools and Materials
Installing a Nest thermostat requires specific tools and materials to ensure a smooth setup process. Having these items ready before beginning the installation will help avoid Wi-Fi connection issues later.
Essential tools:
- Phillips and flathead screwdrivers
- Drill with bits (if mounting requires new holes)
- Wire stripper/cutter
- Level for proper alignment
- Smartphone with Nest app installed
Required materials:
- Nest thermostat unit
- Mounting plate and screws (included)
- Labels for wires (usually included)
- Wall anchors if needed
- Optional: Nest Power Connector if no C wire is available
Ensure your smartphone has Bluetooth enabled, as this is required for the initial setup process. Position your router within 15-20 feet of the installation location for optimal Wi-Fi signal strength.
Installation Process
Proper installation of your Nest thermostat is crucial for ensuring a stable WiFi connection. Following the correct procedures during setup can prevent many connection issues before they start.
Step-By-Step Guide
Turn off power to your heating and cooling system at the circuit breaker before beginning installation.
Remove your old thermostat carefully, taking photos of the wiring for reference. Label each wire according to its terminal connection.
Install the Nest base plate on the wall, using the included level to ensure it’s straight. Feed the labeled wires through the center opening.
Connect the wires to the appropriate terminals on the Nest base. If your system lacks a C wire, consider installing a Nest Power Connector to provide consistent power.
Attach the display by aligning it with the base and pressing until it clicks.
Restore power at the circuit breaker.
Follow on-screen setup instructions to connect to WiFi. You’ll need your network name and password ready.
Troubleshooting Common Installation Issues
The most frequent installation problem affecting WiFi connection is improper wiring. Without proper power, the Nest thermostat may connect intermittently or not at all.
Check for a C wire connection. This “common” wire provides constant power to the thermostat. Many older homes lack this wire, causing the Nest to rely on battery power which can be insufficient for stable WiFi.
Verify the placement of your thermostat. Installing it too close to large metal objects or too far from your router can affect WiFi signal strength.
If your thermostat shows low battery warnings after installation, it might drop off your WiFi network. Consider adding a Nest Power Connector or contacting a professional HVAC technician for assistance.
Configuring Network Settings
Proper network configuration is essential for your Nest thermostat to function optimally. Getting your device connected to Wi-Fi and maintaining a stable connection will ensure you can control your home’s temperature remotely and receive important updates.
Connecting to Wi-Fi
If your Nest thermostat won’t connect to Wi-Fi, start by checking the basic connection settings. Press the thermostat ring and navigate to Settings, then select Network. Your thermostat should display available networks in the area.
If no networks appear, try these steps:
- Move closer to your router to ensure adequate signal strength
- Restart your thermostat by turning it off for 30 seconds
- Reset your device to factory settings if problems persist
For connection issues, verify your Wi-Fi password is correct. The Google Home app can help manage your thermostat’s network connection. Open the app, select your thermostat, and tap Settings to update network information.
Optimizing Network Performance
Your Nest thermostat’s connection can be affected by various factors in your home. Thick walls, floors, appliances, and furniture can interfere with Wi-Fi signals.
Try these optimization techniques:
- Position your router in a central location with minimal obstructions
- Reduce interference by keeping other electronics away from both router and thermostat
- Update firmware on both your router and Nest device regularly
Network congestion can also cause connection problems. If multiple devices share your network, consider upgrading your internet plan or router. Some users find that rebooting their Wi-Fi network resolves persistent connection issues with their smart thermostat.
For advanced troubleshooting, the Nest app provides diagnostic tools that can identify specific connectivity problems.
Troubleshooting Wi-Fi Connection Problems
When your Nest thermostat disconnects from Wi-Fi, it loses many of its smart features. These connection issues can be solved through systematic troubleshooting steps that address common problems with wireless networks, device settings, and placement.
Identifying the Issue
First, check if the problem is with your Nest device or your Wi-Fi network. The Nest thermostat will display a Wi-Fi icon with an exclamation mark when it’s having connection troubles.
Stand near your thermostat with another device like a smartphone to test if your Wi-Fi network is available in that location. If other devices connect normally, the issue is likely with the thermostat itself.
Look for potential interference sources. Metal objects, mirrors, or thick walls can block Wi-Fi signals. The thermostat might also struggle to connect if it’s too far from the router.
Check if your router is functioning properly. Restarting it often resolves temporary connectivity issues that affect all devices on the network.
Step-By-Step Wi-Fi Troubleshooting
Restart your router – Unplug it for 30 seconds, then plug it back in and wait for it to fully boot up.
Check your network settings on the thermostat:
- Press the thermostat ring to open the menu
- Go to Settings > Network
- Verify your network is listed and selected
Reset network connection if necessary:
- Go to Settings > Reset > Network
- Select your Wi-Fi network from the list
- Enter your password carefully
If problems persist, restore factory settings through Settings > Reset > All Settings. Note that this removes all personalized settings.
Check if your router location is optimal. Moving it closer to the thermostat may help.
Ensure your Wi-Fi password hasn’t changed recently. Even one incorrect character will prevent connection.
When to Contact Support
If basic troubleshooting doesn’t work, it’s time to seek professional help. The Google Home app offers built-in diagnostic tools that can identify more complex issues.
Contact Google Nest Support directly if your thermostat shows error codes or if it can’t find any networks after multiple restart attempts.
For hardware-related issues, certified technicians can diagnose whether the internal Wi-Fi component has failed. This might be covered under warranty if your device is less than two years old.
Consider consulting home repair professionals if the issue relates to your home’s electrical system or wiring connections. JustAnswer verified experts provide remote consultation for complex technical problems requiring specialized knowledge.
Improving Your Google Nest Experience
Getting your Nest thermostat connected to Wi-Fi is just the beginning. With proper integration and usage, this smart device can significantly reduce energy costs while making your home more comfortable and environmentally friendly.
Leveraging Google Home Integrations
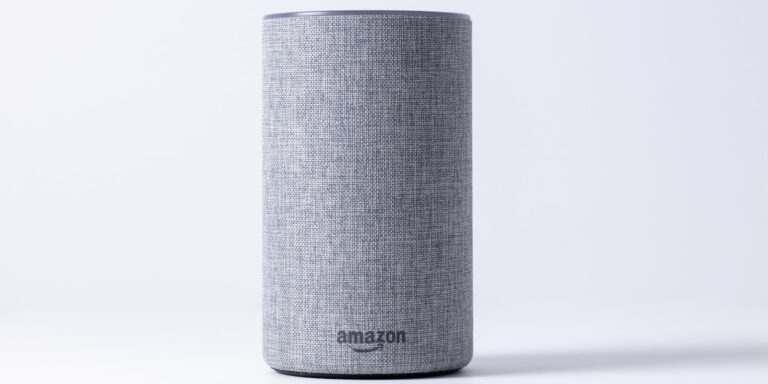
The Nest thermostat works seamlessly with the Google Home ecosystem, offering convenient voice control options. Users can adjust temperature settings by simply saying commands like “Hey Google, set the temperature to 72 degrees.” This hands-free control is particularly helpful when cooking, relaxing, or entertaining guests.
Beyond basic commands, more advanced voice interactions are possible. For example:
- “Hey Google, set the living room to eco mode”
- “Hey Google, what’s the current temperature?”
- “Hey Google, raise the temperature by two degrees”
The integration also allows for scheduled routines. Users can program the thermostat to automatically adjust when they say “Good morning” or “Good night,” creating a comfortable environment without manual adjustments.
Maximizing Energy Savings
The Nest thermostat is designed to help reduce energy consumption, potentially saving users 10-12% on heating bills and up to 15% on cooling costs. These savings come from several smart features:
Home/Away Assist: The thermostat detects when no one is home and automatically adjusts to an eco-friendly temperature. This prevents unnecessary heating or cooling of an empty house.
Learning Capabilities: Over time, the Nest learns your preferred temperatures and schedule, creating an efficient automated program. This eliminates the need for constant manual adjustments.
The Nest app provides detailed energy reports showing usage patterns and offering suggestions for additional savings. Many Nest thermostats are Energy Star certified, confirming their energy-efficient operation.
Engaging with the Nest Renew Program
Nest Renew is Google’s innovative program that helps users prioritize clean energy usage. This optional service connects to compatible Nest thermostats to make smarter energy choices.
The program offers Energy Shift, which automatically adjusts heating and cooling to times when more clean energy is available on the grid. This simple change helps reduce carbon footprint without sacrificing comfort.
Users can earn Renew Points by participating in energy-saving events and making eco-friendly choices. These points can be directed toward community clean energy projects.
The Basic plan is free, while Renew Premium offers additional features for a monthly fee. The program dashboard provides insights into clean energy usage and environmental impact, helping users track their contribution to sustainability efforts.
Maintaining Your Thermostat
Proper maintenance ensures your Nest thermostat stays connected to WiFi and functions efficiently. Regular attention to both hardware and software aspects helps prevent connectivity issues and extends the life of your smart device.
Regular Maintenance Tips
Keep your Nest thermostat clean by gently dusting the display with a soft, dry cloth. Avoid using cleaning solutions or water that could damage the electronics.
Check the battery level regularly. A low battery is often the cause of WiFi connection problems. If you notice your thermostat frequently disconnecting, verify whether the battery percentage is below 3.7V.
Inspect your HVAC system’s compatibility with the Nest thermostat. Some systems require a C-wire for stable power. Without it, your smart thermostat may experience intermittent power issues that affect WiFi connectivity.
Position your WiFi router away from interference sources. Metal objects, thick walls, and other electronic devices can block signals between your router and thermostat.
Software Updates and Features
Enable automatic updates in the Nest app to ensure your thermostat always has the latest firmware. Updated software often includes fixes for connectivity issues and new energy-saving features.
Perform a network test through the Nest app if you suspect connection problems. This helps identify whether the issue is with your home network or the thermostat itself.
Consider resetting your thermostat’s account connection when persistent WiFi issues occur. Navigate to Settings > Reset > Account Connection, then follow the prompts to reconnect.
Check your WiFi password if connection problems persist. Incorrect credentials are a common reason the thermostat won’t connect to networks it previously recognized.
The Nest app provides valuable HVAC monitoring insights. Review these periodically to spot potential issues before they affect your thermostat’s performance or connectivity.
Enhancing Your Shopping Experience
When purchasing a Nest thermostat, knowing the right places to shop and understanding available benefits can save you money and reduce frustration, especially if you’re looking to replace a unit that won’t connect to WiFi.
Exploring the Online Store
The Google Store offers the complete range of Nest thermostats with detailed specifications to help you choose the right model for your home. You can compare features between the Nest Learning Thermostat and the more affordable Nest Thermostat E.
Most online retailers provide helpful filtering tools to narrow down options based on compatibility with your existing HVAC system. This is particularly important since incompatibility can lead to WiFi connection issues.
Google’s official store often features exclusive bundles that include additional smart home products at discounted rates. These bundles might include Google Home speakers that can enhance your thermostat control options if your device faces connection problems.
Before purchasing, check the product description for the latest firmware version information, which may address known connectivity issues.
Understanding Instant Rebates
Many utility companies offer substantial rebates for installing energy efficient products like Nest thermostats. These rebates can sometimes reduce the price by $50-100, making premium models more affordable.
The rebate process typically happens in one of two ways: instant rebates applied at checkout or mail-in rebates you claim after purchase. Google’s store and authorized retailers often show eligible rebates based on your zip code.
Some energy providers offer additional savings through demand response programs. These programs may provide extra discounts if you allow your utility company limited control over your thermostat during peak demand periods.
Remember to verify rebate eligibility before purchasing, as requirements vary by location and utility provider. The savings can substantially offset the cost of replacing a thermostat with WiFi connection problems.
Managing Returns and Exchanges
If your Nest thermostat won’t connect to WiFi despite troubleshooting, most retailers offer a 30-day return window. Google Store provides a straightforward return process through your purchase history.
Keep original packaging and receipts to ensure smooth returns. Most retailers require all components to be returned together, including the base plate and installation hardware.
For thermostats with persistent connectivity issues, contact customer support before initiating a return. Technical support might resolve your problem without requiring a return.
Exchange policies vary between retailers. Best Buy and Amazon often offer direct exchanges for identical models, while some smaller retailers might only offer store credit. When exchanging due to WiFi problems, request that the replacement be from a different manufacturing batch, as this may avoid repeating the same issue.
Frequently Asked Questions
Nest thermostat Wi-Fi connection issues can be frustrating, but most problems have straightforward solutions. These common questions address specific connectivity problems and their fixes.
How do I reconnect my Nest thermostat to Wi-Fi after it has been disconnected?
To reconnect your Nest thermostat to Wi-Fi, first access the settings menu on your device. Select “Network” and then choose your Wi-Fi network from the list of available networks.
If your network doesn’t appear, try resetting the account connection by going to Settings > Reset > Account connection. After the device reboots, navigate back to Network settings and attempt to reconnect.
Make sure you have the correct Wi-Fi password handy, as incorrect credentials are a common cause of connection failures.
What steps should I take if my Nest thermostat is offline but my Wi-Fi is working?
First, check for wireless interference by standing near your thermostat and connecting to the same network with another device like your phone. If that device connects successfully, the issue is with the thermostat.
Try restarting your Nest thermostat by pressing and holding the display until it turns off, then pressing it again to turn it back on.
Verify that your Wi-Fi router isn’t blocking your thermostat from connecting. Some routers have MAC filtering that might prevent new devices from joining the network.
How can I resolve a low battery issue that prevents my Nest thermostat from connecting to Wi-Fi?
Wi-Fi connectivity requires sufficient battery power. If your Nest thermostat has a low battery, it may disconnect from Wi-Fi to conserve energy.
Ensure your thermostat is receiving adequate power from your HVAC system’s C-wire (common wire) or through the Nest Power Connector if your system doesn’t have a C-wire.
Allow your thermostat to charge for at least 30 minutes before attempting to reconnect to Wi-Fi. A battery level below 3.6V may not support Wi-Fi functionality.
What should I do if my Nest thermostat keeps going offline in the application?
If your thermostat repeatedly disconnects, check the location of your router. The thermostat should be within a reasonable range of your Wi-Fi router to maintain a stable connection.
Consider potential interference sources between your router and thermostat. Metal objects, thick walls, or other electronic devices can disrupt the signal.
Try rebooting both your router and thermostat. Sometimes a simple restart can resolve intermittent connection issues.
How can I fix a W5 error on my Nest thermostat?
The W5 error indicates a Wi-Fi connection problem. First, verify that your Wi-Fi network is operational by connecting other devices.
Try factory resetting your Nest thermostat if other troubleshooting methods fail. Go to Settings > Reset > All Settings, but be aware this will erase your preferences and scheduling.
Check if your router’s firmware is up to date, as outdated firmware can sometimes cause compatibility issues with smart devices.
Why does my Nest thermostat keep indicating that the connection failed?
Connection failures often occur when the Wi-Fi signal is weak or unstable. Try moving your router closer to the thermostat if possible.
Ensure your Wi-Fi network operates on a compatible frequency. Nest thermostats work with 2.4GHz networks, but some older models may have issues with certain 5GHz networks.
Check if your Nest’s Wi-Fi chip is functioning properly. If your thermostat cannot detect any networks at all after multiple reset attempts, the internal Wi-Fi hardware might be defective and require replacement.