Time Machine is one of macOS’s most valuable backup tools, offering users a seamless way to recover lost files or restore their entire system. When your backup disk isn’t available, Time Machine local snapshots provide an alternative recovery option stored directly on your Mac. To restore from a Time Machine local snapshot, users can access Time Machine from the menu bar, enter Time Machine, browse through the timeline to locate the desired snapshot, and select the files they wish to restore.
For Intel-based Mac users, restoration can also be initiated during startup by holding Command + R until the Apple logo appears. This method is particularly useful when performing a full system restore or when your Mac isn’t functioning properly. Time Machine’s interface makes the restoration process intuitive, displaying files as they appeared at different points in time.
Many apps also support Time Machine integration through the File > Revert To > Browse All Versions menu option. This feature allows users to view previous versions of documents directly within their applications without navigating through the full Time Machine interface. For those using iCloud services, Time Machine works alongside iCloud Drive and iCloud Photos to provide multiple layers of data protection.
Steps To Restore Time Machine Snapshots
Restoring Time Machine snapshots can help you recover lost files or restore your Mac to a previous state without needing an external backup drive. Snapshots are local backups stored on your Mac’s internal drive and can be used even if your Time Machine backup drive is unavailable.
Method 1: Restore a Time Machine Snapshot Using macOS Recovery Mode
If your Mac is experiencing issues and you want to restore the entire system from a Time Machine snapshot, follow these steps:
1. Enter macOS Recovery Mode
- For Intel Macs: Restart your Mac and immediately hold Command (⌘) + R until you see the Apple logo or a spinning globe.
- For Apple Silicon Macs (M1, M2, M3, etc.): Turn off your Mac, then press and hold the power button until “Loading startup options” appears. Select Options and click Continue.
2. Choose “Restore from Time Machine”
- Once in macOS Utilities, select Restore from Time Machine and click Continue.
3. Select a Local Snapshot
- If you don’t have an external Time Machine backup connected, macOS will show available local snapshots.
- Choose the snapshot from the date you want to restore.
4. Restore Your System
- Follow the on-screen instructions to complete the restoration.
- Your Mac will restart after the process, and your system will be restored to the selected snapshot.
Method 2: Restore Files from a Time Machine Snapshot Without Recovery Mode
If you only need to recover specific files, you can access local snapshots directly from Finder.
1. Open Time Machine
- Click the Time Machine icon in the menu bar (or go to System Settings > General > Time Machine).
- Select Enter Time Machine.
2. Browse Snapshots
- Use the timeline on the right side to browse through available local snapshots.
- Navigate to the folder or file you want to restore.
3. Restore the File
- Select the file or folder.
- Click Restore, and it will be placed back in its original location.
Method 3: Check Available Snapshots via Terminal
If you want to check which snapshots are available on your Mac:
- Open Terminal (found in Applications > Utilities).
- Type the following command and press Enter:
tmutil listlocalsnapshots / - This will display a list of available Time Machine snapshots with timestamps.
- If you want to delete an old snapshot to free up space, use:
sudo tmutil deletelocalsnapshots YYYY-MM-DD-HHMMSS(ReplaceYYYY-MM-DD-HHMMSSwith the exact snapshot name.)
When to Use Time Machine Snapshots
- Accidentally deleted a file? Restore it from Time Machine without needing an external drive.
- System issues after an update? Roll back to a previous snapshot in Recovery Mode.
- Need to revert a macOS change? Use a local snapshot to undo recent modifications.
Snapshots automatically expire when storage runs low, so they aren’t a permanent backup solution. For long-term protection, ensure you also back up with an external Time Machine drive or iCloud.
Key Takeaways
- Time Machine creates local snapshots on your Mac that allow for file restoration even when your backup disk isn’t connected.
- Restoration can be initiated through the Time Machine menu bar icon or during startup for full system recovery.
- Individual files can be restored selectively by entering Time Machine and browsing the timeline to find the version you need.
Understanding Time Machine
Time Machine is Apple’s built-in backup solution that automatically creates incremental backups of all your files. It runs hourly, daily, and weekly to ensure your data remains protected against loss or corruption.
Time Machine Basics
Time Machine works seamlessly in the background on macOS systems. Once set up, it automatically backs up your entire Mac—including system files, applications, accounts, preferences, music, photos, and documents.
The system creates hourly backups for the past 24 hours, daily backups for the past month, and weekly backups until your backup disk is full. When space becomes limited, Time Machine automatically deletes the oldest backups to make room for new ones.
To configure Time Machine, users simply connect an external storage device and select it as their backup disk in System Preferences. The first backup copies everything, while subsequent backups only save what has changed, making the process efficient.
Time Machine’s intuitive interface allows users to “travel back in time” to find deleted files or previous versions of documents with a simple visual timeline.
Local Snapshots vs. Time Machine Backups
Time Machine offers two distinct backup types: local snapshots and external backups, each serving different purposes in your data protection strategy.
Local snapshots are temporary backups stored directly on your Mac’s internal drive. Introduced with macOS High Sierra and enhanced on APFS file systems, these snapshots capture hourly changes for up to 24 hours, even when your external backup disk isn’t connected. This provides a safety net for quick file recovery when you’re away from your regular backup drive.
External backups, meanwhile, are comprehensive archives stored on dedicated external drives. These contain complete copies of your system and files from various points in time, offering more extensive protection and longer retention periods.
The key difference lies in permanence and scope. Local snapshots are automatically managed by macOS, which deletes older ones when space is needed. They’re ideal for recovering recently deleted files or reverting recent changes. External backups provide more complete protection against drive failure or major system issues.
Preparing to Restore
Before attempting to restore files from Time Machine, it’s crucial to verify that your backup system is ready and reliable. This step ensures you can recover your data successfully without encountering errors or corruption issues.
Checking Backup Disk Health
Time Machine backup disks need regular health checks to prevent restore failures. Connect the backup disk to your Mac and open Disk Utility from Applications > Utilities folder. Select the Time Machine drive in the sidebar and click “First Aid” to scan for and repair any disk errors.
For networked Time Machine drives, check connection stability first. Weak Wi-Fi signals or network interruptions can disrupt the restore process.
Look for warning signs like unusual noises, slow performance, or frequent disconnections. These may indicate impending drive failure. If your drive shows signs of trouble, consider creating a new backup on a different disk before attempting to restore.
Mac users can also use the diskutil command in Terminal to check S.M.A.R.T. status of the drive:
diskutil info disk# | grep SMART
Ensuring Backup Integrity
Verify your Time Machine backup is complete and uncorrupted before starting the restore process. Open Time Machine by clicking its icon in the menu bar and selecting “Enter Time Machine.” Browse through recent backups to confirm your files appear as expected.
For a more thorough check, use Terminal to verify backup integrity:
sudo tmutil verifychecksums /Volumes/BackupDiskName
This command scans your Time Machine backup for any corrupted files or incomplete backups.
Local snapshots provide another restore option when your external backup isn’t available. Check available snapshots with:
tmutil listlocalsnapshots /
If Time Machine reports errors during verification, try running a fresh backup before attempting restoration. Partial or corrupted backups may result in incomplete data recovery or restore failures.
Initiating the Restore Process
Time Machine offers multiple entry points to access and restore files from backups. Users can retrieve individual files or complete system snapshots depending on their needs.
Using Finder to Access Backups
To restore files through Finder, users need to first connect their Time Machine backup drive to their Mac. Once connected, they can click the Time Machine icon in the menu bar and select “Enter Time Machine.”
This opens a visual timeline interface where previous versions of files appear. Users can navigate through different backup dates using the timeline on the right edge of the screen.
The Finder window changes to display the contents as they existed at each backup point. To restore a file, users simply select it and click the “Restore” button. The file will be copied to its original location or to a new location if specified.
Time Machine local snapshots are particularly useful when the external backup drive isn’t available. These snapshots are stored directly on the Mac and can be accessed through the same Time Machine interface.
Utilizing Time Machine Application
The Time Machine application provides a more direct approach to restoration, especially for larger recoveries or full system restores.
For complete system restoration, users must boot into macOS Recovery by restarting their Mac and holding Command+R until the Apple logo appears. In the macOS Utilities window, they should select “Restore From Time Machine Backup” and click “Continue.”
The system will prompt users to select their Time Machine backup source. After connecting the backup drive, users select it from the available options and click “Continue.”
Time Machine will display available backups with their dates. Users should choose the most appropriate backup point and click “Continue.” They can then select which information to transfer – entire system, applications, or specific user accounts.
For restoring individual files while in normal operation, launching Time Machine from the menu bar or Applications folder provides the same visual timeline interface as the Finder method.
Restoring Specific Items
Time Machine offers granular recovery options that allow users to retrieve exactly what they need without restoring an entire backup. The process is straightforward and can save valuable time when trying to recover deleted or damaged files.
Individual Files and Folders
To restore individual files or folders from a Time Machine backup, users need to open a Finder window that corresponds to the location where the items were originally stored. For instance, if recovering a document from the Documents folder, they should first navigate to that folder.
Next, they can click the Time Machine icon in the menu bar and select “Enter Time Machine.” The interface will display the current folder across different backup points in time. Users can navigate through snapshots using the timeline on the right side of the screen or the arrow buttons.
When they locate the desired file or folder, they simply select it and click the “Restore” button. Time Machine will copy the item back to its original location with its original permissions intact. If a file with the same name already exists, the system will ask whether to keep the original, replace it, or keep both versions.
Applications and System Preferences
Restoring applications or System Preferences requires a slightly different approach than recovering regular files. For applications, users can enter Time Machine while viewing the Applications folder to see previous versions of installed programs.
After selecting the desired application version, clicking “Restore” will retrieve it to the current system. This can be particularly useful when a recently updated app exhibits problems and users want to revert to a previous stable version.
For System Preferences, users can open the System Preferences window before entering Time Machine. This allows them to browse through previous configurations and settings. When they find the desired preferences snapshot, they can restore specific settings rather than having to reconfigure everything manually.
Some preferences may require restarting applications or the entire system to take effect properly after restoration.
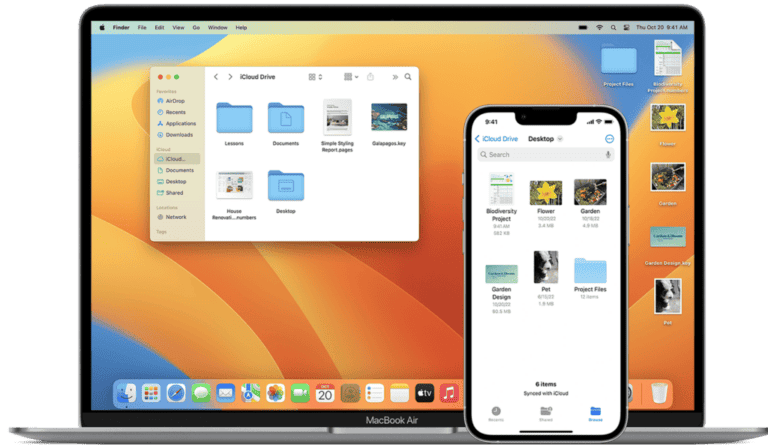
iCloud and iCloud Drive Data
Time Machine creates backups of iCloud Drive data stored locally on the Mac. To restore iCloud Drive files, users should open the iCloud Drive folder in Finder before entering Time Machine.
The recovery process follows the same pattern as restoring regular files – browse through the timeline, select the desired documents, and click “Restore.” Once restored, these files will automatically sync back to iCloud if an internet connection is available.
For iCloud data not visible in the filesystem (like certain app data), users may need to restore the entire application’s data folder. This can be found by using Spotlight to search for the app’s container folder, then entering Time Machine from that location.
Note that some iCloud-specific settings might require additional steps to fully restore, particularly if they involve server-side configurations that Time Machine cannot directly access.
Full System Restore
Sometimes you need more than just recovering a few files – a complete system restoration may be necessary after severe issues like hard drive failure or major system corruption. Time Machine makes this process straightforward with several methods to get your Mac back to a working state.
Using macOS Recovery
To begin a full system restore, you’ll need to start your Mac in Recovery Mode. Restart your Mac and hold Command+R until the Apple logo appears. This boots into macOS Recovery, giving you access to essential utilities.
For Intel-based Macs, you can also use Option+Command+R for upgrading to the latest macOS compatible with your Mac. Apple Silicon Macs (M1/M2) require a slightly different approach – turn on your Mac and continue holding the power button until startup options appear.
Once in Recovery Mode, you’ll see several options on screen. Select “Restore from Time Machine Backup” from the utilities window. The system will then guide you through selecting your backup source – this could be an external drive, network location, or Time Capsule.
Choose the most recent backup unless you’re specifically trying to revert to an earlier system state. The restore process can take several hours depending on the amount of data.
Reinstalling macOS
If your Time Machine backup isn’t accessible or you want a clean start while preserving your data, reinstalling macOS is an option. From Recovery Mode, select “Reinstall macOS” instead of the Time Machine option.
The system will download and install a fresh copy of macOS. This doesn’t erase your data by default, but performs a clean installation of system files. You’ll need an internet connection for this process to download the necessary files.
For a completely fresh start, use Disk Utility (also available in Recovery Mode) to erase your drive first. Be careful – this deletes all data on the selected volume. Only proceed if you have backups or don’t need the existing data.
The installation process typically takes 30-60 minutes, varying based on your internet speed and Mac’s performance. Follow the on-screen instructions to complete the installation.
Migration Assistant for User Accounts
After reinstalling macOS, you’ll need to restore your user accounts, applications, and personal files. This is where Migration Assistant comes in. You can launch it during the initial setup or find it later in the Applications > Utilities folder.
When prompted, select “From a Mac, Time Machine backup, or startup disk” and then choose your Time Machine backup drive. The assistant will scan for available backups and let you select which one to use.
Migration Assistant offers granular control over what to transfer. You can select specific user accounts, applications, and system settings. This is helpful if you only want to restore certain elements while keeping others fresh.
The transfer process can take several hours depending on data volume. Your Mac may restart multiple times during this process. Once complete, you’ll have your familiar environment back with all your applications and settings intact.
Troubleshooting Common Issues
Time Machine backup problems can often be resolved with the right approach. When issues arise with snapshots or backups, specific solutions exist for the most common scenarios.
Handling Backup Drive Errors
When Time Machine shows errors related to the backup drive, first check physical connections. Unplug and reconnect the external drive to ensure a proper connection. This simple step often resolves many connectivity issues.
If the drive appears but won’t complete backups, open Time Machine preferences and toggle the backup switch off and on. For persistent problems, try verifying the backup disk by holding Option while clicking the Time Machine menu bar icon and selecting “Verify Backups.”
Terminal commands can help diagnose drive issues. Run diskutil list to identify the drive, then diskutil verifyVolume /dev/diskX (replace X with your drive identifier) to check for errors.
Some users report success by reformatting their backup drive as APFS or Mac OS Extended (Journaled). Before reformatting, ensure you have copied any critical backups elsewhere.
Dealing with Corrupted Backups
Corrupted backups prevent proper restoration and future backups. To check if corruption exists, use tmutil verifychecksums /Volumes/BackupName in Terminal, replacing “BackupName” with your actual backup volume name.
If corruption is detected, you may need to create a fresh backup. First, open Time Machine preferences and click “Select Disk” to temporarily remove the current backup disk. Then add it back and choose “Replace” when prompted.
For partially corrupted backups, try recovering specific files rather than complete snapshots. Browse Time Machine using the Time Machine interface to locate uncorrupted versions of needed files.
The command tmutil listlocalsnapshots / shows all local snapshots currently stored. If you identify a corrupted snapshot, you can delete it using sudo tmutil deletelocalsnapshots YYYY-MM-DD-HHMMSS with the specific timestamp.
Freeing Up Storage Space
Local snapshots can consume significant storage space. To view all snapshots and the space they use, enter tmutil listlocalsnapshots / in Terminal. This command displays available snapshots with their timestamps.
To manually delete specific snapshots that are taking up space, use sudo tmutil deletelocalsnapshots YYYY-MM-DD-HHMMSS with the snapshot’s timestamp. For bulk deletion, the command sudo tmutil thinlocalsnapshots / 999999999999 4 removes all but the most recent snapshots.
macOS automatically manages snapshots when space runs low, but you can be more aggressive with cleanup. In Terminal, run sudo tmutil thinlocalsnapshots / 100000000000 1 to remove all but essential snapshots.
Check your backup settings in Time Machine preferences to exclude large folders or files you don’t need backed up. Excluding items like Downloads, virtual machine files, or video libraries can significantly reduce backup size.
Advanced Time Machine Operations
Time Machine offers powerful capabilities beyond the basic backup and restore functions. Power users can leverage command-line tools, work with APFS snapshots, and manage storage more efficiently through terminal commands.
Using Terminal with tmutil
The tmutil command provides advanced control over Time Machine operations from the Terminal. This command-line utility allows users to perform actions not available in the graphical interface.
To check the status of Time Machine backups, users can enter tmutil status in Terminal. This shows whether a backup is in progress and its completion percentage.
Creating a manual backup is simple with tmutil startbackup. Adding the -b flag makes it run in the background, allowing continued use of the Mac during the backup process.
For those who need to compare backups, tmutil compare identifies differences between the current system and the most recent backup, or between two specific backups using timestamps.
The command tmutil destinationinfo displays details about configured backup destinations, including available space and backup history.
Time Machine and APFS Snapshots
APFS (Apple File System) snapshots integrate seamlessly with Time Machine on modern Macs. These snapshots are point-in-time versions of the file system stored locally.
Time Machine creates local APFS snapshots approximately once per hour. These snapshots remain available even when the external backup drive is disconnected, providing access to previous file versions.
To view available APFS snapshots, use tmutil listlocalsnapshots / in Terminal. This shows all snapshots with their creation timestamps.
Snapshots use a storage optimization technique called “copy-on-write,” which only tracks changes rather than duplicating unchanged files. This makes them space-efficient.
When the primary backup drive reconnects, Time Machine transfers local snapshots to the external drive, ensuring continuity in the backup history.
Deleting Local Backups via Terminal
Managing storage space sometimes requires removing local Time Machine backups. The Terminal provides precise control over this process.
To delete a specific local snapshot, use tmutil deletelocalsnapshots followed by the snapshot date in YYYY-MM-DD-HHMMSS format. For example: tmutil deletelocalsnapshots 2025-02-25-120000.
For removing all local snapshots, the command tmutil deletelocalsnapshots / will free up the space they occupy. This is useful when storage space is critically low.
Before deleting snapshots, checking their size with tmutil listlocalsnapshots / and tmutil thinlocalsnapshots / 10000000000 1 helps make informed decisions. The second command frees approximately 10GB of space while preserving newer snapshots.
macOS automatically manages local snapshots when storage pressure increases, but manual deletion gives users direct control when needed.
Data Recovery Alternatives
When Time Machine backups fail or aren’t available, several alternatives can help recover important files. These options range from software tools that can scan and retrieve lost data to professional services that specialize in complex recovery scenarios.
Third-Party Data Recovery Tools
Disk Drill stands out as a powerful alternative for Mac users when Time Machine fails. This versatile tool can recover files from crashed hard drives, accidentally formatted volumes, and even damaged Time Machine backups. It features a clean interface and preview function that lets users see files before recovery.
Duplicati offers free, open-source backup capabilities with strong encryption and compression features. Unlike Time Machine, it works across multiple platforms including Windows and Linux, making it ideal for mixed-device households.
Macrium Reflect provides reliable disk imaging and cloning features. It creates complete snapshots of the system that users can browse and restore individual files from without performing a full system recovery.
For those needing recovery without backups, Stellar Data Recovery can scan Mac drives to locate deleted or lost files. It supports recovery from various scenarios including accidental deletion, drive formatting, and virus attacks.
Professional Data Recovery Services
When software tools can’t solve the problem, professional data recovery services offer advanced solutions. These services employ specialized equipment and clean-room environments to recover data from physically damaged drives.
DriveSavers and Ontrack are industry leaders with decades of experience. They can recover data from water-damaged devices, drives with mechanical failures, and even fire-damaged equipment. Success rates typically range from 85-95% depending on damage severity.
Professional services cost significantly more than software tools, with prices ranging from $300 to $1,500+ depending on drive size and damage extent. However, the recovery process is handled by certified technicians with specialized training.
Most reputable services offer free evaluations and only charge if recovery is successful. They also maintain strict confidentiality protocols for sensitive data, making them suitable for business and personal recovery needs.
Frequently Asked Questions
Time Machine provides powerful backup and recovery options for Mac users. Here are answers to common questions about restoring from Time Machine backups, managing snapshots, and recovery procedures.
What are the steps to restore a Mac from a Time Machine backup on an external drive?
Restoring a Mac from a Time Machine backup on an external drive requires several straightforward steps. First, connect the external drive containing the Time Machine backup to the Mac.
For a complete system restore, restart the Mac and hold Command+R to boot into Recovery Mode. Select “Restore from Time Machine Backup” from the macOS Utilities window and follow the on-screen instructions.
The Mac will prompt users to select the backup source (the external drive) and then choose which specific backup to restore from. After selecting the appropriate backup, the restoration process will begin and may take several hours depending on the amount of data.
How can I recover specific files from a Time Machine backup?
Recovering individual files from Time Machine is simpler than a full system restore. Users can click the Time Machine icon in the menu bar and select “Enter Time Machine” or use Spotlight to search for and open the Time Machine application.
The interface displays a stack of windows representing different backup points. Navigate through these windows using the timeline on the right edge of the screen or the arrow buttons to find the version of the file needed.
Once the desired file is located, select it and click the “Restore” button. Time Machine will copy that file back to its original location. Alternatively, users can drag the file to a different location if they prefer not to overwrite the current version.
What is the process to restore a Mac to a previous date using Time Machine?
To restore a Mac to a previous date, users should first ensure their Time Machine backup drive is connected. Then, restart the Mac while holding Command+R to enter Recovery Mode.
In the macOS Utilities window, select “Restore from Time Machine Backup” and follow the prompts to select the backup drive. The next screen will display available backup dates and times.
Select the specific date and time to restore from, then complete the restoration process by following the on-screen instructions. This will revert the entire system to that point in time, including all files, applications, and settings.
How to perform a clean install on a Mac and restore from Time Machine thereafter?
For a clean install followed by selective restoration, first back up the Mac using Time Machine. Create a bootable installer for macOS using a USB drive and the “createinstallmedia” command in Terminal.
Boot from the installer by holding Option during startup and selecting the USB drive. Use Disk Utility to erase the Mac’s internal drive, then install a fresh copy of macOS.
During the setup process, choose the option to “Restore from a Time Machine Backup” when prompted. Alternatively, complete the setup as a new Mac and later use Migration Assistant (found in Applications > Utilities) to selectively transfer data from the Time Machine backup.
Can operating system updates be restored along with files using Time Machine?
Time Machine backs up the entire system, including the operating system and all its components. When performing a full restore, the Mac will return to the exact state captured in that backup, including the OS version.
This capability allows users to roll back problematic OS updates by restoring to a backup made prior to the update. However, Apple recommends caution when reverting to older OS versions as some newer applications may not work properly.
For security reasons, users should generally maintain the latest OS version and only roll back temporarily if experiencing significant issues. After resolving specific problems, updating to the current OS version is advisable.
How to manage local snapshots taken by Time Machine on a Mac?
Time Machine creates local snapshots on the startup disk when the backup drive isn’t available. These snapshots help users recover recently deleted files even when disconnected from their backup drive.
Local snapshots are automatically created approximately every hour and stored directly on the Mac’s internal drive. They use available space that can be automatically reclaimed by the system when needed for other purposes.
To view local snapshots, open Time Machine like normal even without the backup drive connected. The available snapshots will appear in the timeline. To manually delete local snapshots and free up space, users can use Terminal commands or temporarily disable Time Machine and restart the Mac.