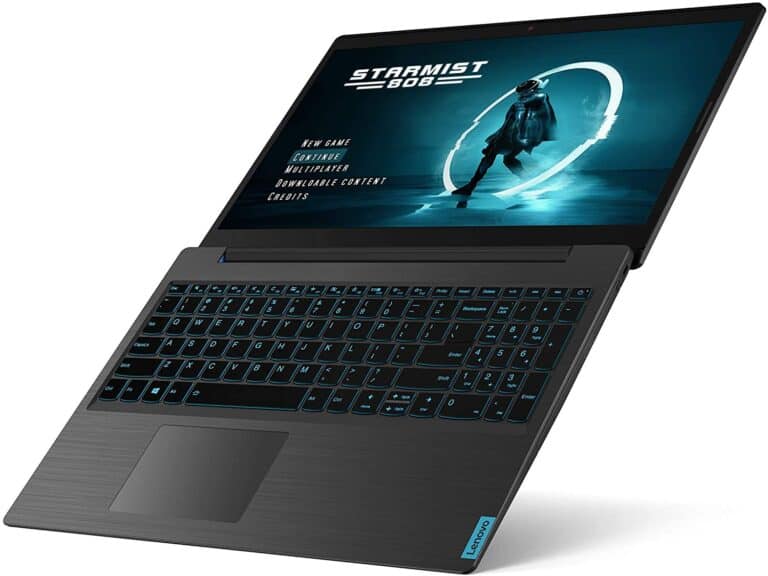
Is your Dell docking station giving you trouble? You’re not alone. Many users face issues with their Dell docks, from connection problems to display malfunctions. The most common fixes for Dell docking station issues include resetting the dock by holding the reset button for 30 seconds, updating all drivers and firmware, and checking cable connections for proper seating.
Troubleshooting these devices doesn’t have to be complicated. Sometimes the solution is as simple as pressing the reset button on the top right corner of your dock for at least 30 seconds after disconnecting it from your laptop. Other times, you might need to update the firmware and drivers for both your dock and computer to ensure compatibility.
Power delivery issues are another common problem with Dell docks. If your dock isn’t charging your laptop, try checking the AC adapter LED to confirm it’s providing power, and inspect your cables for any damage or loose connections.
Dell Docking Station Not Working
Dell docking stations are designed to enhance productivity by connecting multiple devices through a single connection. However, when they malfunction, they can disrupt your entire workflow. This comprehensive guide will walk you through effective troubleshooting steps to get your Dell docking station working again.
Common Symptoms
- Docking station not powering on
- Connected monitors not being detected
- USB devices not recognized
- Ethernet connection failing
- Intermittent connectivity issues
Step-by-Step Troubleshooting
1. Check Physical Connections
Start with the basics:
- Ensure the docking station’s power adapter is securely plugged into both the dock and wall outlet
- Verify the USB-C or USB-A cable connecting your laptop to the dock is firmly attached at both ends
- Inspect all cables for visible damage or wear
- Try unplugging and reconnecting all cables
2. Restart Your Devices
A simple restart often resolves many issues:
- Disconnect the docking station from your laptop
- Shut down your computer completely (don’t just put it to sleep)
- Unplug the docking station’s power adapter for 30 seconds
- Reconnect the power adapter to the dock
- Power on your laptop and reconnect to the docking station
3. Update Docking Station Drivers
Outdated drivers are a common culprit (source: WPS Blog):
- Visit Dell’s official support website
- Enter your docking station’s service tag or model number
- Download the latest drivers for your specific model
- Install the drivers and restart your computer
- For Windows users, also check Windows Update for any pending driver updates
4. Update Firmware
Firmware updates can fix bugs and compatibility issues:
- Go to Dell’s support page for your docking station model
- Look for firmware updates specifically for your dock
- Follow Dell’s instructions carefully when installing firmware updates
- Never disconnect the dock during a firmware update
5. Perform a Dock Reset
Many Dell docking stations have a reset procedure (source: WPS Blog):
- Disconnect all cables from the docking station except the power cable
- Unplug the power adapter and wait 30-60 seconds
- Press and hold the power button on the dock (if available) for 15 seconds
- Reconnect the power adapter
- Wait for the dock to initialize before reconnecting your laptop
6. Check Monitor Connection Issues
If monitors aren’t being detected (source: GeekBitz):
- Verify monitors are powered on and set to the correct input source
- Try different video ports on the dock (HDMI, DisplayPort, USB-C)
- Test monitors with different cables to rule out cable failure
- Update your graphics drivers through Device Manager or your GPU manufacturer’s website
- Check your laptop’s display settings to ensure it’s set to extend or duplicate displays
7. Update BIOS
Your laptop’s BIOS can affect docking station compatibility:
- Visit Dell’s support website and locate BIOS updates for your laptop model
- Follow Dell’s instructions for safely updating your BIOS
- After updating, restart and reconnect the docking station
8. Check USB Power Settings (Windows)
Windows power management can interfere with dock functionality:
- Open Device Manager
- Expand “Universal Serial Bus controllers”
- Right-click each USB Root Hub and select Properties
- Go to the Power Management tab
- Uncheck “Allow the computer to turn off this device to save power”
- Repeat for all USB hubs
9. Disable USB Selective Suspend
- Open Control Panel > Power Options
- Click “Change plan settings” for your active power plan
- Select “Change advanced power settings”
- Expand “USB settings” > “USB selective suspend setting”
- Set both “On battery” and “Plugged in” to “Disabled”
10. Test with Different Devices
Isolate the problem:
- Try connecting the docking station to a different laptop if available
- Test your laptop with a different docking station
- This helps determine if the issue is with the dock, laptop, or specific configuration
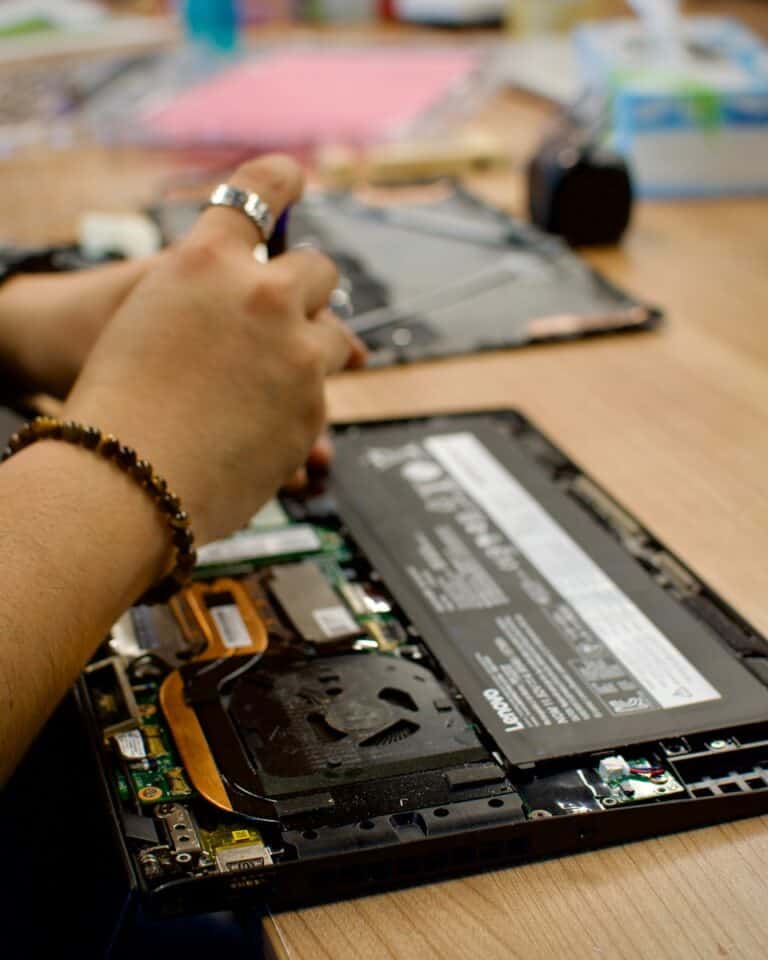
11. Check for Hardware Damage
Inspect for physical issues:
- Look for bent pins in USB-C or other ports
- Check for overheating (the dock should be warm but not excessively hot)
- Ensure the dock is on a flat, ventilated surface
- Look for any indicator lights that might signal errors
Model-Specific Considerations
Different Dell docking station models may have unique requirements:
- Dell WD Series (WD15, WD19): Often require specific Dell drivers
- Dell D6000: Universal docks using DisplayLink technology need DisplayLink drivers
- Dell Thunderbolt Docks: Require Thunderbolt firmware and may need BIOS settings enabled
- Dell USB-C Docks: Check that your laptop supports USB-C Power Delivery and DisplayPort Alt Mode
When to Contact Support
If none of these steps resolve your issue, it may be time to contact Dell support (source: Dell Support):
- Your docking station may be defective and need replacement
- There could be compatibility issues with your specific laptop model
- You may need advanced technical assistance
Visit Dell’s support page or contact them directly for warranty service or replacement options.
Prevention Tips
To avoid future docking station issues:
- Keep drivers and firmware regularly updated
- Use the original power adapter that came with your dock
- Don’t overload the dock with too many high-power USB devices
- Ensure adequate ventilation around the docking station
- Regularly check for Windows and system updates
Conclusion
Most Dell docking station issues can be resolved through systematic troubleshooting. Start with simple solutions like checking connections and restarting devices before moving to more advanced steps like driver updates and firmware installations. By following this guide, you should be able to identify and fix the problem efficiently, getting back to a productive multi-device setup.
Key Takeaways
- Resetting your dock, updating drivers, and checking cable connections solve most common docking station problems.
- Diagnostic indicators on Dell docks can help identify specific issues through LED light patterns.
- Compatibility between your specific laptop model and docking station should be verified through Dell’s support documentation.
Understanding the Basics of Docking Stations
A docking station is a device that expands a laptop’s connectivity options. It serves as a central hub where you can connect multiple peripherals through a single cable to your laptop.
Dell docking stations are designed to work seamlessly with Dell laptops, though many models are compatible with other brands too. These docks typically connect via USB-C or Thunderbolt ports.
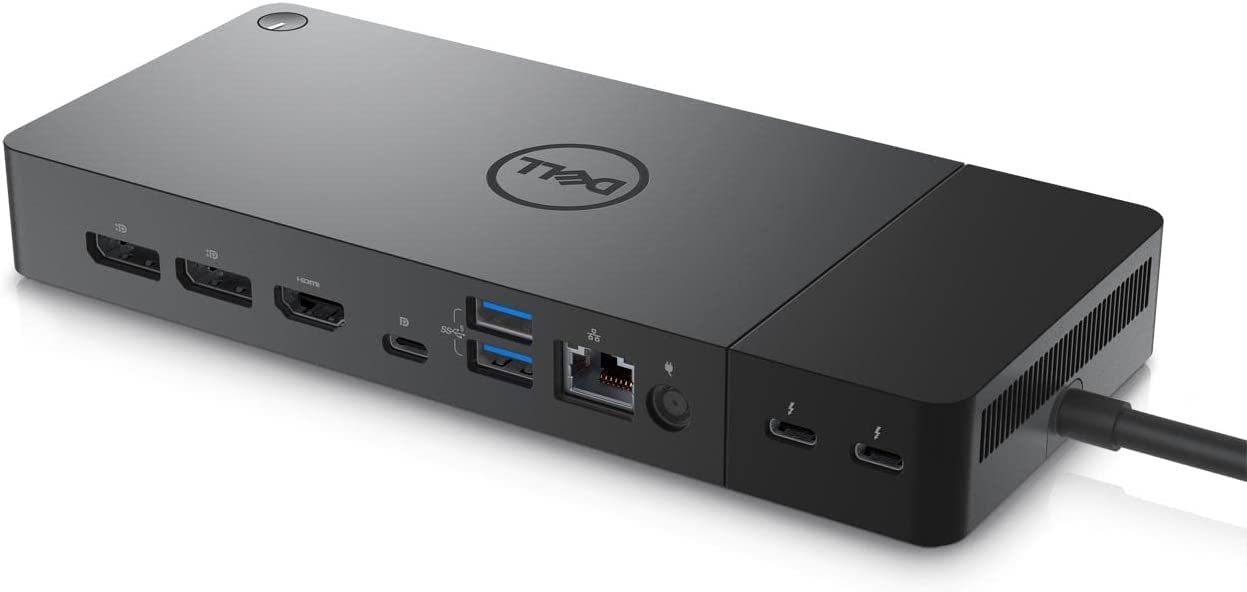
Types of Dell Docking Stations:
- USB-C docks (WD19, WD19S)
- Thunderbolt docks (WD22TB4)
- Universal docks
The main advantage of using a Dell docking station is the ability to connect to multiple monitors, ethernet, external storage, and other peripherals through a single connection.
Most modern docking stations deliver power to your laptop. This eliminates the need for a separate power adapter, keeping your workspace tidy.
Connection is typically simple—just plug the dock’s cable into your laptop’s USB-C or Thunderbolt port. The system should recognize the dock automatically.
Dell docking stations require proper drivers to function correctly. These drivers help your laptop communicate effectively with the dock and manage power delivery.
Some Dell docks feature a reset button on the device. This can be useful when troubleshooting connection issues, as pressing this button for 30 seconds can resolve many common problems.
Understanding the relationship between your laptop’s port capabilities and your dock specifications is crucial for optimal performance and troubleshooting.
Initial Troubleshooting Steps
When your Dell docking station isn’t working properly, several simple steps can often resolve the issue without requiring technical support. These troubleshooting methods address the most common problems users face with their docking stations.
Checking Power and Connection Integrity
First, verify that your Dell docking station is receiving power. The power LED should be illuminated when properly connected to a power outlet. If it’s not lit, check if the power adapter is firmly plugged into both the dock and the wall outlet.
Examine all cables for visible damage such as fraying, bending, or broken connectors. Even minor damage can prevent proper functioning.
For USB-C docks, ensure the cable is fully inserted into both the dock and laptop ports. These connections sometimes loosen during normal use.
Try using a different power outlet to rule out electrical issues with your current outlet. Some Dell docking stations like the WD19 series require significant power to function properly, particularly when charging laptops and powering multiple Dell monitors.
Restarting Devices and Docking Station
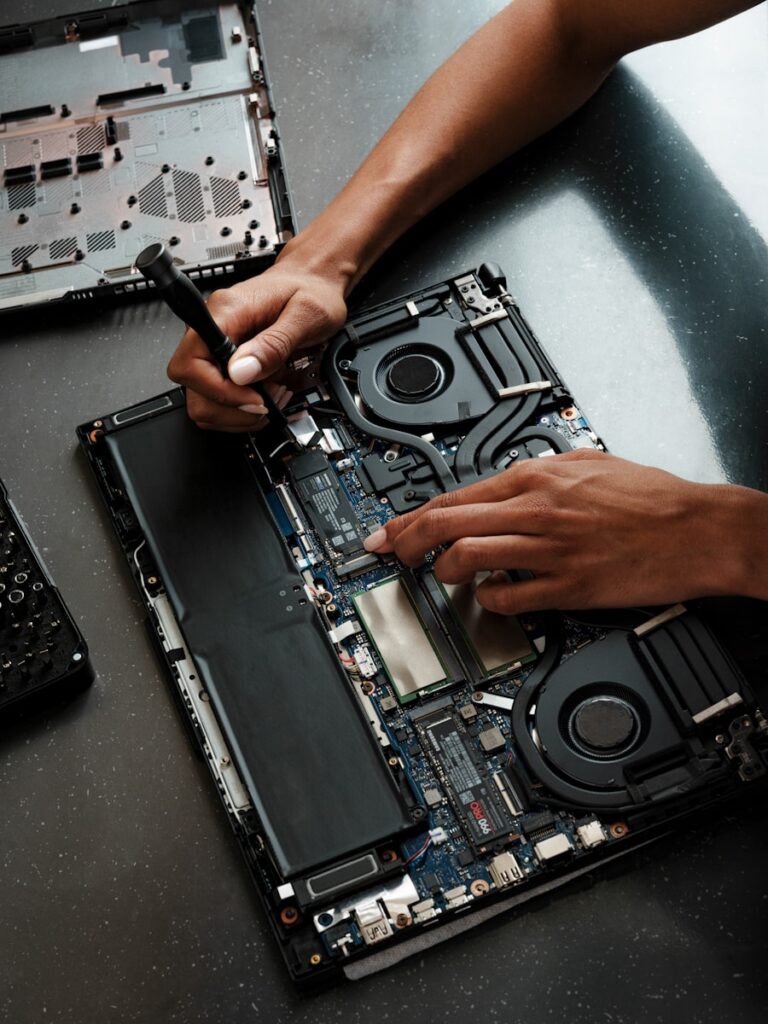
Power cycling often resolves temporary glitches. Disconnect all cables from your docking station, including power, USB, and display connections.
Press and hold the reset button on your Dell dock for at least 30 seconds. This button is typically located on the top, toward the lower right corner when viewed from above.
Restart your laptop completely before reconnecting it to the dock. This clears temporary system states that might interfere with dock recognition.
Reconnect components one at a time: first power to the dock, then the cable to your laptop, and finally peripheral devices. This methodical approach helps identify if a specific connection is causing problems.
Using the Right Ports and Cables
Not all USB-C ports on laptops support docking functionality. Check your laptop’s manual to identify which ports fully support data, video, and power delivery required for docking stations.
For Thunderbolt docks, verify you’re using a compatible Thunderbolt-enabled port on your laptop. These ports often have a lightning bolt symbol next to them.
Use only the cables provided with your Dell docking station. Third-party cables may not support the necessary bandwidth or power specifications.
If your dock connects via DisplayPort or HDMI to monitors, ensure you’re using cables rated for the resolution and refresh rate of your Dell monitors. Older or lower-quality cables may not support higher-resolution displays.
Testing with Alternative Devices
Connect the docking station to a different laptop to determine if the issue lies with the dock or the original computer. If it works with another device, your laptop may need driver or firmware updates.
Try connecting a different monitor to the dock. This helps identify whether the issue involves the dock’s display outputs or the original monitor.
Test peripheral devices directly with your laptop instead of through the dock. If they work when connected directly, the problem is likely with the dock itself.
If possible, try a different Dell docking station model. Some laptops work better with specific dock models despite having compatible connections.
Software and Driver Solutions
Most Dell docking station problems can be fixed with the right software updates. Keeping drivers up-to-date ensures your dock communicates properly with your laptop.
Updating Dell Docking Station Drivers
The first troubleshooting step should be updating your dock’s firmware and drivers. Dell regularly releases updates that fix bugs and improve compatibility with different laptops.
To update your drivers, visit the Dell support website and enter your docking station’s model number. Look for the latest drivers specifically for your dock model (WD19, D6000, etc.).
For Windows 10 and Windows 11 users, Dell Command Update utility can automatically find and install the correct drivers. This tool simplifies the update process and ensures all components stay current.
Important update steps:
- Disconnect the dock from your computer
- Install the new drivers
- Restart your computer
- Reconnect the dock
Installing DisplayLink Drivers
Some Dell docking stations use DisplayLink technology to support multiple monitors. If your dock’s video outputs aren’t working properly, the DisplayLink drivers might need attention.
DisplayLink drivers are especially important for USB-C docks that support multiple monitors. Without the proper driver, screens may flicker, show incorrect resolutions, or not work at all.
Download the latest DisplayLink drivers compatible with your operating system. The drivers work with both Windows 10 and Windows 11.
After installation, restart your computer before reconnecting the dock. This ensures the DisplayLink software properly initializes when the dock is connected.
Addressing Compatibility Issues
Dell docking stations may encounter compatibility problems with different laptop models, operating systems, and connection types. These issues often require specific solutions based on the hardware and software configurations involved.
Understanding Different Model Requirements
Dell docking stations come in various models, each designed for specific laptop connections. The WD19DC and WD19DCS Performance Docking Stations require dual USB-C ports and are primarily compatible with certain Dell Precision workstations. Meanwhile, the WD19 series works with single USB-C connection laptops.
Before purchasing a docking station, users should verify the connection type on their laptop. USB-C ports with Thunderbolt capability offer faster data transfer rates but may require different drivers than standard USB-C connections.
Power delivery requirements also vary by model. Higher-end laptops may need docking stations that provide sufficient wattage to charge while operating. Users should check their laptop’s power requirements against the docking station’s output specifications.
For optimal performance, ensure the docking station firmware is updated through Dell Update or Dell Command Update applications.
Ensuring Operating System Compatibility
Operating system compatibility plays a crucial role in docking station functionality. Windows 10 and Windows 11 typically offer the best support for Dell docking stations, though driver installation may be necessary.
Dell recommends resetting the docking station and updating Windows before troubleshooting other issues. Many functionality problems stem from outdated drivers or operating system conflicts.
To install the proper drivers:
- Visit Dell’s support website
- Download the latest docking station drivers for your specific OS version
- Update BIOS and chipset drivers on the laptop first
- Install the docking station drivers following the guided installation
USB-C connection issues often resolve after Windows updates. If problems persist after updating, try connecting the dock to different USB-C ports on the laptop or performing a full power cycle of both devices.
Resolving HP Laptop Connection Anomalies
Non-Dell laptops, particularly HP models, may experience connection difficulties with Dell docking stations. These compatibility issues frequently relate to USB-C port specifications and power delivery standards.
Some users report issues connecting HP laptops to Dell WD15 docking stations, often due to USB-C port limitations. HP laptops may have different power delivery requirements or limited Thunderbolt support compared to Dell machines.
For Ethernet connectivity problems, users should check the network adapter settings. Opening “Change adapter options” in Network Settings can reveal if the docking station’s Ethernet connection appears as “Ethernet 2” or another secondary connection.
When connecting HP laptops to Dell docks, try these troubleshooting steps:
- Install Dell docking station drivers manually (even on non-Dell laptops)
- Verify the HP laptop supports the power profile used by the Dell dock
- Update the laptop’s USB-C/Thunderbolt drivers
- Test with different USB-C cables designed for data transfer
Hardware-Related Solutions
When a Dell docking station stops working, the issue often stems from physical connections or port problems. Addressing these hardware challenges can quickly restore functionality without requiring complex technical fixes.
Checking HDMI and USB-C Port Functionality
Start by examining the physical condition of all ports on both the docking station and laptop. Look for bent pins, debris, or damage in the USB-C and HDMI ports that might prevent proper connections.
Try connecting devices directly to your laptop’s ports to determine if the issue is with the dock or the computer itself. If a monitor works when connected directly to your laptop but fails through the dock, the dock’s port may be faulty.
Dell recommends resetting the docking station by unplugging all cables, including power, for about 30 seconds before reconnecting. This simple reset often resolves intermittent connection issues.
For USB-C ports, ensure you’re using the correct port on your laptop, as not all USB-C ports support video or docking functionality.
Resolving External Monitor Detection Issues
When Dell monitors or other external displays aren’t detected through the docking station, try pressing the Windows key + P to access display settings. Select “Extend” or “Duplicate” to activate multiple monitors.
If monitors still aren’t detected, check if your dock’s firmware needs updating. Dell provides specific drivers for their docking stations that can resolve detection problems.
Try different monitor cables or ports on the dock. Some users report that reconnecting the USB-C cable several times may resolve detection issues with stubborn connections.
For multi-monitor setups, remember that your laptop’s graphics capabilities might limit how many external monitors can function simultaneously through the dock.
Advanced Troubleshooting
When standard fixes fail to resolve Dell docking station issues, more technical solutions are needed. These advanced steps target system-level compatibility problems and often require accessing deeper system settings that control how your computer interacts with external devices.
Performing BIOS Updates
Outdated BIOS versions can cause serious compatibility issues with Dell docking stations. To update your system BIOS:
- Visit Dell’s Support website and enter your service tag
- Download the latest BIOS update for your specific model
- Save all work and close programs before installing
- Run the BIOS update utility and follow the on-screen instructions
The computer will restart several times during this process. After completion, test the docking station again to see if functionality has been restored. BIOS updates often include critical fixes for USB-C and Thunderbolt connectivity issues that affect docking performance.
Be sure to connect your laptop to power during any BIOS update to prevent potential system damage from power loss during installation.
Adjusting BIOS Settings for Docking Stations
Some docking station problems can be resolved by modifying specific BIOS settings:
- Restart your computer and press F2 (or Del) repeatedly to enter BIOS setup
- Navigate to the Advanced or System Configuration section
- Look for settings related to:
- Thunderbolt Security Level (set to “No Security” for testing)
- USB Power Share (enable or disable)
- USB/Thunderbolt Pre-boot (enable)
- C-States Control (disable for troubleshooting)
These settings control how power and data flow through the ports used by docking stations. Incorrect configurations can prevent proper detection or cause intermittent failures. After making changes, save and exit the BIOS, then test the dock again to see if performance improves.
Exploring Firmware Upgrade Options
Dell docking stations have their own firmware that requires periodic updates. Outdated firmware can cause display issues, intermittent connectivity, and power delivery problems.
To update dock firmware:
- Download Dell Command Update or Dell Update from Dell’s support site
- Install and run the application
- Allow it to scan for available updates
- Select and install any available dock firmware updates
For manual updates, visit Dell’s troubleshooting guide to find specific firmware for your dock model. Many dock issues, especially with newer models like WD19, are resolved through firmware updates that improve compatibility with various laptop models.
Some docks have a dedicated reset button that should be pressed for at least 30 seconds after firmware updates to complete the installation process.
Seeking Professional Help
When your Dell docking station isn’t working, sometimes the best solution is to get professional assistance. Technical experts have specialized knowledge and tools to address complex issues that troubleshooting alone can’t fix.
Utilizing Dell Tech Support
Dell offers several support options for dock-related problems. Their official support website provides detailed information about specific docking stations like the WD19DC and WD19DCS models.
Customers can contact Dell tech support through:
- Phone support: Direct access to technicians
- Live chat: Real-time troubleshooting guidance
- Email support: Detailed problem descriptions with screenshots
Dell tech support can remotely diagnose firmware issues that often cause connectivity problems. They have access to proprietary diagnostic tools that aren’t available to the general public.
For customers with Premium Support or ProSupport plans, expedited service is available with minimal wait times.
Contacting Verified Experts
Independent technicians with Dell certification can offer valuable assistance for dock issues. These professionals have undergone specific training on Dell hardware systems.
Many verified experts can be found through:
- IT service companies with Dell partnership status
- Computer repair shops with Dell-certified technicians
- Freelance professionals with verifiable Dell credentials
When selecting an expert, verify their credentials and ask about their experience with your specific docking station model. Check online reviews and request references if possible.
Verified experts can diagnose hardware failures more accurately than general technicians. They often have specialized equipment to test power delivery and port functionality.
Engaging in a Multi-Step Expert Quality Process
Professional technicians typically follow a structured approach when addressing dock issues:
- Initial assessment: Documenting the specific symptoms and error messages
- Hardware inspection: Checking for physical damage to ports and cables
- Diagnostic testing: Using specialized tools to test power and data transfer
- Firmware analysis: Verifying current versions and identifying upgrade needs
Many professionals will perform a complete system reset of the dock before more complex interventions. This often includes a 30-second reset button hold to clear temporary errors.
For persistent issues, experts might use oscilloscopes or multimeters to check power delivery. They can also test alternative peripherals to isolate the problem source and ensure it’s dock-related rather than peripheral-specific.
Frequently Asked Questions
Dell docking stations sometimes experience issues that can disrupt your workflow. Here are answers to the most common troubleshooting questions to help you get your dock working properly again.
How can I perform a hard reset on a Dell docking station?
To perform a hard reset on a Dell docking station, first disconnect the dock from your laptop. Locate the reset button, which is typically on the top or side of the device.
For the WD19 series, press and hold the reset button for at least 30 seconds. This button is often found on the top right corner when viewing the dock from above.
After the reset, reconnect the power adapter to the docking station first, then connect it to your computer.
What should I do if the power light on my Dell docking station is not turning on?
If the power light isn’t illuminated, first check that the power adapter is connected properly to the docking station. Ensure the power cable is firmly plugged into both the dock and the wall outlet.
Try using a different power outlet to rule out electrical issues. If available, test with another power adapter that’s compatible with your dock model.
Check for any visible damage to the cables or adapter. If the power light still doesn’t turn on after these steps, the docking station might need repair or replacement.
Why is my Dell docking station failing to connect with my monitor?
Monitor connection issues often stem from cable problems or incorrect settings. First, verify that all cables between the dock and monitor are securely connected.
Try using different video ports on the docking station if available. For example, switch from HDMI to DisplayPort to see if that resolves the issue.
Check your display settings in Windows to ensure the external monitor is detected. You may need to press the Windows key + P to select the appropriate display mode.
Update the drivers for both your computer and docking station, as outdated drivers often cause display problems.
Where can I find the latest drivers for my Dell docking station?
The latest drivers for Dell docking stations can be found on the Dell Support website. Search for your specific docking station model to access the appropriate drivers.
Dell Technologies recommends updating Windows first, then installing the latest drivers for both your computer and docking station. This ensures compatibility and optimal performance.
You can also use Dell Update utility or Dell Command Update on supported systems to automatically detect and install the latest updates.
What steps should I take if my Dell docking station’s USB ports are not functioning?
When USB ports aren’t working, start by checking if the docking station is properly connected to your laptop. Ensure the connecting cable is securely plugged in at both ends.
Try connecting your USB devices directly to your laptop to determine if the issue is with the devices or the dock. If they work directly with the laptop, the problem is with the dock.
Update the dock firmware and drivers. Outdated software is a common cause of USB port failures on docking stations.
How can I resolve compatibility issues when using a Dell docking station with an HP laptop?
Using a Dell docking station with non-Dell laptops may cause compatibility issues. First, check if your Dell dock supports universal compatibility through USB-C or Thunderbolt connections.
Install the latest firmware and drivers for both the docking station and your HP laptop. This often resolves basic compatibility problems.
Some functions might be limited when using cross-brand equipment. For example, power delivery or certain video outputs might not work as they would with a Dell laptop.
If problems persist, consider using a dock from the same manufacturer as your laptop for the best compatibility and full feature support.