Is your Google TV streamer refusing to connect to WiFi? This frustrating issue can interrupt your streaming experience, but there are several effective solutions to get you back online quickly. Whether you’ve just moved your device or are experiencing random disconnections, the problem often stems from your router setup or device settings.
The most common fixes include checking the distance between your streamer and router, rebooting your router, turning off Fast Roaming in the Chromecast settings, or completely forgetting the network and reconnecting from scratch. Many users find that simply unplugging both the router and Google TV device for 30 seconds before reconnecting solves their connectivity problems.
If basic troubleshooting doesn’t work, you might need to uninstall and reinstall the Google Home app on your mobile device before trying to pair your Chromecast again. Router interference from other electronics or outdated firmware can also cause persistent connection issues.
Fix Google TV Streamer Not Connecting To WiFi
The Google TV Streamer is an excellent streaming device that brings your favorite content to your television, but like any connected device, it can occasionally experience WiFi connectivity issues. If your Google TV Streamer won’t connect to WiFi, don’t worry—this comprehensive guide will walk you through proven solutions to get you back to streaming in no time.
Understanding the Problem
WiFi connectivity issues with the Google TV Streamer can manifest in several ways:
- Device won’t detect available networks
- Connection drops repeatedly
- “Unable to connect” error messages
- Successful connection but no internet access
- Slow or buffering streams despite strong WiFi signal
These problems can stem from various sources including router issues, distance problems, network congestion, or device configuration errors. Let’s explore the solutions from simplest to most advanced.
Solution 1: Basic Restart and Reconnection
The first and often most effective solution is a simple restart of both your Google TV Streamer and your router.
Restart Your Google TV Streamer
Method 1: Through Settings
- Navigate to Settings on your Google TV Streamer
- Select System → Restart
- Confirm the restart
- Wait for the device to reboot completely
Method 2: Power Cycle
- Unplug the power cable from your Google TV Streamer
- Wait 30 seconds to allow capacitors to fully discharge
- Plug the power cable back in
- Wait for the device to boot up
- Try reconnecting to WiFi
Restart Your Router
- Unplug your router from the power source
- Wait 60 seconds (this is crucial for a complete reset)
- Plug the router back in
- Wait 2-3 minutes for the router to fully restart
- Check that other devices can connect to WiFi
- Attempt to reconnect your Google TV Streamer
Tip: Once the power reset is complete, reconnect both devices and follow the instructions to reconnect the Google TV Streamer to your WiFi network (source: Zont Sound).
Solution 2: Verify and Re-enter WiFi Credentials
Incorrect WiFi passwords are a common culprit for connection failures.
How to Reconnect to WiFi
- On your Google TV Streamer, go to Settings
- Select Network & Internet
- Choose WiFi
- Select your network from the available list
- If already connected, select Forget Network first
- Enter your WiFi password carefully
- Double-check for typos—passwords are case-sensitive
- Select Connect
Password Best Practices
- Check for similar characters: Distinguish between 0/O, 1/l/I
- Verify case sensitivity: WiFi passwords differentiate between upper and lowercase
- Look for special characters: Ensure symbols are entered correctly
- Test on another device: Confirm the password works on your phone or laptop first
Solution 3: Optimize Distance and Positioning
Distance between your Google TV Streamer and WiFi router significantly impacts connection quality and reliability.
Understanding WiFi Range
Perhaps the distance between your Google TV Streamer and the network router is insufficient for a reliable WiFi connection. The first thing to note here is that the 2.4 GHz and 5 GHz Wi-Fi coverage differ (source: Zont Sound).
2.4 GHz WiFi:
- Range: 150 feet indoors, 300 feet outdoors
- Speed: Slower (up to 600 Mbps theoretically)
- Penetration: Better through walls and obstacles
- Best for: Devices far from router
5 GHz WiFi:
- Range: 50 feet indoors, 100 feet outdoors
- Speed: Faster (up to 1300 Mbps theoretically)
- Penetration: Weaker through walls
- Best for: Devices close to router, 4K streaming
Optimal Positioning Tips
For Your Google TV Streamer:
- Place it in an open area, not inside a TV cabinet
- Keep it away from metal surfaces that can interfere with signals
- Avoid placing it behind your TV if possible
- Ensure proper ventilation to prevent overheating
For Your Router:
- Position it centrally in your home
- Elevate it on a shelf or mount it high
- Keep it away from:
- Microwaves and cordless phones
- Baby monitors
- Thick walls or metal objects
- Aquariums
- Point antennas vertically for best coverage
Measuring Your Connection
To test if distance is the issue:
- Temporarily move your router closer to the Google TV Streamer
- If the connection works, distance was the problem
- Consider these solutions:
- Move the router to a more central location
- Use a WiFi extender or mesh system
- Switch to the 2.4 GHz band for better range
- Install powerline adapters
- Use an ethernet connection if possible
Solution 4: Switch Between WiFi Bands
Most modern routers broadcast on both 2.4 GHz and 5 GHz frequencies. Switching bands can resolve connectivity issues.
How to Change WiFi Bands
If Your Router Has Separate Network Names:
- Go to Settings → Network & Internet → WiFi
- Look for two versions of your network (e.g., “MyNetwork” and “MyNetwork-5G”)
- Forget your current network
- Connect to the alternate band
- Test the connection
If Your Router Uses a Single Network Name:
- You may need to access your router settings
- Log into your router’s admin panel (usually 192.168.1.1 or 192.168.0.1)
- Look for WiFi settings or wireless configuration
- Enable separate names for 2.4 GHz and 5 GHz networks
- Reconnect your Google TV Streamer to the appropriate band
When to Use Each Band
Use 2.4 GHz when:
- Your Google TV Streamer is far from the router
- There are walls or obstacles between devices
- You’re streaming HD content (not 4K)
- You experience frequent disconnections on 5 GHz
Use 5 GHz when:
- Your device is close to the router
- You’re streaming 4K or HDR content
- You need faster speeds
- The 2.4 GHz band is congested with devices
Solution 5: Factory Reset Your Google TV Streamer
If basic troubleshooting hasn’t worked, a factory reset may be necessary. This returns your device to its original state, eliminating any software glitches or corrupted settings.
Before You Reset
Important: A factory reset will:
- Delete all downloaded apps
- Remove all accounts
- Erase personalized settings
- Require complete setup again
Backup what you can:
- Note your installed apps
- Write down account credentials
- Take photos of custom settings
How to Factory Reset
Method 1: Through Settings
- Go to Settings on your Google TV Streamer
- Select System → About
- Choose Factory Reset
- Confirm your choice
- Wait for the device to reset (5-10 minutes)
- Set up your device from scratch
- Reconnect to WiFi using fresh credentials
Method 2: Hardware Reset (if device is unresponsive)
- Locate the reset button on your Google TV Streamer (usually a small pinhole)
- Use a paperclip or pin to press and hold the button
- Hold for 10-15 seconds
- Release when the device restarts
- Follow on-screen setup instructions
After the Reset
- Complete the initial setup wizard
- Connect to WiFi using your correct password
- Sign in to your Google account
- Reinstall your apps gradually
- Test streaming to ensure stable connection
Solution 6: Update Router Firmware
Outdated router firmware can cause compatibility issues with newer devices like the Google TV Streamer.
How to Update Router Firmware
Step 1: Access Your Router
- Connect a computer or phone to your network
- Open a web browser
- Enter your router’s IP address (commonly 192.168.1.1, 192.168.0.1, or 10.0.0.1)
- Log in with admin credentials (often “admin”/”admin” or found on router label)
Step 2: Check for Updates
- Look for Firmware Update, Router Update, or Administration section
- Click Check for Updates
- If an update is available, download it
- Follow prompts to install (do NOT interrupt this process)
- Router will restart automatically
Step 3: Reconnect
- Wait for router to fully reboot (2-3 minutes)
- Reconnect your Google TV Streamer
- Test the connection
Router-Specific Instructions
Different router brands have different update processes:
Google WiFi/Nest WiFi:
- Updates automatically
- Check status in Google Home app
TP-Link:
- Log in via tplinkwifi.net
- Go to Advanced → System Tools → Firmware Upgrade
Netgear:
- Access via routerlogin.net
- Navigate to Advanced → Administration → Firmware Update
Linksys:
- Log in at myrouter.local
- Go to Connectivity → Router Firmware Update
Solution 7: Adjust Router Settings
Certain router settings can interfere with Google TV Streamer connectivity.
Recommended Router Settings
WiFi Security:
- Use WPA2 or WPA3 security (avoid WEP—it’s outdated)
- Ensure your Google TV Streamer supports your security protocol
Channel Selection:
- For 2.4 GHz: Use channels 1, 6, or 11 (least overlap)
- For 5 GHz: Try channels 36, 40, 44, or 48
- Use your router’s auto-select feature if available
DHCP Settings:
- Ensure DHCP is enabled on your router
- Check that your router has enough available IP addresses
- Consider reserving an IP address for your Google TV Streamer
AP Isolation:
- Disable AP Isolation (also called Client Isolation)
- This setting prevents devices from communicating with each other
- Found in wireless security settings
MAC Filtering:
- If enabled, add your Google TV Streamer’s MAC address to the allowed list
- Or temporarily disable to test if it’s causing issues
How to Find Your Google TV Streamer’s MAC Address
- Go to Settings → Network & Internet
- Select Your Network Name
- Scroll to find MAC Address
- Write it down for router configuration
Solution 8: Check for Interference
Electronic devices and physical obstacles can interfere with WiFi signals.
Common Sources of Interference
Electronic devices:
- Microwave ovens (especially when running)
- Cordless phones (particularly 2.4 GHz models)
- Baby monitors
- Bluetooth devices
- Wireless security cameras
- Fluorescent lights
- Neighboring WiFi networks
Physical barriers:
- Thick walls (especially concrete or brick)
- Metal surfaces and appliances
- Mirrors
- Large aquariums
- Refrigerators
Reducing Interference
- Move interfering devices: Relocate cordless phones, baby monitors, etc., away from your router
- Change router placement: Position router away from interference sources
- Use 5 GHz band: Less crowded and less susceptible to interference
- Change WiFi channel: Switch to a less congested channel
- Use a WiFi analyzer app: Identify the best channels in your area
WiFi Analyzer Tools
For Android:
- WiFi Analyzer (by farproc)
- NetSpot
For iPhone:
- Network Analyzer
- WiFi SweetSpots
For Computer:
- NetSpot (Mac/Windows)
- WiFi Analyzer (Windows)
- Wireless Diagnostics (Mac built-in)
Solution 9: Use Ethernet Connection (If Available)
While not a WiFi solution, if nothing else works try to connect via a wired connection (if your device supports it) to see if that gets things to work.
Key Takeaways
- Position your Google TV streamer closer to your WiFi router and check for interference from other electronic devices.
- Rebooting both your router and streaming device often resolves temporary connection problems.
- Advanced solutions include disabling Fast Roaming in device settings and forgetting/reconnecting to your network.
Understanding Google TV Streamer and Its Connectivity
Google TV Streamer connects your regular TV to a world of streaming content, but sometimes it faces wireless connection issues. Understanding how the device works and its components can help troubleshoot common WiFi problems.
Overview of Google TV
Google TV is a smart entertainment platform developed by Google that brings together streaming services, apps, and content recommendations in one interface. The system runs on dedicated streaming devices like the Google TV Streamer (formerly known as Chromecast with Google TV) as well as on some Smart TVs with Google TV built in.
The platform requires an internet connection to function properly. When connected to WiFi, Google TV provides access to popular streaming services like Netflix, Disney+, and YouTube. It also offers personalized recommendations based on viewing habits.
The interface uses a row-based layout with categories for easy navigation. Users can search for content using voice commands through the remote control.
Google TV Streamer Components
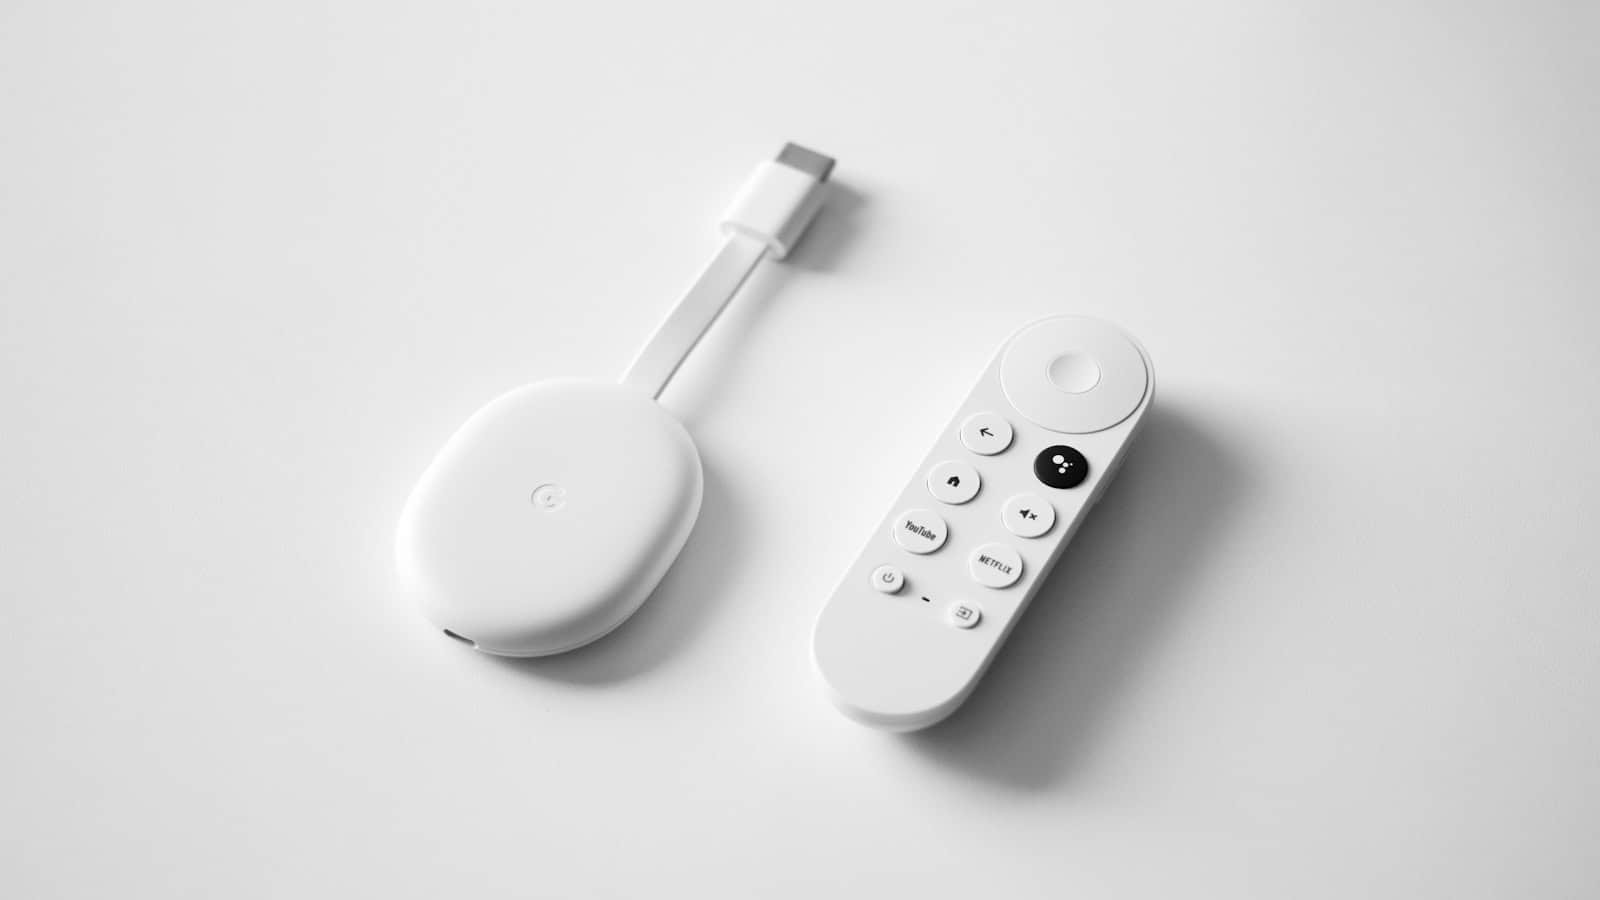
The Google TV Streamer is a compact dongle-like device that plugs directly into a TV’s HDMI port. The device includes several key components:
- Processor – Powers the interface and handles streaming content
- WiFi antenna – Connects to home networks (supports 2.4GHz and 5GHz bands)
- HDMI connector – Plugs into TV for audio and video transmission
- USB-C port – For power connection
- Bluetooth – Connects to the included remote control
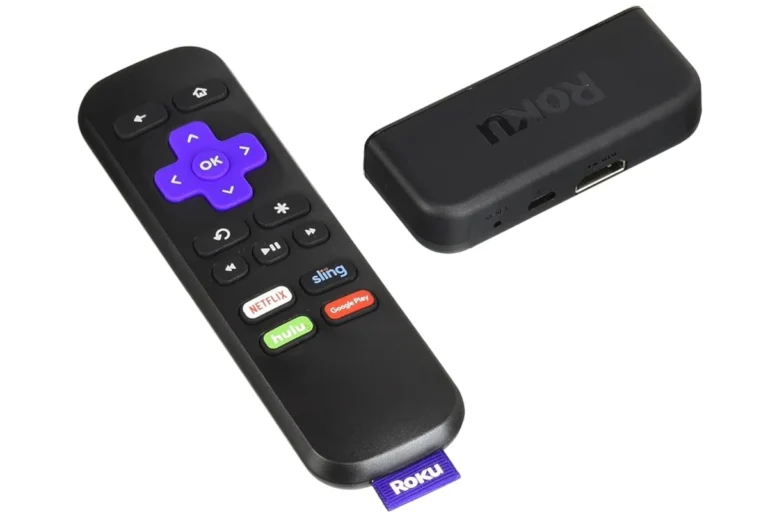
The device ships with a voice-enabled remote control featuring dedicated buttons for Netflix and YouTube. The remote pairs with the streamer via Bluetooth, which works independently from WiFi connectivity.
Users need to ensure their Google TV Streamer and controlling device are on the same WiFi network for proper functionality. Distance between the streamer and router can affect connection quality.
Initial Setup for Google TV Streamer
Setting up a Google TV Streamer properly from the beginning can help avoid many Wi-Fi connection issues later. The setup process involves three key steps that ensure your device communicates properly with your TV and network.
Connecting to HDMI and Power
The first step in setting up a Google TV Streamer is connecting it correctly to your TV. Insert the Google TV Streamer into an available HDMI port on your television. Make sure to note which HDMI port number you’re using, as you’ll need to select this input source on your TV.
Next, connect the power adapter to the Google TV Streamer and plug it into a wall outlet. It’s recommended to use the original power adapter that came with the device rather than powering it through a USB port on the TV, as this can cause power supply issues.
Wait for the LED indicator on the device to light up, confirming that it’s receiving power. The TV screen should display the Google TV startup screen within a few moments.
Using the Google Home App
The Google Home app plays a crucial role in setting up the Google TV Streamer. Before beginning, download the Google Home app on a smartphone or tablet if it’s not already installed.
Open the app and tap the + icon to add a new device. Select “Set up device” and then “New device.” The app will scan for nearby devices and should detect your Google TV Streamer.
Follow the on-screen instructions to connect your streamer to your Wi-Fi network. For best results, make sure your Google TV Streamer is within 20 feet of your router during setup. If the device fails to connect, try moving your router closer temporarily.
The app will guide you through signing in with your Google account and accepting various terms and conditions.
Configuring Google TV Streamer Settings
Once connected to Wi-Fi, the Google TV Streamer will need additional configuration. First, select which streaming services to install. Choose the ones you subscribe to for a more streamlined experience.
Navigate to Settings > Network & Internet to confirm your Wi-Fi connection is stable. If experiencing connection issues, select your network and “Forget” it, then reconnect with the correct password.
Adjust display settings by going to Settings > Display & Sound. Here you can optimize resolution, HDR settings, and audio output based on your TV’s capabilities.
For better performance, enable Developer Options and reduce background processes. This can be done by going to Settings > System > About and tapping the build number seven times. Then go to Developer Options and limit background processes to no more than four.
Remember to keep your Google TV Streamer updated by checking for system updates in Settings > System > About.
Troubleshooting Wi-Fi Connection Issues
When your Google TV streamer won’t connect to Wi-Fi, it can prevent you from enjoying your favorite shows and apps. These connection problems typically stem from a few common issues that can be resolved with the right approach.
Verifying Wi-Fi Network Status
First, check if the problem is with your Wi-Fi network rather than the Google TV device. Other devices in your home should be able to connect to the internet without issues.
Make sure your Google TV is within 20 feet of your router for optimal connection. Physical barriers like walls and electrical appliances can interfere with the signal.
If your network appears on the device but won’t connect, try to:
- Forget the network and reconnect by going to Settings > Network & Internet > Forget Network
- Check if your router’s firmware is updated
- Disable “Fast Roaming” in your Google TV settings which has resolved connection issues for many users
Restarting Google TV
A simple restart can resolve many temporary connection issues. This refreshes the system and clears any glitches affecting the Wi-Fi connection.
To restart your Google TV:
- Unplug the power cord from your device
- Wait at least 60 seconds
- Plug the power cord back in
- Allow the device to fully boot up
For more persistent issues, try a factory reset as a last resort. Go to Settings > System > About > Factory Reset. Remember this will erase all your data and installed apps.
If your device briefly connects then drops, a restart might fix this cycling behavior.
Network Diagnostics and Tools
Google TV has built-in tools to help diagnose connection problems. Navigate to Settings > Network & Internet to access these features.
Check your network status details:
- Signal strength (should show “Excellent” or “Good”)
- IP address assignment (confirm it’s not showing 0.0.0.0)
- Connection speed
Try the following diagnostic steps:
- Run a network test from the Settings menu
- Check for system updates that might fix known Wi-Fi bugs
- Switch between 2.4GHz and 5GHz networks if your router offers both
If you’re experiencing interference, change your router’s channel settings. Sometimes specific Wi-Fi channels have less congestion and provide more stable connections for streaming devices.
Advanced Google TV Streamer Connectivity Solutions
When basic troubleshooting fails to resolve Wi-Fi connection issues with your Google TV Streamer, several advanced solutions can help restore stable connectivity. These methods address deeper configuration problems that might be causing persistent disconnections.
Adjusting Router Settings
Router configuration plays a crucial role in maintaining a stable connection with your Google TV Streamer. For optimal performance, position your Google TV Streamer within 20 feet of your router. This proximity helps ensure a strong signal.
If you’re using a newer Wi-Fi 7 router, compatibility issues may occur. Some users have reported that the Google TV Streamer won’t connect to Wi-Fi 7 routers despite multiple attempts. In this case, try the following:
- Switch to a 2.4GHz band instead of 5GHz or 6GHz
- Disable WPA3 security temporarily and use WPA2
- Change your router’s channel to avoid interference
- Disable any MAC address filtering that might block your device
For persistent issues, consider creating a separate guest network specifically for your streaming devices.
Updating Google TV Streamer Software
Outdated software often causes connectivity problems. Check if your Google TV Streamer is running the latest firmware by following these steps:
- Navigate to Settings on your Google TV home screen
- Select System > About > System update
- If an update is available, download and install it
Sometimes, pending updates can interfere with Wi-Fi stability. After updating, reboot both your router and Google TV Streamer to ensure changes take effect properly.
The update process typically takes 5-10 minutes depending on your connection speed. During this time, ensure your device remains powered to prevent corruption of the update files.
Resetting Google TV Streamer to Factory Settings
When all else fails, restoring factory settings often resolves persistent connectivity issues. Before proceeding, note that this will erase all personalized settings and installed apps.
To perform a factory reset:
- Go to Settings > System > About
- Select Factory reset > Erase everything
- Wait for the device to restart and complete setup
After reset, try connecting to your network before reinstalling apps. This helps isolate whether a specific app was causing interference.
If connection issues persist after factory reset, try forgetting the network completely before reconnecting. This clears cached network credentials that might be corrupted.
For devices that still won’t hold a Wi-Fi connection, contact Google support as hardware issues might be present.
Exploring Alternative Streaming Setup Options
When Wi-Fi connections consistently fail with your Google TV Streamer, alternative connection methods can provide more stable viewing experiences for your streaming services like YouTube TV.
Using Ethernet Adapters
Ethernet adapters offer a reliable alternative to wireless connections for Google TV Streamers. These adapters connect directly to your streaming device through the USB port and provide a wired internet connection that eliminates Wi-Fi interference problems.
Most Google TV Streamers support official Ethernet adapters that deliver consistent internet speeds. The setup process is straightforward:
- Purchase a compatible Ethernet adapter for your device
- Connect the adapter to your Google TV Streamer
- Run an Ethernet cable from your router to the adapter
- Restart your device to recognize the wired connection
Wired connections typically provide faster speeds than Wi-Fi and eliminate buffering issues during peak viewing times. This solution works particularly well for streaming 4K content on services like YouTube TV where bandwidth requirements are higher.
Considering Range Extenders
Range extenders can solve connection problems when the Google TV Streamer is located too far from your Wi-Fi router. These devices amplify your existing Wi-Fi signal to reach areas with poor coverage.
When selecting a range extender, look for:
- Dual-band capability – Supports both 2.4GHz and 5GHz networks
- Same brand as router – Ensures compatibility
- Signal strength indicators – Helps with optimal placement
Place the extender halfway between your router and the streaming device for best results. Many modern extenders create a seamless network experience, allowing your Google TV Streamer to connect automatically without reconfiguration.
Range extenders typically cost less than running Ethernet cables through walls while still providing the stable connection needed for buffer-free streaming of your favorite content.
Optimizing Home Network for Streaming
A stable network environment is crucial for Google TV Streamer performance. Proper device placement and managing network traffic can significantly reduce buffering issues and connection drops.
Placement of Google TV Streamer
The physical location of your Google TV Streamer matters more than many users realize. For optimal connectivity, place your device within 20 feet of your Wi-Fi router. Avoid putting it behind large metal objects, inside entertainment centers, or behind your Smart TV, as these can block signal strength.
Consider using the HDMI extender that comes with most Google TV devices. This small adapter can improve Wi-Fi reception by moving the streamer away from potential interference sources.
If your home has thick walls or multiple floors, consider a mesh Wi-Fi system to ensure consistent coverage throughout your living space. This is especially helpful when other smart devices like Smart Lights compete for bandwidth.
Managing Wi-Fi Network Traffic
Modern homes often have dozens of connected devices sharing bandwidth. During streaming sessions, temporarily disable or schedule updates for bandwidth-heavy devices.
Some users report success after disabling network stack optimization in device settings, which prevents automatic Wi-Fi disconnections.
Connect your Google TV Streamer to the 5 GHz network rather than 2.4 GHz when possible. The 5 GHz band typically provides:
- Faster data transfer speeds
- Less interference from other household devices
- Better streaming performance for 4K content
Set streaming devices as priority in your router’s QoS (Quality of Service) settings. This ensures your Smart TV and Google TV Streamer receive bandwidth priority during peak usage times.
Leveraging Google Integration
Google TV’s powerful integration with other Google services can help resolve connectivity issues. These connections offer alternative pathways and troubleshooting options when your Google TV Streamer won’t connect to WiFi.
Using the Google Play Store for Apps
When experiencing WiFi connectivity problems, network diagnostic apps from the Google Play Store can identify and resolve issues. These apps scan for network problems and suggest fixes specific to Google TV devices.
Network Analyzer and WiFi Analyzer apps help identify channel congestion that might affect connection stability. They show which channels are overcrowded in your area.
If Google TV repeatedly drops WiFi connection, consider installing a VPN app. This sometimes bypasses network restrictions that interfere with connectivity.
Google Play also offers system maintenance apps that can clear cache and optimize performance. These tools often resolve connectivity issues caused by software conflicts or memory overload.
Streaming Content from YouTube
YouTube can serve as a connectivity test for Google TV devices. If YouTube connects while other apps fail, the issue may be app-specific rather than network-related.
The YouTube app requires less bandwidth than other streaming services. This makes it ideal for testing connections on weak networks. If YouTube works, try reducing video quality in other apps.
Google TV owners can use their smartphone’s YouTube app to cast content. This sometimes works even when the Google TV’s direct WiFi connection fails. The casting feature uses different connection protocols.
Some users report that launching YouTube before other apps improves overall connectivity. This might be because the app refreshes network settings when launched.
Frequently Asked Questions
Google TV streamers can experience WiFi connectivity issues that frustrate users. These common problems often have simple solutions that don’t require technical expertise or replacement of your device.
How do I troubleshoot a connection issue between my Google TV streamer and my Samsung TV over WiFi?
First, check if both devices are connected to the same WiFi network. Many connection problems happen when devices are on different networks.
Make sure your Samsung TV’s software is up to date. Outdated firmware can cause compatibility issues with streaming devices.
Try rebooting your router by unplugging it for about 30 seconds before plugging it back in. This often resolves temporary network glitches.
What steps should I take if my Chromecast is not connecting to WiFi after a factory reset?
After a factory reset, set up your Chromecast again using the Google Home app on your smartphone or tablet. Make sure your mobile device is connected to the WiFi network you want to use.
Place your Chromecast closer to your WiFi router during setup to ensure a strong signal. Poor signal strength can interrupt the connection process.
Some users have found that turning off Fast Roaming in the Chromecast settings resolves persistent connection issues after reset.
Why is my Google TV unable to connect to WiFi during the setup process?
Your router may be using a WiFi band that isn’t compatible with your Google TV streamer. Try switching between 2.4GHz and 5GHz networks if available.
The WiFi password may have been entered incorrectly. Double-check for typos, especially with case-sensitive passwords.
Some Google TV streamers struggle with complex WiFi passwords. If possible, temporarily simplify your password to test if this is the issue.
What can I do if my Hisense Google TV won’t connect to WiFi?
Try forgetting the network and reconnecting. Go to Settings > Network & Internet > select your network > Forget Network, then reconnect.
Restart your Hisense TV completely by unplugging it from power for at least one minute, then plugging it back in.
Check if your Hisense TV needs a software update. Sometimes updates fix WiFi connectivity issues that weren’t addressed in previous versions.
How can I resolve the WiFi connection problems on my TCL Google TV?
Reset your TCL Google TV’s network settings. This can be done through Settings > System > Advanced system settings > Network reset.
Make sure your WiFi isn’t experiencing interference from other electronic devices. Move devices like cordless phones, microwave ovens, or baby monitors away from your router.
If your TCL TV briefly connects then drops, try assigning a static IP address to your TV through your router’s settings.
What should I check if my TV is suddenly unable to connect to WiFi?
Verify that other devices in your home can still connect to WiFi. If they can’t, the problem is with your network, not your TV.
Check if your router has recently been updated or reconfigured. Some updates can change security settings that affect device connections.
Try connecting your TV using an Ethernet cable if possible. This can help determine if the issue is specific to the WiFi connection or a broader network problem.