Video editing can transform raw footage into engaging stories that capture viewers’ attention. Whether you’re creating content for YouTube, family memories, or professional projects, learning to edit videos is a valuable skill in today’s digital world. With user-friendly tools like Adobe Express and Canva’s drag-and-drop video editor, even beginners can create professional-looking videos without extensive training.
The editing process might seem overwhelming at first, but breaking it down into manageable steps makes it approachable. Start by organizing your footage, then build your story through cuts and transitions. Modern video editing software offers intuitive interfaces that help you arrange clips, add text, and enhance your videos with music and effects.
You don’t need expensive equipment or years of experience to create impressive videos. Many successful content creators learned through practice and online resources like complete beginner’s guides. The key is to start simple, focus on telling a compelling story, and gradually build your skills as you gain confidence in the post-production process.
How to Edit Videos: Techniques for Professional Results
Want to turn your raw footage into polished, professional content? Whether you’re editing YouTube videos, short films, or marketing promos, following a structured editing process will elevate your work. Here’s a step-by-step guide with techniques that professionals use:
1. Organize Your Footage
- Import all media into folders (video, audio, images, music).
- Rename files with clear identifiers (e.g., “Interview_Take1”).
- Create bins or folders within your editing software to stay organized.
Pro Tip: Use proxy files for faster editing if you’re working with 4K or higher resolution footage.
2. Choose the Right Editing Software
- Beginners: iMovie, CapCut, Clipchamp.
- Intermediate: Final Cut Pro, Adobe Premiere Elements.
- Professional: Adobe Premiere Pro, DaVinci Resolve, Avid Media Composer.
Pro Tip: Stick with one platform to build speed and familiarity.
3. Create a Rough Cut
- Drag your clips onto the timeline in the order of your storyboard or script.
- Trim out unusable footage and keep the best takes.
- Focus only on story flow—don’t worry about music or effects yet.
Pro Tip: Cut on action or motion to create seamless scene transitions.
4. Tighten the Edit
- Fine-tune cuts for better pacing and rhythm.
- Use J-cuts and L-cuts to let audio lead or follow visual transitions.
- Adjust clip speed (slow motion or time lapse) for emphasis or dramatic effect.
Pro Tip: Match cuts (like matching shapes or motions across scenes) create smooth visual flow.
5. Add Transitions Sparingly
- Use hard cuts (no transition) for most scenes—it’s cleaner and faster.
- Use dissolves, wipes, or fades only when needed for emotion or time jumps.
Pro Tip: Too many transitions can feel amateurish. Less is more.
6. Incorporate B-Roll
- Layer B-roll footage over interviews or voiceovers to add context and visual interest.
- Use B-roll to cover cuts or keep viewers engaged during long dialogue sections.
Pro Tip: Always shoot more B-roll than you think you need.
7. Edit the Audio
- Balance volume levels across all clips.
- Use noise reduction on poor-quality recordings.
- Add music tracks that match the tone, and duck the music under dialogue.
- Insert sound effects (whooshes, ambience, clicks) to enhance realism.
Pro Tip: Use headphones while editing to catch subtle audio issues.
8. Color Correction & Grading
- First, color correct to balance exposure, white balance, and contrast across clips.
- Then, color grade to give the video a consistent tone or mood (warm, cool, cinematic, etc.).
Pro Tip: Use LUTs (Look-Up Tables) for quick, cinematic looks.
9. Add Text & Graphics
- Add lower thirds, titles, and callouts sparingly and legibly.
- Use motion graphics to emphasize points (especially for tutorials or promos).
Pro Tip: Stick to clean fonts and simple animation unless your brand calls for flair.
10. Export With the Right Settings
- Choose the correct resolution (usually 1080p or 4K).
- Use H.264 codec for high-quality, web-ready files.
- Check settings for frame rate, bit rate, and audio quality.
Pro Tip: Always watch your exported video end-to-end before publishing.
Bonus Tips for Professional Results
- Edit for emotion: Every cut should enhance the viewer’s connection.
- Cut the fluff: Keep the video as short and tight as possible.
- Use keyboard shortcuts to speed up your workflow.
- Back up your project files regularly to avoid data loss.
Mastering video editing takes time, but these techniques will dramatically improve the quality of your videos. Once you nail the basics, you can explore advanced effects like motion tracking, green screen keying, or 3D animations.
Key Takeaways
- User-friendly video editing tools make it possible for beginners to create professional-looking content without specialized training.
- The editing process becomes manageable when broken down into organizing footage, arranging clips, and enhancing with effects and audio.
- Regular practice and learning from online tutorials will improve your storytelling abilities and post-production efficiency.
Understanding the Basics of Video Editing
Video editing transforms raw footage into polished content through organizing clips, adding effects, and creating smooth transitions. The right tools and workspace setup can dramatically improve your editing efficiency.
Video File Formats
When starting your video editing journey, understanding file formats is essential. Common formats include MP4, MOV, and AVI, each with different qualities and uses.
MP4 is widely used because it offers good quality while maintaining relatively small file sizes. It’s compatible with most platforms and devices.
MOV files, created by Apple, provide excellent quality but have larger file sizes. They work best for professional editing on Mac systems.
AVI files maintain high quality but result in very large files. They’re less compressed, making them good for editing but impractical for sharing online.
When importing footage to your video editor, ensure your chosen format is compatible. Some editors may require you to convert files before importing.
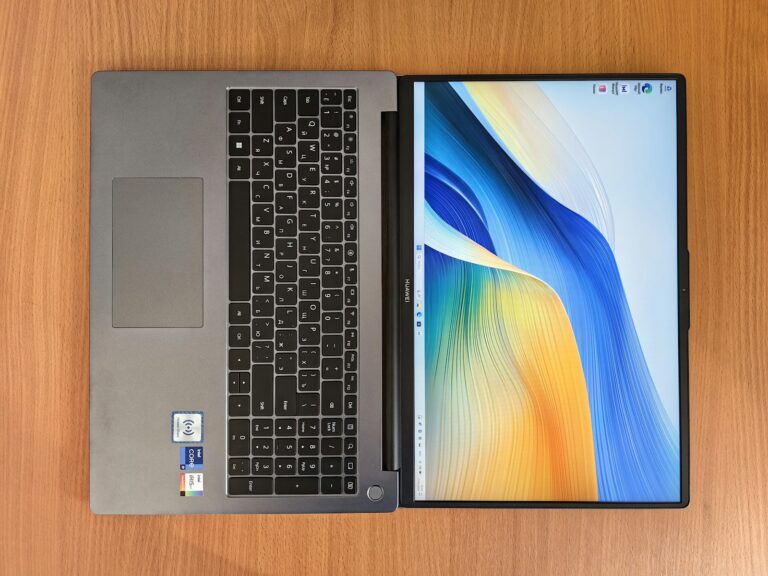
Selecting the Right Video Editor
Choosing the appropriate editing software depends on your experience level and project needs. Beginners should start with user-friendly options like iMovie or Windows Video Editor.
For intermediate users, consider Adobe Premiere Rush or DaVinci Resolve’s free version. These offer more features while maintaining a user-friendly interface.
Professional editors typically use Adobe Premiere Pro, Final Cut Pro, or the full version of DaVinci Resolve. These provide comprehensive tools but have steeper learning curves.
Key features to look for include:
- Multi-track editing capability
- Built-in effects and transitions
- Color correction tools
- Audio editing features
Try free trials before purchasing any software to ensure it meets your specific needs.
Setting Up Your Workspace
Creating an efficient workspace will significantly improve your editing process. Start by organizing your files into clearly labeled folders for projects, raw footage, music, and exports.
Your physical workspace matters too. Use a monitor with accurate color display if possible. Dual monitors can be extremely helpful—one for your timeline and one for preview.
Customize your editing software layout to suit your workflow. Most editors allow you to arrange panels and tools for quick access to frequently used features.
Create keyboard shortcuts for common actions. Learning these will dramatically speed up your editing.
Invest in a mouse with programmable buttons or a specialized editing controller if you edit frequently. These tools can make precise adjustments much easier.
Back up your projects regularly to prevent losing work. External hard drives or cloud storage are both good options.
Organizing Your Media
Good organization is the foundation of efficient video editing. When your files are properly arranged, you can focus more on creativity and less on hunting for that perfect clip or sound effect.
Importing Video Footage and Audio Files
Start by creating a consistent folder structure for each project. Name your main folder with the project title and date, then create subfolders for raw footage, audio, graphics, and exports.
When importing files, transfer everything from your camera to your computer first. Clearly label each file with the date and a brief description of the content. For example: “2025-03-21_Interview_John.mp4” is much more useful than “MOV001.mp4.”
In your editing software, use bins or folders to organize different types of content. Many editors create specific bins for music, sound effects, and visual overlays. This makes assets easy to find when you need them.
Consider using color coding or tags to quickly identify different types of clips. For example:
- Red = interviews
- Blue = B-roll footage
- Green = completed sequences
Managing Storage Space
Video files consume enormous amounts of storage. Consider investing in an external hard drive dedicated to your video projects. This keeps your computer’s internal storage free while providing a reliable backup.
Create a system for archiving completed projects. Once you’ve finished editing, move the project and its assets to long-term storage and delete unnecessary files like unused takes and duplicate clips.
Regular backups are essential. Follow the 3-2-1 backup rule:
- 3 copies of your data
- 2 different storage types
- 1 copy stored off-site
Use metadata to make files searchable. Add keywords, descriptions, and ratings to help you find specific clips later. This becomes increasingly valuable as your library of footage grows.
Consider deleting raw footage after a project is complete if storage is limited. Always keep your final exports and project files, but intermediate renders and unused clips can often be deleted.
Beginning the Editing Process
Starting your video editing journey requires understanding a few fundamental elements. The timeline, playhead, and rough cut form the foundation of your editing workflow and will help you transform raw footage into a polished final product.
Creating a Project Timeline
The timeline is the main workspace where you’ll build your video. When you import your footage, it will appear in your media library.
To start your project:
- Create a new project in your editing software
- Set the correct specifications (resolution, frame rate)
- Drag clips from your media library onto the timeline
Your timeline typically has multiple tracks for video and audio. The top tracks usually overlay content on lower tracks.
Don’t worry about perfection at this stage. Place your clips in a logical sequence that follows your plan or script. You can always rearrange them later.
Understanding the Playhead and Timeline Navigation
The playhead is the vertical line that shows your current position in the timeline. It represents what you’re seeing in the preview window.
Basic playhead controls:
- Space bar – Play/pause
- Arrow keys – Move frame by frame
- J, K, L keys – Reverse, pause, and forward playback
Mastering timeline navigation saves enormous time. Learn to use keyboard shortcuts for zooming in and out of your timeline.
The playhead also helps with precision edits. You can cut clips exactly where the playhead sits by using the split or razor tool in most editing programs.
Making the Rough Cut
The rough cut is your first complete version of the edit. Don’t aim for perfection—focus on structure.
Start by reviewing all your footage. Some editors make selects of their best clips before beginning the actual edit. Others prefer to dive right in.
For your rough cut:
- Trim the beginnings and ends of clips
- Remove obvious mistakes
- Arrange clips in logical order
- Don’t worry about precise timing yet
Remember to keep it simple. Focus on basic cuts and transitions before attempting complex effects.
Your rough cut should tell your story from beginning to end, even if it’s not perfectly polished. This provides the foundation for all fine-tuning that follows.
Refining Your Edit
After completing your rough cut, it’s time to polish your video with precision edits, creative transitions, and professional graphics that enhance your story.
The Assembly and Final Cut
The editing process typically moves from an assembly cut to a final cut. Your assembly cut is the first arrangement of all your clips in sequence—a basic skeleton of your video. Don’t worry about perfection at this stage.
When refining, focus on tightening the pacing. Use these powerful edit types:
- Ripple Edit: Adjusts a clip’s in or out point while shifting all subsequent clips to avoid gaps
- Roll Edit: Changes where two clips meet without affecting your timeline’s duration
- Slip Edit: Keeps clip duration but shifts which portion of footage is shown
Pay attention to your cuts’ timing. A well-timed edit often goes unnoticed by viewers, while poorly timed cuts feel jarring. Trust your instincts—if something feels off, it probably needs adjustment.
Essential editing techniques like these help you transform your rough assembly into a polished final cut.
Using Transitions and Filters
Transitions create smooth movement between scenes rather than abrupt jumps. Use them purposefully—not every cut needs a fancy transition.
Standard transitions include:
- Cross dissolve (gradual fade between clips)
- Dip to black (scene fades to black, then new scene appears)
- Wipe (one scene replaces another with a moving line)
Video filters enhance your footage’s look and mood. Common filters include:
- Color correction: Adjust brightness, contrast, and saturation
- LUTs (Look-Up Tables): Apply pre-designed color grades for consistent looks
- Sharpening: Enhance details without creating noise
Keep your transition style consistent throughout your video. Mixing too many different transitions creates a distracting, amateur look. Remember that Final Cut Pro and other editors offer advanced features to refine these elements.
Adding Titles and Graphics
Titles and graphics add context and professionalism to your video. Keep text readable—use contrasting colors and appropriate font sizes.
When creating titles, consider:
- Font choice: Select fonts that match your video’s style
- Duration: Display text long enough to read (typically 3-5 seconds)
- Animation: Simple animations can make titles more engaging
Lower thirds (name captions) should be unobtrusive yet legible. Position them in the bottom third of the screen.
Graphics should enhance your story, not distract from it. Use them to explain complex concepts or add visual interest to talking points. Many beginner-friendly tutorials demonstrate how to add professional-looking graphics.
Always preview your titles at full screen to ensure they’re readable. Text that looks fine while editing might be too small or detailed when viewed normally.
Enhancing Video With Audio
Good audio can make the difference between an amateur video and a professional production. Sound quality affects how viewers perceive your content and how long they stay engaged.
Adding Music and Sound Effects
Music sets the emotional tone of your video and helps maintain viewer interest. To add music effectively, select tracks that match your video’s mood and purpose. Free music is available from libraries like YouTube Audio Library or premium options like Epidemic Sound.
When adding music to your video:
- Adjust volume levels so music doesn’t overpower dialogue
- Consider using different tracks for different sections
- Fade music in and out at transition points
Sound effects can enhance your video’s audio quality by adding depth and realism. Use them for emphasis, transitions, or to complement visual elements. Create a sound effects folder organized by categories for quick access during editing.
Remember to respect copyright laws when using any audio files. Many editing programs allow you to directly import audio tracks and adjust them within your timeline.
Syncing Audio and Video
Perfect synchronization between audio and video creates a seamless viewing experience. Most editing software includes tools to help you align audio with corresponding video frames.
To sync effectively:
- Use visual cues like hand claps during filming
- Look for waveform peaks to match audio events
- Employ automated sync features in your editing software
For interviews or dialogue scenes, you can use enhanced speech tools to improve clarity while maintaining sync. If you’re working with separate audio recordings, align them with video by matching visual mouth movements with speech.
Timing adjustments may be necessary throughout your edit. Many editors use the J-K-L keyboard shortcut method for precise frame-by-frame adjustments when syncing.
Noise Reduction and Audio Refinement
Unwanted background noise can distract viewers and reduce your video’s professional quality. Most editing software includes noise reduction tools to clean up audio tracks.
You can improve a noisy video by:
- Applying noise reduction filters to remove constant background sounds
- Using equalization (EQ) to enhance voice frequencies
- Adjusting audio levels for consistency throughout your video
For advanced audio editing, consider exporting your audio to dedicated software like Audacity. This free tool allows for detailed adjustments before reimporting the cleaned audio.
New AI-powered options like Adobe Podcast with Speech Enhancement can automatically improve audio quality with minimal effort. These tools can save time while delivering professional results.
The Art of Visual Storytelling
Video editing goes beyond technical skills—it’s about weaving compelling narratives that engage viewers. Visual storytelling combines thoughtful sequencing, psychological elements, and rhythmic flow to create videos that resonate emotionally.
Crafting the Story Through Editing
Editing transforms raw footage into a coherent narrative. You need to select shots that advance your story and arrange them in a sequence that makes sense to viewers.
Start by organizing your clips according to your script or storyboard. This gives you a foundation to build upon. When choosing between multiple takes, select the ones that best convey the emotion or information needed for that moment.
Visual storytelling courses teach that transitions between scenes should feel natural, not jarring (unless that’s your intention). Try using:
- Match cuts: Connecting visually similar elements across different scenes
- J and L cuts: Where audio precedes or continues after a visual cut
- Montage sequences: Compressing time while showing progression
These techniques help you create a flow that keeps viewers engaged with your story.
The Kuleshov Effect and Film Editing Psychology
The Kuleshov Effect is a powerful psychological phenomenon that shows how viewers interpret meaning from the juxtaposition of shots. When you place two unrelated images next to each other, your audience naturally creates a connection between them.
For example, showing a neutral face followed by a plate of food suggests hunger. The same face followed by a coffin suggests grief. Nothing about the face changed—only the context did.
You can use this principle to:
- Create emotional responses without explicit dialogue
- Imply relationships between characters or events
- Build suspense by controlling what information is revealed when
This editing philosophy proves that meaning comes not just from individual shots but from how you arrange them. Your cuts actively shape how viewers interpret your story.
The Role of Pacing and Rhythm
Pacing determines how quickly your story unfolds, directly affecting viewer engagement. Fast cuts create energy and excitement, while longer takes allow moments to breathe and emotions to develop.
Consider these pacing principles:
- Match pace to content: Action sequences benefit from quicker cuts; emotional moments often need more time
- Create contrast: Varying your pacing prevents monotony and helps emphasize key moments
- Build rhythmic patterns: Video editing’s storytelling power comes from establishing visual rhythms that guide viewers through your content
Your editing rhythm should reflect the natural ebb and flow of your story’s tension. Pay attention to the “beats” between cuts—these pauses give viewers time to process information.
Music and sound effects also contribute significantly to rhythm. They can bridge visual edits and create continuity across scenes that might otherwise feel disconnected.
Advanced Video Editing Techniques
Taking your video editing skills to the next level requires mastering techniques that add polish and professional quality. These advanced methods will help your videos stand out and engage viewers more effectively.
Employing Special Effects and Montage
Special effects can transform ordinary footage into compelling visual stories. You can create impressive transitions between scenes using effects like dissolves, wipes, and fades to guide viewers through your narrative smoothly.
Montage techniques combine multiple shots to compress time or show parallel actions. To create an effective montage:
- Match the rhythm of your cuts to your background music
- Use similar visual elements to connect different scenes
- Vary shot lengths to create emotional impact
Try using J and L cuts where audio and video don’t cut at the same time. This creates a more natural flow between scenes and helps maintain viewer interest.
Many editing software packages offer preset effects, but learning to customize these will give your videos a unique style that stands out from basic edits.
Color Correction and Grading
Color correction and grading are crucial steps that elevate amateur footage to professional quality. Start with correction to fix exposure, white balance, and contrast issues in your raw footage.
Once your footage looks natural, apply creative color grading to establish mood and visual consistency. Popular grading styles include:
- Orange and teal – Creates cinematic contrast between subjects and backgrounds
- Desaturated with selective color – Draws attention to specific elements
- High contrast monochrome – Adds drama and timelessness
Use scopes like waveforms and histograms to ensure your colors stay within broadcast-safe ranges. Create adjustment layers to apply consistent grading across multiple clips simultaneously.
Remember to save your color profiles as presets to maintain consistency across projects or series. This practice ensures your brand or channel maintains a recognizable visual identity.
Utilizing 2D and 3D Space
Moving beyond flat compositions opens new creative possibilities in your editing. In the 2D plane, you can create dynamic motion by:
- Animating position and scale properties
- Using keyframes to create smooth movements
- Applying motion tracking to pin elements to moving objects
For 3D space manipulation, modern editing software allows you to:
- Create depth by positioning elements on different planes
- Rotate objects in three dimensions
- Use perspective effects to simulate camera movements
Markers help you remember key areas of your timeline when working with complex spatial effects. They’re particularly useful when synchronizing motion with audio cues or specific moments.
Try using parallax effects where foreground and background move at different speeds to create an immersive depth illusion. This technique works especially well for title sequences and transitions.
Optimizing Workflow and Efficiency
Streamlining your editing process saves time and improves quality. A well-organized workflow helps you focus on creativity rather than technical issues.
Keyboard Shortcuts and Editing Tips
Learning keyboard shortcuts is one of the fastest ways to speed up your editing process. Most professional editors rarely touch their mouse when working. By mastering keyboard shortcuts, you can cut editing time significantly.
Essential shortcuts to learn:
- J, K, L for playback control (reverse, pause, forward)
- I and O for setting in and out points
- B for blade/razor tool
- Ctrl+Z (Cmd+Z on Mac) for undo
Try to keep one hand on the keyboard and one on the mouse. This dual-input approach maximizes efficiency.
Generating optimized media is another powerful technique. This creates proxy files that are easier for your computer to process, making playback smoother during editing.
Customizing Templates and Presets
Creating a library of custom presets saves enormous time on repetitive tasks. Start by developing templates for projects you frequently work on.
Items worth templating:
- Lower thirds and titles
- Color grading looks
- Sound effects and audio presets
- Export settings for different platforms
Organize your media using a consistent folder structure before you begin editing. This fundamental workflow step prevents time wasted searching for assets later.
Keep your most-used effects and transitions in a favorites folder. This eliminates scrolling through lengthy menus. Consider creating project templates with pre-built timelines and folder structures for common projects.
The Influence of Walter Murch and the Rule of Six
Walter Murch, the legendary film editor behind “Apocalypse Now” and “The Godfather,” developed the “Rule of Six” to guide editing decisions. This framework helps you prioritize what truly matters in a cut.
Murch’s Rule of Six, in priority order:
- Emotion – Does the cut reflect the desired emotion?
- Story – Does it advance the story logically?
- Rhythm – Does it occur at a moment that feels right rhythmically?
- Eye trace – Does it respect where the viewer is looking?
- Two-dimensional space – Does it respect screen geography?
- Three-dimensional space – Does it respect real-world spatial relationships?
When optimizing your workflow, consider these principles. They help you make faster decisions about which cuts work best. Murch believed that if you satisfy the top three criteria, your edit will likely succeed.
Exporting and Sharing Your Video
Once you’ve finished editing your masterpiece, it’s time to get it out into the world. The export process transforms your project into a viewable video file, while sharing options help you reach your intended audience.
Understanding Video Formats and Compression
When exporting your video, you’ll need to choose the right format and compression settings. Most editing software offers several options like MP4, MOV, or AVI formats.
MP4 is generally the most versatile choice for most situations. It offers a good balance between quality and file size, making it ideal for online sharing.
Resolution matters too. Common options include:
- 1080p (Full HD): Standard for most videos
- 4K: Higher quality but larger files
- 720p: Smaller files, good for quick social media posts
Compression affects your video’s quality and file size. Higher compression means smaller files but lower quality. For professional work, use lower compression settings. For quick online sharing, higher compression is acceptable.
Bitrate controls how much data is used per second of video. Higher bitrates mean better quality but larger files. For reference:
- YouTube recommends 8-12 Mbps for 1080p videos
- 15-25 Mbps is better for professional work
Sharing to Platforms and Social Media
Most editing software now includes direct sharing options for popular platforms like YouTube, Facebook, Instagram, and TikTok. These built-in tools automatically apply the optimal settings for each platform.
Before sharing, check each platform’s requirements. Instagram prefers square or vertical videos, while YouTube works best with 16:9 widescreen formats.
When exporting for social media, consider these tips:
- Add captions: Many viewers watch without sound
- Optimize length: Keep Instagram videos under 60 seconds, YouTube can be longer
- Quality settings: Use higher quality for YouTube, slightly lower for Facebook
Most editing programs have an “Export” button in the top menu. In Clipchamp, for example, you can click the export button, choose your quality, then save and share your video in three simple steps.
Additional Resources and Tools
Finding the right resources can dramatically speed up your video editing journey. The tools you choose and the learning methods you adopt will shape your editing experience and final results.
Learning With YouTube Tutorials and Online Forums
YouTube offers countless video editing tutorials ranging from beginner to advanced levels. Many professional editors share their knowledge for free, walking you through everything from basic cuts to complex effects.
When you get stuck on a specific technique, consider these resources:
- Reddit communities like r/VideoEditing where you can find free resources and ask specific questions
- Software-specific forums that focus on your chosen editing program
- Discord channels dedicated to video editors where you can get real-time help
Don’t underestimate the power of watching others edit. Seeing how professionals organize their workflow and solve problems can teach you techniques that aren’t covered in standard guides.
Choosing a Graphics Card for Video Editing
Your graphics card (GPU) significantly impacts video editing performance. For smooth playback and faster rendering, consider these factors:
- Basic editing (1080p): 4GB VRAM minimum
- 4K editing: 8GB VRAM recommended
- 8K or effects-heavy work: 12GB+ VRAM ideal
NVIDIA’s CUDA technology works well with Adobe Premiere Pro, while Final Cut Pro is optimized for AMD cards on Mac systems. Budget options like the NVIDIA GTX 1660 Super can handle 1080p editing, while professional work demands RTX 3070 or better.
Remember that your CPU and RAM are equally important. A powerful GPU cannot compensate for insufficient system memory or a weak processor when editing complex projects.
Video Editing Software and Subscription Options
Today’s video editing software comes in various pricing models to fit different needs:
Free Options:
- DaVinci Resolve (free version has almost all features)
- Hitfilm Express (good for effects-heavy videos)
- Canva’s online video editor (simple drag-and-drop interface)
Subscription-Based:
- Adobe Premiere Pro: $20.99/month, integrates with other Adobe products
- Final Cut Pro: $299 one-time purchase, Mac only
- Filmora: $49.99/year, beginner-friendly with templates
When choosing software, consider the learning curve alongside features. Programs like Adobe Premiere Pro offer comprehensive tools but require more time to master than simpler options like iMovie or Canva.
Your choice should align with your long-term goals. If you’re building a career, investing in industry-standard software makes sense despite the higher cost.
Frequently Asked Questions
Video editing can seem challenging at first, but with the right tools and techniques, anyone can create professional-looking videos. Here are answers to common questions about video editing software, platforms, and methods.
What are the best free video editing software options for beginners?
For beginners looking to start editing without spending money, several excellent free options exist. DaVinci Resolve offers professional-level features with a surprisingly intuitive interface. It provides color correction tools that rival paid software.
HitFilm Express combines editing and visual effects capabilities in one package. It’s perfect if you want to add simple special effects to your videos.
Shotcut is another solid choice with cross-platform support. Its basic editing techniques include all the essentials: trimming, cutting, and adding transitions.
Which platforms offer the ability to edit videos online without downloads?
Online video editors have become increasingly powerful in recent years. Clipchamp offers a browser-based editor with templates and stock footage libraries built right in.
WeVideo provides cloud-based editing with collaboration features, making it ideal for team projects. Your work saves automatically and you can access it from any device.
Kapwing specializes in creating social media content with proper aspect ratios for different platforms. No software installation means you can start editing immediately by simply importing your footage.
What are the recommended techniques for editing videos on YouTube?
When editing for YouTube, focus on creating an engaging first 15 seconds to hook viewers. Use jump cuts to maintain pacing and remove dead space or mistakes in your footage.
Add text overlays and graphics to emphasize key points. YouTube’s built-in editor works for simple trims, but using dedicated software provides more creative control.
Structure your content with establishing shots to help viewers understand the context. Including background music at a low volume can enhance the mood without overwhelming your voice.
How can I edit videos effectively on Android devices?
Android devices offer several powerful editing apps. KineMaster provides multi-layer editing with keyframe animation tools rarely found in mobile apps.
PowerDirector offers features like chroma key (green screen) editing and speed adjustments. Its intuitive timeline makes precise editing possible even on smaller screens.
CapCut has gained popularity for its easy-to-use features and trendy effects. The app includes templates that help beginners create professional-looking videos quickly.
Which steps should a beginner follow to start editing videos on a laptop?
Begin by organizing your footage into clearly labeled folders. This organization will save time when searching for specific clips during the editing process.
Next, learn basic cut and trim functions in your chosen software. Understanding how to remove unwanted sections forms the foundation of video editing.
Practice making a plan before diving into complex edits. Storyboarding or creating a simple outline helps maintain a coherent narrative throughout your video.
Are there professional-grade features available in free video editing tools?
Yes, many free tools now include features previously found only in expensive software. DaVinci Resolve offers professional color grading tools used in Hollywood productions.
VSDC Free Video Editor includes masking and object animation features that allow for complex visual effects. These advanced capabilities let you create polished results without spending money.
Free versions may have some limitations like watermarks or export restrictions. However, for most projects, these tools provide enough functionality to create impressive videos that look professionally edited.