AirDrop is a powerful feature on Apple devices that allows quick and easy file sharing. To turn on AirDrop, go to Settings, tap General, then AirDrop, and choose your preferred visibility option. This simple process enables seamless wireless transfer of photos, videos, documents, and more between nearby Apple devices.
AirDrop works on iPhones, iPads, iPods, and Macs. It uses Bluetooth to create a peer-to-peer Wi-Fi network between devices, ensuring fast and secure file transfers. Users can choose to make their device visible to everyone or just their contacts, providing control over who can send them files.
Once AirDrop is on, sharing becomes effortless. Select the content you want to share, tap the share button, and choose the nearby AirDrop-enabled device. The recipient can then accept or decline the transfer, maintaining privacy and security throughout the process.
How to Turn On AirDrop
AirDrop is Apple’s built-in feature that lets you wirelessly share photos, files, contacts, and more between nearby Apple devices — including iPhones, iPads, and Macs. It uses Bluetooth to find devices and Wi‑Fi to transfer files quickly and securely.
📱 For iPhone and iPad
Step 1: Open Control Center
- On iPhone X or later (and iPads with Face ID): Swipe down from the top-right corner of the screen.
- On iPhone 8 or earlier: Swipe up from the bottom of the screen.
Step 2: Turn On Bluetooth and Wi‑Fi
- Make sure both Wi‑Fi and Bluetooth are enabled (they don’t need to be connected to a network).
Step 3: Enable AirDrop
- Press and hold the network settings box (the one with Airplane Mode, Wi‑Fi, and Bluetooth icons).
- Tap the AirDrop icon.
- Choose one of the following options:
- Receiving Off – Disables AirDrop.
- Contacts Only – Only your contacts can send you files.
- Everyone for 10 Minutes – Anyone nearby can send you files for 10 minutes.
✅ Tip: For privacy, “Contacts Only” is the safest option.
💻 For Mac
Step 1: Open AirDrop
- Open Finder → select AirDrop from the sidebar.
(Or go to the menu bar → Go → AirDrop.)
Step 2: Enable AirDrop
- At the bottom of the AirDrop window, choose Allow me to be discovered by:
- No One
- Contacts Only
- Everyone
Step 3: Make Sure Bluetooth and Wi‑Fi Are On
- AirDrop requires both to be enabled, but you don’t need to join a Wi‑Fi network.
📤 How to Send Files Using AirDrop
- Open the file, photo, or item you want to share.
- Tap or click the Share button (the square with an arrow).
- Select AirDrop.
- Choose the nearby device you want to send to.
- The recipient will get a prompt to Accept or Decline.
⚙️ Troubleshooting Tips
- Ensure both devices are within about 30 feet (9 meters).
- Turn off Personal Hotspot if it’s enabled.
- Restart Bluetooth or Wi‑Fi if AirDrop isn’t appearing.
- On Mac, check Firewall settings → make sure “Block all incoming connections” is unchecked.
🔒 Privacy Tip
AirDrop uses end-to-end encryption, so your files are secure during transfer. However, always use Contacts Only in public areas to avoid unwanted sharing requests.
Key Takeaways
- AirDrop enables wireless file sharing between Apple devices
- Users can control AirDrop visibility in device settings
- File transfers with AirDrop are fast and secure
Understanding AirDrop
AirDrop allows quick wireless file sharing between Apple devices. It uses a combination of technologies to create a secure, direct connection for transferring photos, documents, and more.
Technical Requirements
AirDrop works on iOS devices running iOS 7 or later and Mac computers with macOS Sierra or newer. Both Wi-Fi and Bluetooth must be turned on for AirDrop to function. Personal Hotspot should be off.
For iPhone and iPad users, AirDrop is accessible through the Control Center. On Mac, it’s found in the Finder sidebar.
AirDrop uses Bluetooth to discover nearby devices and creates a direct Wi-Fi connection for file transfers. This peer-to-peer connection ensures fast and secure sharing without using cellular data or internet connectivity.
AirDrop Settings Overview
AirDrop offers three visibility settings:
- Receiving Off: Disables AirDrop completely
- Contacts Only: Allows sharing with saved contacts
- Everyone: Enables sharing with all nearby Apple devices
To change AirDrop settings on iOS:
- Open Settings
- Tap General
- Select AirDrop
- Choose desired option
On Mac, click the AirDrop icon in Finder to adjust settings.
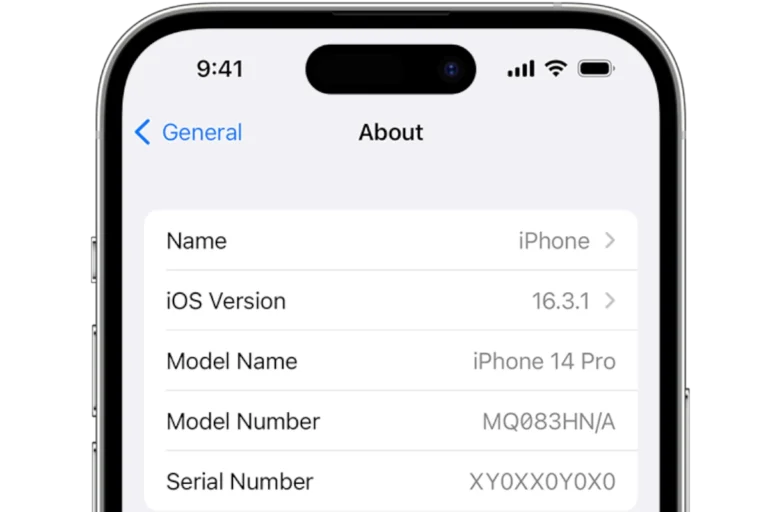
Users can customize their device name in Settings > General > About to make it easier for others to identify them when sharing.
Privacy and Safety Features
AirDrop prioritizes user privacy and security. When receiving files, users must approve each transfer before it begins. This prevents unwanted content from automatically downloading to the device.
File transfers are encrypted end-to-end, protecting data from interception. AirDrop also uses randomized Wi-Fi connections to enhance privacy during transfers.
To further protect privacy, the “Contacts Only” setting requires both devices to be signed in to iCloud and have each other’s Apple ID email or phone number saved in their contacts.
For public spaces, users can set AirDrop to “Receiving Off” to prevent unsolicited file requests from strangers.
How to Enable AirDrop
AirDrop allows easy file sharing between Apple devices. Users can quickly turn on this feature through different methods on iPhones, iPads, and Macs.
Turning on AirDrop on iPhone and iPad
On iOS and iPadOS devices, users have two main ways to enable AirDrop. The quickest method is through Control Center. Swipe down from the top-right corner of the screen to open Control Center. Press and hold the network settings card. Tap the AirDrop icon and choose “Contacts Only” or “Everyone” to activate it.
Alternatively, open the Settings app. Tap “General,” then “AirDrop.” Select “Contacts Only” or “Everyone” to turn on AirDrop. The “Receiving Off” option disables AirDrop completely.
For older iPhone models, swipe up from the bottom of the screen to access Control Center.
Activating AirDrop on Mac
Mac users can enable AirDrop through Finder or System Preferences. In Finder, click “Go” in the menu bar and select “AirDrop.” The AirDrop window will open, automatically turning on the feature.
To adjust AirDrop settings, click the “Allow me to be discovered by” dropdown. Choose “No One,” “Contacts Only,” or “Everyone.”
For System Preferences, click the Apple menu and select “System Preferences.” Go to “Sharing” and check the “AirDrop” box to enable it. Ensure both Wi-Fi and Bluetooth are on for AirDrop to function properly.
Sending and Receiving Files with AirDrop
AirDrop allows quick and easy file sharing between nearby Apple devices. This feature simplifies sending photos, documents, and other data wirelessly.
How to Use AirDrop to Send Files
To send files via AirDrop, users should first ensure AirDrop is turned on. They can do this by opening Control Center and tapping the AirDrop icon. Next, they should choose “Contacts Only” or “Everyone for 10 Minutes” to set who can see their device.
To share content:
- Open the app containing the file to share
- Tap the Share button
- Select AirDrop from the options
- Choose the recipient’s device
AirDrop works well for sharing multiple photos. In the Photos app, users can swipe to select several images before tapping Share. This method is faster than sending large files via email or text.
How to Accept AirDrop Requests
When someone sends a file via AirDrop, the recipient’s device will display a notification. To accept the transfer:
- Tap the notification when it appears
- Choose “Accept” to receive the file
The received file will open in the appropriate app. For example, photos will appear in the Photos app. Users can adjust their AirDrop settings to control who can send them files. Options include:
- Receiving Off: Disables AirDrop
- Contacts Only: Allows only saved contacts to send files
- Everyone: Permits all nearby Apple devices to send files
For security, it’s best to use “Contacts Only” in public places. This prevents unwanted file transfers from strangers.
Managing Connections and Troubleshooting
AirDrop relies on Wi-Fi and Bluetooth to function properly. Users may encounter issues that require troubleshooting to ensure smooth file transfers between devices.
Ensuring Proper Connectivity
To use AirDrop effectively, both Wi-Fi and Bluetooth must be active on the iPhone. Users should check these settings in Control Center or the Settings app. Personal Hotspot should be turned off, as it can interfere with AirDrop functionality.
For optimal performance, devices should be within 30 feet of each other. Physical obstructions like walls can impact signal strength. Users should also verify that their device is not in Airplane Mode, which disables wireless features.
AirDrop Troubleshooting Tips
If AirDrop isn’t working, users can try several fixes. Restarting both devices often resolves connectivity issues. Updating to the latest iOS version can also help, as it may include bug fixes for AirDrop.
Users should check their AirDrop visibility settings. Options include “Receiving Off,” “Contacts Only,” or “Everyone.” If set to “Contacts Only,” ensure the sender is in the recipient’s Contacts app.
Resetting network settings can solve persistent problems. This action clears saved Wi-Fi networks and Bluetooth connections. Users can do this by going to Settings > General > Transfer or Reset iPhone > Reset > Reset Network Settings.
Frequently Asked Questions
AirDrop enables easy file sharing between Apple devices. Users often have questions about turning it on and troubleshooting common issues.
How can I enable AirDrop on my iPhone?
Open Control Center by swiping down from the top-right corner of the screen. Press and hold the network settings card. Tap AirDrop and choose “Contacts Only” or “Everyone” for visibility.
What steps are needed to turn on AirDrop on an iPad?
The process is similar to iPhone. Swipe down from the top-right corner to open Control Center. Long-press the network settings card. Select AirDrop and choose your preferred visibility option.
How to activate AirDrop on a Mac?
Click the AirDrop icon in the Finder sidebar. If not visible, go to Finder > Menu Bar > Go > AirDrop. Use the “Allow me to be discovered by” dropdown to set visibility preferences.
What could prevent AirDrop from working on my iPhone?
Several factors can interfere with AirDrop. Bluetooth or Wi-Fi might be turned off. The devices may be too far apart. Outdated iOS versions can also cause issues.
How do I check if AirDrop is enabled on my device?
On iOS, open Control Center and look for the AirDrop icon. On Mac, check the AirDrop status in Finder. If visible, AirDrop is enabled.
How does one disable AirDrop after use?
To turn off AirDrop on iOS, open Control Center, tap AirDrop, and select “Receiving Off.” On Mac, go to AirDrop in Finder and choose “No One” from the visibility options.